
Related Manuals for Yolink YS8006-UC


Summary of Contents for Yolink YS8006-UC
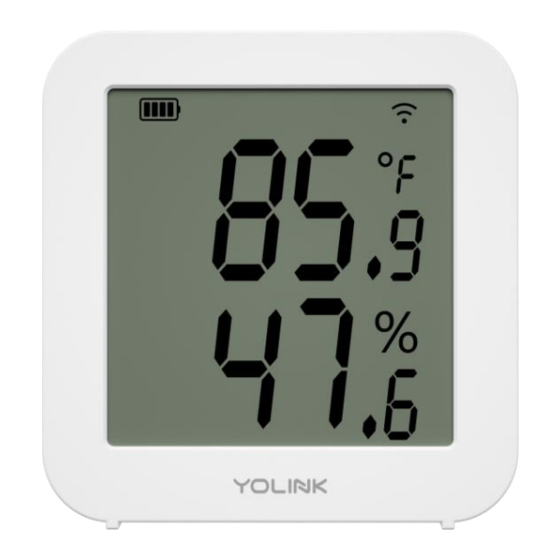
- Page 1 X3 Temperature & Humidity Sensor YS8006-UC Installation Manual & User Guide Rev 1.0 August 19, 2022...
-
Page 2: Table Of Contents
SECTION TOPIC PAGE Welcome! Introduction What's in the Box? Install the YoLink App Add Your X3 T/H Sensor to the App Installation Get to Know Your X3 T/H Sensor Sensor Refresh Frequency App Functions: Device Screen App Functions: Device Details Screen... -
Page 3: A Welcome
Mostly unimportant (it’s ok to breeze past it!) Welcome! Thank you for purchasing YoLink products! Whether you are adding additional YoLink products or if this is your first YoLink system, we appreciate you trusting YoLink for your smart home & automation needs. -
Page 4: B Introduction
(original YoLink Hub or the SpeakerHub), not via WiFi or other wireless methods. If you do not not already have a YoLink hub, and unless there is an existing YoLink wireless network in your building (e.g. -
Page 5: C What's In The Box
What’s in the Box? X3 Temperature & Humidity Sensor Quick Start Guide... -
Page 6: D Install The Yolink App
Install the YoLink App If you are new to YoLink, please install the app on your phone or tablet, if you have not already. Otherwise, please proceed to part Scan the appropriate QR code below or find the “YoLink app” on the appropriate app store. - Page 7 Install the YoLink App, Continued You will immediately receive an email from no-reply@yosmart.com with some helpful information. Please mark the yosmart.com domain as safe, to ensure you receive important messages in the future. Log in to the app using your new username and password. The app opens to the Favorite screen, as shown.
-
Page 8: E Add Your X3 T/H Sensor To The App
Add Your X3 T/H Sensor to the App Approve access to the camera, if requested. A viewfinder will be shown on the app. Hold the phone over the QR code (on the rear of the X3 T/H Sensor) so that the code appears in the viewfinder. If successful, the Add Device screen will be displayed Refer to Figure 1 on the next page. - Page 9 Figure 2. Figure 1 Figure 2 If this is your first YoLink system, please visit our product support area at yosmart.com for an introduction to the app, and for tutorials, videos, and other support resources. Ensure your YoLink Hub or SpeakerHub is setup and online...
-
Page 10: F Installation
Installation If not already turned on, press the SET button once to turn on the device. Place the sensor at the desired location. Ensure your device is placed on a stable surface or mounted securely on a wall or other surface. Please refer to device environmental operating range information on part M. -
Page 11: G Get To Know Your X3 T/H Sensor
Get to Know Your X3 T/H Sensor Please take a moment to familiarize yourself with your X3 Temperature & Humidity Sensor, in particular the LED behaviors and SET button functions. Battery Level 0 bars indicates the Mounting Slot batteries need to be Hang the sensor on replaced the wall with a... -
Page 12: H Sensor Refresh Frequency
Sensor Refresh Frequency Both temperature and humidity values refresh when one of the following conditions are met: SET button b. At least 9°F(5°C) a. The SET change over a period button has been pressed longer than 1 minute c. At least a 10% d. -
Page 13: I App Functions: Device Screen
App Functions: Device Screen Device Support Device Settings -Tap to go to Details screen Battery Level -Shown red if battery level is low Connection Status Latest Refresh Temperature -Green: Normal; Red: Warning Latest Refresh Humidity -Green: Normal; Red: Warning Refresh Icon -Tap to refresh readings Latest Refresh Time -Sensor refresh frequency (refer to... -
Page 14: I App Functions: Device Details Screen
-Tap to view the device alert history State -Displays the current online/offline state of the device Model -X3 Temperature Humidity Sensor Model (YS8006-UC) Device EUI -Device’s unique ID number -Device’s unique serial number, tap to save the device’s QR code, if desired Signal Intensity... -
Page 15: I App Functions: Alert Settings Screen
App Functions: Alert Settings Screen Tap to view or select a strategy to be related to this device Tap to go to the Alarm Strategies screen Slide or tap the pencil icon to set up the temperature alert range Device will alert when the temperature reaches red area. -
Page 16: I App Functions: Chart Screen
App Functions: Chart Screen... -
Page 17: I App Functions: Alarm Strategies Screen
Tap to select Admin to enable email notification, select All, if desired to send to all members Send SMS Tap to select Admin to enable limited text message (Only Admin can receive SMS) Trigger Action Tap to choose trigger actions (YoLink sirens, YoLink SpeakerHubs, scene) -
Page 18: I App Functions: Automation
App Functions: Automation The X3 Temperature & Humidity Sensor can be set up as a condition in automation. For example, you can automatically turn on a fan if the sensor detects a high temp. This example is shown below. The automation also sends a custom notification (via app push notification, email, SMS, or SpeakerHub broadcast) reminding you the sensor detects high or low temperature or humidity. -
Page 19: J Third-Party Assistants & Integrations
3. On Voice Monkey website, on Manage Monkeys Page, add a monkey, name it as “Sunroom Monkey" 4. Go to IFTTT app, create an applet, if this - YoLink - THS - complete trigger fields, then that - Alexa Voice Monkey - choose Trigger Monkey(Routine) - select “Sunroom Monkey"... -
Page 20: K Firmware Updates
Firmware Updates Your YoLink products are constantly being improved, with new features added. It is periodically necessary to make changes to your device's firmware. For optimal performance of your system, and to give you access to all available features for your devices, these firmware updates should be installed when they become available. -
Page 21: M Specifications
Specifications... -
Page 22: N Warnings
Warnings Please install, operate and maintain the X3 Temperature & Humidity Sensor only as outlined in this manual. Improper use may damage the unit and/or void the warranty Use only new, name brand, lithium non-rechargeable AA batteries Do not use rechargeable batteries Do not use zinc blend batteries Do not mix new and old batteries Do not puncture or damage batteries. -
Page 23: O 2-Year Limited Electrical Warranty
This warranty does not cover abuse or misused products or products used in commercial applications. This warranty does not apply to YoLink devices that have been improperly installed, modified, put to a use other than designed, or subjected to acts of God (such as floods, lightning, earthquakes, etc.). -
Page 24: Pfcc Statement
-Consult the dealer or an experienced radio/TV technician for help. The device has been evaluated to meet general RF exposure requirement. The device can be used in portable exposure condition without restriction. PRODUCT NAME: RESPONSIBLE PARTY: TELEPHONE: YOLINK X3 YOSMART, INC. (949) 825-5958 TEMPERATURE & HUMIDITY SENSOR MODEL NUMBER:... -
Page 25: Q Contact Us & Customer Support
Contact Us / Customer Support We are here for you, if you ever need any assistance installing, setting up or using a YoLink app or product! Please email us 24/7 at service@yosmart.com You can use our online chat service by visiting our website, www.yosmart.com or by scanning the QR code...
Need help?
Do you have a question about the YS8006-UC and is the answer not in the manual?
Questions and answers