Table of Contents
Advertisement
Available languages
Available languages
Quick Links
Advertisement
Table of Contents

Related Manuals for Steren AMP-040SD


Summary of Contents for Steren AMP-040SD
- Page 2 IMPORTANTE Antes de utilizar su nuevo Kit C Antes de utilizar su nuevo Amplificador con lector SD, por favor lea las siguientes recomendaciones Verifique la línea de voltaje antes de utilizar el equipo Conectar el amplificador a una línea de voltaje diferente a la que utiliza puede provocar fuego y dañar el equipo.
-
Page 3: Instalación
Si no piensa utilizar el amplificador por un tiempo considerable, desconecte el cable del tomacorriente. No abra el gabinete Dentro del producto no existen componentes que puedan ser utilizados por el usuario. El abrir el gabinete puede causar un choque eléctrico, y cualquier modificación al producto anulará... - Page 4 Evite las áreas húmedas. No obstruya las ranuras de ventilación ni coloque objetos directamente sobre ellas. Recuerde, los amplificadores de poder generan calor, y los disipadores de calor y las ranuras de ventilación que forman parte del gabinete están especialmente diseñados para remover ese calor. Colocar otros equipos electrónicos cerca de esos sistemas de disipación de calor podrían afectar el rendimiento del amplificador y los otros objetos colocados encima de él.
- Page 5 CARACTERISTICAS • Potencia de 40W • Lector SD y USB para reproducir archivos de audio en formato • 3 entradas 6,3mm para 2 micrófonos y 1 auxiliar • Controles de volumen independientes • Salida de línea de 70V ESPAÑOL-05...
-
Page 6: Panel Frontal
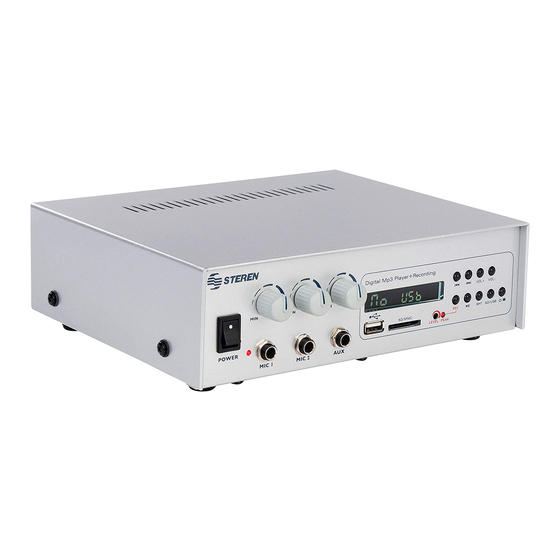
CONTROLES Panel Frontal 8 9 10 11 1.- Interruptor de encendido / apagado del amplificador. 2.- LED indicador de encendido. 3.- Entrada de micrófono 1. 4.- Entrada de micrófono 2. 5.- Entrada de auxiliar. Conecte un equipo de audio externo con conector 6,3mm. 6.- Puerto USB. - Page 7 9.- Vol-: Disminuye el nivel de volumen del reproductor en modo USB/ 10.- Play/pausa: Permite reproducir o pausar una pista de audio. 11.- Permite encender / apagar el reproductor en modo USB/SD y detiene la reproducción de una pista de audio. 12.- Cambia de modo: SD ó...
- Page 8 Panel Posterior 1.- Salida de impedancia 4, 8 y 16 ohms 2.- Fusible 3.- Salida de linea 70V 4.- Entrada de alimentación de 12V - - - por medio de una batería. 5.- Cable de corriente eléctrica. ESPAÑOL-08...
- Page 9 CONEXIONES En la parte frontal: 1.- En las entradas MIC1, MIC2 puede conectar 2 micrófonos con plug 6,3mm. 2.- En la entrada AUX puede conectar un equipo de audio externo como un sintonizador de radio, un reproductor de CD o un reproductor MP3, etc.
- Page 10 En la parte posterior: 1.- Para conectar los altavoces puede conectarlos de diferentes formas por ejemplo. Dos Altavoces de 8ohms conectados en paralelo para obtener una impedancia de 4ohms. 4 ohms 8 ohms 8 ohms ESPAÑOL-10...
- Page 11 Dos altavoces de 8 ohms conectados en serie para obtener una impedancia de 16ohms. 16 ohms 8 ohms 8 ohms ESPAÑOL-11...
- Page 12 Cuatro altavoces de 8ohms en serie/paralelo para obtener una impedancia de 8ohms. 8 ohms 8 ohms 8 ohms 8 ohms 8 ohms ESPAÑOL-12...
- Page 13 2.- Cuando requerimos conectar más de cuatro bocinas o combinaciones de ellos y debido a la dificultad de conseguir por medio de conexiones serie/paralelo una impedancia estándar, se utiliza la línea de 70 volts del amplificador. Para usar la línea de 70 volts, es necesario el empleo de un transformador de línea, que acopla la impedancia de las bocinas a la línea de 70volts.
- Page 14 Por ejemplo: C (COM) C (COM) T2 (70V) C (COM) C (COM) TRANSFORMADOR DE LINEA C (COM) TRANSFORMADOR DE LINEA C (COM) ESPAÑOL-14...
- Page 15 Alimentación: 1.- En este amplificador puede utilizar una bateria de 12V - - -, Simplemente conecte el polo positivo de la batería a la entrada (+) del amplificador y el polo negativo de la batería a la entrada (-) del amplificador como se muestra en la siguiente figura.
-
Page 16: Operación
OPERACIÓN Una vez realizado las conexiones correspondientes: 1.- Ajuste el nivel de volumen al mínimo. 2.- Presione el interruptor de encendido del amplificador. 3.- Encienda el equipo que desee utilizar (micrófonos o un equipo de audio externo). 4.- Gradualmente ajuste el volumen a un nivel óptimo. 5.- Para reproducir archivos en formato MP3 de una memoria USB ó... -
Page 17: Especificaciones
ESPECIFICACIONES Entrada: 127V~ 60Hz / 12V - - - Consumo: 500mA 2,1A Potencia de salida: 15W rms / 40W máx Rango de frecuencia: 150Hz a 15kHz Impedancia: 4, 8 y 16ohms Salida de línea: 70V Antes de utilizar su nuevo Kit C El diseño del producto y las especificaciones pueden cambiar sin previo aviso. -
Page 18: Póliza De Garantía
1.- Para hacer efectiva la garantía, presente ésta póliza y el producto, en donde fue adquirido o en Electrónica Steren S.A. de C.V. 2.- Electrónica Steren S.A de C.V. se compromete a reparar el producto en caso de estar defectuoso sin ningún cargo al consumidor. Los gastos de transportación serán cubiertos por el proveedor. - Page 19 Biólogo MaximIno Martínez No. 3408 Int. 3 y 4, San Salvador Xochimanca, México, D.F. 02870, RFC: SPE941215H43 ELECTRONICA STEREN DEL CENTRO, S.A. DE C.V. Rep. del Salvador 20 A y B, Centro, 06000, México. D.F. RFC: ESC9610259N4 ELECTRONICA STEREN DE GUADALAJARA, S.A.
- Page 21 IMPORTANT Before using your new Amplifier with SD card reader, please read the following recommendations. Verify Voltage Line Before Use Connecting the amplifier to a voltage line other than specified can produce fire hazard, and may damage the amplifier. If you have any questions about the voltage requirements for your specific model, or about the voltage line in your area, contact your selling dealer before plugging the unit into a wall outlet.
-
Page 22: Installation Location
Do Not Open the Cabinet There are no user-serviceable components inside this product. Opening the cabinet may present a shock hazard, and any modification to the product will void your guarantee. If water enters the unit, or any metal object such as paper clip, wire or staple accidentally falls inside the cabinet, disconnect the unit from the AC power source immediately and consult an authorized warranty station. - Page 23 Placing other electronic equipment near these heat dissipation systems may possibly affect the long-term reliability of both your amplifier and the objects placed above it. The carton and shipping materials used in protecting your new amplifier were specially designed to cushion it from the shocks and vibration of shipping.
- Page 24 FEATURES • 40W power output • SD card reader or USB flashdrive to play MP3 files. • Three 6.3mm input jack for 2 microphones and one auxiliary. • Independent volume controls. • 70V line input. ENGLISH-05...
- Page 25 CONTROLS Front Panel 8 9 10 11 1.- Amplifier´s On / Off switch 2.- In-Use LED indicator 3.- MIC 1: Microphone 1 input 4.- MIC 2: Microphone 2 input 5.- Aux input Allows to connect an external audio system 6.- USB port 7.- SD slot 8.- Forward: advances to next track.
- Page 26 9.- Vol- Decreases the volume level when you play in SD/USB mode 10.- Play/pause: Press to play or pause a track. 11.- In SD/USB mode can power on / off the amplifier - stops a song 12.- Change to SD or USB mode 13.- RTP: REP I;...
- Page 27 Rear Panel 1.- 4, 8 and 16 ohms impedance output 2.- Fuse 3.- 70V output line 4.- 12V - - - input 5.- Power cord ENGLISH-08...
-
Page 28: Front Panel
CONNECTIONS Front panel: 1.- Insert two microphones in MIC1 and MIC2 inputs with 6.3mm plug 2.- In the AUX input connect an external audio system such as: CD player, radio tuner, MP3 player. Use a 6.3mm adapter if you need it. 3.- Insert a SD memory in amplifier´s SD slot or an USB flashdrive in USB port. - Page 29 Rear panel: 1.- There are different wats to connect the speakers, i.e: Two 8ohm speakers parallel to get an impedance of 4ohms 4 ohms 8 ohms 8 ohms ENGLISH-10...
- Page 30 Two 8ohm speakers in serial to get an impedance of 16ohms 16 ohms 8 ohms 8 ohms ENGLISH-11...
- Page 31 Four 8ohm speakers in serial/ parallel to get an impedance of 8ohms 8 ohms 8 ohms 8 ohms 8 ohms 8 ohms ENGLISH-12...
- Page 32 2.- When you need to connect more of four speakers you can use the amplifier´s 70V line output To use the 70V line output, is needed a line transformer You can connect more speakers as the amplifier support With it, you will get a better distribution of volume It is easy to install.
- Page 33 i.e.: C (COM) C (COM) T2 (70V) C (COM) C (COM) LINE TRANSFORMER C (COM) LINE TRANSFORMER C (COM) ENGLISH-14...
-
Page 34: Power Input
Power Input: 1.- You can connect a 12V battery. Simply connect the battery´s positive terminal to the input (+) from the amplifier and the battery´s negative pole to the input (-) from the amplifier as shown in the figure. 12V BATTERY 2.- Also you can use the power cord, connect it to a electrical contact. - Page 35 HOW TO USE 1.- Set the volume level to the minimum. 2.- Press On/Off button in the amplifier. 3.- Power on the device that you want to use (CD player, microphones or an external audio system). 4.- Gradually, raise the volume level to an optimum level. 5.- To playback files in MP3 format from the SD memory or USB flashdrive, press the next button 6.- The LCD screen lights on,...
-
Page 36: Specifications
SPECIFICATIONS Input: 127V~ 60Hz / 12V - - - Power consumption: 500mA 2.1A Power output: 15W rms 40W max Frequency response: 150Hz to 15kHz Impedance: 4, 8 & 16ohms Line out: 70V Product design and specifications are subject to change, without notice. -
Page 37: Warranty
Part number: AMP-040SD Brand: Steren WARRANTY This Steren product is warranted under normal usage against defects in workmanship and materials to the original purchaser for one year from the date of purchase. CONDITIONS 1.- This warranty card with all the required information, invoice or purchase ticket, product box or package, and product, must be presented when warranty service is required. - Page 38 RETAILER INFORMATION Name of the retailer Address Product Brand Part number Serial number Date of delivery In case your product fails or have questions, please contact your nearest dealer. If you are in Mexico, please give a call to our Call Center. Call Center 01 800 500 9000...
Need help?
Do you have a question about the AMP-040SD and is the answer not in the manual?
Questions and answers