Harman Kardon CDR 30 Owner's Manual
Harman kardon cdr 30: owners manual
Hide thumbs
Also See for CDR 30:
- Service manual (90 pages) ,
- Owner's manual (32 pages) ,
- Product information (2 pages)

Subscribe to Our Youtube Channel
Related Manuals for Harman Kardon CDR 30


Summary of Contents for Harman Kardon CDR 30
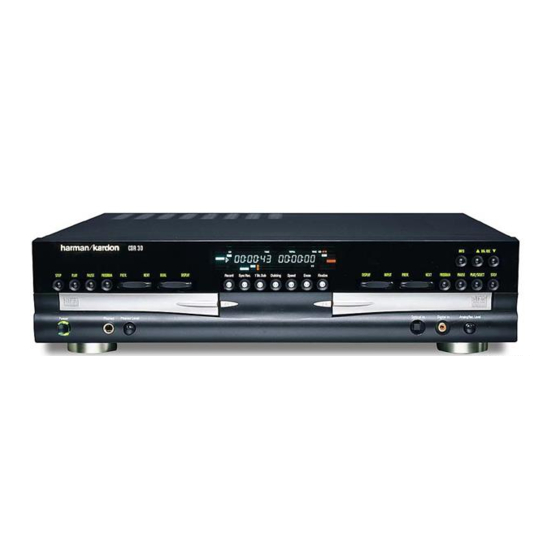
- Page 1 CDR 30 CD Recorder OWNER’S MANUAL CDR 30 STOP PLAY PAUSE PROGRAM PREV. NEXT DUAL DISPLAY Record Sync Rec. 1 Trk. Dub Dubbing Speed Erase Finalize DISPLAY Power Phones Phones Level ® Power for the digital revolution ™...
-
Page 2: Table Of Contents
Table of Contents 3 Introduction Special Features Important Information on CD Recording 4 Safety Information 5 Front Panel Controls 7 Front Panel Information Display 9 Rear Panel Connections 10 Remote Control Functions 12 Installation and Connections 14 CD Recording Basics Disc Types Recording Options CDR Terminology and Display Messages... -
Page 3: Introduction
CDR 30 uses special CD-R and CD-RW discs designed only for audio use. CD-R discs designed for computer use will not work in the CDR 30. See page 14 for more information on which types of discs are used with the CDR 30. -
Page 4: Safety Information
CDR 30 which may not be covered by the war- ranty, be certain that all discs are removed from the unit before it is moved. Once the CDR 30 is installed, discs may be left in the unit when it is turned off, but the unit should NEVER be moved with discs left in either deck. -
Page 5: Front Panel Controls
Speed Select Button Erase Button Finalize Button Power Switch: Press this switch to apply power to the CDR 30. The unit will be turned on and the Standby Mode Indicator sur- rounding the switch will turn green. Once the unit has been turned on with this switch, it may be operated from either the front panel or remote control. -
Page 6: Front Panel Controls
Information Display: The indicators in the Information Display provide status reports on the operation of the CDR 30. See page 7 for com- plete explanations of each indicator. Remote Sensor: The IR sensor that receives the commands from the remote control is behind this area. -
Page 7: Front Panel Information Display
Remain Time, Total Time, Track Time as well as separate Play/Pause Indicators and CD Indicators for each deck. As the function of these indicators is identical for both decks, they are described in this manual with a common letter. When the CDR 30 is playing or recording a disc, any indicators that light on the left side of the display describe the status of the Play Deck, while those that light on the right side of the display describe the status of the Record Deck. - Page 8 Front Panel Information Display Record Indicator: This indicator lights when the unit is making a recording and flashes during the preparations for recording. MP3 Playback Indicator: These indicators will light when either of the decks is playing a disc that contains MP3 data. R/RW Indicator: This indicator shows which type of recordable disc is present in the Record Deck...
-
Page 9: Rear Panel Connections
¤ ‚ Remote IR Input: Connect the output of a remote infrared sensor or the remote control output of another compatible Harman Kardon product to this jack. This will enable the remote control to operate even when the front-panel Remote Sensor is blocked. -
Page 10: Remote Control Functions
Remote Control Functions Power-On Button Play Deck (CDP) Display CDP Deck Open/Close CDP Deck Select Program Reverse Search Single Play Select Program Check Previous-Track Play/Select Random Play Text Readout Select Auto/Manual Track Increment Selector Track Increment Numeric Keys A-B Repeat Select Repeat MP3 Select Intro Scan... - Page 11 Remote Control Functions Power-On Button: Press this button to turn the CDR 30 on. Note that in order for this control to function, the Front-Panel Power Switch must first be pressed so that the unit is in the Standby mode.
-
Page 12: Installation And Connections
For that reason, do not place the CDR 30 directly on top of an amplifier, receiver, or other heat source. Always allow at least 2 cm of free space on all sides of the CDR 30, as well as other electronic products, to allow for proper ventilation. - Page 13 Harman Kardon component or a compatible IR system remote product that is not blocked by a cabinet. You may also use the IR Sensor in the CDR 30 to send commands to other compatible remote products. Connect the Remote IR Out Jack ⁄...
-
Page 14: Cd Recording Basics
”CD-R” or ”CD Recordable” may be recorded on one time, and when they are finalized they will play in either deck in the CDR 30 or in any conventional CD player, including home, car and portable models. The Record Deck... -
Page 15: Playback Basics
CD-R or CD-RW disc is in use. If a computer data disc is placed in the CDR 30, a DATA DISC or DISC ERROR mes- sage will appear, depending on if the data disc is finalized or not. -
Page 16: Normal Play
When a disc has been recorded ONLY with MP3 data, simply insert the disc in the CDR 30 as you would for any CD. After the disc’s Table of Contents (TOC) data has been read, the MP3... -
Page 17: Hdcd Playback
• When an MP3 disc is dubbed in the CDR 30, the copy disc will be recorded in the standard “Red Book” CD Audio format. It is not possible to make an MP3 copy of an MP3 disc. -
Page 18: Dual-Play Mode
Playback Basics Dual-Play Mode Since the CDR 30 has more than one CD deck, you may play a disc in either drawer. After the unit was turned on or the Single Play Select button on the remote or Dual/Single Play... -
Page 19: Program Play
Repeat Play The CDR 30’s programming system enables you to repeat either a single track on a disc, the entire disc (or all programmed tracks), or a spe- cially programmed passage that you select. -
Page 20: Random Play
Repeat A-B programming. 20 PROGRAM PLAY Random Play The CDR 30 may be programmed to play all the tracks on any disc in random order, playing each track until the entire disc has been played. To playback the tracks in a random sequence... -
Page 21: Cd Recording
Record Drawer . When the disc is inserted, the CDR 30 will examine it to determine if it is a CD-R or CD-RW disc, and optimize itself for the best possible recording. This is indicated by OPC... -
Page 22: Recording From An External Source
The Auto mode for either digital or analog recordings must be started manually, but the track number will be increased automatically after the CDR 30 receives silence for 3 seconds syncronously with the music starting. When the source is paused or stopped, after 3 or 10 sec- onds (depends on the source used) the record- ing will stop. -
Page 23: Sync Recording
(caused by too low a record level) or distortion (caused by too high a record level). Since the CDR 30 accepts both digital and analog sources, a different procedure is required, depending on the type of input used. -
Page 24: Finalizing Cd-R And Cd-Rw Discs
Important Note on Erasure and Finalization Times: Regardless of the speed at which a disc was recorded, the CDR 30 will erase and finalize discs at the x4 speed to minimize the length of the process. However, in some cases, it... -
Page 25: Troubleshooting Guide And Error Messages
• Unfinalize the disc to add tracks to a CD-RW disc • Replace the disc with a blank or unfinalized CD-R or CD-RW disc • Only CD Audio, MP3 and DTS discs will play in the CDR 30; replace the disc •... -
Page 26: Technical Specifications
Height measurement includes feet and chassis. All features and specifications are subject to change without notice. Harman Kardon is a registered trademark, and Power for the digital revolution is a trademark, of Harman Kardon, Inc. DTS is a registered trademark of Digital Theater Systems, Inc.
Need help?
Do you have a question about the CDR 30 and is the answer not in the manual?
Questions and answers