Table of Contents
Advertisement
Available languages
Available languages
Quick Links
Advertisement
Chapters
Table of Contents

Related Manuals for Sparraw FASTER SP


Summary of Contents for Sparraw FASTER SP
- Page 1 TAPIS DE COURSE SP-RUNNER SP-RUN102 NOTICE DE MONTAGE N°de lot : SP-RUN102-PROD2021 Mise à jour le 04/08/21 AVANT LA PREMIÈRE UTILISATION, LIRE ATTENTIVEMENT LA NOTICE ET LES CONSEILS DE SÉCURITÉ www.sparraw.com...
-
Page 2: Table Of Contents
SOMMAIRE Informations de sécurité importantes Page 3 Caractéristiques techniques principales Page 8 Inventaire Page 9 Assemblage Page 10 Fonctionnement du tapis de course Page 12 Directives d’entraînement Page 15 Entretien Page 17 Problèmes fréquents et solutions Page 19 Garantie et Normes Page 21 Transport et Service après-vente Page 22... -
Page 3: Informations De Sécurité Importantes
INFORMATIONS DE SECURITE IMPORTANTES MAXIMUM LA PINCE DE SÉCURITÉ A UN AIMANT QUI DOIT ÊTRE MIS SUR LE MONITEUR. A L’AUTRE EXTREMITE DE CE CABLE, ON Y TROUVE UNE PINCE QUI DOIT ETRE FIXEE AUX VETEMENTS. LE TAPIS DE COURSE NE POURRA FONCTIONNER UNIQUEMENT SI LA PINCE DE SECURITE EST MISE EN PLACE SUR LE MONITEUR. - Page 4 AVERTISSEMENT Afin de réduire les risques de blessures graves, lisez attentivement toutes les instructions et tous les avertissements liés au tapis de course avant son utilisation. Nous déclinons toute responsabilité pour les dommages corporels ou matériels résultant de l’utilisation de ce produit. Consignes Générales et Avertissements Avant de commencer tout programme d’entraînement, consultez votre médecin.
- Page 5 Vérifiez dans le manuel le poids maximum que votre équipement peut supporter. Un poids excessif pourrait entraîner un dysfonctionnement du système d’exploitation, qui ne serait pas couvert par la garantie. Portez des vêtements et des chaussures appropriés. Ne pas utiliser de vêtements amples qui pourraient s‘accrocher au niveau de l’appareil.
- Page 6 Consignes d’installation Deux personnes seront nécessaires pour sortir l’appareil de l’emballage. Les dommages causés lors de la sortie de l’appareil de son emballage, ne seront pas couverts par la garantie. Votre équipement fonctionne avec une alimentation électrique : assurez-vous que le câble d’alimentation et la prise sont en bon état.
- Page 7 Fonctionnement de l’arrêt d’urgence : Retirer la pince de sécurité du moniteur. Attendez l’arrêt complet du tapis avant de descendre Cette unité est conçue pour un usage domestique et dans un lieu intérieur et non pour un environnement professionnel, extérieur ou commercial. (Type de classe : HC) Entretien Débranchez toujours le câble d’alimentation avant de nettoyer l’appareil, après l’entraînement et avant toute opération de maintenance...
-
Page 8: Caractéristiques Techniques Principales
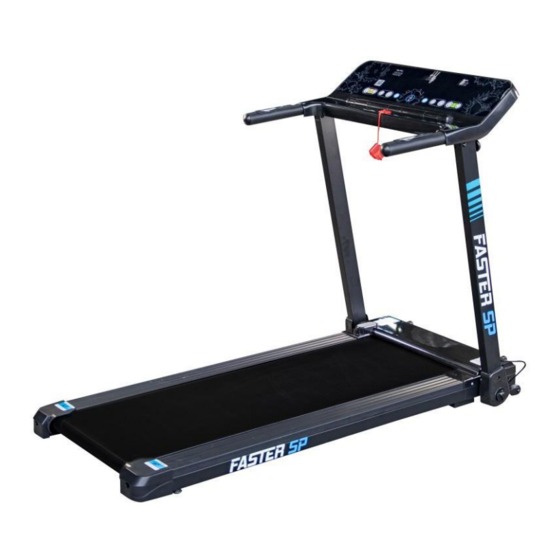
CARACTERISTIQUES TECHNIQUES PRINCIPALES J-MONITEUR M- POIGNEES AVEC CAPTEUR CARDIAQUE G -PINCE DE SECURITE 3-VIS DE M8*15 (vis de blocage) A-CACHE SURFACE MOTEUR DE COURSE E-BANDE LATERALE ROUE VERROU DE PLIAGE L-EMBOUT DE PROTECTION ET VIS REGLAG 220-240V~ VOLTAGE D’ENTREE 50/60 Hz FREQUENCE 1210x410mm SURFACE DE COURSE... -
Page 9: Inventaire
INVENTAIRE L’assemblage de ce tapis de course requiert deux personnes. Numéro Quantité NOMS Châssis Clé Huile de silicone Vis M8*15 Clé Verrou de pliage Pince de sécurité Manuel d’instructions... -
Page 10: Assemblage
ASSEMBLAGE ETAPE 1 Ouvrez le carton et sortez la machine à l’aide de deux personnes, posez-la à plat sur le sol. ETAPE 2 Soulevez le moniteur en suivant la direction A jusqu’à ce que la partie supérieure du tapis soit bloquée automatiquement. - Page 11 ETAPE 4 Mise en route du tapis de course Branchez la prise au secteur. Appuyer sur le bouton situé sur la partie inférieure du tapis. Le bouton devient orange et l’écran principal s’allume. BOUTON DE MISE EN MARCHE / ARRET...
-
Page 12: Fonctionnement Du Tapis De Course
FONCTIONNEMENT DU TAPIS DE COURSE 1/FONCTIONNALITES D’AFFICHAGE DU MONITEUR A. Vitesse : montre la vitesse de 1 à 10 km / h B. Temps : montre la durée de l’effort C. Distance / calorie : Il s’agit d’un double affichage. Selon le mode sélectionné 2 types d’informations s’affichent : Affichage de la distance : format à... - Page 13 FONCTION MODE Utiliser la fonctionnalité MODE pour définir votre objectif selon 3 critères au choix : -La distance à parcourir -Le durée de l’effort -Le nombre de calories dépensées. L’utilisation de cette fonctionnalité se présente sous forme de « compte à rebours ». FONCTION PROGRAMME : La fonctionnalité...
- Page 14 TIME SETTING TIME / 20= EACH SECTION OPERATION TIME SECTION PROGRAM SPEED SPEED SPEED SPEED SPEED SPEED SPEED SPEED SPEED SPEED SPEED SPEED La durée de chaque programme est de 30 minutes. Dans le tableau, nous pouvons distinguer les 12 programmes dans la colonne de gauche.
-
Page 15: Directives D'entraînement
DIRECTIVES D’ENTRAINEMENT ATTENTION ! Avant de commencer à utiliser ce programme d’exercices et le produit, consultez votre médecin. Ceci est particulièrement important pour les personnes âgées de 35 ans ou pour les personnes ayant des problèmes de santé. ATTENTION ! AVERTISSEMENT ! Les systèmes de surveillance du rythme cardiaque peuvent manquer de précision. - Page 16 FRÉQUENCE DE L’ENTRAÎNEMENT Afin de rester en forme ou d’améliorer votre forme, effectuez deux séances d’entraînement chaque semaine, avec une journée de repos entre les séances d’entraînement. Après quelques mois d’entraînement régulier, vous pourrez suivre jusqu’à trois séances d’entraînement par semaine. Si vous débutez la pratique de la course, entrainez-vous à...
-
Page 17: Entretien
ENTRETIEN REGLAGES DU TAPIS DE COURSE Après une certaine période, et selon le poids de l’utilisateur : Vous devrez ajuster le tapis de course sur 2 éléments : - L’axe du tapis de course (Causes possibles : le tapis n’est pas posé sur une surface plane ou les utilisateurs ne courent pas au milieu du tapis) - La tension du tapis de course Réglages en cas de déviation du tapis de course :... - Page 18 Réglage de la courroie du moteur : Ouvrir la partie plastique qui recouvre le moteur puis utilisez la clé pour faire tourner le boulon de réglage dans le sens des aiguilles d’une montre Veuillez ne pas trop serrer car cela pourrait exercer une pression excessive sur le moteur, ce qui pourrait endommager le moteur, le tapis et le rouleau Remarque : Enlevez régulièrement tous les objets susceptibles d’être tombés dans le tapis.
-
Page 19: Problèmes Fréquents Et Solutions
PROBLEMES FRÉQUENTS ET SOLUTIONS ERROR CODE PROBLÈMES COMMENT LE RÉSOUDRE APPAREIL NON CONNECTÉ À Brancher le câble d’alimentation L’ÉLECTRICITÉ LE BOUTON N’EST PAS EN Mettre sur « On » le bouton d’allumage POSITION "ON" D’AFFICHAGE MODULE DE CONTRÔLE CIRCUIT DU Appuyer sur la protection ou changer avec MONITEUR PAS ALIMENTÉ... - Page 20 E-04 COURANTS ELECTRIQUES Vérifiez la machine dans son intégralité et que rien ne soit coincé Vérifiez que la tension d’entrée est normale Vérifiez que la carte mère n’a pas PROTECTION d’odeur, changez-la si E-05 ANTI-EXPLOSION nécessaire Vérifiez que le fil du moteur est bien connecté...
- Page 21 Nos produits fitness bénéficient d’une garantie commerciale de 1 ans sur le châssis et moteur et 6 mois sur les pièces d’usures si vous avez acheté le produit sur le site www.sparraw.com, à compter de la date de livraison, dans des conditions normales d’utilisation.
- Page 22 Si votre produit présente un défaut ou des pièces manquantes suite à un problème lié au transport et que vous avez émis des réserves concrètes sur l’état de la marchandise et non du colis, merci d’envoyer les photos du problème ainsi que la facture d’achat à contact@sparraw.com sous 72h ouvrées. Notre service client prendra en compte votre réclamation.
- Page 23 ANNEXE Les pièces mentionnées dans le tableau ci-dessous sont déjà assemblées sur le produit à réception et donc pour la plupart invisibles. Ne pas les prendre en compte dans l’inventaire des pièces à réception de votre colis . N° pièce Titre Commentaires Capot arrière de protection...
- Page 24 TREADMILL SP-RUNNER SP-RUN102 INSTRUCTION’S MANUAL N°de lot : SP-RUN102-PROD2021 Updated 04/08/21 READ THIS MANUAL BEFORE USE www.sparraw.com...
- Page 25 SUMMARY Important safety information Page 23 Main technical features Page 28 Inventory Page 29 Assembly instructions Page 30 Treadmill operation Page 32 Workout guidelines Page 35 Maintenance Page 37 Common errors Page 39 Warranty and Standards Page 41 Transport et Customer service Page 42 Annexe...
-
Page 26: Important Safety Information
IMPORTANT SAFETY INFORMATIONS THE SECURITY KEY HAS A MAGNET WHICH MUST BE PUT IN THE DISPLAY. AT THE END OF THE LACE THERE IS A CLAMP WHICH SHOULD BE ATTACHED TO THE CLOTHES.THE TREADMILL WILL START WORKING ONLY IF THE TONG IS PLACED IN THE DISPLAY.THIS IS ESSENTIAL. A CORRECT LUBRICATION OF THE TREADMILL WITH SILICON OIL OR TEFLON IS REALLY IMPORTANT. - Page 27 WARNING ! In order to decrease the risk of suffering severe injuries, read carefully all the importants instructions and warnings regarding the use of a treadmill before using it. We don’t take any responsibility for personal injuries or property damages resulting from the use of this product.
- Page 28 No more than one person on the treadmill at a time The accessories can be different depending of the model. This electronic product can’t be thrown under any circumstances into the municipal rubbish bins. With the aim of preserving the environment, this product must be recycled according to the applicable law of your country.
- Page 29 If your equipment is provided with a security key, please understand the produce before using it. The security key has a magnet which must be put in the display. At the end of the lace there is a clamp which should be attached to the clothes. The treadmill will start working only if the key is placed in the display.
- Page 30 supply and turn the “on” button into the correct position (I), insert the security key and let the treadmill work for several minutes without any weight on it. Repeat this action on a regular basis. 5 months < 3 HOURS/WEEK 2 month 4 –...
-
Page 31: Main Technical Features
MAIN TECHNICAL FEATURES G -SECURITY KEY J- MONITOR M-HANDRAIL FOAM 3- SCREW M8*15 (LOCK SCREW) MOTO COVER I- RUNNING BELT E -SIDE RAIL K- WHEEL FOLD LOCK L-END CAP AND SCREW ADJUST 220-240V~ INPUT VOLTAGE 50/60 Hz FREQUENCY 1210x410mm RUNNING AREA Time, Speed, Distance, FUNCTIONS Calorie, heart rate... -
Page 32: Inventory
INVENTORY Assembly requires two persons. Numero fittings Quantity Main frame Allen wrench Silicone oil M8*15 Screw Wrench Fold lock Security key Manual book... -
Page 33: Assembly Instructions
ASSEMBLY INSTRUCTIONS STEP 1 Open the box and take out the machine (2 persons). Place it flat on thon the ground. STEP 2 Lift the monitor in direction A until the upper part of the mat is locked automatically. In position B, insert the two fold lock safety screws. - Page 34 STEP 4 Getting started Insert the plug. Press the button situated on the lower part of the treadmill. The button become orange and the main screen turn on. START/STOP BUTTON...
-
Page 35: Treadmill Operation
TREADMILL OPERATION 1/MONITOR DISPLAY FUNCTIONS: A. Speed: show speed 1-10km/h B. Time: show the effort time C. Distance/calorie: it’s a double display. According to the selected mode, 2 kind of information are displayed: Distance display: Decimal point format : 0.00 Calories display: Integer format : 0-999 Example: 0.300 =>... - Page 36 MODE FUNCTION Use MODE functions to define your goal according to 3 criteria: - Distance to be covered - Effort time - Calories spent This function is a “count down” form. PROGRAM FUNCTION The PROGRAM function provides pre-defined programs. Below, we can see details of the 12 programs with the table.
- Page 37 TIME SETTING TIME / 20= EACH SECTION OPERATION TIME SECTION PROGRAM SPEED SPEED SPEED SPEED SPEED SPEED SPEED SPEED SPEED SPEED SPEED SPEED The time of each program is 30 minutes. On the table, we can differentiate 12 programs in the left column. Each program is made of 20 sequences wich vary in time.
-
Page 38: Workout Guidelines
WORKOUT GUIDELINES WARNING! Before starting to use this product or any exercise programs, consult your doctor. This is specially important for people older than 35 years old, or for people with health problems. WARNING! Heart rate monitoring systems can be inaccurate. Overuse can result in serious injury or death. - Page 39 FREQUENCY OF THE WORKOUT To be fit or improve your shape, complete two workout sessions each week, with a rest day between the workouts. After some moths of regular training, you will be able of completing up to three workouts a week. If you are beginner runner, better to start the training at low speed without straining for the first 2 weeks.
-
Page 40: Maintenance
MAINTENANCE TREADMILL ADJUSTMENT After a certain period, due to the weight of the user, you have to adjust 2 elements: - The axis of the treadmill (Potential causes: the treadmill isn’t on a plane surface, or the user don’t run on the middle of the treadmill) - The tension of the treadmill THE ADJUSTMENT TO THE DRIVEN BELT... - Page 41 General maintenance CLEANING: Don’t use abrasive products. A damp cloth is enough. LEVELING: If your unit is provided with leveling wheels, please adjust them to avoid vibrations and therefore malfunctions. KEEP THESE MAINTENANCE ADVISES FOR FUTURE REFERENCES. This product must be plug on earthed. If the power cable is damaged, it must be replaced with a manufacturer recommended power cable.
-
Page 42: Common Errors
COMMON ERRORS ERROR CODE REASONS HOW TO SOLVE ELECTRICITY NOT Connecte the electricity CONNECTED NO DISPLAY POWER SWITCH NOT TURN Turn on power switch Press over-load protector or change new PCB NO POWER OR BROKEN SIGNAL WIRE NOT Re-connect signal wire or change new one CONNECTED COMPUTER BROKEN Change new computer... - Page 43 ERROR CODE REASONS HOW TO SOLVE Check input voltage is normal or not EXPLOSION-PROOF PROTECTION Check PCB has smell or not, change it if has E-05 Check motor wire is well connected or not Re-connect motor wire or change new motor E-06 MOTOR WIRE PROBLEM wire...
- Page 44 WARRANTY Our product Fitness have one-year commercial warranty to the frame and engine and 6 months to the wearing parts if you bought the product on the site www.sparraw.com, from the date of delivery, in under normal conditions of use.
- Page 45 - Intact packaging but the product has a problem not linked to the transport or missing parts. Please send justifying photos and product invoice to contact@sparraw.com under 72 working hours and don’t sign the delivery slip.
- Page 46 Annexe The parts mentioned in the table below are already assembled on the product upon receipt and therefore for the most part invisible. Do not take them into account in the parts inventory upon receipt of your package. N° piece Title Commentary Rear protective cover...
Need help?
Do you have a question about the FASTER SP and is the answer not in the manual?
Questions and answers