
Related Manuals for AEG FSE62417P


Summary of Contents for AEG FSE62417P
- Page 1 FSE62417P User Manual Dishwasher Kasutusjuhend Nõudepesumasin USER MANUAL...
-
Page 2: Table Of Contents
13. ENVIRONMENTAL CONCERNS..............27 FOR PERFECT RESULTS Thank you for choosing this AEG product. We have created it to give you impeccable performance for many years, with innovative technologies that help make life simpler – features you might not find on ordinary appliances. Please spend a few minutes reading to get the very best from it. - Page 3 ENGLISH of incorrect installation or usage. Always keep the instructions in a safe and accessible location for future reference. 1.1 Children and vulnerable people safety This appliance can be used by children aged from 8 • years and above and persons with reduced physical, sensory or mental capabilities or lack of experience and knowledge if they have been given supervision or instruction concerning the use of the appliance in a...
-
Page 4: Safety Instructions
If the supply cord is damaged, it must be replaced by • the manufacturer, its Authorised Service Centre or similarly qualified persons in order to avoid a hazard. WARNING: Knives and other utensils with sharp • points must be loaded in the basket with their points down or placed in a horizontal position. - Page 5 ENGLISH access to the mains plug after the • Do not drink and play with the water in installation. the appliance. • Do not pull the mains cable to • Do not remove the dishes from the disconnect the appliance. Always pull appliance until the programme is the mains plug.
-
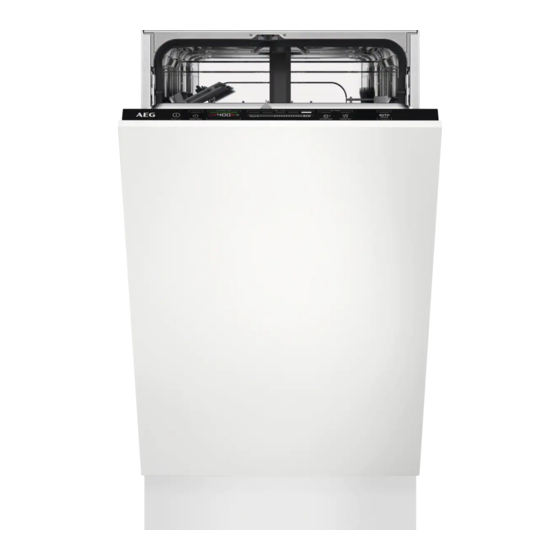
Page 6: Product Description
• Disconnect the appliance from the household room illumination. mains supply. • Cut off the mains cable and discard it. 2.6 Disposal • Remove the door catch to prevent children and pets to get closed in the WARNING! appliance. -
Page 7: Control Panel
ENGLISH 4. CONTROL PANEL On/Off button / Reset button EXTRAS buttons Delay Start button AUTO Sense program button Display MY TIME selection bar 4.1 Display 4.2 ECOMETER The ECOMETER indicates how the programme selection impacts energy and water consumption. The more bars are on, the lower the consumption is. -
Page 8: Programme Selection
5. PROGRAMME SELECTION 5.1 MY TIME 5.2 AUTO Sense MY TIME selection bar allows to select a The AUTO Sense programme suitable dishwashing cycle based on automatically adjusts the dishwashing programme duration. cycle to the type of load. The appliance senses the degree of soil and the amount of dishes in the baskets. - Page 9 ENGLISH Programme Dishwasher Degree of soil Programme phases EXTRAS load 1h 30min Crockery, Normal, lightly • Dishwashing 60 °C • ExtraPower cutlery, pots, dried-on • Intermediate rinse • GlassCare pans • Final rinse 55 °C • Drying • AirDry 2h 40min Crockery, Normal to •...
-
Page 10: Basic Settings
Water (l) Energy (kWh) Duration (min) 1) 2) Programme Machine Care 7.4 - 8.9 0.396 - 0.484 1) The pressure and the temperature of the water, the variations of the mains supply, the options, the quantity of dishes and the degree of soil can change the values. - Page 11 ENGLISH 1. Use Previous or Next to select the bar of the ECOMETER dedicated to the desired setting. • The bar of the ECOMETER dedicated to the chosen setting flashes. • The display shows the current setting value. 3 4 5 6 2.
- Page 12 Water hardness German de‐ French de‐ mmol/l Clarke de‐ Water softener lev‐ grees (°dH) grees (°fH) grees 47 - 50 84 - 90 8.4 - 9.0 58 - 63 43 - 46 76 - 83 7.6 - 8.3 53 - 57...
- Page 13 ENGLISH in the same cycle or at the beginning of Acoustic signals sound also the next programme. This activity when a malfunction of the increases the total water consumption of appliance occurs. It is not a programme by additional 4 litres and possible to deactivate these the total energy consumption of a signals.
-
Page 14: Before First Use
6.6 Key tones The latest programme that was completed before the appliance The buttons on the control panel make a deactivation is saved. It is then selected click sound when you press them. You automatically after you activate the can deactivate this sound. -
Page 15: Daily Use
ENGLISH 7.2 How to fill the rinse aid CAUTION! dispenser Only use rinse aid designed specifically for dishwashers. 1. Press the release element (A) to open the lid (B). 2. Pour the rinse aid in the dispenser (C) until the liquid reaches the marking "FILL". - Page 16 8.2 How to select and start a 8.4 How to start the AUTO programme using MY TIME Sense program selection bar 1. Press 1. Slide your finger across MY TIME • The light related to the button is selection bar to choose a suitable programme.
-
Page 17: Hints And Tips
ENGLISH 8.9 The Auto Off function Make sure that there is detergent in the detergent This function saves energy by switching dispenser before you start a the appliance off when it is not operating. new programme. The function comes into operation automatically: 8.8 Opening the door while •... - Page 18 • The filters are clean and correctly agents), rinse aid and salt separately installed. for optimal cleaning and drying • The cap of the salt container is tight. results. • The spray arms are not clogged.
-
Page 19: Care And Cleaning
ENGLISH 10. CARE AND CLEANING • Do not use abrasive products, WARNING! abrasive cleaning pads, sharp tools, Before any maintenance strong chemicals, scourer or solvents. other than running the • Wipe clean the door, including the programme Machine Care, rubber gasket, once a week. deactivate the appliance and •... - Page 20 5. Make sure that there are no residues of food or soil in or around the edge 1. Turn the filter (B) counterclockwise of the sump. and remove it. 6. Put back in place the flat filter (A). Make sure that it is correctly positioned under the 2 guides.
- Page 21 ENGLISH 10.6 Cleaning the lower spray We recommend to clean the lower spray arm regularly to prevent soil from clogging the holes. Clogged holes can cause unsatisfactory washing results. 1. To remove the lower spray arm, pull it upwards. 10.7 Cleaning the upper spray arms We recommend to clean the upper spray arms regularly to prevent soil from...
-
Page 22: Troubleshooting
4. To install the spray arm back, insert the mounting element in the spray arm and fix it in the duct by turning it counterclockwise. Make sure that the mounting element locks into place. 3. Wash the spray arm under running water. - Page 23 ENGLISH Problem and alarm code Possible cause and solution The programme does not • Make sure that the appliance door is closed. start. • If the delay start is set, cancel the setting or wait for the end of the countdown. •...
- Page 24 Problem and alarm code Possible cause and solution The appliance stops and • It is normal. It provides optimal cleaning results and en‐ starts more times during op‐ ergy savings. eration. The programme lasts too • If the delay start option is set, cancel the delay setting or long.
- Page 25 ENGLISH 11.1 The product number 1. Press and hold simultaneously code (PNC) for about 3 seconds. The display shows the PNC of your If you contact an Authorised Service appliance. Centre, you need to provide the product 2. To exit the PNC presentation, press number code of your appliance.
-
Page 26: Technical Information
Problem Possible cause and solution Traces of rust on cutlery. • There is too much salt in the water used for washing. Refer to "The water softener". • Silver and stainless steel cutlery were placed together. Do not place silver and stainless steel items close to‐... -
Page 27: Environmental Concerns
ENGLISH Voltage (V) 220 - 240 Electrical connection Frequency (Hz) Water supply pressure Min. / max. bar (MPa) 0.5 (0.05) / 10 (1.0) Water supply max 60 °C Cold water or hot water Capacity Place settings 1) Refer to the rating plate for other values. 2) If the hot water comes from alternative source of energy (e.g. -
Page 28: Ohutusinfo
12. TEHNILINE TEAVE...................52 13. JÄÄTMEKÄITLUS..................... 53 PARIMATE TULEMUSTE SAAVUTAMISEKS Täname, et valisite selle AEG toote. Töötasime selle välja, et saaksite palju aastaid nautida laitmatuid tulemusi, ning lisasime elu lihtsustavaid uuenduslikke funktsioone, mida te tavaliste seadmete juures ei pruugi leida. Leidke mõni minut aega ning lugege, kuidas seadmega parimaid tulemusi saavutada. - Page 29 EESTI on tingitud paigaldusnõuete eiramisest või väärast kasutusest. Hoidke kasutusjuhend kindlas kohas alles, et saaksite seda vajadusel vaadata. 1.1 Laste ja ohustatud inimeste turvalisus Vähemalt 8-aastased ja vanemad lapsed ning piiratud • füüsiliste, sensoorsete või vaimsete võimete või väheste kogemuste ja teadmistega isikud tohivad seda seadet kasutada järelevalve all või kui neid on õpetatud seadet ohutul viisil kasutama ja mõistma kaasnevaid ohte.
-
Page 30: Ohutusjuhised
HOIATUS: Nugade ja muude teravate otstega riistade • korvi laadimisel suunake nende otsad allapoole või asetage need horisontaalasendisse. Ärge jätke seadme ust lahti, kui selle juurest ära • lähete, sest keegi võib kogemata ukse peale komistada. Enne mistahes hooldust lülitage seade välja ja •... - Page 31 EESTI veel mõnda aega voolata, kuni see on • Pidage meeles, et kui olete puhas ja selge. parandanud seadet ise või lasknud • Seadme esmakordsel kasutamisel ja seda teha ebapädeval isikul, võib see pärast seda kontrollige, ega kuskil kahjustada seadme ohutust ja muuta pole lekkeid.
-
Page 32: Tootekirjeldus
3. TOOTEKIRJELDUS Ülemised pihustikonsoolid Söögiriistade korv Alumine pihustikonsool Alumine korv Filtrid Ülemine korv Andmeplaat Joonisel on näidatud toote üldine ülevaade. Täpsema Soolamahuti teabe saamiseks vt teisi Õhuava peatükke või seadmega Loputusvahendi jaotur kaasasolevaid dokumente. Pesuainejaotur 3.1 Beam-on-Floor Beam-on-Floor kustub, kui seade lülitatakse välja. -
Page 33: Juhtpaneel
EESTI 4. JUHTPANEEL Sisse/välja nupp / lähtestusnupp EXTRAS nupud Delay Start nupp AUTO Sense programminupp Ekraan MY TIME valikuriba 4.1 Ekraan 4.2 ECOMETER ECOMETER näitab, kuidas mõjutab programmivalik energia- ja veetarbimist. Mida rohkem ribasid põleb, seda madalam on tarbimine. tähistab kõige keskkonnasõbralikumat programmi A. -
Page 34: Programmi Valimine
5. PROGRAMMI VALIMINE 5.1 MY TIME 5.2 AUTO Sense MY TIME valikuriba võimaldab valida Programm AUTO Sense kohandab sobiva nõudepesutsükli olenevalt pesutsüklit automaatselt vastavalt nõude programmi kestusest. tüübile. Seade tunneb ära korvides olevate esemete määrdumisastme ja koguse. Vee temperatuuri ja kogust ja programmi kestust reguleeritakse vastavalt. - Page 35 EESTI Programm Nõudepesu‐ Määrdumisas‐ Programmi etapid EXTRAS masina koormus 1h 30min Lauanõud, Normaalsed, • Nõudepesu 60 °C • ExtraPower söögiriistad, kergelt kinni‐ • Vaheloputus • GlassCare potid, pannid kuivanud toidu‐ • Lõpploputus 55 °C jäänused • Kuivatus • AirDry 2h 40min Lauanõud, Normaalsed •...
-
Page 36: Üldseaded
Vesi (l) Energia (kWh) Kestus (min) 1) 2) Programm Machine Care 7.4 - 8.9 0.396 - 0.484 1) Vee surve ja temperatuur, elektripinge kõikumine, erinevad valikud ja nõude kogus ning määrdumisas‐ te võivad väärtusi mõjutada. 2) Programmide väärtused, välja arvatud ECO, on ainult hinnangulised. - Page 37 EESTI Seade muutmine Veenduge, et seade on seadistusrežiimis. 1. Kasutage Tagasi või Edasi, et valida soovitud seadele määratud ECOMETER riba. • Valitud seadele määratud 3 4 5 6 ECOMETER riba vilgub. • Ekraanil kuvatakse kehtiv seade 6.1 Seadistusrežiim väärtus. 2. Seade avamiseks vajutage OK. Kuidas seadistusrežiimis •...
- Page 38 Saksa kraadid Prantsuse mmol/l Clarke’i Veepehmendaja ta‐ (°dH) kraadid (°fH) kraadid 43 - 46 76 - 83 7.6 - 8.3 53 - 57 37 - 42 65 - 75 6.5 - 7.5 46 - 52 29 - 36 51 - 64 5.1 - 6.4...
- Page 39 Vee surve ja temperatuur programmidega. ning erinevused elektrivarustuses võivad neid Kuivatusfaasi kestus ja luugi avanemise väärtusi muuta. aeg võivad olla erinevad sõltuvalt valitud programmist ja valikutest. 6.3 Loputusvahendi tase Kui AirDry luugi avab, kuvatakse näidikul käimasoleva programmi järelejäänud Loputusvahend võimaldab nõusid aeg.
-
Page 40: Enne Esmakordset Kasutamist
6.7 Viimane programmivalik Seadme sisselülitamisel valitakse see siis automaatselt. Viimati kasutatud programmi ja valikute Kui viimase programmi valik on välja automaatse valimise määramine. lülitatud, on vaikeprogrammiks ECO. Salvestatakse viimane, enne seadme väljalülitamist lõpetatud programm. 7. ENNE ESMAKORDSET KASUTAMIST 1. Kontrollige, kas veepehmendaja on reguleeritud vastavalt teie piirkonna vee karedusele. -
Page 41: Igapäevane Kasutamine
EESTI 7.2 Kuidas täita loputusaine ETTEVAATUST! jaoturit Kasutage vaid nõudepesumasinate jaoks mõeldud loputusvahendit. 1. Vajutage avamisdetaili (A), et avada kaas (B). 2. Kallake loputusvahend jaoturisse (C), kuni vedelik jõuab tasemeni „FILL“. 3. Eemaldage mahaläinud loputusvahend imava lapiga, et ei tekiks liiga palju vahtu. 4. - Page 42 2. Soovi korral valige sobivad EXTRAS. 2. Vajutage korduvalt -nuppu, kuni 3. Programmi käivitamiseks sulgege ekraanil kuvatakse soovitud seadme uks. viitkäivituse aeg (1 kuni 24 tundi). Nupule vastav märgutuli põleb. 8.3 EXTRAS sisselülitamine 3. Pöördloenduse käivitamiseks sulgege seadme uks. 1. Valige programm MY TIME valikuriba Pöördloenduse ajal ei saa viivituse aega...
-
Page 43: Vihjeid Ja Näpunäiteid
EESTI 8.9 Funktsioon Auto Off 8.10 Programmi lõpp See funktsioon säästab energiat, Kui programm on lõppenud, kuvatakse lülitades seadme välja, kui seda ei ekraanil 0:00. kasutata. Funktsioon Auto Off lülitab masina Funktsioon käivitub automaatselt, kui: automaatselt välja. • Pesuprogramm on lõppenud. Kõik nupud on mitteaktiivsed, välja •... -
Page 44: Puhastus Ja Hooldus
• Veenduge, et veepehmendaja tase • Kasutage seadet ainult oleks õige. Kui kogus on liiga suur, nõudepesumasinakindlate nõude võib üleliigne soolakogus vees pesemiseks. tekitada söögiriistadel roostet. • Ärge peske nõudepesumasinas järgmisi materjale: puit, sarv, 9.3 Kuidas lõpetada tinasulam, vask, alumiinium, õrnalt... - Page 45 EESTI 10.1 Machine Care 10.3 Lahtiste detailide eemaldamine Machine Care on programm, mis puhastab seadme sisemust parimate Pärast iga kasutamist kontrollige tulemustega. Eemaldatakse ka katlakivi nõudepesumasina filtreid ja äravooluosa. ja rasvajäägid. Lahtised detailid (nt klaasi-, plast-, luutükid, hambaorgid jms) halvendavad Kui seade tuvastab puhastusvajaduse, pesutulemusi ja võivad seadme süttib indikaator...
- Page 46 7. Pange uuesti kokku filtrid (B) ja (C). 8. Pange tagasi filter (B) lameda filtri sees (A). Keerake päripäeva, kuni see kohale lukustub. 2. Eemaldage filter (C) filtrist (B). 3. Eemaldage lame filter (A). 4. Peske filtrid puhtaks. ETTEVAATUST! Filtrite ebaõige asend võib...
- Page 47 EESTI 10.7 Ülemiste pihustikonsoolide puhastamine Ülemisi pihustikonsoole on soovitatav regulaarselt puhastada, et vältida avade ummistumist. Ummistunud avad võivad olla kehvade pesutulemuste põhjuseks. Ülemised pihustikonsoolid asuvad ülemise korvi all. Pihustikonsoolid (B) on paigaldatud sisselasketoru (A) külge kinnituselemendi abil (C). 2. Peske pihustikonsool voolava vee all puhtaks.
-
Page 48: Tõrkeotsing
Veenduge, et kinnituselement lukustub oma kohale. 4. Pihustikonsooli tagasiasetamiseks lükake kinnituselement 11. TÕRKEOTSING Vaadake alltoodud tabelit, et leida teavet HOIATUS! võimalike probleemide kohta. Masina ebaõige remont võib Mõnede probleemide korral kuvatakse ohustada masina kasutajat. - Page 49 Ekraanil olev järelejäänud • See ei ole rike. Masin töötab õigesti. aeg pikeneb ja liigub edasi hüplikult kuni programmi lõ‐ puni. Väike leke masina uksest. • Masin ei ole loodis. Reguleerige tugijalgu vastavalt vaja‐...
- Page 50 Probleem ja häirekood Võimalik põhjus ja lahendus Masina luuki on raske sulge‐ • Masin ei ole loodis. Reguleerige tugijalgu vastavalt vaja‐ dusele (kui on kohaldatav). • Nõude osad ulatuvad korvidest väljapoole. Masina luuk avaneb pesut‐ • Funktsioon AirDry on aktiveeritud. Saate funktsiooni väl‐...
- Page 51 EESTI 11.2 Nõudepesu- ja kuivatustulemused ei vasta ootustele Probleem Võimalik põhjus ja lahendus Kehvad pesutulemused. • Vt jaotist "Igapäevane kasutamine", jaotist "Vihjeid ja näpunäiteid" ja korvi täitmise infolehte. • Kasutage tõhusamat pesuprogrammi. • Aktiveerige funktsioon ExtraPower, et tõhustada vali‐ tud programmi pesutulemusi. •...
-
Page 52: Tehniline Teave
Probleem Võimalik põhjus ja lahendus Ebameeldiv lõhn masina sees. • Vt jaotist „Sisemuse puhastamine“. • Käivitage programm Machine Care koos katlakiviee‐ maldi või nõudepesumasinate puhastusvahendiga. Katlakivijäägid nõudel, sise‐ • Soolatase on madal, kontrollige soola lisamise indi‐ musel ja ukse siseküljel. -
Page 53: Jäätmekäitlus
EESTI 12.1 Link EL EPREL-i andmebaasist, kasutades linki https:// eprel.ec.europa.eu ja toote mudelinime andmebaasile ja tootenumbrit, mille leiate seadme andmesildilt. Vt jaotist "Toote kirjeldus". Seadme energiamärgisel olevalt QR- koodilt leiate veebilingi selle seadme Täpsema teabe saamiseks registreerimiseks EL EPREL-i energiamärgise kohta külastage andmebaasis. - Page 56 www.aeg.com/shop...
Need help?
Do you have a question about the FSE62417P and is the answer not in the manual?
Questions and answers