Table of Contents
Advertisement
Quick Links
Advertisement
Table of Contents

Subscribe to Our Youtube Channel
Related Manuals for Bosch WTG864H2


Summary of Contents for Bosch WTG864H2
- Page 1 Tumble dryer WTG864H2 [en] User manual and installation instructions...
-
Page 2: Table Of Contents
Futher information and explanations are available online: Table of contents 1 Safety .......... 4 9 Programmes ....... 24 1.1 General information.... 4 9.1 Automatic programmes.... 24 1.2 Intended use....... 4 9.2 Timed programmes .... 25 1.3 Restriction on user group... 4 10 Accessories...... 26 1.4 Safe installation ...... 5 1.5 Safe use ........ 7 11 Laundry........ - Page 3 16 Troubleshooting....... 37 17 Transportation, storage and disposal ........ 41 17.1 Preparing the appliance for transportation ...... 41 17.2 Disposing of old appliance .. 41 18 Customer Service..... 42 18.1 Product number (E-Nr.) and production number (FD).. 42 19 Consumption values.... 43 20 Technical data ......
-
Page 4: Safety
en Safety 1 Safety Observe the following safety instructions. 1.1 General information ¡ Read this instruction manual carefully. ¡ Keep the instruction manual and the product information safe for future reference or for the next owner. ¡ Do not connect the appliance if it has been damaged in transit. 1.2 Intended use Only use this appliance: ¡... -
Page 5: Safe Installation
Safety en 1.4 Safe installation Take note of the safety instructions when installing the appliance. WARNING ‒ Risk of electric shock! Incorrect installation is dangerous. ▶ Connect and operate the appliance only in accordance with the specifications on the rating plate. ▶ Connect the appliance to a power supply with alternating cur- rent only via a properly installed socket with earthing. - Page 6 en Safety ▶ If the power cord is too short and a longer one is not available, please contact an electrician to have the domestic installation adapted. WARNING ‒ Risk of injury! The high weight of the appliance may result in injury when lifted. ▶...
-
Page 7: Safe Use
Safety en CAUTION ‒ Risk of cutting! Touching sharp edges on the appliance may lead to cuts. ▶ Do not touch the sharp edges on the appliance. ▶ Wear protective gloves when installing and transporting the ap- pliance. 1.5 Safe use WARNING ‒ Risk of electric shock! If the appliance or the power cord is damaged, this is dangerous. - Page 8 en Safety WARNING ‒ Risk of explosion! If there is coal dust or flour in the air around the appliance, this may cause an explosion. ▶ Keep the area around the appliance clean during operation. WARNING ‒ Risk of poisoning! Condensation water from this appliance is not suitable for drinking and may be contaminated with fluff.
-
Page 9: Safe Cleaning And Maintenance
Safety en ▶ If drying is interrupted early, remove the laundry immediately and spread it out. CAUTION ‒ Risk of injury! The covering plate may break if you stand on or climb onto the appliance. ▶ Do not stand on or climb onto the appliance. The appliance may tip over if you sit on or lean against the open door. - Page 10 en Safety WARNING ‒ Risk of injury! The use of non-original spare parts and non-original accessories is dangerous. ▶ Only use the manufacturer's original spare parts and original ac- cessories. WARNING ‒ Risk of poisoning! Poisonous fumes may be given off if you use cleaning agents that contain solvents.
-
Page 11: Preventing Material Damage
Preventing material damage en Do not use hard scouring pads or ▶ 2 Preventing material cleaning sponges. Clean the appliance with nothing damage ▶ but water and a soft, damp cloth. Remove all detergent residue, Follow these instructions to avoid ma- ▶ spray residue or other residues im- terial damage and damage to the ap- mediately if they come into contact... -
Page 12: Energy Saving Mode
en Installation and connection Observe the programme's maximum 4 Installation and con- load capacity. nection → "Programmes", Page 24 a If the maximum load is exceeded, this extends the programme dura- 4.1 Unpacking the appliance tion and increases energy con- sumption. ATTENTION! Objects remaining in the drum that After drying, clean the fluff filter are not designed for operation with → Page 28. -
Page 13: Requirements For The Install- Ation Location
Installation and connection en Replace the accessories in ques- ▶ Installation loca- Requirements tion before operating the appli- tion ance. On the floor Place the appli- → "Accessories", Page 26 ance on a clean, level and firm Included with Description surface. the appliance Align the appli- Tumble dryer ance... -
Page 14: Water Drain Hose
en Installation and connection Pull out the condensation hose 4.4 Water drain hose from the connecting piece. Condensation forms during drying, which your appliance uses for auto- matic cleaning. Use the water drain hose to drain away excess condens- ation directly into the waste water system. - Page 15 Installation and connection en Push the water drain hose as far Water outlet connection types as it will go into the connecting ATTENTION! piece. In the event of a blocked or covered outlet, accumulated wastewater can flow back into the appliance. Before operating the appliance, en- ▶...
-
Page 16: Aligning The Appliance
en Installation and connection Secure the elbow to the gully. 4.5 Aligning the appliance In order to reduce vibrations and noises, align the appliance correctly. To align the appliance, turn the ap- ▶ pliance feet. Check that the appli- ance is level using a spirit level. All appliance feet must stand firmly on the ground. -
Page 17: Familiarising Yourself With Your Appliance
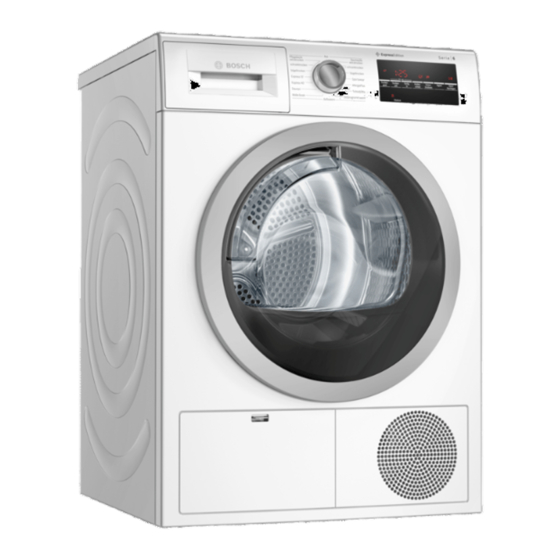
Familiarising yourself with your appliance en 5 Familiarising yourself with your appliance 5.1 Appliance You can find an overview of the parts of your appliance here. On certain models, specific details such as the colour and shape may differ from those pictured. Air inlet Door Maintenance flap on the base Condensation container... -
Page 18: Control Panel
en Familiarising yourself with your appliance 5.2 Control panel You can use the control panel to configure all functions of your appliance and to obtain information about the operating status. Programmes → Page 24 Programme selector → Page 27 Display → Page 19 Buttons → Page 21... -
Page 19: Display
Display en 6 Display The display shows the current settings, options or relevant information. Example: Display Display Designation Description 0:40 Programme dura- Approximate expected programme dura- tion/programme tion or programme time remaining. time remaining 1:25 Timed programme The timed programme is set. → "Timed programmes", Page 25 ... -
Page 20: Dryness Level
en Display Display Designation Description Crease-reduction The crease-reduction function is activated. function Gentle drying Gentle drying is activated for delicate fab- rics. → "Buttons", Page 21 Quiet drying Quiet drying with no audible signals is ac- tivated. → "Buttons", Page 22 ... - Page 21 Buttons en 7 Buttons Below is an overview of the buttons and their setting options. Button Selection Description Start/Nachlegen ¡ Start Start, cancel or pause the programme. ¡ Cancel ¡ Pause 3 Sek. ¡ Activate Activate or deactivate the childproof lock. ¡...
- Page 22 en Buttons Button Selection Description Fertig in Up to 24 hours Set the programme end. The programme duration is already included in the set number of hours. Once the programme has started, the pro- gramme duration is dis- played. Trockenzeit 20 min - 3:30 h Set the programme dura- tion for timed pro- grammes.
-
Page 23: Changing The Dryness Level
Dryness level en 8 Dryness level Each automatic programme has a specified dryness level. The dryness level defines how dry or damp your laundry is after the programme ends. Dryness level Laundry Drying result extratrocken Multi-layered, thick laundry The laundry is dry. that does not dry readily. -
Page 24: Programmes
en Programmes 9 Programmes You can dry your fabrics using either an automatic programme or a timed pro- gramme. 9.1 Automatic programmes Automatic programmes are pro- Tips grammes in which humidity sensors ¡ Select the dryness level according measure the residual moisture in the to the type of fabric or the desired laundry during the drying cycle. -
Page 25: Timed Programmes
Programmes en Programme Description Max. load (kg) Sportswear Dry self-drying sportswear made of per- formance fibres, microfibres and synthet- ics. Express 15' Suitable for shirts and blouses made of cotton, linen, synthetics or blended fab- rics. Note: For optimal drying results, dry a maximum of 5 shirts or 5 blouses at the same time. -
Page 26: Accessories
en Accessories 10 Accessories Use original accessories. These have been made especially for your appli- ance. Note: Some accessories are avail- able in other colours. Contact → "Customer Service", Page 42. Order number Connection kit To save space, stack the WTZ20410 appliance on a suitable washing machine of the same width and depth and that is from the... -
Page 27: Laundry
QR code in the table of scanning the QR code in the table of contents or on www.bosch- contents or on www.bosch- home.com. home.com. 11.1 Preparing the laundry 12.1 Switching on the appli-... -
Page 28: Starting The Programme
en operation Close the door. 12.4 Starting the programme Press Start/Nachlegen . Requirement: A programme is set. → "Setting a programme", Page 27 12.7 Cancelling the pro- Press Start/Nachlegen . ▶ gramme a The display shows the programme Press Start/Nachlegen . duration or the "Ready in" time. Open the appliance door. - Page 29 operation en Remove the fluff from the door. Open the fluff filter. Remove the fluff filter. Remove the fluff. Remove the fluff from the recess. Clean the fluff filter thoroughly un- der warm, running water and then dry it off. Ensure that no fluff falls into the air channel.
-
Page 30: Condensation Container
en operation Close the fluff filter. Emptying the condensation container If the drying programme has finished or the display shows a notification while the appliance is in operation, empty the condensation container. Requirements ¡ The display shows the following after drying: "End" ¡... -
Page 31: Childproof Lock
Childproof lock en Press and hold the two 3 Sek. Inserting the condensation ▶ buttons for approx. 3 seconds. container goes out in the display. Requirement: The condensation con- tainer → Page 30 is removed from the appliance. Push the condensation container ▶ in as far as it will go. -
Page 32: Basic Settings
en Basic settings 14 Basic settings You can configure the basic settings for your appliance to meet your needs. 14.1 Overview of the basic settings Basic setting Programme Value Description position End signal 0 (off) Set the volume of the signal at the 1 (quiet) end of the programme. -
Page 33: Changing The Basic Set- Tings
Note: You can find further information in the digital instruction manual by scanning the QR code in the table of contents or on www.bosch- home.com. 15.1 Tips on cleaning and care Wipe down the This ensures the Press Start/Nachlegen and, at the... -
Page 34: Base Unit
en Cleaning and servicing Pull out the heat exchanger cover 15.2 Base unit by the handle. The base unit is the accessible area at the bottom of the appliance in which you will find the heat ex- changer. Opening the base unit Requirements ¡... - Page 35 Cleaning and servicing en Pull out the heat exchanger hori- Slide the heat exchanger in hori- zontally. zontally as far as it will go. Clean the heat exchanger from all Close the base unit → Page 35. sides under running water and dry Closing the base unit Requirement: The base unit is open.
-
Page 36: Moisture Sensor
en Cleaning and servicing Close the maintenance flap. Clean the moisture sensor with a sponge. 15.3 Moisture sensor The moisture sensor in this appliance measures how damp the laundry is during the drying cycle. The appli- ance changes the duration of the automatic programme depending on the residual moisture in the laundry. -
Page 37: Troubleshooting
Troubleshooting en 16 Troubleshooting You can rectify minor faults on your appliance yourself. Read the troubleshoot- ing information before contacting after-sales service. This will avoid unneces- sary costs. WARNING Risk of electric shock! Incorrect repairs are dangerous. Repairs to the appliance should only be carried out by trained specialist ▶... - Page 38 en Troubleshooting Fault Cause and troubleshooting Creasing. → "Changing the dryness level", Page 23. ▶ → "Adjusting the dryness level", Page 23. ▶ Anti-Crease not activated. Activate the Anti-Crease function. ▶ → "Buttons", Page 21 and programme Condensation tank filled. terminated. → "Emptying the condensation container", Page 30. → "Inserting the condensation container", Page 31. → "Starting the programme", Page 28.
- Page 39 Troubleshooting en Fault Cause and troubleshooting The length of the pro- The programme operation is optimised electronically. gramme changes dur- This may change the programme duration. ing the drying cycle. Not a fault – no action required. ▶ Pumping noise. Condensation pump active. Not a fault –...
- Page 40 en Troubleshooting Fault Cause and troubleshooting The laundry is too Unsuitable programme for the type of fabric. damp. Set a timed programme for the subsequent drying. ▶ → "Programmes", Page 24 There has been a power cut. Check whether the lighting in your kitchen or other ▶...
-
Page 41: Transportation, Storage And Disposal
Transportation, storage and disposal en 17.2 Disposing of old appli- 17 Transportation, stor- ance age and disposal Valuable raw materials can be re- used by recycling. 17.1 Preparing the appliance for transportation WARNING Risk of harm to health! Tip: The appliance may contain re- Children can lock themselves in the sidual water, which may drip out of it appliance, thereby putting their lives when transported. -
Page 42: Customer Service
en Customer Service 18 Customer Service Function-relevant genuine spare parts according to the corresponding Eco- design Order can be obtained from Customer Service for a period of at least 10 years from the date on which your appliance was placed on the market within the European Eco- nomic Area. -
Page 43: Consumption Values
Consumption values en 19 Consumption values The programme The actual values may deviate from Baumwolle schranktrocken the indicated values depending on (denoted by the arrow symbol) is the type of fabric, composition of suitable for drying cotton laundry with laundry to be dried, residual moisture a normal dampness level, and is the in the fabric, set degree of dryness, most efficient programme for drying... -
Page 44: Technical Data
en Technical data Programme Final Load Spin Initial Pro- Energy mois- (kg) speed mois- gramm con- ture (rpm) ture e dura- sump- level level tion tion (h:min) (kWh/ cycle) Baumwolle bügel- 12,0 1000 1:05 2,12 trocken Baumwolle bügel- 12,0 2:27 4,50 trocken Baumwolle bügel-... - Page 48 Expert advice for your Bosch home appliances, help with problems or a repair from Bosch experts. Find out everything about the many ways Bosch can support you: www.bosch-home.com/service Contact data of all countries are listed in the attached service direct- ory.
Need help?
Do you have a question about the WTG864H2 and is the answer not in the manual?
Questions and answers