Table of Contents
Advertisement
Quick Links
Advertisement
Table of Contents

Related Manuals for Bosch WTG86402UC


Summary of Contents for Bosch WTG86402UC
- Page 1 Use and Care Manual, Installation Instructions Dryer WTG86402UC...
- Page 2 Welcome to Your New Dryer! Congratulations on your selection of a new Bosch dryer for your laundry needs. We are confident you will enjoy the superior performance and reliability. Please do not hesitate to contact our Customer Service department if you have any questions or comments about your new dryer.
-
Page 3: Table Of Contents
Reversing the door - step by step ......... 17 Additional information on products, accessories, replacement parts and services can be found at Getting to know your appliance ......... 19 www.bosch-home.com and in the online shop Control panel ..............19 www.bosch-eshop.com Operating Instructions ..........20 Your new dryer .............. -
Page 4: Important Information
Please take a moment to record the following basic the maintenance and care mentioned in this manual. If information about the purchase of your new Bosch dryer. you have a problem with your dryer, please consult This information will be helpful in the event you need to ~ Troubleshooting;... -
Page 5: Your Dryer Is Intended For
Your dryer is intended for Only household use and in a non-commercial Installation by qualified installers. ▯ ▯ environment. Installation in accordance with all regulatory ▯ Household use only for drying washable textiles. requirements; if in doubt have the appliance installed ▯... -
Page 6: Important Safety Instructions
To reduce the risk of fire or electrical shock, DO NOT ▯ THE FOLLOWING use an extension cord or an adapter to connect the dryer to the electrical power supply. Bosch dryers are provided with an Use and Care ▯ Manual with Installation Instructions. -
Page 7: Introduction To Your New Dryer
Environmentally friendly use of your dryer Sensor controlled auto cycles. ▯ Your new Bosch dryer is designed to use energy in a 17.7 lb (8 kg) large drum capacity (for regular cotton highly efficient way to help reduce operating costs, ▯... -
Page 8: Dimensions And Clearances Required
Use optimum load Air inlet on the dryer ▯ ▯ Utilize the maximum amount of laundry for the Do not cover or allow any articles/items to restrict the appropriate cycle. However, do not exceed air inlet on the front of the dryer. recommended loads. -
Page 9: Minimum Clearances
Minimum clearances Label Dimension U.S. Metric Inches Closet: Stacked E & F are minimum area size! Top Vent 63 sq. 404 sq. Bottom Vent 63 sq. 404 sq. Vent spacing is actual (not minimum dimensions) 73.6 Under counter (Preferred) Closet: Stand alone (shown) or Side by Side Front of the appliance fully open. -
Page 10: Installation Instructions
If front of the appliance is covered ventilation openings must be installed. Under counter (Less Desirable) E & F are minimum area sizes 63 sq.in. 404 sq. cm 63 sq.in. 404 sq. cm G & H actual spacing dimensions for min. open area sizes 3 in. -
Page 11: Before Installing The Dryer
Before installing the dryer Parts provided with your dryer Unpacking the appliance Back side of the dryer CAUTION Remove the appliance packaging carefully to prevent damage to the surfaces. After removing the packaging, immediately remove any objects from the drum. Check the dryer for transportation damage. -
Page 12: Accessories For Your Appliance
The dryer can be mounted on a special pedestal for easier loading and unloading. Pedestal item number: WMZ20500 Stacking kits The dryer can be stacked on a Bosch washer of the same dimensions to save space. Stacking kit without a shelf: WTZ20410 Stacking kit with a shelf: WTZ11400... - Page 13 Secure hose and/or elbow as shown below. Sink “D” Examples of connections: or floor “E”. Plumbing box or Standpipe connection: ▯ NOTICE: Examples shown are for reference only. Not all For most plumbing box installations (with adjacent fittings, connectors, nuts, brackets, ties, etc. are supplied washer) the plastic elbow supplied with the dryer will to accommodate every application.
-
Page 14: Electrical Connections
Replacement power cords can be purchased NOTICES through our Customer Service department. Examples shown are for reference only. Not all fittings, ▯ Use only a UL listed 30 amp power cord. connectors, nuts, brackets, ties, etc. are supplied to ▯ accommodate every application. - Page 15 Remove the 4-wire power cord (as supplied): Connecting a 3-wire power supply cord A. Remove the 3 Philips screws (2 labeled L and one labeled N). WARNING B. Remove the green grounding screw PE (T20 torx). ELECTRIC SHOCK HAZARD NOTICE: Be careful not to drop the screws into the To reduce risk of fire, electric shock, serious injury, dryer.
-
Page 16: Leveling The Dryer
This is just as important as This appliance is equipped with a 208/240V 15A the dryer being level to prevent vibration. receptacle for use ONLY with Bosch washer. CAUTION Do not use this receptacle to power any other device. -
Page 17: Reversing The Door - Step By Step
Reversing the door - step by step Remove screws from the hook insert and then remove it from the door. Tip: To reverse your dryer door side: Use only T20 (Torx) type screw driver to remove and ▯ reinstall door screws. Do not use any other tools to reverse the door (hinge ▯... - Page 18 Prepare the hinge insert and the hook insert to install Remove the door lock from the dryer. and then screw them following the instructions below. Install the door lock (1) and then door lock cover (2) at the opposite site of the door seal. Remove screws from the door lock cover and then remove it from the dryer.
-
Page 19: Getting To Know Your Appliance
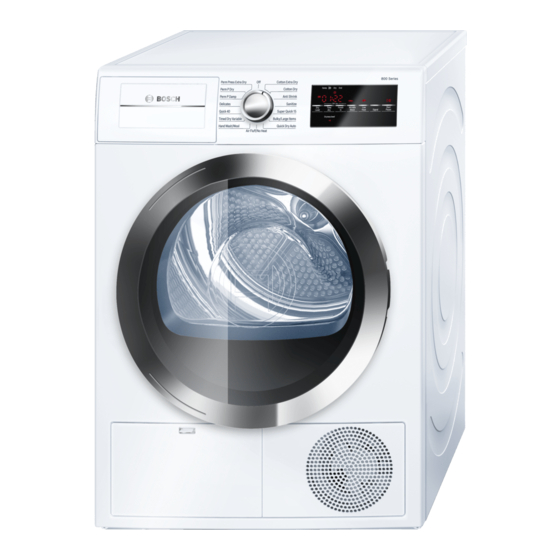
Getting to know your appliance Control panel Program Selector Dry Level, Time dry, Finish in Selectable Option Settings for customizing Pro- Selecting a program and switching on/off; grams as desired. turns in both directions. Indicator Symbol lights or desired time is displayed if setting is active.~ Default Program and Option settings;... -
Page 20: Operating Instructions
Operating Instructions WARNING RISK OF FIRE, ELECTRIC SHOCK, OR INJURY To reduce the risk of fire, electric shock, or injury to persons, read the IMPORTANT SAFETY INSTRUCTIONS and Operating Instructions before operating this appliance. Your new dryer Control panel, display area, program selector Drum with interior light (depending on model) The interior light activates after the door is opened and after the program starts, it switches off automatically. -
Page 21: Before Using The Dryer For The First Time
Lint filter Air inlet Open the maintenance flap Close the maintenance flap Heat exchanger Before using the dryer for the first time WARNING Read these operating instructions carefully. BEFORE INSTALLING OR USING YOUR DRYER Check that the supply voltage corresponds with the Read and follow all installation and operating voltage specifications on the rating plate on the dryer, instructions. -
Page 22: Using The Program Selector To Choose A Drying Cycle
Using the program selector to choose a Special programs drying cycle The programs Sanitize, Jeans, Anti Shrink, Super Quick 15, Towels, Bulky/Large Items and Heavy Duty NOTICE: If you have activated the childproof lock, you (depending on model) are made for special type fabric must deactivate it before you can set a program. -
Page 23: Loading The Laundry
Loading the laundry Load the laundry WARNING RISK OF EXPLOSION Do not dry laundry that has ever been in contact with solvents, oil, wax, grease or paint (e.g. hair styling products, nail varnish remover, stain remover, cleaning solvent, etc.). Check lint filter. Place laundry in the empty drum. -
Page 24: Indicator Of Program Sequence
Tip: The estimated remaining time will be updated. Cancel program Indicator of program sequence If required, you can cancel the selected program: Bosch dryers use an advanced control system with a Touch Start/Pause. moisture sensor continually monitoring the laundry’s Rotate the program selector to Off. -
Page 25: Laundry
Select Cotton Extra Dry on position 1. 0 = off, 1 = soft, 2 = The appliance is on. mid, 3 = loud, 4 = very loud Hold down Start/Pause and turn the program selector to the right (position 3). Release Start/Pause button. Adjustment mode is now activated and the default Position 4 for button signals volume volume for buzzer appears in the display. -
Page 26: Program Selection Table
Program selection table Programs Max. Type of laundry (For laundry which is:) load up Standard programs full load Normal cotton and linen type load (bed linen, cotton clothes, etc.) Cotton Dry full load Terry bathrobes and terry bed linen (particularly thick or multi-ply) Cotton Extra Dry 1/2 load Trousers, dresses, skirts, shirts, blouses, leggings, sports clothing with synthetic- Perm P Damp... -
Page 27: Default Program And Option Settings
Default Program and Option settings Finish in At the factory initial settings are pre-set for all cycles. You can change some program settings as follows. The program end (Finish in) time can be set in one hour increments to a maximum of 24 h (hours). Dry level After selecting the desired drying program (at the dial) but before touching the Start button, touch the Finish in... -
Page 28: Cleaning And Maintenance
Change spin speed Quit adjustment mode Press the Time Dry or Finish in button to change the Turn the program selector to Off position. The settings setting (allowable values are between 600 and 1800 in were saved. increments of 100). Cleaning and maintenance Your appliance is designed to give you many years of To clean the lint filter:... -
Page 29: Cleaning The Heat Exchanger
Remove fluff (run hand over filter). To clean the heat exchanger: If the dryer is hot, run on Air Fluff/No Heat program to allow the dryer to cool down. Residual water may escape, place an absorbent cloth under the maintenance flap. Unlock the maintenance flap and open it completely. -
Page 30: Cleaning The Moisture Sensors
Rinse the heat exchanger and the cap on all sides with To clean the moisture sensors: a jet of water to completely remove all of the lint and Open the door. fluff. Remove all lint and fluff from the seals on the dryer The deposit on the sensors can easily be removed by and heat exchanger. -
Page 31: Troubleshooting
Troubleshooting Introduction Before calling customer service, check whether you can rectify the fault yourself by means of the following table. NOTICE: Before doing maintenance work or trying to fix If a fault cannot be rectified or a repair is required: a problem, rotate the program selector to Off. - Page 32 Problem Possible cause(s) Solution(s) Water is leaking out. Dryer is not leveled. Level the dryer. ~ Leveling the dryer; Page 16 The heat exchanger seal is dirty. Clean the heat exchanger seal. ~ Cleaning the heat exchanger; Page 29 Drain hose is leaking. Check entire length of drain hose for leaks;...
-
Page 33: Statement Of Limited Product Warranty
Bosch to notify you in the unlikely event of a of Bosch at its sole option. All replaced and/or repaired safety notice or product recall. - Page 34 Bosch would still pay for labor and parts flooring, and for any alterations including without and ship the parts to the nearest authorized service limitation cabinetry, walls, floors, shelving, etc.);...
- Page 36 1901 Main Street, Suite 600 • Irvine, CA 92614 • 1-800-944-2904 *9001300484* www.bosch-home.com • © 2012 BSH Home Appliances Corporation 9001300484 9704...
Need help?
Do you have a question about the WTG86402UC and is the answer not in the manual?
Questions and answers