Table of Contents
Advertisement
Quick Links
OWNER'S MANUAL
ASSEMBLY AND
OPERATING INSTRUCTIONS
WARNING
For Outdoor Use Only (outside any
WARNING
1. Improper installation, adjustment, alteration, service
or maintenance can cause injury or property damage.
2. Read this instruction manual thoroughly before
installing or servicing this equipment.
3. Failure to follow these instructions could result in
fire or explosion, which could cause property damage,
personal injury or death.
4. This instruction manual contains important
information necessary for proper assembly and safe
use of this appliance.
5. Always keep this manual for convenient future
reference.
WARNING
1. DO NOT store or use gasoline or other flammable
vapors and liquids in the vicinity of this or any other
appliance.
2. An LP tank not connected for use should not be
stored in the vicinity of this or any other appliance.
DANGER
If you smell gas:
1. Shut off gas to the appliance.
2. Extinguish any open flames.
3. Open the lid.
4. If the odor continues, keep away from the appliance
and immediately call your gas supplier or fire
department.
DANGER
Never operate this appliance unattended.
DANGER
Check for leaks every time prior to you light the grill,
even if purchased fully assembled. Gas leaks may
cause a fire or explosion.
Please read the instructions on Page 16.
enclosure).
service department at 1-866-994-6390 from 9:00 am
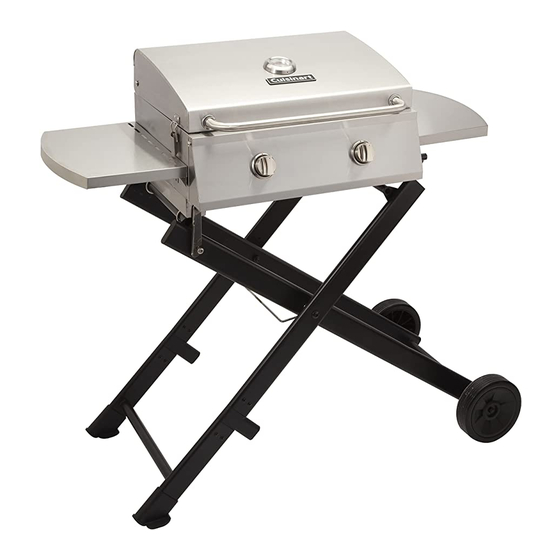
Chef's Style Roll-Away
Portable Gas Grill
Model NO: CGG-340
Customer Service Hotline
1-866-994-6390
DO NOT RETURN YOUR GRILL TO THE STORE
Before visiting your local retailer, call our customer
to 5:00 pm Eastern Time, Monday through Friday.
1
Advertisement
Table of Contents

Related Manuals for Cuisinart CGG-340


Summary of Contents for Cuisinart CGG-340
- Page 1 Chef’s Style Roll-Away Portable Gas Grill Model NO: CGG-340 OWNER’S MANUAL ASSEMBLY AND OPERATING INSTRUCTIONS WARNING For Outdoor Use Only (outside any enclosure). WARNING 1. Improper installation, adjustment, alteration, service or maintenance can cause injury or property damage. 2. Read this instruction manual thoroughly before installing or servicing this equipment.
-
Page 2: Table Of Contents
Table of Contents Table of Contents Safety Information Preparation Parts List Assembly Instructions Folding and Transport Instructions Installation Instructions Operating Instructions Care and Maintenance Trouble Shooting Questions? Back Cover... -
Page 3: Safety Information
SAFETY INFORMATION Please read the following instructions carefully before attempting to assemble, operate or install the product. Failure to follow these instructions may result in serious bodily injury and/or property damage. If you have questions regarding the product please call customer service at 866-994-6390, 9 a.m.-5 p.m., EST, Monday-Friday or email Grilling@TheFulhamGroup.com. - Page 4 SAFETY INFORMATION The Fuel System Gas grills are used safely by millions of people when following simple safety precautions. The items in the fuel system are designed for operation with this grill. They must not be replaced with any other brand. (See parts list for replacement items.) GAS BURNER: The gas burner is constructed of stainless steel and should not require maintenance other than inspection for insects/nests inside the air intake slots.
-
Page 5: Preparation
PREPARATION Before beginning assembly, installation or operation of product, make sure all parts are present. Compare parts with package contents list and diagram above. If any part is missing or damaged, do not attempt to assemble, install or operate the product. Contact customer service for replacement parts. WARNING: this appliance is not intended for and should never be used as a heater. -
Page 6: Parts List
PART LIST PART DESCRIPTION PART DESCRIPTION (x2) Lid Assembly (x1) Control Knob Lid Hinge Long Securing (x1) (x2) Screw Latch Temperature Firebox (x1) (x2) Gauge Bumper (x1) (x2) Lid Bumper Control Panel (x2) (x1) Leg Connector Logo Badge Lid Handle Lower Leg (x1) (x2) - Page 7 PART LIST PART DESCRIPTION PART DESCRIPTION HARDWARE (x2) Wheel Wheel Axel (x16) (x2) M5x10 Screw Bolt Threading Securing (x1) Leg Assembly (x2) Latch Screw Wheel Axel (x2) Shaft (x2) Bolt Valve and Grill Body (x2) (x1) Manifold Connector Pin Assembly (x2) (x1) Cotter Pin...
-
Page 8: Assembly Instructions
ASSEMBLY INSTRUCTIONS Remove all contents from packaging and make sure all parts are present before attempting to assemble. Part numbers reference the tables on pages 6 and 7. Remove Cooking Grate (Part 43) and Flame Tamers (Part 45) from inside the grill before attempting to assemble. The leg assembly is spring loaded so caution is advised when unpacking it. - Page 9 ASSEMBLY INSTRUCTIONS STEP 3 - - - - - - - - - - - - - - - - - - - - - - - - - - - - - - - - - - - - - - - - - - - - - - - - - - - - - - - - - - - - - - - - - - - - - - - - - - - - - - - - - - - •...
- Page 10 ASSEMBLY INSTRUCTIONS STEP 5 - - - - - - - - - - - - - - - - - - - - - - - - - - - - - - - - - - - - - - - - - - - - - - - - - - - - - - - - - - - - - - - - - - - - - - - - - - - - - - - - - - - - - - •...
- Page 11 ASSEMBLY INSTRUCTIONS STEP 7 - - - - - - - - - - - - - - - - - - - - - - - - - - - - - - - - - - - - - - - - - - - - - - - - - - - - - - - - - - - - - - - - - - - - - - - - - - - - - - - - - - - - - - •...
-
Page 12: Folding And Transport Instructions
ASSEMBLY INSTRUCTIONS STEP 9 - - - - - - - - - - - - - - - - - - - - - - - - - - - - - - - - - - - - - - - - - - - - - - - - - - - - - - - - - - - - - - - - - - - - - - - - - - - - - - - - - - - - - - •... - Page 13 FOLDING AND TRANSPORT INSTRUCTIONS STEP 2 - - - - - - - - - - - - - - - - - - - - - - - - - - - - - - - - - - - - - - - - - - - - - - - - - - - - - - - - - - - - - - - - - - - - - - - - - - - - - - - - - - - - - - •...
- Page 14 FOLDING AND TRANSPORT INSTRUCTIONS STEP 3 - - - - - - - - - - - - - - - - - - - - - - - - - - - - - - - - - - - - - - - - - - - - - - - - - - - - - - - - - - - - - - - - - - - - - - - - - - - - - - - - - - - - - - •...
-
Page 15: Installation Instructions
INSTALLATION INSTRUCTIONS GAS HOOK-UP Only the pressure regulator and hose assembly supplied with the grill should be used. Any replacement pressure regulator and hose assembly must be specified by the grill manufacturer. This grill is configured for Liquid Propane. Do not use a Natural Gas supply. Total gas consumption (per hour) with all burners set on “HI”: Main burners 20,000 BTU/Hr. - Page 16 INSTALLATION INSTRUCTIONS DISCONNECTING THE LIQUID PROPANE CYLINDER • Turn the grill burner valves “OFF” and make sure the grill is cool. • Turn the Liquid Propane cylinder valve “OFF” by turning clockwise until it stops. • Detach the regulator assembly from the cylinder valve by turning the quick coupling nut counterclockwise. •...
-
Page 17: Operating Instructions
INSTALLATION INSTRUCTIONS WARNING 1. The grill and its individual shutoff valve must be disconnected from the gas supply piping system during any pressure testing of that system at test pressure in excess of 1/2-in.PSI (3.5kpa). 2. The outdoor cooking gas appliance must be isolated from the gas supply piping system by closing its individual manual shutoff valve during any pressure testing of the gas supply piping system at test pressure equal to or less than 1/2-in.PSI (3.5kpa). - Page 18 OPERATING INSTRUCTIONS FLAME CHARACTERISTICS • Check for proper burner flame characteristics. Burner flames should be blue and stable with no yellow tips, excessive noise, or lifting as shown in Fig. 6. • Turn the control knobs and Liquid Propane cylinder valves “OFF.” •...
-
Page 19: Care And Maintenance
CARE AND MAINTENANCE There is very little care and maintenance needed. The Portable Gas Grill is designed and made of materials that will last many years with normal use. Following these instructions will improve the longevity and quality of cooking. To ensure safe operation of your grill, the area of cooking should always be kept free of combustible materials of any type, such as gasoline or other flammable vapors or liquids. - Page 20 CARE AND MAINTENANCE This unit must be kept in an area free from combustible materials, gasoline and other flammable vapors and liquids. Make sure all openings into the grill body are free of blockages or debris and there are no objects or materials blocking the flow of combustion or ventilation.
-
Page 21: Troubleshooting
TROUBLESHOOTING WARNING Spiders and insects can nest inside the burners of the grill and disrupt gas flow. This very dangerous condition could cause a fire behind the valve panel, thereby damaging the grill and making it unsafe for operation. Inspect the grill at least twice a year. When to Look for Spiders You should inspect the burners at least twice a year or immediately after any of the following conditions occur: •... - Page 22 Questions, problems, missing parts? Before returning to your retailer, call our customer service department at 866-994-6390, 9 a.m.-5 p.m., EST, Monday-Friday or email Grilling@TheFulhamGroup.com. Model#CGG-340 North American Distributor: The Fulham Group Newton, MA 02466...
Need help?
Do you have a question about the CGG-340 and is the answer not in the manual?
Questions and answers