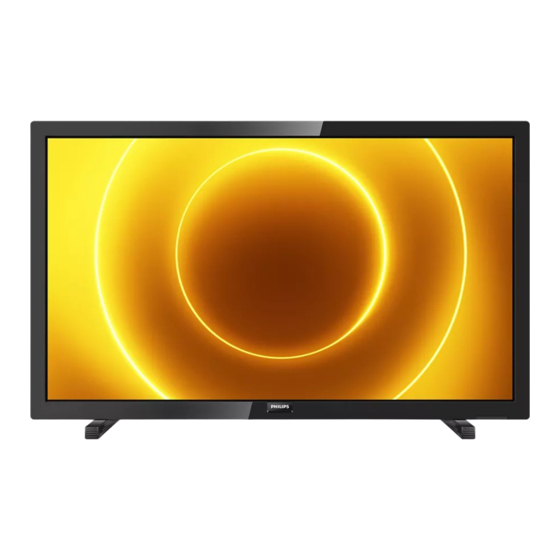
Philips 24PFT5505/98 Service Manual

Philips 24PFT5505/98 Service Manual

Chassis tps20.1a/ap

Advertisement

Quick Links

Chassis name
TPS20.1A LA
Published by Doris.zheng/SC 2036 Quality
2020
TP Vision Netherlands B.V.
©
All rights reserved. Specifications are subject to change without notice. Trademarks are the
property of Koninklijke Philips Electronics N.V. or their respective owners.
TP Vision Netherlands B.V. reserves the right to change products at any time without being obliged to adjust
earlier supplies accordingly.
PHILIPS and the PHILIPS' Shield Emblem are used under license from Koninklijke Philips Electronics N.V.
Platform
MSD3663
Subject to modification
Model name
24PFT5505/98
24PHT5565/67
24PHT5565/68
24PHT5565/70
24PHT5565/73
24PHT5565/75
24PHT5565/79
24PHT5565/98
32PHT5505/56
32PHT5505/67
32PHT5505/68
32PHT5505/70
32PHT5505/75
32PHT5505/98
TPS20.1A
AP
32PHT5505/94
32PHT5545/94
32PFT5505/98
32PFT5505/56
32PFT5505/75
32PHT5545/79
43PFT5505/56
43PFT5505/67
43PFT5505/68
43PFT5505/70
43PFT5505/75
43PFT5505/98
43PFT5545/79
43PFT5505/94
3122 785 21190
2020-Sep-04

Advertisement

Table of Contents
loading

Summary of Contents for Philips 24PFT5505/98

  • Page 1 Koninklijke Philips Electronics N.V. or their respective owners. TP Vision Netherlands B.V. reserves the right to change products at any time without being obliged to adjust earlier supplies accordingly. PHILIPS and the PHILIPS’ Shield Emblem are used under license from Koninklijke Philips Electronics N.V.
  • Page 2: Table Of Contents

    Koninklijke Philips Electronics N.V. or their respective owners. TP Vision Netherlands B.V. reserves the right to change products at any time without being obliged to adjust earlier supplies accordingly. PHILIPS and the PHILIPS’ Shield Emblem are used under license from Koninklijke Philips Electronics N.V.
  • Page 3: Product Information

    Wall Mounting 24PFT5505: 1920x 1080 32PHT5505: 1366x 768 If mounting the TV, purchase a Philips TV mount or any TV 32PHT5545: 1366x 768 mount compliant with the VESA standard. To prevent damage to cables and connectors, leave a clearance gap...
  • Page 5: Precautions, Notes, And Abbreviation List

    Refer to the diversity tables for the correct values. two pins of the Mains/AC Power plug. • The correct component values are listed on the Philips • Check the cabinet for defects, to prevent touching of any Spare Parts Web Portal.
  • Page 6 To avoid wear-out of tips, switch “off” unused equipment or reduce heat. • Mix of lead-free soldering tin/parts with leaded soldering tin/parts is possible but PHILIPS recommends strongly to avoid mixed regimes. If this cannot be avoided, carefully clear the solder-joint from old tin and re-solder with new tin.
  • Page 7 possible dangerous impact, others of quite high potential Board-Level Repair are of limited current and are sometimes held in less BTSC Broadcast Television Standard regard. Committee. Multiplex FM stereo sound • Always respect voltages. While some may not be system, originating from the USA and dangerous in themselves, they can cause unexpected used e.g.
  • Page 8 G-TXT Green TeleteXT distance is 6.5 MHz. L' is Band I, L is all H_sync to the module bands except for Band I High Definition LG.Philips LCD (supplier) Hard Disk Drive Loudspeaker HDCP High-bandwidth Digital Content Protection: LVDS Low Voltage Differential Signalling A “key”...
  • Page 9 Serial Peripheral Interface bus; a 4-wire module, implementing the CA system for a synchronous serial data link standard host (e.g. a TV-set) S/PDIF Sony Philips Digital InterFace Power On Reset, signal to reset the uP SRAM Static RAM PSDL Power Supply for Direct view LED...
  • Page 10 Software 640 × 480 (4:3) SWAN Spatial temporal Weighted Averaging Variable Level out: processed audio Noise reduction output toward external amplifier SXGA 1280 × 1024 Vestigial Side Band; modulation method Thin Film Transistor WYSIWYR What You See Is What You Record: record Total Harmonic Distortion selection that follows main picture and TMDS...
  • Page 11: Mechanical Instructions

    3. Mechanical Instructions 3.1 Cable Dressing M+P BOARD (1052) ECN402 CN402 CN601 ECN402 Cable dressing (24" 5565 series) ECN601 ECN601 ECN7 LOUDSPEAKER LOUDSPEAKER (1184) (1184) IR/LEC BOARD (1056) Back cover overview (24" 5565 series)
  • Page 12: Cable Dressing (32" 5505/5545 Series)

    M+P BOARD (1052) ECN408 CN408 CN401 CN601 ECN408 Cable dressing (32" 5505/5545 series) ECN408 M+P BOARD (1052) CN408 CN401 CN601 ECN408 Cable dressing (43" 5505/5545 series)
  • Page 13: Assembly/Panel Removal

    ECN401 to key&IR ECN401 ECN601 ECN401 KEY BOARD LOUDSPEAKER LOUDSPEAKER (1057) (1184) (1184) IR/LED BOARD ECN601 (1056) Back cover overview (32" & 43” 5505/5545 series) 3.2 Assembly/Panel Removal 3.2.1 Stand removal Notes: Figures below can deviate slightly from the actual situation due to the different set executions. Remove the fixation screws [1] that secure the stand.
  • Page 14 (24" series)
  • Page 15 32”/ 43” Series: Remove all fixation screws [2] and [3] that secure the Back cover assy. Unplug the connector [4 and [5] ]that marked by red box below from SSB, and remove the wires from the hook in red circle as below picture Gently lift the rear cover from the TV.
  • Page 16 32”/43” Series: 1. Unplug the connector from the SSB. Caution: be careful, as these are very fragile connectors! 2. Remove fixation screws [1] and connector [2] from the IR board control unit. 3. Press the snap that marked by blue box below backward then take out the IR board. When defective, replace the whole unit.
  • Page 17 The SSB can now be shifted from side connector cover, then lifted and taken out of the I/O bracket. 3.2.5 Power Supply Unit (PSU) Caution: it is mandatory to remount all different screws at their original position during re-assembly. Failure to do so may result in damaging the PSU. Gently unplug all connectors from the PSU.
  • Page 18: Service Modes

    4. Service Modes 4.1 Service Modes The Service Mode feature is split into following parts: Factory Mode.  Factory mode offer features, which can be used by the Service engineer to repair/align a TV set. Some features are: Make alignments (e.g. White Tone). ...
  • Page 19: Software Upgrading, Error Code And Panel Code

    5. Software Upgrading, Error code and Panel Code 5.1.1. The following update is for .bin file. Rename the file to “MERGE3663.bin”. Prepare a USB memory (File format: FLAT, Size: 1G~8G). Copy the software to USB flash disk (root directory). Switch off the TV and Insert the USB memory stick that contains the software update files in one of the TV’s USB 2.0 port. Switch on the TV.
  • Page 20: Trouble Shooting

    Trouble shooting 2016年12月10日 2016/4/8 Picture-related Intermittent Ask Photo Picture ? problem ? Menu Smarkt Signal SW latest ? Backlight? issue function? issue SSB+LVDS+Panel Update SW LED working ? PSU/SSB Problem solved ? Sound ? PSU+ Panel Finish SW+SSB...
  • Page 21 Trouble shooting 2016年12月10日 2016/4/8 Audio/Sound- related Intermittent Sound ? problem ? Setting SW latest ? Mute ? issue issue Update SW Extra device Check extra connect? device Problem solved ? Factory setting Finish Sound back ? Setting issue SSB+SPK...
  • Page 22 6.Slow response to user interaction 7.Switches ON by itself 8.Switches Off by itself 9.Stuck in standby mode / unable to start up 10.Stuck on PHILIPS / ANDROID logo 11.CAM not recognized by TV 12.CAM authentication issue 13.Misc CAM issue 14.IP-EPG issues 15.BC-EPG issues...
  • Page 23: Circuit Diagrams

    7.Circuit Diagrams 7.1 J 715G8791 IR/LED Panel(For 24” 5505 Series) 7-1-1 IR BOARD R001 4K7 1/16W 5% LED001 GPTS06033RC3-PB CN001 R004 CONN R002 R003 100R 1/16W 5% 1K 1/16W 5% NC/10K 1/16W 5% Q001 BC847C C001 IRM-H936M3/TR2 10UF 6.3V C003 100N 16V C002 ----><----|...
  • Page 24: 715G8623 Ir Board

    7.2 E 715G8623 IR Board (For 32”&43” 5505/5545 Series) 7-2-1 IR Light Sensor CN201 R223 R224 R225 R226 R227 R228 R229 I2C ADDR LED_R DVD3V3 DVD3V3 JSA-1130 0x44 RC-IR C222 1uF 10V JSA-1130 0x45 3V3SB LS_SCL R225 0R05 1/16W C221 100N 16V DVD3V3 LS_SDA...
  • Page 25: 715Ga039 Ir Board

    7.3 E 715GA039 IR Board(For 24” 5565 Series) 7-3-1 IR&STB LED&Light sensor L i g h t S e n s o r DVD3V3 U222 DVD3V3 R 2 2 3 R 2 2 4 R 2 2 5 R 2 2 6 R 2 2 7 R 2 2 8 R 2 2 9...
  • Page 26: 715G9740 Keyboard

    7.4 E 715G9740 Keyboard control panel (For 24”/32” /43” 55x5/5605 Series) 7-4-1 Key...
  • Page 27: Styling Sheet

    8. Styling Sheets 8.1 5505 series 24" 1052 0040 1050 1184 1057 1056 + 36 1056 0050 0030...
  • Page 28: 5565 Series 24

    8.2 5565 series 24" 1052 0040 1050 1184 1056 0050 0030...
  • Page 29: 55X5 Series 32"/43

    8.3 55x5 series 32"/ 43” 1050 0040 1052 1184 0030 1056 0050 1057 0063 0036 0050...
  • Page 30: Dismantling Procedure For Specific Handling Parts

    9. Dismantling procedure for specific handling parts As complete appliances, LCDs are deemed to be hazardous waste (e.g. 16 02 13*, 20 01 35*) in the EU according to the German Waste Catalogue Ordinance. These appliances may only be handled by authorized handling plants. LCDs must be stored in accordance with the requirements stipulated in Appendix VIII (1) or (2) of Directive 2012/12/EU and must, amongst other things, be stored in a weatherproof manner.
  • Page 31 These substances, mixtures and components shall be disposed of or recovered in compliance with Directive 2008/98/EC cathode ray tubes: the fluorescent coating has to be removed equipment containing gases that are ozone depleting or have a global warming potential (GWP) above 15, such as those contained in foams and refrigeration circuits: the gases must be properly extracted and properly treated.
  • Page 32 The diffusion panels can be accessed by lifting the inner casing, typically held in place with clips which can be removed with appropriate tools. The panel consists of several plastic sheets which can be processed. A final consideration is that of the back light which must be removed prior to processing.
  • Page 33 A Power cord or other external cables plugged into the back of the LCD can easily be removed by hand and/or screwdriver; 2 types of connection of power cord are typical as shown in the pictures. Capacitors > 25 mm are located in the power supply units and can be removed by nipper.

Table of Contents