
Related Manuals for Safelab Airone Class II


Summary of Contents for Safelab Airone Class II
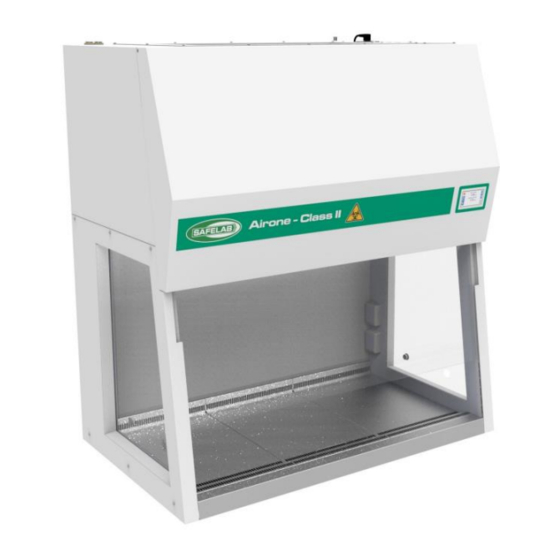
- Page 1 Airone Class II Microbiological Safety Cabinet Range Operating and maintenance manual (Software V 0.79 onwards) Rev N...
-
Page 3: Table Of Contents
Contents Section 1 ..................5 Description of the cabinet ..................5 Working principal ....................5 Features ........................5 Specifications ......................6 Normal environmental conditions ................ 6 SECTION 2 ..................7 Installation ......................7 Important handling procedures ................7 Location ........................7 Ducting connection (optional) ................ - Page 4 Log Service Visit ....................31 This manual is intended to provide information about the product. Safelab systems ltd assumes no liability whatsoever for the accuracy of any information contained herein, as products can be subject to improvement changes at any time.
-
Page 5: Section 1
Section 1 Description of the cabinet Working principal Class II Microbiological Safety Cabinets are designed to provide a high level of protection for the operator, environment and sample. The cabinets work on a recirculating principal with approximately 70% of the air drawn from the working area being recirculated. The remaining 30% is exhausted via single or double HEPA filters back to the laboratory. -
Page 6: Specifications
Specifications MSCT1200 MSCT1800 Cabinet MSCT800 Type Recirculating W 1200mm x D 750mm x W 1800mm x D 750mm x H External dims W 800mm x D 750mm x H H 2195mm incl base 2195mm incl base stand 2195mm incl base stand stand (1330mm without) (1330mm without) +66mm for (1330mm without) +66mm... -
Page 7: Section 2
The Cabinet should be fully tested and commissioned by suitably qualified persons before being put into service. Safelab have a nationwide team of service engineers who can take care of your installation, commissioning and service requirements. Please contact our service department for... -
Page 8: Section 3
SECTION 3 Operating instructions Basic operations Cabinet overview Outlet filter Power inlet Front panel Power switch (Gas strut assisted for service access) Control panel Electronically controlled sliding sash VHP/services ports Removable worksurface trays... -
Page 9: Startup
Startup The main switch is positioned on the upper right-hand side of the front cover. Upon switching the unit on it will display the welcome screen for a few seconds The system will then run a system check and display the user access code screen** Press “0127”... -
Page 10: Controls
Controls The cabinet is equipped with a touch-screen control system. It provides complete control of the cabinet and displays all the operating parameters in an easy to understand touch screen interface. Home screen This is displayed whilst the cabinet is operating normally in its day-to day operation. Key of features: System status display area –... -
Page 11: Sliding Sash Operation
Sliding sash operation The cabinet is equipped with an electrically actuated glass sliding sash. It has one pre-set position this is its normal operating position. In addition, there is an integrated safety system that detects obstructions within the opening and automatically prevents the sash from closing. -
Page 12: Standby
Standby Standby is a status where the cabinet is closed, the lighting is turned off and the fans are stopped. The control system is still operational. To put the cabinet into standby, first ensure any items or obstructions are removed from the front edge of the worksurface then press the “Standby”... -
Page 13: Lighting
Lighting The cabinet is equipped with low energy LED lighting. The lighting levels can be adjusted or turned by pressing the “Lighting” icon on the home screen (7). This expands to reveal the following options: Increase brightness On/Off Decrease brightness By pressing the “Up”... -
Page 14: Cleaning And Disinfection
Cleaning and disinfection Surface cleaning and disinfection Cleaning should be carried out with a non-corrosive disinfectant solution. The worksurface may be removed if required. Glass front cleaning and disinfection WARNING: DO NOT ATTEMPT TO OPEN THE FRONT COVER WITHOUT EITHER FULLY RAISING OR CLOSING THE SLIDING SASH –... -
Page 15: Decontamination With Formaldehyde - Unit Without The Optional Carbon Exhaust Filter Kit (Cef)
Decontamination with Formaldehyde – Unit without the optional carbon exhaust filter kit (CEF) Safelab Sytems Ltd can supply a suitable Formalin vaporiser and neutraliser for use with the cabinet. The vaporiser simply plugs into the electric socket inside the cabinet and the entire disinfection process runs under the control of the cabinet. - Page 16 Cycle delay time is used to delay the start time, for example if you wish for the cycle to begin early next morning. To start immediately, set to zero. Select cycle duration accordance with vaporiser manufacturer’s instructions. Note - During the course of the cycle, the fans will occasionally run to aid circulation of the vapour.
-
Page 17: Decontamination With Formaldehyde - When Using The Optional Carbon Exhaust Filter Kit (Cef)
Decontamination with Formaldehyde – When using the optional carbon exhaust filter kit (CEF) This is a factory order option that consists of a specially formulated carbon filter and quick-release mounting kit that fits to the top of the cabinet. This can be used whenever the decontamination cycle is run and allows for the safe and effective removal of residual formaldehyde fumes following the cycle. - Page 18 Select duration for post cycle purge. Select cycle delay time /cycle duration accordance with vaporiser manufacturer’s instructions. During the course of the cycle, the fans will occasionally run to aid circulation of the vapour. At the end of the cycle, follow the instructions displayed on screen: Decontamination complete / aborted...
-
Page 19: Decontamination With Vhp (Vaporised Hydrogen Peroxide)
Decontamination with VHP (Vaporised Hydrogen Peroxide) The cabinet is suitable for VHP decontamination. Connection ports used with apparatus, on the side glazing and the exhaust cover plate. Refer to manual provided with your VHP equipment before running a decontamination cycle. Preparation prior to decontamination ... -
Page 20: Section 4
SECTION 4 Supervisor settings This passcode protected menu page allows supervisors to set cabinet and cycle specific preferences that regular users cannot access or change. It is accessed from the home screen by selecting “Menu” then the “Settings” icon. This opens the password protected access screen Enter the passcode to access the supervisor settings screen. -
Page 21: Airflow Display
Airflow Display Select to choose airflow display unit values Auto Start Auto Start – This feature allows the user to set the cabinet to allow automatic startup at a preset time/day. A practical example of this feature would be if a user would like the cabinet to start prior to arrival and purge for 30mins before the start of the working day. -
Page 22: Auto Standby
Auto Standby Auto Standby – This feature allows the user to set the cabinet to allow automatic standby at a preset time/day. A practical example of this feature would be if a user would like the cabinet to automatically shut down and enter standby at the end of the working day. -
Page 23: Cabinet Access
Cabinet access Cabinet access – Enabling this feature will mean users will be prompted for the user passcode prior to startup. This prevents unauthorised use. Power Sockets Enable or disable to automatically turn off Auxiliary power sockets when the cabinet goes into standby mode. -
Page 24: Audible Alarm
Audible Alarm Enable or disable to allow warning sounds whenever an alarm state is displayed. Set Time Adjust the time as required and press “Enter” to set. Press “Back” to return to the menu. Reset UV Allows the Supervisor to reset the UV hours following a new UV tube fitment. -
Page 25: Select Language
Select Language Allows the Supervisor to select language. -
Page 26: Section 5
Press the “Home” icon to exit Service information is reset by a Safelab engineer during a service visit. When a service becomes due a warning screen will be displayed momentarily on start-up during the preceding month. Pressing the “Info”... -
Page 27: Replacing The Uv Tube
Replacing the UV tube Remove all equipment and apparatus from the cabinet. Fully raise the sliding sash and open the front cover (Section 3). Turn cabinet off at the main power switch – NOT STANDBY VIA THE SCREEN and disconnect from power supply. -
Page 28: Replacing The Outlet Safety Hepa Filter
UV LAMP GS-00567 GS-00432 GS-01001 Other spare parts are available – please contact Safelab Systems Ltd for details. Servicing In accordance to BSEN12469:2000 ANNEX “K”, an annual service is recommended to maintain optimum operating conditions and will include the following points ... -
Page 29: Section 6
SECTION 6 Service settings This password protected menu page allows engineers and suitably qualified persons to calibrate system settings following service and maintenance procedures. It is accessed by selecting “Menu” then the “Settings” icon. This opens the password protected access screen. Enter the passcode to access the “Service settings”... -
Page 30: Set Fan Speeds
Options are displayed to carry out the following procedures: Set Fan Speeds This enables the system airflow sensors to be set. From the “Calibration” screen, select “Set fan speeds” Follow the on-screen commands to carry out this function. Airflow Sensors This enables the system airflow sensors to be calibrated. -
Page 31: Log Service Visit
Log Service Visit Select the “Log Service Visit” to open the service details page. Select/check sections as applicable to task carried out and select “Enter” to store. - Page 32 Safelab Systems Ltd Safelab Systems ltd Airone Building www.safelab.co.uk 8 Beaufighter Road Weston-Super-Mare BS24 8EE enquiries@safelab.co.uk +44 (0)1934 421 340...
Need help?
Do you have a question about the Airone Class II and is the answer not in the manual?
Questions and answers