Table of Contents
Advertisement
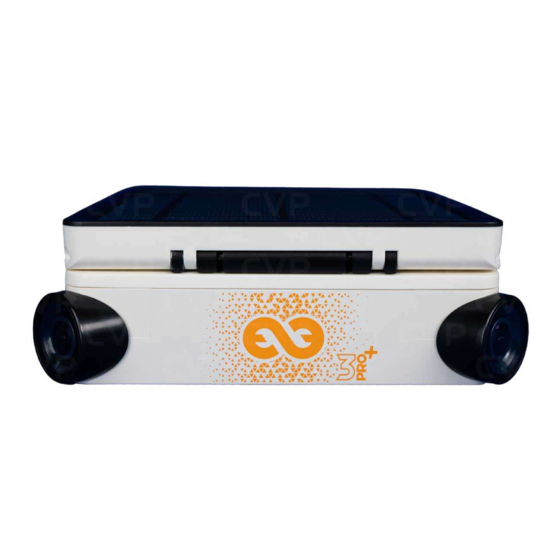
Quick Links
Advertisement
Table of Contents

Related Manuals for Enlaps Tikee 3


Summary of Contents for Enlaps Tikee 3
- Page 1 User’s guide Tikee 3 / 3 PRO+ v1.0...
-
Page 2: Table Of Contents
Table of contents ...........................1 1. Introduction ...........................3 Overview of your Tikee 3 & 3 PRO+...................3 Package contents........................3 Prerequisites..........................4 Creating a user account on the myTikee cloud platform.......4 First charge of the device....................5 Downloading the mobile app Tikee Remote............5 2. Tikee overview ...........................6... - Page 3 Choice of the resolution Downloading the timelapse Viewing last shot photo Associating your Facebook account Share timelapses Timelapse Builder........................37 6. Products briefs ........................38 Product range Tikee 3......................38 Tikee 3 Tikee 3 PRO+ Some key features........................40 Adaptive interval Always ON 7.Maintenance and cautions ..................41 Enlaps support...........................41...
-
Page 4: Introduction
1. Introduction Overview of your Tikee 3 & 3 PRO+ Here are the main components of the Tikee : Solar panel Trigger LED Power LED Anti-theft insert Extended power connector (Tikee 3 PRO+ only) LOCKING SYSTEM Locks the position of the solar panel once its tilt has been set... -
Page 5: Prerequisites
Prerequisites Some elements are needed to ensure the optimal functioning of your Tikee: - A microSD card (not provided) is required to use your Tikee (see dedicated section page 7) - A smartphone connected to the internet (supported versions: Android 6.0 and up/iOS 10.0 and up - min. -
Page 6: First Charge Of The Device
First charge of the device Caution : For an optimal use of your Tikee/TikeePRO, you have to fully charge the battery before its first use. Plug a USB cable (not provided) into your Tikee into the dedicated USB slot. Make sure that the logo is facing down to avoid damaging the USB slot. Plug the other end of the USB cable into a power adapter (not supplied), and then into a power outlet. -
Page 7: Tikee Overview
Caution: when plugged in, this connector is not waterproof. 2. External power connector Only present on the Tikee 3PRO+, it is used to connect the Enlaps external solar panel (not sup- plied with the camera). This connector is waterproof, so it can be used outdoors. -
Page 8: Led
Technical information about microSD cards compatible with the Tikee : - microSDHC, microSDXC, - 8GB to 128GB capactity for Tikee 3 and up to 512GB for Tikee 3 PRO + - UHS-1 class and speed class minimum U1 or U3... -
Page 9: Microsim Card (Not Included)
__ MB x 30 days (see page 16 according to chosen resolution) ) To easily estimate your consumption, you can use the timelapse planner here : https://enlaps.io/en/timelapse-planner Few exemples with M picture format : - 1 photo every 15 minutes, 24/24... -
Page 10: Starting Up The Tikee
By connecting to the Tikee camera with the Tikee Remote mobile application: - Check that the latest update is installed. If this is not the case, update by reaching this https://enlaps.io/en/download link : - Check the battery status. A full charge (= 100%) is necessary - For a connected use ;... - Page 11 90° We recommend to use the stainless steel arm designed by Enlaps for Tikee. It is advisable to lay the TIkee flat, half way up the final construction. Starting up the Tikee...
-
Page 12: Solar Panel Set-Up
The merging of the images is optimized on the first 100 photos of the sequence. To ensure optimal image fusion, follow these guidelines: - Do not start shooting until the Tikee has been set up. (The images taken before the set- up would then be used to calculate the image fusion, causing poor results) - Do not start shooting in bad conditions (especially at night or with very poor visibility). - Page 13 2. Setting the incline of the solar panel : Tilt the panel according to the latitude of your position (approximately 30° in France for example). Once the panel has been tilted at the desired angle, lock it with the 2 screws located on either side of the photovoltaic panel (using moderate force).
-
Page 14: Getting Started With The Tikee Remote Mobile App
4. Getting started with the Tikee Remote mobile app Connect your Tikee to the mobile app Before you keep reading, make sure you have followed the instructions of Chapter 1 - Beginning. Please, check that the version of your mobile application is the latest available on the store 1. -
Page 15: Setting Up The Connection Of Your Tikee To Mytikee Cloud Platform
3. You access directly to the status screen of your Tikee To disconnect from Tikee Tikee’s name / serial number Tikee’s status Firmware release of Tikee Available space on the memory card Note: it should remain at least 200MB of free space to start a sequence Remaining battery percentage The Tikee has 2 possible status:... - Page 16 (These are not Enlaps identifiers) Password : To complete if provided by your mobile operator (This is not the Enlaps password). PIN 2 : to complete if provided by your mobile operator Once the parameters filled to save them...
-
Page 17: Advanced Settings
We recommand to test the connection of your Tikee once the parameters are set up. For that click on ‘’Test connection’’. This step may take several minutes because the Tikee will check all of the steps to be connected to myTikee cloud platform server. At the end of the test you will receive a notification about the success or not of the test. - Page 18 Example: Sample mode activated, threshold set to 5. The Tikee will send 1 image every 5 images. Caution/Important : The other images captured by the Tikee are stored on the microSD card, please allow sufficient space. With a Tikee 3 you only have access to the Normal mode. Getting started with the mobile app Tikee Remote...
-
Page 19: Update Your Tikee
If this is not the case, update your Tikee either: - From the microSD card. Go to our website https://enlaps.io/en/download, download the update according to your camera model from a computer following the instructions given, copy it on the microSD card previously formatted (see formatting chapter). -
Page 20: Create And Setting Up A Sequence
LTE network and smartphone or tablet connected to the wifi or LTE network), click on the preview button. To create your first sequence, click on new sequence and then set it up. Here is a summary table of possible sequences with your Tikee 3 PRO+ : Long Event Burst... -
Page 21: Format And Size Of The Images
If you stop a running short term sequence before the end of the sequence, the images are not sent to the cloud platform but are kept on the microSD card. Format and size of the images Tikee 3 PRO+ Logotype retenu JPEG : Left and right image stored on the SD card : 4608 x 3456 each, approx. -
Page 22: Autonomy
- the upload of photos on the cloud (or no) and the quality of the connection. - the chosen image resolution - the outside temperature - Enlaps external solar panel connection (compatible only with a Tikee 3 PRO+) Here are estimates of autonomy with the following assumptions : - Battery power only (without solar panel) - Ambient temperature 20°C... -
Page 23: Starting A Sequence
The Tikee has 3 power modes : - Normal : The Tikee has sufficient energy, so it captures and downloads the images normally according to the chosen parameters (this status corresponds to a percentage higher than about 30% of the battery). - Eco : Tikee’s energy has decreased, it continues to take images and store them on the microSD card but no longer sends them to the cloud. -
Page 24: User Account
To delete or stop a sequence : 1 Stop shooting by clicking STOP 2 Drag the insert of the sequence to be deleted to the left and click on the delete logo. 3 Press START again to continue with the sequence still in progress Note : A short-term sequence cannot be restarted. -
Page 25: Getting Started With The Mytikee Cloud Platform
5. Getting started with myTikee cloud platform (basic features) To go further, visit : https://help.enlaps.io/en and https://enlaps.io/en/enlaps-academy Foreword Points of view Photoset A Videos using All photos of a This feature is only all or part of the shooting sequence... - Page 26 Photo set : database of all of the shot photos during an in progress or ended sequence. These are merged to obtain a panoramic image. Point of view : A point of view uses a photo set to create a video. You can create several points of views based on the same photo set.
-
Page 27: Setting Up Your Tikee
Edit a portfolio: In the Portfolios section, click on the pencil that appears when the mouse hovers over the 3 small dots You can delete existing viewpoints by clicking on them and then saving. This leads you directly to the viewing area where you can access the following settings: - the map to visualize the location of the points of view - the treatments to be applied to the photos... -
Page 28: Viewing And Editing Sequences
From this page you can also set up your FTP, add new sequences or synchronize your camera (Tikee 3 PRO and 3 PRO+) with a set up LTE network. Viewing and editing sequences You can consult the information of your timelapse sequences by clicking on the chosen sequence. -
Page 29: Mytikee Subscriptions
Note : It is not possible to mix myTikee Editing and myTikee Storytelling licences on the same account. https://enlaps.io/en/mytikee-software.html Please consult the prices and conditions on myTikee myTikee Editing myTikee Storytelling... - Page 30 myTikee myTikee Editing myTikee Storytelling Filtering by IA of the photos: Nice weather, snow, good visibility, beautiful sky Viewsfeed: automatic content selection and generation Blurring of people (option + 10 € / month) Advanced sharing of multiple viewpoints in a portfolio for easy integration Getting started with myTikee cloud platform...
-
Page 31: Editing A Point Of View
Editing a point of view Points of view In the tab , to edit a point of view, click on the pencil that appears when you move your mouse over the viewpoint Important : Editing does not modify the photoset. Filters When you modify the filters, the photo mosaic will update automatically with the photos that fit within the filters. -
Page 32: How To Delete A Photo
Deleting an image and a selection of images How to delete a photo : 1. Double click on a photo and it will open wide. 2. Click on 3. A confirmation message is displayed, click on ‘’OK’’ to confirm the deletion or ‘’Cancel’’ to return to the selected photo. - Page 33 return to the selected photo in fullscreen. You can cancel the process at any time by clicking on ‘’Cancel’’. Caution : The removal of an image of the mosaic deletes this image from all the points of view that use it. The removal is final and irreversible.
-
Page 34: Pan&Zoom
Pan&Zoom You can select two types of framing using the slider centered at the bottom of the tile ‘’Pan & Zoom’’. You can choose : Full size or Pan&Zoom. Full size framing Toggle the slider to desactivate Pan&Zoom. The video uses panoramic photos taken by your Tikee. - Page 35 Tutoriel : https://www.youtube.com/watch?v=zy46TKVcFOEE Public mode When your sharing mode is ‘’Public’’ , everybody with the link (Enlaps users or not) can view and share your video. It can also be watched in the ‘‘Public’’ section, next to the search bar.
-
Page 36: Downloading
When creating your media, a watermark with the Tikee logo will appear highlighted on your video. This watermark can be disabled with an Editing or Storytelling subscription. No Enlaps watermark and/or custom logo (myTikee Editing and myTikee Storytelling) With a myTikee Editing or myTikee Storytelling account, you can choose not to watermark when creating your video or to affix your custom logo. -
Page 37: Visualizing A Timelapse
Visualizing a timelapse Choice of the resolution In the Video tab of the viewing area, you can choose between two different resolutions to view the timelapse video : - Optimized : 720p - Full : 1080p *If Pan&Zoom, video cropped to the selected size (minimum FHD) By default, in the display screen, the video is in optimised resolution, it is quite possible to switch from 720p to 1080p (and vice versa), by clicking on the resolution at the bottom right of the video. -
Page 38: Share Timelapses
Facebook’’ Timelapse Builder The Timelapse builder is an automated, professional quality video post-production system specifically developed by Enlaps. This functionality is only available with Editing or Storytelling licences. This allows you to process photos according to the following parameters: - Anti-flicker... -
Page 39: Products Briefs
Tikee 3 Logotype The Tikee 3 model has a North American and a European and rest of the world version for which the network bands are adapted to the locality (see information on 4G/LTE bands). The Tikee 3PRO+ has no specific geographical zoning for the network. - Page 40 Version - Small (S) - 2048 x 1536 per image, approx. 1 MB per pair (panoramic image after fusion: 3280 x 1180) Medium (M) - 2664 x 1998 pixels - Medium (M) - 2664 x 1998 pixels per Wireless per image, approx. 2.5 MB per pair image, approx.
-
Page 41: Some Key Features
Always ON: Accessible only with the Tikee 3 and the 3 PRO+, this feature allows the camera to be woken up at any time from the mobile or platform cloud via the advanced camera settings. To use this feature, there are a few prerequisites: 1. -
Page 42: Maintenance And Cautions
If there are signs of condensation or moisture inside a lens, turn off the Tikee (do not charge) and contact customer support. Enlaps support For questions relating to your Tikee camera or mobile & cloud platform, you can read our FAQ : https://help.enlaps.io/en/... - Page 43 You can also contact us on enlaps.io/en/contact In the event of an identified failure, a return of the product to our premises will be necessary for a diagnosis. Maintenance and cautions...
-
Page 44: Informations About Frequency Bands ( 4G/Lte & 3G)
Note - Modular Approval : Contains : FCC ID : UDV-SIM7100A IC : 8460A-SIM7100A FCC ID : 2ADHKBTLC1000 IC : 20266-BTLC1000MR Radio-Frequency technologies embedded in Tikee 3 PRO+ device : RF technology Frequency bands Max power WIFI 2.4-2.4835Ghz 17.2 dBm (EIRP) - Page 45 the instruction, may cause harmful interference to radio communications. However, there is no guarantee that interference will not occur in a particular installation. If this equipment does cause harmful interference to radio or television reception which can be determined by turning the equipment off and on, the user is encouraged to try to correct interference by one or more of the following measures: - Reorient or relocate the receiving antenna.
-
Page 46: Battery Information
9. Battery information Optimization of the battery The LED turns orange when the battery charge is low. If the battery charge reaches 0% while shooting, the Tikee saves the file and turns off. In case of bad conditions of sunshine, the Tikee is discharged gradually and adapts then its operation to save energy: - Partial discharge: the upload is deactivated, the camera only connects once a day but continues shooting;... -
Page 47: Trademarks
10. Trademarks Enlaps™ and Tikee™ are registered trademarks or trademarks of Enlaps SAS in France and at the international level. Other names and brands are the property of their respective owners. Tikee 3 PRO+ Logotype retenu Join us on :...
Need help?
Do you have a question about the Tikee 3 and is the answer not in the manual?
Questions and answers