Table of Contents
Advertisement
Quick Links
Advertisement
Table of Contents
Troubleshooting

Related Manuals for Spraying Systems AutoJet 1750+


Summary of Contents for Spraying Systems AutoJet 1750+
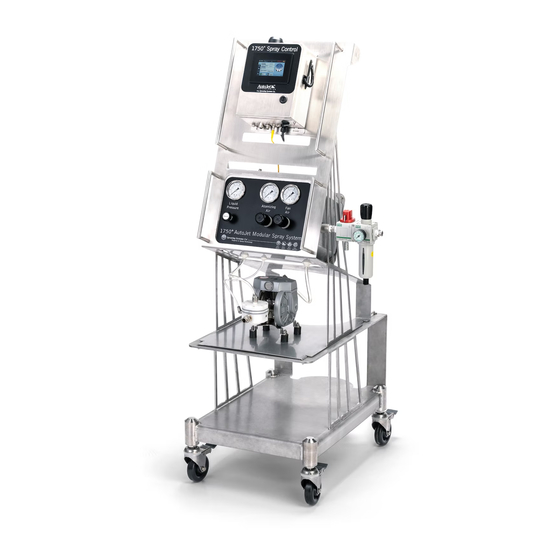
- Page 1 ® AutoJet 1750+ Spray Control Panel OWNER’S MANUAL ML001750PLUS spray.com...
-
Page 2: Table Of Contents
TABLE OF CONTENTS 1. Preface ······························································· 3 12. Trigger devices and Accessories ·························· 36 1.1 Important ······················································· 3 12.1 Electric Nozzle Cord Set ······························· 36 1.2 How To Use This Manual ································ 3 12.2 Trigger Cable ················································ 36 2. Safety ································································· 3 12.3 Photoelectric Object Sensor ························... -
Page 3: Preface
This system has been designed with components that work together to provide the best system performance. When ® replacement parts are required, only Spraying Systems Co. recommended components should be used to maintain proper system operation, electrical and pneumatic safety. The use of any unauthorized replacement parts will void any warranties. -
Page 4: Unpacking The System
Make sure all equipment is rated and approved for the environment in which it is used. Any approvals obtained for Spraying Systems Co. equipment will be voided if instructions for installation, operation, and service are not followed. All phases of equipment installation must comply with federal, state, and local codes. -
Page 5: Overview
The controller is designed to run both electric and air actuated spray nozzles. — Can drive Spraying Systems Co. electric-actuated spray nozzles (3.6 amps. max.) with Pulse Width Modulation (PWM). Specifically, the PulsaJet® spray nozzle line and the AA250AUH Electric spray nozzles can be used. - Page 6 • Offers easy to use timing modes of Fixed Spray Time; Variable Spray Time, and Repeat. • ® Can control and drive up to ten (10) Spraying Systems Co. electric spray nozzles • AA10000AUH-03 PulsaJet® spray nozzles – Ten (10) •...
-
Page 7: Plug And Spray Connections
3.3 PLUG AND SPRAY CONNECTIONS All the connections are the same as the full system. Located on the bottom of the panel the connections are as follows. • Power input connection, route power cord through oval opening on right-hand side of frame and plug in 120 VAC outlet rated for at least 5A. -
Page 8: Remote Connections
3.4 REMOTE CONNECTION Users can connect to the 1750+ with a mobile device via Wi-Fi to create an access point. Once set-up is complete, you can adjust settings, view alarms, troubleshoot, review maintenance schedules, and more on the connected mobile device. -
Page 9: Hmi Operation-Set Spray Parameters
3.6 HMI OPERATION—SET SPRAY PARAMETERS 1. Set the system to manual mode. Disconnect the nozzles. Set all pressure regulators to 0. Turn on the main air pressure and increase liquid pressure gradually to flush the system. Everything is now flushed except for the nozzles. Connect the nozzles and set the pressure regulators to the required pressure and then check if there are any leakage. -
Page 10: Home Screen Settings
SECTION 4 1750+ HOME SCREEN 4.1 HOME SCREEN SETTINGS The home screen at the top and side bars will always be visible and accessible. Setpoint: Displays the configurable mode in the application you are set in. Nozzle status: Displays the current nozzle spray status as a percentage of the maximum flow rate. Atomizing air status: Atomizing Air Status and spray status are read-only representations of the current status. -
Page 11: General Settings
SECTION 5 GENERAL SETTINGS General Settings and Application Settings are the two settings in the 1750+. General settings are related to the spray control panel itself and include settings that relate to operators and interaction with the 1750+. 5.1 SETTINGS SCREEN The 1750+ allows operators to manage users and user settings, change the language (where applicable), view system information, and view the activity log. -
Page 12: Users Management Settings
ATTENTION: A system restart is required to apply any changes made to user settings. ® Note: Should it ever be required, you can contact your Spraying Systems Co. representative to receive instructions on how to perform a total system reset to factory settings. - Page 13 Edit User Add User Edit the selected user’s properties. You can change the Create a new user and assign them to a User Group. Ensure user’s password for them, or change their User Group. that you use the drop-down menu to pick the correct user group.
-
Page 14: User Groups
5.3 USER GROUPS The system contains four preloaded users (username and password sets) that are the factory (default) settings. Users can choose to use (or edit) these existing users or create new users as they see fit. Each of these default users has a different level of user rights to interact with the system based on their selected User Group. -
Page 15: Supply Air To The System
It is not regulated; therefore, you must provide a minimum of 45 psi (3.1 bar) to the ® system. It must be above 45 psi (3.1 bar) to actuate air actuated nozzles like Spraying Systems Co. 1/4JAU series. -
Page 16: Application Settings
SECTION 7 APPLICATION SETTINGS Application settings are related to your spray application, and will allow you to customize the spray parameters to achieve the desired spray coverage and flow rates. These settings will also allow you to configure certain 1750+ accessories, such as the trigger interlock and remote duty cycle if they are included in your specific configuration in later chapters of the text. - Page 17 DISTANCE BASED SPRAY TIMING The fixed and variable spray length timing modes have an alternative in which distances are used instead of time. These modes are called fixed spray distance and variable spray distance. In these modes, delays are expressed in distance units.
- Page 18 PARAMETERS—ADVANCED NOZZLE SETTINGS For custom applications, it is possible to change the properties of the nozzle manually. These settings should only be modified by instruction from qualified SSCO personnel except for the nozzle cycle count. WARNING: Incorrect settings can permanently damage the spray nozzle! Negative Pulse: Pulse time in milliseconds •...
- Page 19 CYCLE SPEED The maximum frequency parameter (f ) determines the maximum speed of the nozzle at 50% duty cycle and is entered as a number of cycles/minute. This parameter can be found in the datasheet of the electric spray nozzle being used.
-
Page 20: Recipe Settings
7.2 RECIPE SETTINGS Recipes are an optional feature that can be added with a fee to your 1750+. A recipe is a pre-configured set of parameters that allows you to change to a different production batch quickly. These parameters cover most of the timing and spray settings. -
Page 21: Spray Timing Modes
7.3 SPRAY TIMING MODES Timing modes are selected by going to the HMI settings page and selecting the “Timing” button. The system will spray for a predetermined time depending on the timing mode selected. The spray controller allows for accurate time-based control over the spray nozzle based on an external trigger signal. When there is a start delay value of 0 sec., the spray will start immediately after the trigger signal is sent to the 1750+, and if the stop delay is set to 0 sec. -
Page 22: Fixed Spray Time
7.4 FIXED SPRAY TIME This timing mode is used to create a delayed spray pulse for a fixed predetermined amount of time. The system will spray after a trigger, then stops until next trigger event occurs. For every trigger, there is a single spray event. Set parameter value to 0. - Page 23 SPECIAL CASE: MULTIPLE TRIGGERS WITH SPRAY OVERLAP Occurs if the system receives multiple start events (rising edge of trigger signal) before a spray cycle is finished. If the time delay between two successive start events (or trigger pulses) is lower than the spray time, then there is an overlap of two successive spray pulses.
-
Page 24: Variable Spray Time
7.5 VARIABLE SPRAY TIME The system will spray for a period based on the detected length of a product. Instead of entering a fixed spray period, an upper limit can be configured. The resulting spray period will be determined by the detection of the start and end of a trigger signal, with a fixed start and end delay. - Page 25 MULTIPLE TRIGGER EVENTS DURING SPRAY If the system receives multiple start events before the spray cycle is finished, they will be added to a queue and executed according to the given delay times. Variable spray period—multiple triggers OVERLAPPING SPRAY EVENTS If spray events overlap, the overlapping event will be ignored, and the system will continue to spray to ensure the objects are sprayed correctly.
- Page 26 OBJECTS TOO SMALL If spray events overlap, the overlapping event will be ignored, and the system will skip the small object. This situation may occur when the following is true: • Stop delay < Start delay • Object size < (start delay - stop delay) Variable spray period—small objects Variable Spray Period—Objects too small DISTANCE DELAY, MAXIMUM SPRAY PERIOD...
-
Page 27: Duty Cycle
7.6 DUTY CYCLE Duty cycle represents the ratio of the spraying "on" time to the "off" time, which results in some percentage of the maximum possible (continuous) flow through the nozzle. The duty cycle settings allow you to select the source and enter sensor default values. -
Page 28: Trigger
7.7 TRIGGER If you have an external trigger source, select the correct and corresponding option for your external trigger from the drop down list. Toggling the “Inverted” option to the On position will allow the use of a trigger that sends a signal when off rather than when on. -
Page 29: Tank Level (Level Sensor)
7.8 TANK LEVEL (LEVEL SENSOR) If your configuration includes a pressure pot with a level switch, select the edit button and use the drop down menu to activate the level sensor signal. Once turned on the 1750+ can now see the low level condition. Tank level sensor settings TANK LEVEL SENSOR SETTINGS •... -
Page 30: Faults And Alarms
SECTION 8 FAULTS AND ALARMS 8.1 FAULTS AND ALARMS SETTINGS When the fault indicator in the left-hand icon menu is illuminated yellow/orange, the 1750+ has detected that there is a fault present. Some faults are recoverable, but certain faults can result in the 1750+ entering standby mode. When this happens, triggering signals or events will no longer be accepted until the reason for the fault has been corrected. -
Page 31: Maintenance And Troubleshooting
SECTION 9 MAINTENANCE AND TROUBLESHOOTING 9.1 MAINTENANCE AND TROUBLESHOOTING TAB The 1750+ is equipped with an internal maintenance scheduler. This allows you to create and set Preventative Maintenance (PMs) events. These events can include anything from routine cleanings to specific events like component repair or replacement. - Page 32 ® The contact information for your local Spraying Systems Co. Spray Specialist can be found by selecting the Spray Specialist tab. These editable boxes contain the name, phone number, and email address of your Spray Specialist.
-
Page 33: Diagnostics
SECTION 10 DIAGNOSTICS The diagnostics screen is a tool to help with system troubleshooting. This screen groups together real-time readings from connected digital and analog inputs and accessories and displays all of the read-only values in one location. These values can help to diagnose the cause of any faults. See Faults and Troubleshooting section for more information. - Page 34 HMI COMMUNICATION FAULT You will see small yellow triangles on the screen. Note this error occurs if the HMI is not communicating with the gun driver control board. Reboot the controller and if this does not fix the issue then consult with the factory. HMI communication fault FAULTS AND SOLUTIONS: ...
- Page 35 Controller will not operate spray nozzle. — Ensure that there is proper fluid pressure supplied to the nozzle. — Ensure that system is recognizing your trigger input. This is a common problem. If remote trigger/sensor is being used and button on the setup screen is set to “local”, the system cannot be recognized, the system trigger needs to be set to something other than “local”.
-
Page 36: Trigger Devices And Accessories
12.1 ELECTRIC NOZZLE CORD SET ® If the system is designed to operate Spraying Systems Co. PulsaJet or AA250 electric actuated spray nozzles, the sys- tem is supplied with a cord to connect the spray nozzle to the Control Panels. All the electric actuated nozzle cord sets are wired as shown in the diagram. -
Page 37: Photoelectric Object Sensor
Note: Connect pins 3 & 4 with a switch or dry contact relay to initiate trigger. WARNING: Never connect pin 1 (24vdc) to any other pin unless you are wiring in your own 24VDC sensor. Doing so could cause equipment damage. (Cut the brown and white wire if you're not using them) 12.3 PHOTOELECTRIC OBJECT SENSOR Infrared –... -
Page 38: Proximity Sensor
12.5 PROXIMITY SENSOR For sensing metallic objects. Kit includes sensor, with mounting nuts and locking washer, and cable. SPECIFICATIONS: Proximity sensor – Detects all metals 10mm max. sense dist., 24vdc, NPN outputs N.O./N.C., shielded, IP67, 5m cable wired • Kit number: 040TS04000118W0 •... -
Page 39: Hand Trigger Pendant
12.8 HAND TRIGGER PENDANT For manual triggering of the system. The unit offers two switches to independently trigger the system. Cable length offers flexibility in location of operation. SPECIFICATIONS: • Part number: SW001550M12HT • 2 Switches 1 - On/Off selector switch ... -
Page 40: Laser Sensor (Short)
12.10 LASER SENSOR (SHORT) For accurate short distance sensing of objects (thin, shiny, dark, clear, multi-faceted) SPECIFICATIONS: Laser sensor – with cable, connector, and bracket. • Kit number: 040TS04000135W0 • NPN – NO + NC • 1.0” – 3.5” [25mm – 90mm] sensing range (1.5mm – 3mm deviation range). •... -
Page 41: Fault Output Cable Kit
Fault Output Signal Kit 040TS04000054W0 12.13 FAULT OUTPUT CABLE KIT The 1750+ and 2150+ offer a feature to provide a signal when a fault has occurred during operation. This is wired as shown in the table below. To use this feature, you need to have our optional splitter cable kit. •... -
Page 42: Extension Cable
12.14 EXTENSION CABLE If longer length cables are required, an extension cable is available that can be used to go between the nozzle cable and the junction block or the junction block cable and the system. This cable can also be used to extend the trigger device cable lengths. -
Page 43: Level Sensor Input
12.16 LEVEL SENSOR INPUT A level switch (any normally open or normally closed float switch) can be wired to the system, so when the tank level drops below a certain level, a fault will be shown on the HMI. Wire the level sensor/float switch to the panel utilizing the cable shown below. You will only use the black and blue wires (dry contacts - polarity not important), carefully cut back and tape the brown and white wires. -
Page 44: Spare And Replacement Parts
SECTION 13 SPARE AND REPLACEMENT PARTS Accessory Kits Part Number Photoelectric Object Sensor: Object Sensor Kit, Trig, 5 m cord length, M12 4 pin (F) 040TS04000014W0 Proximity sensor: Detects all metals 10mm max. sense dist., 24vdc, NPN outputs 040TS04000118W0 N.O./N.C., shielded, IP67, 5m cable wired Thru-Beam Sensor: Trig, 5 m cord length, connector—M12 4 pin female, IP67/ 040TS04000028W0 IP69K rating, NPN output... - Page 45 However, Spraying Systems Co. assumes no liability for errors or omissions and reserves the right to make changes without notice to any products described herein to improve reliability, function, or design. Other company and product names may be trademarks of their respective companies.
Need help?
Do you have a question about the AutoJet 1750+ and is the answer not in the manual?
Questions and answers