Advertisement
Quick Links
www.wize-av.ru
Instruction Manual
WA RN ING!
!
WARNING! SEVERE PERSONAL INJURY AND PROPERTY DAMAGE CAN RESULT FROM
IMPROPER INSTALLATION OR ASSEMBLY. READ THE FOLLOWING WARNINGS BEFORE
Do not use this product for any purpose not explicitly specified by Wize. Improper installation may
cause property damage or personal injury. If you do not understand these directions, or have doubts
about the safety of the installation, contact Wize Customer Service or call a qualified contractor. Wize
is not liable for damage or injury caused by incorrect mounting, assembly, or use.
The hardware provided with this product, is exclusively intended for installation on walls made of
solid wood, concrete, concrete block or solid wood columns with a maximum of 16 mm of drywall.
For walls made of other materials, for example hollow bricks, please consult your installer and/or
specialist supplier.
DO NOT EXCEED THE MAXIMUM WEIGHT CAPACITY FOR THIS PRODUCT
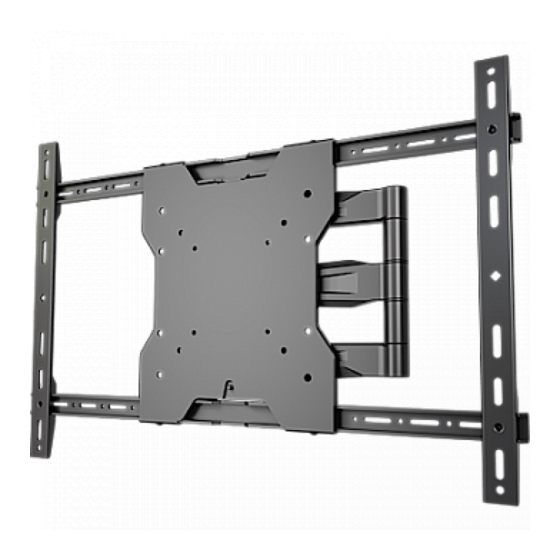
Сверхтонкое шарнирное крепление для панелей
Для ТВ 13"-65" / Макс. вес: 36 кг
info@wize.ru
Manuel D'instructions
Инструкция
!
BEGINNING.
AU65
ВНИМАНИЕ! ТРАВМА И ПОВРЕЖДЕНИЕ ОБОРУДОВАНИЯ МОЖЕТ ПРОИЗОЙТИ ОТ
НЕПРАВИЛЬНОЙ УСТАНОВКИ ИЛИ СБОРКИ. ОЗНАКОМЬТЕСЬ СО СЛЕДУЮЩИМИ
Компоненты, входящие в этот продукт, предназначен для установки на стенах из цельного
дерева, бетона или бетонных блоков. Для стен из других материалов, таких как кирпич,
пожалуйста, проконсультируйтесь с вашим инсталлятором и / или специалистом поставщика.
НЕ ПРЕВЫШАЙТЕ МАКСИМАЛЬНЫЙВЕС, УКАЗАННЫЙ В ИНСТРУКЦИИ
AVERTISSEMENT! SI CE PRODUIT N'EST PAS CORRECTEMENT INSTALLÉ OU ASSEMBLÉ,
IL RISQUE DE CAUSER DES BLESSURES RAVES, VOIRE MORTELLES, AINSI QUE DES DOM-
MAGES MATÉRIELS IMPORTANTS. AVANT DE COMMENCER, LISEZ LES AVERTISSEMENTS
N'utilisez pas ce produit à une fin non spécifiée expressément par Wize. Une installation incorrecte
peut entraîner des préjudices corporels ou des dommages matériels. Si vous ne comprenez pas ces
instructions ou si vous avez des doutes quant à la sécurité de l'installation, veuillez contacter le service
clientèle de Wize ou un installateur qualifié. Wize n' e st pas responsable des dommages ou des préju-
dices causés par un montage, un assemblage ou une utilisation incorrects.
Le matériel fourni avec ce produit, est exclusivement destiné à être installé sur des murs en bois mas-
sif, en béton, blocs de béton ou des colonnes en bois massif avec un maximum de 16 mm de plaques
de plâtre. Pour les murs faits d'autres matériaux, comme la brique creuse, s'il vous plaît consulter votre
installateur et / ou fournisseur spécialisé.
NE DÉPASSEZ JAMAIS LA CAPACITÉ DE CHARGE MAXIMALE DE CE PRODUIT.
1
В НИМ А НИЕ !
ПРЕДУПРЕЖДЕНИЯМИ ПЕРЕД НАЧАЛОМ.
AVE RT ISSEM ENT
SUIVANTS.
Advertisement

Subscribe to Our Youtube Channel
Related Manuals for Wize AU65


Summary of Contents for Wize AU65
- Page 1 If you do not understand these directions, or have doubts clientèle de Wize ou un installateur qualifié. Wize n’ e st pas responsable des dommages ou des préju- about the safety of the installation, contact Wize Customer Service or call a qualified contractor. Wize dices causés par un montage, un assemblage ou une utilisation incorrects.
- Page 2 В Е С Н А Г Р У З К И КОМПЛЕКТАЦИЯ Maximum Weight Capacity 80l b / 36к г Contenido del paquete Contenu de l’emballage Peso máximo de pantalla Poids maximal de l’écran ВН ИМА Н ИЕ! РЕКОМЕ НДО ВАННЫЙ ИНСТР У МЕНТ M4 x 12 мм...
-
Page 3: Инст Р Укц Ия По Мо Н Таж У
ИНСТ Р УКЦ ИЯ ПО МО Н ТАЖ У К О МПЛ ЕКТАЦ И Я Instrucciones de instalación Instructions d’installation Contenido del paquete Contenu de l’emballage 1a -1 УС Т АНО ВК А Н А ДЕРЕВЯ ННЫ Й БРУС Using stud finder locate centers of 2 studs Определите... - Page 4 1a - 3 УСТАНО ВКА Н А Д Е Р ЕВЯННЫЙ Б Р УС У СТ АНОВК А НА БЕ ТОН И ШЛ АК ОБ ЛОК 1 b-1 Use wall plate (C) to mark hole location on center line. Use level to make a line on wall. Приложите...
- Page 5 У С ТА Н ОВК А Н А БЕТ О Н И Ш ЛАК О БЛО К МОНТ АЖ Н АС Т ЕННОГО К РОНШТЕЙ НА 1b- 3 Use 10mm - 3/8” drill bit to make a 65mm - 2.5” hole on marks. Fasten wall plate to wall using screw (A).
- Page 6 НА СТР ОЙК А ТВ А Д А П ТЕ Р А МО НТА Ж ТВ АДА ПТ ЕРОВ Use spacer (T or U) between TV and mount if needed. Bracket arms can be adjusted to fit various TV mounting patterns. Раздвижной...
- Page 7 МОН ТА Ж Т В ФИ К С АЦИ Я И ВЫ РА ВНИ В АН ИЕ ТВ Level TV to desired position then tighten screw (Q). Hook TV on to adapter plate. Secure bracket to adapter plate with M5 x 10mm secur- ing screws (Q) and washers (R and S).
- Page 8 У К Л АД К А К А Б Е Л Я T O SECU R E T V IN FIXED P O SIT IO N Using part (Y) attach powercord to arm. Collapse mount arm until clicked into secure fixed position. Кабель...
-
Page 9: Warranty
Sous réserve des lois en vigueur, Wize réfute toute autre garantie expresse Wize will not be liable for any damages arising out of the use of, or inability to use, Wize products. Wize ou implicite, notamment toute garantie de commercialisation ou de convenance à un usage bears no responsibility for incidental or consequential damages.
Need help?
Do you have a question about the AU65 and is the answer not in the manual?
Questions and answers