Table of Contents
Advertisement
Quick Links
www.wize-av.com
Instruction Manual
Manual de Instrucciones
WA RNING !
!
WARNING! SEVERE PERSONAL INJURY AND PROPERTY DAMAGE CAN RESULT FROM
IMPROPER INSTALLATION OR ASSEMBLY. READ THE FOLLOWING WARNINGS BEFORE
Do not use this product for any purpose not explicitly specified by Wize. Improper installation may
cause property damage or personal injury. If you do not understand these directions, or have doubts
about the safety of the installation, contact Wize Customer Service or call a qualified contractor. Wize
is not liable for damage or injury caused by incorrect mounting, assembly, or use.
The hardware provided with this product, is exclusively intended for installation on walls made of
solid wood, concrete, concrete block or solid wood columns with a maximum of 16 mm of drywall.
For walls made of other materials, for example hollow bricks, please consult your installer and/or
specialist supplier.
DO NOT EXCEED THE MAXIMUM WEIGHT CAPACITY FOR THIS PRODUCT
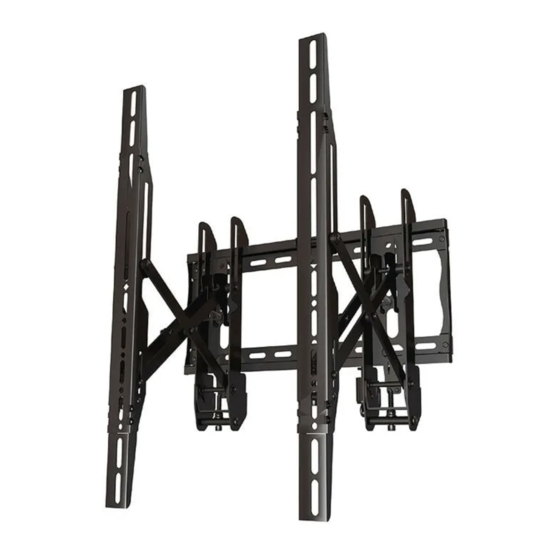
VWP46G2
Video Wall Mount
For 37"-60" TV's / Weight Capacity: 200 lb
info@wize-av.com
Manuel D'instructions
!
BEGINNING.
iA DV E RTEN CIA !
¡ADVERTENCIA! LA INSTALACIÓN O EL MONTAJE INAPROPIADOS PUEDEN PROVOCAR
LESIONES, DAÑOS MATERIALES O INCLUSO LA MUERTE. ANTES DE COMENZAR, LEA LAS
SIGUIENTES ADVERTENCIAS.
No utilice este producto para ningun fn que no sea explicitamente especifcado por Wize.
Una instalacion inadecuada puede provocar danos materiales o lesiones personales. Si no
entiende las instrucciones de montaje o tiene alguna duda sobre la seguridad de la instalación,
contacte con Wize o llame a un operario cualifcado. Wize no es responsable de
daños o lesiones causados por el montaje, ensamblaje o uso incorrectos.
El ferretería que incluye este producto, es exclusivamente destinado a ser instalado en las pare-
des de madera maciza, hormigón, bloques de concreto o columnas de madera sólida con un
máximo de 16 mm de drywall. Para las paredes hechas de otros materiales, por ejemplo, ladrillos
huecos, por favor consulte a su instalador y / o distribuidor especializado.
NO EXCEDA LA CAPACIDAD DE PESO MÁXIMA PARA ESTE PRODUCTO.
AVE RT ISSE ME NT
AVERTISSEMENT! SI CE PRODUIT N'EST PAS CORRECTEMENT INSTALLÉ OU ASSEMBLÉ,
IL RISQUE DE CAUSER DES BLESSURES RAVES, VOIRE MORTELLES, AINSI QUE DES DOM-
MAGES MATÉRIELS IMPORTANTS. AVANT DE COMMENCER, LISEZ LES AVERTISSEMENTS
N'utilisez pas ce produit à une fin non spécifiée expressément par Wize. Une installation incorrecte
peut entraîner des préjudices corporels ou des dommages matériels. Si vous ne comprenez pas ces
instructions ou si vous avez des doutes quant à la sécurité de l'installation, veuillez contacter le service
clientèle de Wize ou un installateur qualifié. Wize n' e st pas responsable des dommages ou des préju-
dices causés par un montage, un assemblage ou une utilisation incorrects.
Le matériel fourni avec ce produit, est exclusivement destiné à être installé sur des murs en bois mas-
sif, en béton, blocs de béton ou des colonnes en bois massif avec un maximum de 16 mm de plaques
de plâtre. Pour les murs faits d'autres matériaux, comme la brique creuse, s'il vous plaît consulter votre
installateur et / ou fournisseur spécialisé.
NE DÉPASSEZ JAMAIS LA CAPACITÉ DE CHARGE MAXIMALE DE CE PRODUIT.
1
SUIVANTS.
Advertisement
Table of Contents

Related Manuals for Wize VWP46G2


Summary of Contents for Wize VWP46G2
- Page 1 If you do not understand these directions, or have doubts clientèle de Wize ou un installateur qualifié. Wize n’ e st pas responsable des dommages ou des préju- about the safety of the installation, contact Wize Customer Service or call a qualified contractor. Wize dices causés par un montage, un assemblage ou une utilisation incorrects.
-
Page 2: W E I Ght Ca Pac I T Y
W E I GHT CA PAC I T Y PACKAGE CO NTE NTS Maximum Weight Capacity 200l b / 91 kg Contenido del paquete Contenu de l’emballage Peso máximo de pantalla Poids maximal de l’écran CAUTI O N! T OOLS R EQUIRED Herramientas necesarias Outils nécessaires M6 x 12mm... -
Page 3: Install Instructions
1a -3 WO O D STU D IN STAL L ATIO N IN STA LL INSTRU CT ION S Use wall plate (C) to mark hole location on center line. Use la placa de pared (C) para marcar la ubicación de los agujeros en la línea cen- Instrucciones de instalación Instructions d’installation tral. - Page 4 1b-3 MASON RY B LOC K & CON CR ETE IN STALLATI ON 1b-1 M AS O N RY BLO C K & C ON C R ET E INS TA L L AT ION Level wall plate, then mark 6 hole locations. Insert (B) into both holes.
- Page 5 4 -1 ATTACH M O UNT B RA CKETS PO RT RAIT BRA CKET EX TE NSI ONS For portrait mode, add extensions to bracket with screw (H). Repeat steps 3-8. Align mount bracket (E) to holes on back of TV. Fasten using supplied hardware with a screwdriver.
- Page 6 4 - 3 ATTA CH MO UNT BR A CK ET S HAN G TV Use spacers (R / S) between TV and mount if needed. Hook top of bracket over the top of wall mount then lower down and tilt toward wall. Utilice espaciadores (R / S) entre la televisión y montar si es necesario.
- Page 7 SE CUR E BRACKET T O WA LL P LAT E B RACKET EXTEN SIO N Remove key then push lock button. This will engage the lock pin, securing the bracket Make sure the extension lock pin is in the unlocked position, then push the release to the wall plate.
- Page 8 PL UMB A D J UST ME NT RO L L /HEIGHT AD JUSTM ENT Using a 5mm allen key, turn plumb adjustment screw. Turn screw clockwise to adjust Using a 5mm allen key, turn height adjustment screw. Turn screw clockwise to raise the screen towards the wall and counterclockwise to adjust away from the wall.
-
Page 9: Warranty
à un usage Wize will not be liable for any damages arising out of the use of, or inability to use, Wize products. Wize quelconque. Wize réfute toute responsabilité pour des dommages résultant de l’utilisation bears no responsibility for incidental or consequential damages. - Page 10 VW46 Full motion Articulating Wall Mount www.wize-av.com info@wize-av.com Monitor size Horizontal distance (diagonal) between wall plates 40” Determine horizontal 2” distance between wall plates in your video 42” wall grid by following 4” this chart. 46” 7” 47” 8.5” 52”...
- Page 11 VW46 Full motion Articulating Wall Mount www.wize-av.com info@wize-av.com Monitor Determine vertical dis- tance between wall plates: 1) Measure the height of the monitor (X) 2) Measure and mark distance (X) between drill locations in order to properly allign wall plates vertically...
- Page 12 VW46 Full motion Articulating Wall Mount www.wize-av.com info@wize-av.com Hang monitors starting at the bottom center location and build up.
Need help?
Do you have a question about the VWP46G2 and is the answer not in the manual?
Questions and answers