Table of Contents
Advertisement
Quick Links
Advertisement
Table of Contents

Related Manuals for Matsushita Electric SB-FS740P


Summary of Contents for Matsushita Electric SB-FS740P
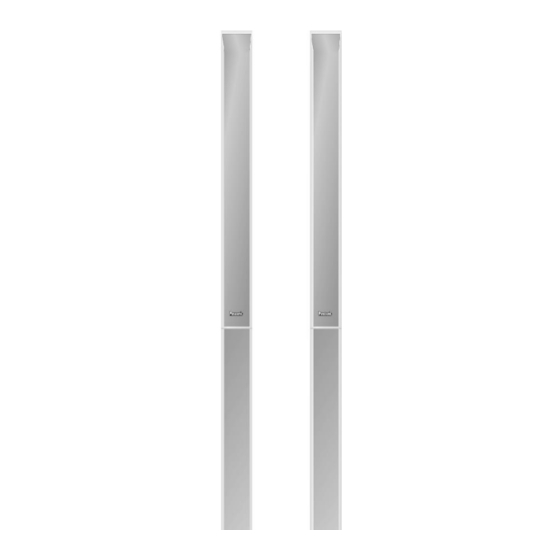
- Page 1 ORDER NO. MD0512487C7 Speaker System SB-FS740P Colour (S)... Silver Type...
-
Page 2: Specifications
SPECIFICATIONS Specification... - Page 3 2. Total harmonic distortion is measured by the digital spectrum analyzer. Music Center : SA-HT740P-S System : SC-HT740P-S Front Speaker : SB-FS740P-S Surround Speaker : SB-FS741P-S Center Speaker : SB-PC740P-S Subwoofer : SB-W740P-S Music Center : SA-HT740PC-S...
-
Page 4: Assembling And Disassembling
2005 Matsushita Electric Industrial Co. Ltd.. All rights reserved. Unauthorized copying and distribution is a violation of law. 1. Assembling and Disassembling “ATTENTION SERVICER” Some chassis components may have sharp edges. Be careful when disassembling and servicing. 1. This section describes procedures for checking the operation of the major printed circuit boards and replacing the main components. - Page 5 - Disassembly of Speaker Base Stand 1.1. Disassembly flow chart The following chart is the procedure for disassembling the casing and inside parts for internal inspection when carrying out the servicing. To assemble the unit, reverse the steps shown in the chart as below. 1.2.
- Page 6 Step 1: Remove the (+) white and (-) blue wires from the Upper Rear Cabinet Assembly. Step 2: Pull out the Speaker Cable from the groove. Step 3: Remove 1 screw from the Upper Rear Cabinet Assembly.
- Page 7 Step 4: Take out the Front Speaker Unit as arrow shown. 1.3. Disassembly of Front Speaker Follow (step 1) to (step 4) in Item 1.2. Step 1: Remove 10 screws from the Upper Rear Cabinet Assembly . Step 2: Take out the Upper Rear Cabinet Assembly as arrow shown. 1.4.
- Page 8 Step 1: Detach the (+) yellow and (-) black wires from the Tweeter. Step 2: Remove 4 screws from the Tweeter.
- Page 9 Step 3: Remove Tweeter from the Upper Front Panel Assembly as arrow shown. 1.5. Disassembly of Woofer Follow (step 1) to (step 4) in Item 1.2. Follow (step 1) to (step 2) in Item 1.3.
- Page 10 Step 1: Detach the (+) red and (-) gray wires from the Woofer. Step 2: Remove 4 screws from the Woofer. Step 3: Take out the Woofer from the Upper Front Panel Assembly as arrow shown.
- Page 11 1.6. Disassembly of Terminal Jack Follow (step 1) to (step 4) in Item 1.2. Follow (step 1) to (step 2) in Item 1.3. Step 1: Detach the (+) red and (-) gray wires from the Upper Rear Cabinet Assembly.
- Page 12 Step 2: Remove 1 screw from the Terminal Jack. Step 3: Remove the Terminal Jack from the Upper Rear Cabinet Assembly. 1.7. Disassembly of Lower Box Assembly Follow (step 1) to (step 4) in Item 1.2. Step 1: Pull out the Speaker Cable from the ridges. Step 2: Pull out the Speaker Cable from the inside groove by using hand.
- Page 13 Step 3: Remove 1 screw from the Lower Rear Cabinet Assembly. Step 4: Remove 2 screws from the Base Stand Assembly. Step 5: Pull out the Speaker Cable from the groove as arrow shown. Step 6: Remove the Lower Box Assembly as arrow shown. Step 7: Pull out the Speaker Cable from the Base Stand Assembly.
- Page 14 Step 1: Remove 8 screws from the Lower Rear Cabinet Assembly. Step 2: Take out the Lower Rear Cabinet Assembly from the Lower Front Panel Assembly. 1.9. Disassembly of Base Stand Assembly Follow (step 1) to (step 4) in Item 1.2. Follow (step 1) to (step 7) in Item 1.7.
-
Page 15: Connection Of The Speaker Cables
2. Connection of the Speaker Cables - Be sure to connect speaker cables before connecting the AC power supply cord. - The load impedance of any speaker used with this unit must be 4 - Be sure to connect the cable from the right speaker to the right terminal and the cable from the left speaker to the left terminal. - Page 16 - To prevent damage to circuitry, never short-circuit positive (+) and negative (-) speaker wires. - Be sure to connect only positive (white) wires to positive (+) terminals and negative (blue) wires to negative (-) terminals. Incorrect connection can damage the speakers. Positioning the speakers How you set up your speakers can affect the bass and the sound field.
- Page 17 proper ventilation. - To allow for proper ventilation and to maintain good airflow around the main unit, position it with at least 5 cm (2”) of space on all sides. - Do not block the ventilation holes of the main unit. Center speaker - Vibration caused by the center speaker can disrupt the picture if it is placed directly on the television.
-
Page 18: Exploded View
- Reduce the volume in the following cases to avoid damage. - When playing distorted sound. - When the speakers are reverberating due to a record player, noise from FM broadcasts, or continuous signals from an oscillator, test disc, or electronic instrument. - Page 20 4.2. Packaging Note: The diagram below shows the packaging for SB-HT740P-S. Pls also refer to Service Manual of SB-FS741P-S (MD0512486C0) for packaging.
- Page 21 SB- HT740P-S consists of SB-FS741-S (x2) & SB-FS740P-S (x2).
-
Page 22: Replacement Parts List
5. Replacement Parts List Notes : - Important safety notice : When replacing any of these components, be sure to use only manufacturer’s specified parts shown in the parts list. - [M] markings in the Remarks columns indicates parts supplied by PAVCSG.
Need help?
Do you have a question about the SB-FS740P and is the answer not in the manual?
Questions and answers