Table of Contents
Advertisement
Quick Links
Advertisement
Table of Contents

Related Manuals for Thunder Scientific 9500


Summary of Contents for Thunder Scientific 9500
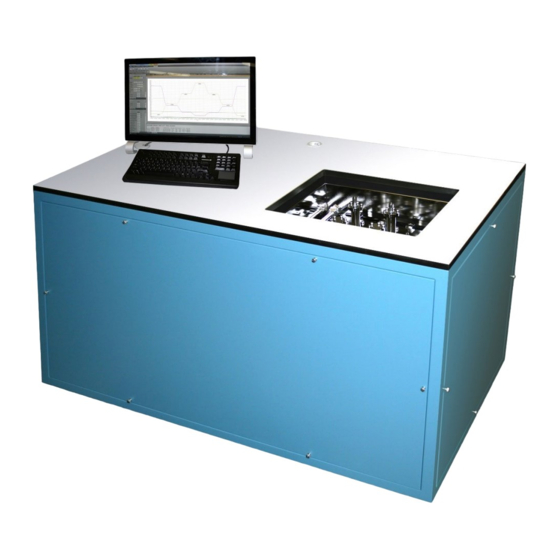
- Page 1 Model 9500 System Manual Thunder Scientific Corporation...
- Page 2 Document Edition 3.0 July 2022 THUNDER SCIENTIFIC® is the registered trademark of Thunder Scientific Corporation. All the information provided in this document is correct and true at the time of publication. Thunder Scientific Corporation reserves the right to change any technical data without notice.
- Page 3 Suomi English Tämä tuote noudattaa WEEE-direktiivin (2002/96/EY) This product complies with the WEEE Directive (2002/96/EC) marking merkintävaatimuksia. Kiinnitetty etiketti osoittaa, että tätä requirements. The affixed label indicates that you must not discard sähkö-/elektroniikkalaitetta ei saa hävittää kotitalousjätteissä. this electrical/electronic product in domestic household waste. Tuoteluokka: Viitaten WEEE-direktiivin liitteessä...
- Page 4 Deutsch Nederlands Dieses Produkt stimmt mit den Kennzeichnungsanforderungen Dit product voldoet aan de merktekenvereisten van de AEEA- der WEEE-Richtlinie (2002/96/EC) überein. Das angebrachte richtlijn (2002/96/EG). Het aangebrachte merkteken duidt erop dat Etikett weist darauf hin, dass dieses elektrische/elektronische dit elektrische/elektronische product niet met het huishoudelijk Produkt nicht in Hausmüll entsorgt werden darf.
-
Page 5: Table Of Contents
Control Modes ........................... 29 2.13.6 Generating and Shutting down ....................30 2.13.7 Power-Off ..........................31 2.13.8 Set Date and Time ........................32 2.13.9 Help ............................33 3 Principle of Operation Model 9500 System Manual – Document #OM9500 - Edition 3.0 July 2022... - Page 6 Lowering the Bath ........................100 Pump Rotation Test ..........................101 Liquid Level Sensors ........................... 102 5.6.1 Pre-Saturator Level ........................102 5.6.2 Upper Bath Level ........................102 5.6.3 Lower Bath Level ........................103 Model 9500 System Manual – Document #OM9500 - Edition 3.0 July 2022...
- Page 7 Running an Auto Profile ........................225 9.4.1 Understanding Profile Phases ....................227 9.4.2 Manual Override of Profile ...................... 230 10 Connections 10.1 Serial Connection ..........................234 10.1.1 Serial Connection Example 1 ....................249 Model 9500 System Manual – Document #OM9500 - Edition 3.0 July 2022...
- Page 8 13.8.7 Pre-Saturation Temperature at Minimum Limit ..............331 13.8.8 Pre-Saturation Temperature Over Range or at Maximum Limit ..........331 13.8.9 Expansion Valve Temperature at Minimum Limit ..............331 Model 9500 System Manual – Document #OM9500 - Edition 3.0 July 2022...
- Page 9 14.2 Get and Set Commands ........................337 14.2.1 %RH ............................337 14.2.2 Frost Point ..........................338 14.2.3 Dew Point ..........................338 14.2.4 PPMv ............................338 14.2.5 PPMw ............................339 Model 9500 System Manual – Document #OM9500 - Edition 3.0 July 2022...
- Page 10 15.23 9500S918 – Pump / Comp / Flow Schematic ..................368 15.24 9500S919 – AC / SC Power Distribution ..................... 369 15.25 9500A906 – Chamber Lid Assembly ....................370 Model 9500 System Manual – Document #OM9500 - Edition 3.0 July 2022...
-
Page 11: Getting Started
ETTING TARTED This section provides the user with information about the Model 9500 humidity generator, where to obtain technical support, software license agreement, specifications, uncertainty, facility requirements, and installation. The following sections provide further details on using and operating the Model 9500 generator using the ControLog software. -
Page 12: Notice
“as is” basis, and the entire risk of their quality and performance rests with the user. Thunder Scientific Corporation shall not be liable for any incidental or consequential damages in connection with or arising from the furnishing, use, or performance of the examples, procedures, or program. -
Page 13: Technical Support
Table 1-1 2.4 T ECHNICAL UPPORT If the user requires assistance with any aspect of the 9500 Humidity Generating System or the ControLog application, technical support can be obtained by contacting Thunder Scientific Corporation by any of the following means: Web: www.thunderscientific.com... - Page 14 Should you have any questions concerning this Agreement, or if you desire to contact TSC for any reason, please write: Thunder Scientific Corporation, 623 Wyoming NE, Albuquerque, NM 87123 Model 9500 System Manual – Document #OM9500 - Edition 3.0 July 2022...
-
Page 15: Warranty
2.6 W ARRANTY Thunder Scientific Corporation (TSC) warrants, to the Buyer, the Product manufactured by TSC to be free of defects in material and workmanship under normal use and service and to be free from inadequate mechanical design when operated within the specified design limitations for a period of one year from date of acceptance. -
Page 16: Specifications
0 °C to 72 °C when using a thermal insulator over the bath, such as hallow bath balls. Locations are defined at the center of the chamber lid access ports, approximately 5" into the chamber. Model 9500 System Manual – Document #OM9500 - Edition 3.0 July 2022... -
Page 17: Uncertainty
Uncertainty values represent an expanded uncertainty using a coverage factor, k=2, at an approximate level of confidence of 95%. Includes saturation temperature, chamber temperature, bath fluid temperature, pre-saturator temperature, and exp-valve temperature. Model 9500 System Manual – Document #OM9500 - Edition 3.0 July 2022... -
Page 18: Facility Requirements
5 %RH @ 0 °C and 15 psiA Pc). A flow rate capability of 100 L/min and a pressure dew point of 2 °C or less are recommended. The 9500 can support two supply pressure inputs when an air booster system is required to achieve high pressure. The low range supply is directly connected to the facility air supply (<325 psiG), and the high range supply is connected to an air booster to achieve the higher supply pressures (325 psiG). -
Page 19: Cooling Water Supply
2.11.4.1 Air Booster The Model 9500 can be supplied with an air booster system to amplify the input supply pressure when the user’s facility air does not meet the 325 psiG required for low humidity generation. Refer to the air booster system documentation for more information on the air booster system's installation, operation, and maintenance. -
Page 20: Installation
5. Install RS232 serial cable to the COM1 connector on the back of the touch panel PC. 6. Place and then plug the USB keyboard into one of the USB 2 slots (not blue) on the back of the touch panel PC. Model 9500 System Manual – Document #OM9500 - Edition 3.0 July 2022... -
Page 21: Facility Connections
(use larger tubing for long runs). CAUTION! DO NOT RESTRICT OR BACK-PRESSURE GAS SUPPLY OUTLET. Refer to section 2.11.4 Air Supply for gas requirements. Model 9500 System Manual – Document #OM9500 - Edition 3.0 July 2022... - Page 22 THIS PROCEDURE MUST BE PERFORMED UPON INSTALLATION TO ENSURE THE BATH FLUID PUMP ROTATES IN THE PROPER DIRECTION. DO NOT OPERATE THE SYSTEM UNTIL THIS PROCEDURE HAS BEEN PERFORMED. Model 9500 System Manual – Document #OM9500 - Edition 3.0 July 2022...
-
Page 23: Temperature Bath Filling Procedure
2.12.5 Temperature Bath Filling Procedure The Model 9500 humidity generator temperature bath requires approximately 20 gallons of distilled water (do not use deionized water) as a heat transfer fluid for normal operating temperatures between 5 °C and 70 °C. For temperatures below 5 °C, the appropriate amount of propylene glycol must be added. -
Page 24: Temperature Bath Draining Procedure
6. Close the valve and disconnect the drain hose. Note If propylene glycol has been added to the bath water, then the bath water can be saved into – an appropriate container. Model 9500 System Manual – Document #OM9500 - Edition 3.0 July 2022... -
Page 25: Holding Tank Initial Filling Procedure
The reservoir requires an initial filling prior to first use, then periodic filling after that. Refer to section 5.1.1 Fill Water Reservoir for detailed instructions on filling the reservoir. Model 9500 System Manual – Document #OM9500 - Edition 3.0 July 2022... -
Page 26: Setting Supply Pressure Regulator
The Model 9500 humidity generator can be configured to operate on the low-pressure input, high-pressure input, or both. With the system shutdown, press System Parameters under the Utilities tab to open the system parameters wizard dialog. - Page 27 Select Generate from the Operation tab and wait for the system to start and flow and pressure to come to setpoint. While monitoring the supply pressure dialog window, adjust the external regulator. Once complete select Shutdown from the Operation tab to shutdown the system. Model 9500 System Manual – Document #OM9500 - Edition 3.0 July 2022...
- Page 28 325 psiG. Warning! Never exceed 350 psiG. Once complete select Shutdown from the Operation tab to shutdown the system. Refer to drawings: 9500D901-1, 9500D901-3, 9500D901-8 Model 9500 System Manual – Document #OM9500 - Edition 3.0 July 2022...
-
Page 29: Quick Start
2.13.2 Loading Screen After the system boots, the generator shows a loading screen that indicates the status of the loading process and the software version of the generator. Model 9500 System Manual – Document #OM9500 - Edition 3.0 July 2022... -
Page 30: Controlog Screen
Upon completion of the loading process, the generator shows the main ControLog page and a dialog showing the status of establishing communication with the generator. Once communication with the generator is established, the generator’s parameter and data tabs are displayed. Model 9500 System Manual – Document #OM9500 - Edition 3.0 July 2022... -
Page 31: Control Parameters
The Parameter Tab Group is located on the left side of the application and contains a parameter tab for each connected device. The 9500 Parameters contain all the control and measurement parameters critical to the operation of the humidity generator. - Page 32 Blue is for the humidity being generated, red is for the temperature the system is controlling at, and green is for the flow rate at which the system generates the humidity. Model 9500 System Manual – Document #OM9500 - Edition 3.0 July 2022...
-
Page 33: Control Modes
Parameter Name, the Actual Value, and the Unit of the displayed value. 2.13.5 Control Modes The user can change the operating mode of the 9500 by selecting from the drop-down menu within the Mode group on the Generator’s Operation menu tab. -
Page 34: Generating And Shutting Down
The user can select Generate or Shutdown. 2.13.6.1 Generate Mode Selecting Generate from the run menu commands the 9500 into generate mode. When in the Generate mode of operation, the system controls the currently entered setpoints. Anytime a setpoint is changed, the system begins adjusting to that new value. -
Page 35: Power-Off
Control/Display screen is shown. During this idle time, when the 9500 is stopped, gas is not flowing through the generator. 2.13.7 Power-Off To turn the system off, select the “Turn Off” command. The “Turn Off” command is located under the “File” menu. -
Page 36: Set Date And Time
Start by long pressing or right-clicking anywhere within the status bar. A long press is when you touch and hold the screen. Touch and hold long enough for a square selection box to appear. Releasing opens the status bar context menu. Model 9500 System Manual – Document #OM9500 - Edition 3.0 July 2022... -
Page 37: Help
Select “Set Date and Time” from the context menu to open the system Date and Time dialog. 2.13.9 Help The Help Menu, located on the upper right side of the screen, allows the user to open the 9500 System Manual (this document). -
Page 38: Principle Of Operation
RINCIPLE OF PERATION The Model 9500 humidity generation system is based on the two-pressure principle. This process (shown below in an elemental schematic form) involves saturating air or nitrogen with water vapor at a given temperature and pressure. The saturated high-pressure gas flows through an expansion valve where it is isothermally reduced to test pressure. -
Page 39: Saturation Temperature (T 3.4 Chamberhamber Temperature (T Chamber S )
9500 is not a requirement for the successful operation of the generator. Refer to the HumiCalc with Uncertainty Reference Manual for a complete description of the equations used by the 9500 to generate a known humidity value and corresponding uncertainty. -
Page 40: Controlog Interface
Data, and Graph Tab Group, Information Tab Group, and the Status Bar. Each feature is designed to be intuitive to use and to provide the user with detailed information on the operation of the generator and connected device(s). Model 9500 System Manual – Document #OM9500 - Edition 3.0 July 2022... -
Page 41: Menu Bar
It also allows the user to save all open data or graphs, clear data, clear the status log, save the status log, get information about the application, and exit (power down) the Human Machine Interface (HMI) Computer. Model 9500 System Manual – Document #OM9500 - Edition 3.0 July 2022... - Page 42 This can be very useful if you have a device configuration that is often used or a commonly used profile, as it removes the process of navigating and selecting the file each time. Model 9500 System Manual – Document #OM9500 - Edition 3.0 July 2022...
- Page 43 Excel 97-2003 Workbook (*.xls) Example: If the user had two data tabs open, one called “9500 Data” and the other called “UUT Data,” and the user wanted to save the files as Excel Workbooks using the name “Test Data 15Oct20”.
- Page 44 All status log files are saved in HTML format (*.html). Model 9500 System Manual – Document #OM9500 - Edition 3.0 July 2022...
- Page 45 4.1.1.5 File Explorer Opens a Windows file explore to allow the user to manage files. This can be used to quickly copy data and report files from the 9500 to an external USB drive. 4.1.1.6 Clear Unpinned Items Clears all unpinned items in the list of recent files.
- Page 46 The user is safe to switch the main system “POWER” to OFF once the PC has shut down completely (display goes blank). CAUTION! TURNING OFF POWER WITHOUT SHUTTING DOWN THE SYSTEM FIRST CAN CORRUPT THE EMBEDDED OPERATING SYSTEM. Model 9500 System Manual – Document #OM9500 - Edition 3.0 July 2022...
-
Page 47: Home Menu Tab
If the user has not configured the system to record data points, then ControLog asks the user if they would like to define the settings before taking a point. Model 9500 System Manual – Document #OM9500 - Edition 3.0 July 2022... - Page 48 REASON, SOME CONSIDERATION SHOULD BE GIVEN TO THE AMOUNT OF DATA DESIRED, THE OVERALL TIME SPAN OF THE DATA (I.E., HOURS, POSSIBLY DAYS), AND ULTIMATELY THE DATA INTERVAL. Model 9500 System Manual – Document #OM9500 - Edition 3.0 July 2022...
- Page 49 Note Data is only recorded while the 9500 is in generate mode. 4.1.2.5 New Device The New Device connection command allows the user to create a new device connection. Selecting this command opens a Connection Wizard dialog that steps the user through the process of creating a new connection to a device.
-
Page 50: Units Menu Tab
Pressure Unit The Pressure Unit allows the user to change the displayed units for pressure. Available pressure units: • • • • • • • mbar • inHg • Model 9500 System Manual – Document #OM9500 - Edition 3.0 July 2022... - Page 51 Available density units: • g/m^3 • lb/ft^3 • 4.1.3.1.5 Enthalpy Unit The Enthalpy Unit allows the user to change the displayed units for enthalpy. Available enthalpy units: • btu/lb • Model 9500 System Manual – Document #OM9500 - Edition 3.0 July 2022...
-
Page 52: Operation Menu Tab
4.1.4.1 Mode The Mode Menu allows the user to change the operating mode of the 9500. It allows the user to select %RH, Frost Point, Dew Point, PPMv, PPMw, or Saturation Pressure. 4.1.4.1.1... - Page 53 While saturation pressure is held constant, all humidity parameters may vary. 4.1.4.2 Run Menu The Run Menu allows the user to run the 9500 manually in generate mode. The Run menu also allows the user to manually shutdown the 9500. 4.1.4.2.1 Generate Mode Selecting Generate from the run menu commands the 9500 into generate mode.
- Page 54 The Hour Meter allows the user to see the number of operational hours the generator has on it. The hour meter indicates the number of hours the generator has been operated in the generate mode. Model 9500 System Manual – Document #OM9500 - Edition 3.0 July 2022...
-
Page 55: Profile Menu Tab
The Profile Menu Tab allows the user to manage Auto Profiles. Auto Profiles allow the user to program a set of humidity and temperature test points and dwell times that automate the 9500 generation process. The profile menu is dynamic and has operations that are specific to the profile tab. Specific operations are hidden when another non-profile tab is selected. - Page 56 Phase, Assurance to proceed to Soak, or Soak to proceed to Ramp of the next profile point. This allows for early manual termination of any phase within a profile point. Model 9500 System Manual – Document #OM9500 - Edition 3.0 July 2022...
-
Page 57: Utilities Menu Tab
Reservoir Level The Reservoir Level indicates the current level of the water reservoir and, when pressed, opens up the 9500 fluid level interaction dialog that allows the user to view the state of the various fluid levels and liquid level states. - Page 58 The 9500 supports two supply pressure inputs for when a pressure booster is needed to achieve high pressure. The low range supply is directly connected to the facility air supply, and the high range supply is connected to a pressure booster to achieve the higher supply pressures.
- Page 59 Note – The internal 9500 regulator should be set to regulate the high range pressure. The low range supply pressure input must be externally regulated to 100 psiG before entering the 9500.
- Page 60 “Import Uncertainty” dialog that steps the user through a two-step import process. The 9500 uses two pressure ranges, one pressure transducer for saturation pressures below 45 psi and one pressure transducer for saturation pressures above 45 psi. These pressure transducers have different uncertainties and therefore require different HumiCalc solutions.
- Page 61 The first step in the import process is selecting the uncertainty solution for the 9500 operating below 45 psi. Clicking the “Browse” button opens a file dialog that allows the user to browse to the desired location for the solution file to open. Once a file has been selected, clicking the “Next” button displays a status dialog as the first solution is imported into ControLog.
- Page 62 This level is intended for factory support and should not be used regularly by the user of the 9500. A password is required for this level. The passwords are on the yellow product key flyer delivered with the generator.
-
Page 63: Graph Menu Tab
Close Graph The Close graph command allows the user to close the selected graph. Selection results in a confirmation message to assure the user wants to close the graph. Model 9500 System Manual – Document #OM9500 - Edition 3.0 July 2022... - Page 64 Dragging the cursor up scales the display in (zooms in), and dragging the cursor down, scales the display out (zoom out). Model 9500 System Manual – Document #OM9500 - Edition 3.0 July 2022...
- Page 65 Selecting this command opens the Graph Properties dialog that allows the user to change what data is graphed, the display properties for each line, and the axis values. Model 9500 System Manual – Document #OM9500 - Edition 3.0 July 2022...
-
Page 66: Data Menu Tab
The Copy Selection command allows the user to copy the selected data within a data tab to the clipboard. Selecting this command copies the selected data within a data tab to the clipboard in a tab-delimited format. This data may then be pasted into another program. Model 9500 System Manual – Document #OM9500 - Edition 3.0 July 2022... - Page 67 For more information, refer to section 8 Data and Data Summary Model 9500 System Manual – Document #OM9500 - Edition 3.0 July 2022...
- Page 68 OF DATA DESIRED, THE OVERALL TIME SPAN OF THE DATA (I.E., HOURS, DAYS, POSSIBLY WEEKS), AND ULTIMATELY THE DATA INTERVAL. Note Data is only recorded while the 9500 is in generate mode. Model 9500 System Manual – Document #OM9500 - Edition 3.0 July 2022...
-
Page 69: Device Settings Menu Tab
The Settings connection menu command allows the user to change the settings for a specific connection. Selecting this command opens the Connection Wizard dialog for the selected connection, allowing the user to change connection settings as desired. Model 9500 System Manual – Document #OM9500 - Edition 3.0 July 2022... - Page 70 The user can select which connected device to view using the drop-down selection at the top of the tab. The data sent to and received from the selected device is displayed in the lower text area of the console tab. Model 9500 System Manual – Document #OM9500 - Edition 3.0 July 2022...
-
Page 71: Help
4.1.10 Help The Help Menu on the right side of the ribbon menu allows the user to open the 9500 System Manual (this document). Note – Refer to the Thunder Scientific website (www.thunderscientific.com) for the latest manual edition and other information on your Model 9500 Humidity System. -
Page 72: Parameters Tab Group
Each parameter tab displays the current data for its device, and a parameter tab can be selected using the scroll bar at the bottom of the group. Model 9500 System Manual – Document #OM9500 - Edition 3.0 July 2022... - Page 73 If multiple parameter tabs are open, the user can access other tabs using the scroll bar at the bottom of the group. Model 9500 System Manual – Document #OM9500 - Edition 3.0 July 2022...
- Page 74 All Device Parameter Tabs have a context menu that can be displayed by long-pressing the tab title area or by right-clicking in the tab area. The context menu allows quick access to the device-related functions in the Settings Menu Tab. Model 9500 System Manual – Document #OM9500 - Edition 3.0 July 2022...
-
Page 75: Tiles
Within each parameter, tab area are tiles allowing the user to setpoints, view actual values, and view real- time uncertainty values. There are two different tiles: a Setpoint Tile and a Value Tile. Model 9500 System Manual – Document #OM9500 - Edition 3.0 July 2022... - Page 76 For example, let us say the user wants to calculate the lowest %RH achievable given a limited supply pressure of only 100 psi. Model 9500 System Manual – Document #OM9500 - Edition 3.0 July 2022...
- Page 77 Start by opening the HumiCalc pop-up using the drop-down arrow at the right of the setpoint entry box. Next, select the known dropdown to be Saturation Pressure and enter the 100 psi supply pressure max. Model 9500 System Manual – Document #OM9500 - Edition 3.0 July 2022...
- Page 78 Clicking the “Calculate” button results in the calculated %RH based on the 100 psi limit placed in the Setpoint Entry Box and closes the HumiCalc pop-up. Clicking “Ok” closes the setpoint entry and sends the setpoint to the Model 9500 Humidity generator. 4.2.1.1.2 Value Tile The Value Tiles display an actual value of a given parameter to the user.
-
Page 79: 9500 Parameter Tab
4.2.2 9500 Parameter Tab The 9500 Parameters contain all the control and measurement parameters critical to the operation of the humidity generator. Model 9500 System Manual – Document #OM9500 - Edition 3.0 July 2022... -
Page 80: Mass Flow Rate
The 9500 Parameters can be scrolled up and down to show the currently generated humidity in different humidity terms that are calculated using the HumiCalc with Uncertainty engine, along with other values that are important to the operation of the 9500 generator. - Page 81 For more information, refer to section 3 Principle of Operation The Chamber Pressure setpoint controls the pressure within the chamber while generating. The 9500 has the ability to control the pressure within the chamber above ambient pressure. To enable chamber pressure control, enter a setpoint value above the current ambient pressure.
- Page 82 Saturation Vapor Pressure (SVP) is computed at the Saturation Temperature. 4.2.2.19 F@Tt.Pt Enhancement Factor at Test Temperature and Pressure. 4.2.2.20 F@Td.Pt Enhancement Factor at Dew/Frost Point Temperature and Test Pressure. Model 9500 System Manual – Document #OM9500 - Edition 3.0 July 2022...
- Page 83 Dry Air Mole Fraction is the mole fraction of the dry air portion of a sample. The dry air portion is considered to be all constituents in a gas exclusive of the water vapor. Model 9500 System Manual – Document #OM9500 - Edition 3.0 July 2022...
-
Page 84: Cabinet Temperature
The Bath Reserve level indicates only what is in reserve for the bath. 4.2.2.42 Bath Level Bath Level shows the current state of the bath (at the upper level, at the lower level, or transitioning between the two). Model 9500 System Manual – Document #OM9500 - Edition 3.0 July 2022... -
Page 85: Device Parameter Tabs
4.2.3.1 Device Parameters Device Parameters contain all the most recent actual measurement parameters received from the device. Each parameter is displayed in a separate Value Tile. Model 9500 System Manual – Document #OM9500 - Edition 3.0 July 2022... -
Page 86: Data And Graph Tab Group
In addition to using the “Close Data” command from the ribbon menu, a Data and Graph Tab can be closed depending on the state of the device or generator using the “X” in the upper right-hand corner. Model 9500 System Manual – Document #OM9500 - Edition 3.0 July 2022... -
Page 87: Data Tabs
For more information, refer to section 7 Graphing 4.3.3 Profile Tab The Profile Tab contains the profile point definitions for an auto profile. For more information, refer to section 9 Auto Profiling Model 9500 System Manual – Document #OM9500 - Edition 3.0 July 2022... -
Page 88: Information Tab Group
The group can consist of a Status Log tab, a 9500 Warnings & Errors tab, and a 9500 Interface Console tab. By clicking the pin icon on any information tab, the user can pin or unpin the Information tabs. - Page 89 All Information Tabs have a context menu displayed by long pressing or right-clicking in the tab. The context menu allows quick access to functions that can clear and save the information. Model 9500 System Manual – Document #OM9500 - Edition 3.0 July 2022...
-
Page 90: Status Log
9500 Reported Warnings and Errors The 9500 Warnings & Errors tab only appears when the 9500 reports a warning or error. This is a critical information tab because it reports 9500 system warnings and errors to the user. Some types of errors can cause the 9500 to shutdown and require immediate attention by the operator. -
Page 91: 9500 Interface Console
4.4.4 9500 Interface Console The 9500 Interface Console tab allows users to send and receive commands to and from the 9500. The console tab is opened by selecting “Interface Console” from the Utilities Menu Tab. This feature is intended for factory support and should not be used regularly by the user of the 9500. -
Page 92: Status Bar
The Connection and Run Status is shown on the left-hand side of the status bar and gives the user a quick visual and textual reference to the current state of the Model 9500 Humidity generator. As new events are recorded in the Status Log, the event is displayed for a short period of time in the status bar to inform the user of the new event. -
Page 93: Auto Profile Controls And Status
The Auto Profile status consists of the generator “Run Mode” for the current profile point, the “Profile Point” the system is currently running, and the “Phase” of the current point. Model 9500 System Manual – Document #OM9500 - Edition 3.0 July 2022... -
Page 94: Current Point Time
To avoid time stamp confusion, only change the system date and time when the generator is – shutdown and not recording data. Start by long pressing or right-clicking anywhere within the status bar to open the status bar context menu. Model 9500 System Manual – Document #OM9500 - Edition 3.0 July 2022... - Page 95 Select “Set Date and Time” from the context menu to open the system Date and Time dialog. Model 9500 System Manual – Document #OM9500 - Edition 3.0 July 2022...
-
Page 96: Fluid Levels And Bath Control
The Water Reservoir Level is the measured distilled water level in the water reservoir and indicates the amount of distilled water available to fill the pre-saturator during operation. This is the distilled water supply used by the generator to generate a humidified gas output. Model 9500 System Manual – Document #OM9500 - Edition 3.0 July 2022... -
Page 97: Fill Water Reservoir
Pre-Saturator Reservoir” error, you must refill the water reservoir to a minimum of 75% full before trying to generate again. It is always recommended to fill the reservoir and holding tank to 100% whenever filling is required. Model 9500 System Manual – Document #OM9500 - Edition 3.0 July 2022... - Page 98 In most cases, this is not an issue, but if the system is filled over 110%, pressure control may become erratic, and some water may need to be drained from the tank. Model 9500 System Manual – Document #OM9500 - Edition 3.0 July 2022...
-
Page 99: Bath Reserve Level
Note This is a temperature-sensitive calculation, and the calculated level may vary based on the – bath fluid temperature. Model 9500 System Manual – Document #OM9500 - Edition 3.0 July 2022... -
Page 100: Holding Tank Level
Tank instead of the Bath Reserve Level if not already displayed. The Holding Tank water capacity is roughly 7 gallons from empty. Note It is recommended to only fill the holding tank when the bath is near ambient temperature. – Model 9500 System Manual – Document #OM9500 - Edition 3.0 July 2022... - Page 101 Once the tank level reaches 100%, the system automatically stops and closes the fill solenoid. The user can cancel the filling operation anytime by clicking the “Cancel Fill” button below the tank. Model 9500 System Manual – Document #OM9500 - Edition 3.0 July 2022...
- Page 102 110%. This can also result in an inaccurate calculated Bath Reservoir and Bath Level. If this occurs, it is recommended to drain some water from the bath until the overfill condition is removed. Model 9500 System Manual – Document #OM9500 - Edition 3.0 July 2022...
-
Page 103: Bath Level
“Raising Bath Level” and continues the process until the bath level reaches the Upper Bath Level as indicated by the level sensor. The user can cancel the raising process anytime by clicking the “Cancel Raising” button. Model 9500 System Manual – Document #OM9500 - Edition 3.0 July 2022... -
Page 104: Lowering The Bath
LEVEL WHILE GENERATING AT EITHER THE UPPER OR LOWER LEVEL AND LEAVING THE BATH BETWEEN LEVELS CAN RESULT IN POSSIBLE ERROR MESSAGES RELATING TO THE BATH LEVEL MAINTENANCE. Model 9500 System Manual – Document #OM9500 - Edition 3.0 July 2022... -
Page 105: Pump Rotation Test
7. Disconnect main electric service, switch input power connections L1 and L3 at TB-MAIN or main power box connection, then repeat steps 2 through 5. CAUTION! ALWAYS PROPERLY SHUTDOWN THE TOUCH PANEL PC BEFORE SWITCHING OFF THE GENERATORS POWER. Model 9500 System Manual – Document #OM9500 - Edition 3.0 July 2022... -
Page 106: Liquid Level Sensors
The Upper Bath Level is a discrete indication of the presence of water at the upper bath level probe. The bath is at the upper level when this indication is true (green). Model 9500 System Manual – Document #OM9500 - Edition 3.0 July 2022... -
Page 107: Lower Bath Level
When the flow switch indication is red, water is not being circulated within the system. Water only circulates when operating in the Generate mode or performing a pump rotation test. Model 9500 System Manual – Document #OM9500 - Edition 3.0 July 2022... -
Page 108: Calibration
Calibration of the system requires the following support equipment: Note - The following information is a recommendation for calibrating the Thunder Scientific 9500 Humidity Generator. It is the user’s responsibility to ensure the standards used meet/exceed their organization’s specific test limit/guard banding requirements. -
Page 109: Equipment Required
Remove the expansion valve encloser cover on the right side of the system (circled in red below) • to access the Saturator (RTD3) and Expansion Valve (RTD5) temperature probes. Refer to drawing 9500D901-9 for additional views. Model 9500 System Manual – Document #OM9500 - Edition 3.0 July 2022... - Page 110 (V6) (valve is 1/4” FNPT) located directly under the insulated heater housing near the back of the generator. Open the drain valve (handle vertical) and drain completely (approximately 9 Liters), then close the valve (handle horizontal). Model 9500 System Manual – Document #OM9500 - Edition 3.0 July 2022...
- Page 111 The Chamber Temperature RTD2 is not removed; instead, the temperature probe cable length is • extended into the chamber and out through the top. Sufficient cable length is provided to reach Model 9500 System Manual – Document #OM9500 - Edition 3.0 July 2022...
- Page 112 Select Generator Calibration from the Utilities menu tab to open the Calibration Wizard. Model 9500 System Manual – Document #OM9500 - Edition 3.0 July 2022...
- Page 113 After all the “As Received” points have been taken, the user is asked whether they want to calculate new calibration coefficients. Set the type of calibration to Temperature. Model 9500 System Manual – Document #OM9500 - Edition 3.0 July 2022...
- Page 114 ControLog automatically records the standard’s value during each calibration point. If the standard is not connected or you desire to enter the standard’s value manually, then do not select an item from the list. Model 9500 System Manual – Document #OM9500 - Edition 3.0 July 2022...
- Page 115 If the value of the item being calibrated is outside the window, then the item is considered out of tolerance. Model 9500 System Manual – Document #OM9500 - Edition 3.0 July 2022...
- Page 116 For example, if the data storage rate is every 30 seconds, a sample size of 5 minutes results in 10 points being used to calculate the standard deviation. Model 9500 System Manual – Document #OM9500 - Edition 3.0 July 2022...
- Page 117 “Standard” and “Value” columns. This is useful for seeing error values before a point is taken. Model 9500 System Manual – Document #OM9500 - Edition 3.0 July 2022...
- Page 118 Tip - Use the “Next” and “Back” buttons to navigate between taken points. You can clear and retake a point by simply clicking the “Clear Point” button and then repeating the process to retake the point. Model 9500 System Manual – Document #OM9500 - Edition 3.0 July 2022...
- Page 119 Using the temperature bath, generate the third temperature point (35 °C). Once the readings are stable, enter the value of the standard and click the “Take Point” button. Model 9500 System Manual – Document #OM9500 - Edition 3.0 July 2022...
- Page 120 Using the temperature bath, generate the last temperature point (70 °C). Once the readings are stable, enter the value of the standard and click the “Take Point” button. Model 9500 System Manual – Document #OM9500 - Edition 3.0 July 2022...
- Page 121 The “Save Reports” button opens a file dialog to save the report. The default file location is …Documents\Thunder Scientific\9500 ControLog\Reports\. If the report is saved in an Excel format, then each probe appears in its own tab within the workbook. If the report is saved in a pdf or text-based format, then a file for each probe calibrated is created.
- Page 122 If the user selects to calculate new coefficients, they are calculated and displayed. ControLog issues a message telling the user that the coefficients cannot be calculated if a problem occurs during the calculation. Model 9500 System Manual – Document #OM9500 - Edition 3.0 July 2022...
- Page 123 Next, the user is asked to save the new coefficients to the system. Selecting “Yes” results in the current coefficient being over-written by the newly calculated coefficients. Next, the user can view and save the calibration coefficients report for each probe. Model 9500 System Manual – Document #OM9500 - Edition 3.0 July 2022...
- Page 124 You can also enter a standard or reference value before taking a point by clicking the cell in the “Standard” and “Value” columns. This is useful for seeing error values before a point is taken. Model 9500 System Manual – Document #OM9500 - Edition 3.0 July 2022...
- Page 125 Tip - Use the “Next” and “Back” buttons to navigate between taken points. You can clear and retake a point by simply clicking the “Clear Point” button and then repeating the process to retake the point. Model 9500 System Manual – Document #OM9500 - Edition 3.0 July 2022...
- Page 126 Using the temperature bath, generate the next temperature point (50 °C). Once the readings are stable, enter the value of the standard and click the “Take Point” button. Model 9500 System Manual – Document #OM9500 - Edition 3.0 July 2022...
- Page 127 Using the temperature bath, generate the next temperature point (30 °C). Once the readings are stable, enter the value of the standard and click the “Take Point” button. Model 9500 System Manual – Document #OM9500 - Edition 3.0 July 2022...
- Page 128 Using the temperature bath, generate the next temperature point (10 °C). Once the readings are stable, enter the value of the standard and click the “Take Point” button. Model 9500 System Manual – Document #OM9500 - Edition 3.0 July 2022...
- Page 129 The “Save Reports” button opens a file dialog to save the report. The default file location is …Documents\Thunder Scientific\9500 ControLog\Reports\. If the report is saved in an Excel format, then each probe appears in its own tab within the workbook. If the report is saved in a pdf or text-based format, then a file for each probe calibrated is created.
- Page 130 4. Reinstall countertop with seven socket head screws to hand tight only. 5. Refill bath fluid and purge bath inlet tube as per section 2.12.5 Temperature Bath Filling Procedure. 6. Replace all side panels. 7. Reconnect power. Model 9500 System Manual – Document #OM9500 - Edition 3.0 July 2022...
-
Page 131: Pressure Transducer Calibration
Remove the front and right-side panels to access system pressure transducers. • Using the appropriate tools, remove pressure transducers (locations circled below in red) and send them to a pressure calibration lab. Model 9500 System Manual – Document #OM9500 - Edition 3.0 July 2022... - Page 132 ControLog. If less than five coefficients are calculated, then enter zero for any coefficient that is not calculated. Refer to section 6.4 Viewing and Editing Calibration Coefficients Model 9500 System Manual – Document #OM9500 - Edition 3.0 July 2022...
-
Page 133: Internal Calibration Procedure
Chamber Transducer - Ambient to 23 psiA. Supply Transducer – 0 to 350 psiG. CAUTION! DO NOT ENABLE PRESSURE CONTROL WITH PRESSURE TRANSDUCERS DISCONNECTED FROM THE SYSTEM. Model 9500 System Manual – Document #OM9500 - Edition 3.0 July 2022... - Page 134 Select Generator Calibration from the Utilities menu tab to open the Calibration Wizard. Model 9500 System Manual – Document #OM9500 - Edition 3.0 July 2022...
- Page 135 After all “As Received” points have been taken, users are asked whether they want to calculate new calibration coefficients. Set the type of calibration to Pressure. Model 9500 System Manual – Document #OM9500 - Edition 3.0 July 2022...
- Page 136 ControLog automatically records the standard’s value during each calibration point. If the standard is not a connected device or you want to enter the standard’s value manually, do not select an item from the list. Model 9500 System Manual – Document #OM9500 - Edition 3.0 July 2022...
- Page 137 If the value of the item being calibrated is outside the window, then the item is considered out of tolerance. Model 9500 System Manual – Document #OM9500 - Edition 3.0 July 2022...
- Page 138 For example, if the data storage rate is every 30 seconds, a sample size of 1.5 minutes results in 3 points being used to calculate the standard deviation. Model 9500 System Manual – Document #OM9500 - Edition 3.0 July 2022...
- Page 139 There is no need for below ambient testing or calibration. Note - The specific points can be different from those listed above. Use best metrology practices when determining which points to take. Model 9500 System Manual – Document #OM9500 - Edition 3.0 July 2022...
- Page 140 Once the reading is stable, click the “Take Point” button. Once a point has been taken, the wizard automatically advances to the next point. Model 9500 System Manual – Document #OM9500 - Edition 3.0 July 2022...
- Page 141 Using the pressure standard, generate and measure the next pressure point (22.5 psi). Once the readings are stable, enter the value of the standard and click the “Take Point” button. Model 9500 System Manual – Document #OM9500 - Edition 3.0 July 2022...
- Page 142 Using the pressure standard, generate and measure the next pressure point (37.5 psi). Once the readings are stable, enter the value of the standard and click the “Take Point” button. Model 9500 System Manual – Document #OM9500 - Edition 3.0 July 2022...
- Page 143 ControLog advances to the “As Received” calibration report when all pressure points have been entered. The transducer appears in its own tab that contains the data for each calibration point, and the coefficients used when the points were taken. Model 9500 System Manual – Document #OM9500 - Edition 3.0 July 2022...
- Page 144 Next, the user is asked to save the new coefficients to the system. Selecting “Yes” results in the current coefficient being over-written by the newly calculated coefficients. Model 9500 System Manual – Document #OM9500 - Edition 3.0 July 2022...
- Page 145 Next, the user can view and save the calibration coefficients report for the transducer. Model 9500 System Manual – Document #OM9500 - Edition 3.0 July 2022...
- Page 146 ControLog asks for the value before taking the point. You can also enter a standard or reference value before taking a point by clicking the cell in the “Standard” and “Value” columns. This is useful for seeing error values before a point is taken. Model 9500 System Manual – Document #OM9500 - Edition 3.0 July 2022...
- Page 147 Tip - Use the “Next” and “Back” buttons to navigate between taken points. You can clear and retake a point by simply clicking the “Clear Point” button and then repeating the process to retake the point. Model 9500 System Manual – Document #OM9500 - Edition 3.0 July 2022...
- Page 148 Using the pressure standard, generate and measure the next pressure point (35 psi). Once the readings are stable, enter the value of the standard and click the “Take Point” button. Model 9500 System Manual – Document #OM9500 - Edition 3.0 July 2022...
- Page 149 Using the pressure standard, generate and measure the next pressure point (25 psi). Once the readings are stable, enter the value of the standard and click the “Take Point” button. Model 9500 System Manual – Document #OM9500 - Edition 3.0 July 2022...
- Page 150 Using the pressure standard, generate and measure the last pressure point (atmospheric pressure). Once the readings are stable, enter the value of the standard and click the “Take Point” button. Model 9500 System Manual – Document #OM9500 - Edition 3.0 July 2022...
- Page 151 The “Save Reports” button opens a file dialog to save the report. The default file location is …Documents\Thunder Scientific\9500 ControLog\Reports\. Repeat this same procedure for each transducer to calibrate them to their specific range. Model 9500 System Manual – Document #OM9500 - Edition 3.0 July 2022...
-
Page 152: Supply Pressure
For more details, refer to section 6.2.3 Internal Calibration Procedure. Note – The supply pressure transducer must be calibrated in gauge pressure. Model 9500 System Manual – Document #OM9500 - Edition 3.0 July 2022... -
Page 153: Mass Flow Meter Calibration
Once calibration has begun, the units should not be changed again until the calibration is complete. Select Generator Calibration from the Utilities menu tab to open the Calibration Wizard. Model 9500 System Manual – Document #OM9500 - Edition 3.0 July 2022... - Page 154 After all “As Received” points have been taken, users are asked whether they want to calculate new calibration coefficients. Set the type of calibration to Flow and select the Mass Flow Rate as the item to calibrate. Model 9500 System Manual – Document #OM9500 - Edition 3.0 July 2022...
- Page 155 Enter the Name and ID of the standard being used. This information is populated on the calibration report. Selecting “Next” without entering a Name results in ControLog giving the standard a generic name. Model 9500 System Manual – Document #OM9500 - Edition 3.0 July 2022...
- Page 156 An out-of-tolerance condition is indicated by a red circle with an exclamation point for the out-of- tolerance transducer in the Error column. Model 9500 System Manual – Document #OM9500 - Edition 3.0 July 2022...
- Page 157 0, 25, 50, 75, and 100 l/m • Note – The specific points can be different from those listed above. Use best metrology practices when determining which points to take. Model 9500 System Manual – Document #OM9500 - Edition 3.0 July 2022...
- Page 158 Once the reading is stable, click the “Take Point” button. Once a point has been taken, the wizard automatically advances to the next point. Model 9500 System Manual – Document #OM9500 - Edition 3.0 July 2022...
- Page 159 Tip – Use the “Next” and “Back” buttons to navigate between taken points. You can clear and retake a point by simply clicking the “Clear Point” button and then repeating the process to retake the point. Model 9500 System Manual – Document #OM9500 - Edition 3.0 July 2022...
- Page 160 Temperature setpoint to around 21 °C to 25 °C. Enter the next flow rate (25 l/m) in the Flow Setpoint “Value” cell. This starts the 9500, generating a 0 °C dew at the current temperature setpoint. Wait for the system to become stable at the 0 °C dew point.
- Page 161 Continue generating a 0 °C dew point but advance the flow rate to the next point (75 l/m). Using the flow standard, measure the point and once the readings are stable, enter the standard's value and click the “Take Point” button. Model 9500 System Manual – Document #OM9500 - Edition 3.0 July 2022...
- Page 162 ControLog advances to the “As Received” calibration report when all flow points have been entered. The flow meter appears in its own tab that contains the data for each calibration point, and the coefficients used when the points were taken. Model 9500 System Manual – Document #OM9500 - Edition 3.0 July 2022...
- Page 163 If the user selects to calculate new coefficients, they are calculated and displayed. ControLog issues a message telling the user that the coefficients cannot be calculated if a problem occurs during the calculation. Model 9500 System Manual – Document #OM9500 - Edition 3.0 July 2022...
- Page 164 Next, the user is asked to save the new coefficients to the system. Selecting “Yes” results in the current coefficient being over-written by the newly calculated coefficients. Model 9500 System Manual – Document #OM9500 - Edition 3.0 July 2022...
- Page 165 Next, the user can view and save the calibration coefficients report for the flow meter. Next, the user can complete the calibration or choose to take “As Left” points. Model 9500 System Manual – Document #OM9500 - Edition 3.0 July 2022...
- Page 166 Enter the first flow rate (100 l/m) in the Flow Setpoint “Value” cell to continue generating a 0 °C dew point. Using the flow standard, measure the point and once the readings are stable, enter the standard's value and click the “Take Point” button. Model 9500 System Manual – Document #OM9500 - Edition 3.0 July 2022...
- Page 167 Continue generating a 0 °C dew point but advance the flow rate to the next point (50.0 l/m). Using the flow standard, measure the point and once the readings are stable, enter the standard's value and click the “Take Point” button. Model 9500 System Manual – Document #OM9500 - Edition 3.0 July 2022...
- Page 168 Received” calibration report. The flow meter appears in its own tab that contains the data for each calibration point, and the coefficients used when the points were taken. Model 9500 System Manual – Document #OM9500 - Edition 3.0 July 2022...
- Page 169 The “Save Reports” button opens a file dialog to save the report. The default file location is …Documents\Thunder Scientific\9500 ControLog\Reports\. When finished, close the Mass Flow Calibration window by selecting “No” and then Finish. Model 9500 System Manual – Document #OM9500 - Edition 3.0 July 2022...
-
Page 170: Viewing And Editing Calibration Coefficients
Note – Editing calibration coefficients requires Manager Access Level or above (see section 4.1.6.8 Access Control for more information on changing Access Levels). Select Generator Calibration from the Utilities menu tab to open the Calibration Wizard. Select View or edit coefficients. Model 9500 System Manual – Document #OM9500 - Edition 3.0 July 2022... - Page 171 Select the type of calibration and the items for which you wish to view or edit coefficients. The calibration coefficients are then shown for the selected items. Model 9500 System Manual – Document #OM9500 - Edition 3.0 July 2022...
-
Page 172: Coefficient Calculator
To open the calculator, select the name of the item you want to calculate coefficients for, and then press the calculator icon in the lower left corner. Model 9500 System Manual – Document #OM9500 - Edition 3.0 July 2022... - Page 173 Note – The number of coefficients calculate will be directly proportional to the number of data points entered. Model 9500 System Manual – Document #OM9500 - Edition 3.0 July 2022...
- Page 174 Once satisfied with the calculated coefficient, press the "Back" button. The system will ask if you want to use the newly calculated coefficients. Selecting "Yes" will copy the new coefficients, overwriting the current ones. Choosing "No" will leave the current coefficients unchanged. Model 9500 System Manual – Document #OM9500 - Edition 3.0 July 2022...
- Page 175 Next, the user is asked to save the new coefficients to the system. Selecting “Yes” results in the current coefficient being over-written by the newly entered or calculated coefficients. Model 9500 System Manual – Document #OM9500 - Edition 3.0 July 2022...
- Page 176 The “Save Reports” button opens a file dialog to save the report. The default file location is …Documents\Thunder Scientific\9500 ControLog\Reports\. If the report is saved in an Excel format, then each probe or transduce appears in its own tab within the workbook. If the report is saved in a pdf or text- based format, then a file for each probe or transducer is created.
-
Page 177: Graphing
Each graph tab consists of a two-dimension plot across an X and Y-Axis. The graph can be customized to display different point symbols, various line colors, a legend, and a header. Model 9500 System Manual – Document #OM9500 - Edition 3.0 July 2022... -
Page 178: Creating A New Graph
“New” from the Home Menu Tab, Graph Menu Tab, or right-click any graph tab and select “New” from its context menu. A “New Graph Wizard” dialog appears. Model 9500 System Manual – Document #OM9500 - Edition 3.0 July 2022... - Page 179 The user can invert any selection by right-clicking. This highlights all items that are not – currently highlighted and removes the highlight from any items that are currently highlighted. Model 9500 System Manual – Document #OM9500 - Edition 3.0 July 2022...
-
Page 180: Line Properties
Line Properties define the color and point symbol for the selected line. Select the desired line from the selection box and set the Color, Symbol, whether to smooth the line or show data labels and how often to show them. Model 9500 System Manual – Document #OM9500 - Edition 3.0 July 2022... -
Page 181: Chart Properties
Selection Mode allows the user to highlight different lines within the graph. • Once complete, clicking the “Finish” button displays the new graph in the Data and Graph Tab Group. Model 9500 System Manual – Document #OM9500 - Edition 3.0 July 2022... -
Page 182: Customizing A Graph
Panning is useful when you have zoomed in on the graph and want to view different parts of the data without changing the scaling. Model 9500 System Manual – Document #OM9500 - Edition 3.0 July 2022... -
Page 183: Zoom
The portion of the graph within the drag box expands to fill the entire graph. The time and Y-axis limits update accordingly. Model 9500 System Manual – Document #OM9500 - Edition 3.0 July 2022... -
Page 184: Zoom Graph's X-Axis
X-axis (time axis) of interest is contained within the two vertical dashed lines. The portion contained within this region expands to fill the entire X-axis. The Y- axis remains unchanged. Model 9500 System Manual – Document #OM9500 - Edition 3.0 July 2022... -
Page 185: Zoom Graph's Y-Axis
The Scale Y-Axis command allows the user to scale the Y-axis. Dragging the cursor up scales the Y-Axis in (zooms Y-Axis in), and dragging the cursor down scales the Y-Axis out (zooms Y-Axis out). Model 9500 System Manual – Document #OM9500 - Edition 3.0 July 2022... -
Page 186: Graph Properties
Clicking the “Back” button moves back to the data selection page, where the user can select which device items they want to include in the graph. Model 9500 System Manual – Document #OM9500 - Edition 3.0 July 2022... - Page 187 The maximum, minimum, middle, and span values are interrelated, and changing any one – value may result in another value automatically changing to ensure all values mathematically equate. Model 9500 System Manual – Document #OM9500 - Edition 3.0 July 2022...
- Page 188 X-Axis maximum. The graph constantly expands as new data points are recorded. Once complete, clicking the “Finish” button displays the graph in the same tab with the new property settings. Model 9500 System Manual – Document #OM9500 - Edition 3.0 July 2022...
-
Page 189: Saving A Graph
W3C Portable Network Graphics (*.png) • Scalable Vector Graphics (*.svg) To perform the save, select “Save” from the graph menu tab or right-click a graph and select “Save.” Model 9500 System Manual – Document #OM9500 - Edition 3.0 July 2022... - Page 190 Using the “Save” dialog, select the location, name, and graphic type you want to save the graph as. Note ControLog defaults the file name to the name of the graph tab. – Model 9500 System Manual – Document #OM9500 - Edition 3.0 July 2022...
-
Page 191: Data And Data Summary
The data tab data is always stored in SI units regardless of the current system unit – settings. The only exception is for Data Summary tabs which are created using currently selected system units but will not update on further unit changes. Model 9500 System Manual – Document #OM9500 - Edition 3.0 July 2022... - Page 192 The user can navigate through the data using the scroll bars. Model 9500 System Manual – Document #OM9500 - Edition 3.0 July 2022...
- Page 193 The user can also select specific data by clicking and dragging the desired cells. Model 9500 System Manual – Document #OM9500 - Edition 3.0 July 2022...
- Page 194 The user can copy selected data to the clipboard by selecting “Copy Selection” from the context menu or using the keyboard shortcut combination of Crtl+C. Model 9500 System Manual – Document #OM9500 - Edition 3.0 July 2022...
-
Page 195: Device Data Tabs
Data is only recorded while the 9500 is in generate mode. Data is stored at the generate – rate whenever a device is connected, and the 9500 is not connected. This allows the user to use ControLog as a logging application for any device they connect without needing a Model 9500 Humidity generator (only when using the Desktop version of ControLog). -
Page 196: File Data Tabs
Select “Open>Data File” from the file menu to open a data file. Note – ControLog has a limit of five file data tabs opened at any given time. Model 9500 System Manual – Document #OM9500 - Edition 3.0 July 2022... - Page 197 Using the “Load Data File” dialog, browse and select the data file you want to open. Model 9500 System Manual – Document #OM9500 - Edition 3.0 July 2022...
- Page 198 Once the load is complete, the loaded file data tab is displayed. Model 9500 System Manual – Document #OM9500 - Edition 3.0 July 2022...
-
Page 199: Data Summary Tabs
Data Summary tabs are created using the currently selected system units instead of SI – units. ControLog has a limit of five data summary tabs opened at any given time. Model 9500 System Manual – Document #OM9500 - Edition 3.0 July 2022... -
Page 200: Creating A Data Summary
The next step in the data summary creation process is to select the standard. The standard is used as the reference to calculate differences between the device data items if the user chooses to do so. Model 9500 System Manual – Document #OM9500 - Edition 3.0 July 2022... - Page 201 Only one device can be selected as the standard for the summary. – To remove an item as the selected standard, select the desired item from the right-hand side and click the “Remove” button. Model 9500 System Manual – Document #OM9500 - Edition 3.0 July 2022...
- Page 202 To remove an item from the list of devices, select the desired item or items from the right-hand side and click the “Remove” button. Model 9500 System Manual – Document #OM9500 - Edition 3.0 July 2022...
- Page 203 To remove an item or items from the list of data items, select the desired item or items from the right- hand side and click the “Remove” button. Model 9500 System Manual – Document #OM9500 - Edition 3.0 July 2022...
- Page 204 Select the desired device data item and the standard data item to pair a data item. Select “Add” to create the pairing. Model 9500 System Manual – Document #OM9500 - Edition 3.0 July 2022...
- Page 205 It is also recommended to select a small interval (1 second) to ensure all data is encompassed because manual devices often have irregular time intervals between points. Model 9500 System Manual – Document #OM9500 - Edition 3.0 July 2022...
- Page 206 Upon clicking the “Finish” button, ControLog opens a new data tab with the newly created data summary. Model 9500 System Manual – Document #OM9500 - Edition 3.0 July 2022...
-
Page 207: Recorded Data Points Tab
Note Each entry point in the Recorded Data Points tab is created using the currently selected – system units. Model 9500 System Manual – Document #OM9500 - Edition 3.0 July 2022... -
Page 208: How To Record A Data Point
The first step in recording data points is configuring what and how to take each point. Use the Settings menu to open the Record Data Point Wizard to define the data points to be taken. A “Record Data Point Wizard” dialog appears. Model 9500 System Manual – Document #OM9500 - Edition 3.0 July 2022... - Page 209 The user can invert any selection by right-clicking. This highlights all items that are not – currently highlighted and removes the highlight from any items that are currently highlighted. Model 9500 System Manual – Document #OM9500 - Edition 3.0 July 2022...
- Page 210 The prior points are determined from the Data Tab for each recorded point. ControLog includes the number of prior (last) points directly using the entries in the Data Tab for the given point from when the data point was recorded. Model 9500 System Manual – Document #OM9500 - Edition 3.0 July 2022...
- Page 211 NOT taken regardless of the “Automatically with each profile point” setting selection. • Automatically after manual device entry indicates that a point is taken automatically when the user completes a manual device entry. Model 9500 System Manual – Document #OM9500 - Edition 3.0 July 2022...
- Page 212 Once complete, clicking the “Finish” closes the wizard and saves the user selection for recording data points. Model 9500 System Manual – Document #OM9500 - Edition 3.0 July 2022...
-
Page 213: Auto Profiling
Generate mode of operation. The Profile Tab is used to create and modify auto profiles. The tab consists of drop drowns, entry fields, and a data grid. Model 9500 System Manual – Document #OM9500 - Edition 3.0 July 2022... - Page 214 The scrollbar at the bottom can be used to scroll to the remaining profile fields. Model 9500 System Manual – Document #OM9500 - Edition 3.0 July 2022...
-
Page 215: Creating A New Profile
ROFILE A profile is a list of humidity, temperature, pressure, flow, and time parameters used during the automated control of the Model 9500 Humidity generator. The profile essentially programs the computer/controller operations. Open a new profile tab by selecting “New” from the profile menu. - Page 216 The first column, next to the point numbers, is the Generator Mode. The Generator Mode defines the run mode in which the 9500 operates for this profile point. The Generator Modes are the same run modes available during manual operation.
- Page 217 Next, select the known %RH and enter the desired percent relative humidity of 50. Notice that ControLog automatically entered the other known values based on the already entered profile values. Model 9500 System Manual – Document #OM9500 - Edition 3.0 July 2022...
- Page 218 The Mass Flow Rate column contains the air flow values at which the generator operates. Although not affecting the generated value of humidity, the flow rate does affect the air exchange rate, equilibration time of the instruments under test, and permeation. Model 9500 System Manual – Document #OM9500 - Edition 3.0 July 2022...
- Page 219 Ramp Time is the desired amount of time the 9500 should take to transition from one profile test point to another. Setting a ramp time of zero instructs the 9500 to make the transition as quickly as possible. Zero is the setting used for most profiles.
- Page 220 If Assurance is set to “Yes,” a small “Add” button appears on the right-hand side. The “Add” button opens the “Assurance Conditions” dialog for the point. The dialog allows the user to enter various assurance conditions for the profile point. Model 9500 System Manual – Document #OM9500 - Edition 3.0 July 2022...
- Page 221 Note Tolerances can only be entered for 9500 setpoints. The field is grayed out for all other – non-9500 setpoint device items. This is because ControLog can only assure a tolerance for an item that it can directly control.
- Page 222 Update button. To delete an assurance condition, select the desired condition from the list at the bottom and select the Delete button. Once all assurance conditions have been completed, select the “Ok” button to close the dialog. Model 9500 System Manual – Document #OM9500 - Edition 3.0 July 2022...
- Page 223 New points can be inserted between existing points by long pressing or right-clicking and selecting “Insert Point” from the context menu. ControLog inserts a new point at the selected location and automatically predicts the values. Model 9500 System Manual – Document #OM9500 - Edition 3.0 July 2022...
- Page 224 Existing points can also be deleted by selecting the desired point and then by long pressing or right- clicking and selecting “Delete Point” from the context menu. Profile points that cause operational issues for the 9500 are automatically flagged by ControLog and are indicated by a red circle with an exclamation point...
-
Page 225: Saving A Profile
The Profile tab can be saved to a file for future recall. ControLog Auto Profiles are saved in XML format with a *.profile extension. To perform the save, select “Save” from the main menu or right-click a profile tab and select “Save.” Model 9500 System Manual – Document #OM9500 - Edition 3.0 July 2022... - Page 226 Using the “Save Profile” dialog, select the location and name you want to save the profile as. Model 9500 System Manual – Document #OM9500 - Edition 3.0 July 2022...
-
Page 227: Opening A Profile
9.3 O PENING A ROFILE Profiles can be loaded from previously saved profile files. Select “Open” then “Profile” from the File menu to open a profile file. Model 9500 System Manual – Document #OM9500 - Edition 3.0 July 2022... - Page 228 Using the “Open Profile” dialog, browse and select the profile file you want to open. Once the load is complete, the profile tab is displayed with the loaded profile points. Model 9500 System Manual – Document #OM9500 - Edition 3.0 July 2022...
-
Page 229: Running An Auto Profile
To run an auto profile, select “Run Auto Profile” from the main menu or right-click a profile tab and select “Run Auto Profile.” Note Manual setpoint and mode changes are not allowed while operating the system in the – Auto Profile mode. Model 9500 System Manual – Document #OM9500 - Edition 3.0 July 2022... - Page 230 RUNNING A PROFILE WITH ERRORS MAY CAUSE ADVERSE BEHAVIOR DURING THE PROFILE RUN. THE USER IS STRONGLY ENCOURAGED TO ADDRESS AND FIX ALL PROFILE ISSUES BEFORE ATTEMPTING TO RUN THE PROFILE. Model 9500 System Manual – Document #OM9500 - Edition 3.0 July 2022...
-
Page 231: Understanding Profile Phases
The Assurance Phase forces the system to wait until measured parameters, and setpoint values are within a specified tolerance and/or stability before the computer starts the Soak Phase. Model 9500 System Manual – Document #OM9500 - Edition 3.0 July 2022... - Page 232 During the assurance phase, assurance conditions that have not been met are displayed with a yellow footer block for Setpoint Tile and a yellow header block for Value Tile on the parameter tab of the device containing the condition. Model 9500 System Manual – Document #OM9500 - Edition 3.0 July 2022...
- Page 233 Note The assurance phase is active for a minimum of 30 seconds. This delay allows the 9500 to – calculate setpoints before ControLog begins to assure each condition.
-
Page 234: Manual Override Of Profile
While in a hold mode, the system is prevented from completing a point's ramp, assurance, or soak phases. Model 9500 System Manual – Document #OM9500 - Edition 3.0 July 2022... - Page 235 Soak, or Soak to proceed to the Ramp of the next profile point. This allows for early manual termination of any phase within a profile point. Model 9500 System Manual – Document #OM9500 - Edition 3.0 July 2022...
- Page 236 Saturation Pressure, Saturation Temperature, and Flow. Another way to exit the Auto Profile is to switch from Auto Profile to Generate or Shutdown. Model 9500 System Manual – Document #OM9500 - Edition 3.0 July 2022...
-
Page 237: Connections
It is always recommended to have the manufacturer’s documentation for the connected – device while creating the new connection. It is also recommended to use a terminal-based application to test the various commands before creating a new connection. Model 9500 System Manual – Document #OM9500 - Edition 3.0 July 2022... -
Page 238: Serial Connection
The system supports both a “request to receive” type of communication and a “receive only” type of communication. NOTE: MOXA® line of USB to serial adapters are pre-configured to work with the 9500. Contact Thunder Scientific support for more information. Refer to section 2.4 Technical Support. - Page 239 These commands are only required if you need to send special commands to configure the device before data request and response commands are processed. Model 9500 System Manual – Document #OM9500 - Edition 3.0 July 2022...
- Page 240 The terminal emulator program can aid the user in determining the correct format of a command or the format of a response with a connected device. Model 9500 System Manual – Document #OM9500 - Edition 3.0 July 2022...
- Page 241 Select whether a command needs to be sent to request a response. If the device requires a command to be sent to receive a response, then select “Yes.” If the device automatically outputs data without any request, select “No.” Model 9500 System Manual – Document #OM9500 - Edition 3.0 July 2022...
- Page 242 The terminal emulator program can aid the user in determining the correct format of a command or the format of a response with a connected device. Model 9500 System Manual – Document #OM9500 - Edition 3.0 July 2022...
- Page 243 Select whether the response has a delimiter that separates each data item. For example, if the response contains Dew Point, Frost Point, and Pressure with a comma between each data item, then each item is separated by a comma delimiter. Model 9500 System Manual – Document #OM9500 - Edition 3.0 July 2022...
- Page 244 ASCII character. This dialog repeats for each data item in the response. Note The syntax cannot contain a Flag and a Numeric syntax definition. If the user requires – both, create another data item to define them separately. Model 9500 System Manual – Document #OM9500 - Edition 3.0 July 2022...
- Page 245 It is important to have sufficient numeric definition to ensure all possible numeric – responses are covered, primarily when a device responds with scientific notation or varying precession. Model 9500 System Manual – Document #OM9500 - Edition 3.0 July 2022...
- Page 246 -100 and 1 corresponds to 100. The user can then enter these scaling values, and ControLog automatically applies the scaling to the data item whenever it is displayed or logged. Model 9500 System Manual – Document #OM9500 - Edition 3.0 July 2022...
- Page 247 If “None” is selected, then ControLog treats the data item as a simple number and displays and records the value exactly as it is received. Model 9500 System Manual – Document #OM9500 - Edition 3.0 July 2022...
- Page 248 The newly calculated %RH has the same name as the specified Data Item Name but is preceded by “%RH@.” In the below example, the calculated %RH appears as “%RH@Data Point.” Model 9500 System Manual – Document #OM9500 - Edition 3.0 July 2022...
- Page 249 Enter the End of Transmit (EOT) character sent after the response. This is the ASCII character that is sent at the end of transmission of the response. Refer to the legend to enter special characters such as carriage returns and/or line feeds. Model 9500 System Manual – Document #OM9500 - Edition 3.0 July 2022...
- Page 250 Next, the user can select whether to connect to the device or exit without connecting. Note The user can connect anytime by loading the device from the Connections menu. – Model 9500 System Manual – Document #OM9500 - Edition 3.0 July 2022...
- Page 251 Select the communication port that the device is connected to and select the port settings for the device. CAUTION! INCORRECT SETTINGS PROHIBIT COMMUNICATION. REFER TO THE DEVICE MANUFACTURER’S DOCUMENTATION TO VERIFY ALL DEVICE PORT SETTINGS. Model 9500 System Manual – Document #OM9500 - Edition 3.0 July 2022...
- Page 252 NOT REPLY WITHIN THE DESIRED ABOUT OF TIME. Select “Show Interface Console” to automatically open a Device Interface Console tab once communication has been established with the device. Model 9500 System Manual – Document #OM9500 - Edition 3.0 July 2022...
-
Page 253: Serial Connection Example 1
We will request the Frost Point Temperature and Atmospheric Pressure from the mirror as data items. Start by selecting “New Device” from the Home menu tab. Select “Serial” as the type of device connection. Model 9500 System Manual – Document #OM9500 - Edition 3.0 July 2022... - Page 254 Enter “373 Dew Point Mirror” as the name for the device. For the 373, we do not need to send any setup commands. Model 9500 System Manual – Document #OM9500 - Edition 3.0 July 2022...
- Page 255 The 373 sends two responses: one with the requested Frost Point value and the other with the requested Atmospheric Pressure value. The 373 requires a request command to be sent to receive either the Frost Point value or the Atmospheric Pressure value. Model 9500 System Manual – Document #OM9500 - Edition 3.0 July 2022...
- Page 256 The documentation also states that the command must be terminated with a carriage return or a carriage return line feed combination. The 373 responds to the frost point command with a single numeric value; therefore, no delimiter is used. Model 9500 System Manual – Document #OM9500 - Edition 3.0 July 2022...
- Page 257 The response from the frost point command only contains a single numeric value. Model 9500 System Manual – Document #OM9500 - Edition 3.0 July 2022...
- Page 258 373. The response value is the actual value, so there is no need to define any type of scaling. According to the 373 documentation, each response is terminated with a carriage return and line feed. Model 9500 System Manual – Document #OM9500 - Edition 3.0 July 2022...
- Page 259 Next, we define the command for the second response. Referring to the 373 documentation, we enter the command for atmospheric pressure. Again, the command must be terminated with a carriage return or carriage return line feed combination. Model 9500 System Manual – Document #OM9500 - Edition 3.0 July 2022...
- Page 260 The 373 responds to the atmospheric pressure command with a single numeric value; therefore, no delimiter is used. The response from the atmospheric pressure command only contains a single numeric value. Model 9500 System Manual – Document #OM9500 - Edition 3.0 July 2022...
- Page 261 Unit was defined as a pressure in Pascal. The response value is the actual value, so there is no need to define any scaling. The response is terminated with a carriage return and line feed. Model 9500 System Manual – Document #OM9500 - Edition 3.0 July 2022...
- Page 262 Save the newly created device to a file so that it can be recalled at a later time. Select to connect to the device now. Model 9500 System Manual – Document #OM9500 - Edition 3.0 July 2022...
- Page 263 Select the port to which the 373 is connected. Notice that ControLog indicates which ports are in use. Refer to the 373 documentation for specific port settings: The default access interval of 1.5 seconds is entered. Model 9500 System Manual – Document #OM9500 - Edition 3.0 July 2022...
- Page 264 Note that the parameter and data tab have the two data items we defined. Notice that since we defined which unit the data items were received in, ControLog can convert the values into the selected units for easy reading. Model 9500 System Manual – Document #OM9500 - Edition 3.0 July 2022...
-
Page 265: Serial Connection Example 2
DP-30 does not require any request to receive data. Instead, it constantly outputs three data messages at a periodic rate. Start by selecting “New” from the Connections menu. Select “Serial” as the type of device connection. Model 9500 System Manual – Document #OM9500 - Edition 3.0 July 2022... - Page 266 Enter “DP 30 with Options” as the name for the device. For the DP-30, we do not need to send any setup commands. Model 9500 System Manual – Document #OM9500 - Edition 3.0 July 2022...
- Page 267 Dry Temperature value, and one with the Pressure value. The DP-30 does not require any command to be sent to receive a response. The DP-30 automatically transmits the messages. Model 9500 System Manual – Document #OM9500 - Edition 3.0 July 2022...
- Page 268 For the first message, we enter the response identification of the Dew Point Temperature message. The DP-30 Dew Point Temperature message is of a fixed format and does not use any delimiter. Model 9500 System Manual – Document #OM9500 - Edition 3.0 July 2022...
- Page 269 Next, we define these flag definitions and give them a simple “Yes” or “No” description to quickly allow the user to determine their state in the parameter tab. Model 9500 System Manual – Document #OM9500 - Edition 3.0 July 2022...
- Page 270 “S” indicating it is running. We again define these flag definitions and give them a simple “Yes” or “No” description to allow the user to determine the state in the parameter tab quickly. Model 9500 System Manual – Document #OM9500 - Edition 3.0 July 2022...
- Page 271 “S” indicating it is in standby. We again define these flag definitions and give them a simple “Yes” or “No” description to allow the user to determine the state in the parameter tab quickly. Model 9500 System Manual – Document #OM9500 - Edition 3.0 July 2022...
- Page 272 This syntax closely resembles the syntax defined in the DP-30 documentation for the dew point temperature message. The Green portion of the syntax is the current data item’s syntax within the response message. Model 9500 System Manual – Document #OM9500 - Edition 3.0 July 2022...
- Page 273 The Dew Point Temperature message is terminated with a carriage return. Next, we define the response identification for the second message. Referring to the DP-30 documentation, we enter the identification for the Dry Temperature message. Model 9500 System Manual – Document #OM9500 - Edition 3.0 July 2022...
- Page 274 The DP-30 Dry Temperature message is of a fixed format and does not use any delimiter. The Dry Temperature message contains only one numeric value; therefore, there is only one data item for this response. Model 9500 System Manual – Document #OM9500 - Edition 3.0 July 2022...
- Page 275 We define the numeric syntax exactly as the DP-30 documentation specifies. Again, the response value is the actual value, so there is no need to define any type of scaling. The Dry Temperature message is terminated with a carriage return. Model 9500 System Manual – Document #OM9500 - Edition 3.0 July 2022...
- Page 276 We now define the response identification for the third and last message. Referring to the DP-30 documentation, we enter the identification for the Pressure message. The DP-30 Pressure message is of a fixed format and does not use any delimiter. Model 9500 System Manual – Document #OM9500 - Edition 3.0 July 2022...
- Page 277 The Pressure message contains only one numeric value; therefore, there is only one data item for this response. Model 9500 System Manual – Document #OM9500 - Edition 3.0 July 2022...
- Page 278 Again, the response value is the actual value, so there is no need to define any type of scaling. The Pressure message is terminated with a carriage return. Model 9500 System Manual – Document #OM9500 - Edition 3.0 July 2022...
- Page 279 Save the newly created device to a file so that it can be recalled at a later time. Select to connect to the device now. Model 9500 System Manual – Document #OM9500 - Edition 3.0 July 2022...
- Page 280 Select the port the DP-30 is connected to. Notice that ControLog indicates which ports are in use. Refer to the DP-30 documentation for the RS-232 port settings: Use the default access rate of 1.5 seconds. Model 9500 System Manual – Document #OM9500 - Edition 3.0 July 2022...
- Page 281 Once communication is successfully established with the DP-30, a new parameter tab and data tab are created. Notice that ControLog automatically translates the ASCII flags based on the definitions described when creating the data items for the connection. Model 9500 System Manual – Document #OM9500 - Edition 3.0 July 2022...
-
Page 282: Analog Connection
Select “New” from the Connections menu to create a new analog connection. This opens a “Connection Wizard” dialog that steps the user through the connection definition process. Select “Analog” as the type of connection the device uses. Model 9500 System Manual – Document #OM9500 - Edition 3.0 July 2022... - Page 283 Enter the number of analog signals you want to monitor. This is the combined number of analog signals from each device you wish to monitor. Each analog signal connected to the 34970A represents a single data item parameter. Model 9500 System Manual – Document #OM9500 - Edition 3.0 July 2022...
- Page 284 This dialog repeats for each monitored signal. The function defines what type of analog signal the device uses. Model 9500 System Manual – Document #OM9500 - Edition 3.0 July 2022...
- Page 285 The range specifies the range in which the analog signal operates within. The available range selection changes automatically to reflect what is available for the selected function. For example, the Resistance function ranges from 100 Ohms to 100 Mega Ohms. Model 9500 System Manual – Document #OM9500 - Edition 3.0 July 2022...
- Page 286 If “None” is selected, then ControLog treats the data item as a simple number and displays and records the value exactly as it is received. Model 9500 System Manual – Document #OM9500 - Edition 3.0 July 2022...
- Page 287 Each point definition consists of a signal value and a data value. The signal value represents the “raw” analog signal. The data value represents the actual value or real- world value at the given signal value. Model 9500 System Manual – Document #OM9500 - Edition 3.0 July 2022...
- Page 288 All device connection files are saved in XML format with a (*.device) extension. Model 9500 System Manual – Document #OM9500 - Edition 3.0 July 2022...
- Page 289 Next, the user can select whether to connect to the device or exit without connecting. Note The user can connect anytime by loading the device from the Connections menu. – Model 9500 System Manual – Document #OM9500 - Edition 3.0 July 2022...
- Page 290 ControLog defaults to the default port settings for the Keysight Technologies® 34970A – Data Acquisition/Switch Unit. Refer to the Keysight Technologies® documentation for instructions on viewing or setting the Data Acquisition RS-232 settings. Model 9500 System Manual – Document #OM9500 - Edition 3.0 July 2022...
- Page 291 34970A to complete its scan list within the specified interval. As a rule of thumb, use 1.5 seconds per every 10 signals connected to the Data Acquisition Unit with a minimum access interval of 1.5 seconds. Model 9500 System Manual – Document #OM9500 - Edition 3.0 July 2022...
-
Page 292: Analog Connection Example
+10V input signal scaled to a Dew Point/Frost Point Temperature, a Temperature Thermistor, and a 4- wire Temperature RTD. Start by selecting “New” from the Connections menu. Select “Analog” as the type of device connection. Model 9500 System Manual – Document #OM9500 - Edition 3.0 July 2022... - Page 293 Enter “Analog Dew Point Device” as the name for the device. In this example, we have three signals that we want to monitor: a voltage, a thermistor, and an RTD. Model 9500 System Manual – Document #OM9500 - Edition 3.0 July 2022...
- Page 294 Dew Point temperature of +100 °C. By entering scaling, ControLog automatically scales the signal for display in the parameter tab and when recorded in the data tab. Model 9500 System Manual – Document #OM9500 - Edition 3.0 July 2022...
- Page 295 No scaling is required for this data item since the signal value is the actual temperature value. Model 9500 System Manual – Document #OM9500 - Edition 3.0 July 2022...
- Page 296 10 to provide the source and sense connections for an RTD. Given this, the RTD in this example occupies both channels 110 and 120 to complete its 4-wire connection. Model 9500 System Manual – Document #OM9500 - Edition 3.0 July 2022...
- Page 297 No scaling is required for this data item since the signal value is the actual temperature value. Save the newly created device to a file so it can be recalled later. Model 9500 System Manual – Document #OM9500 - Edition 3.0 July 2022...
- Page 298 Select to connect to the device now. Select the communication port that the Keysight Technologies® 34970A Data Acquisition/Switch Unit is connected to and select the port settings for the 34970A. Model 9500 System Manual – Document #OM9500 - Edition 3.0 July 2022...
- Page 299 10 signals, so that we can start with the minimum access interval of 1.5 seconds. Once completed, ControLog attempts to establish communication with the Keysight Technologies® 34970A Data Acquisition/Switch Unit. Model 9500 System Manual – Document #OM9500 - Edition 3.0 July 2022...
- Page 300 Once communication is successfully established with the 34970A, a new parameter tab and data tab are created. Notice that ControLog automatically scales the voltage signal based on the definitions described when defining the data item. Model 9500 System Manual – Document #OM9500 - Edition 3.0 July 2022...
-
Page 301: Manual Connection
Select “New” from the Connections menu to create a manual connection. This opens a “Connection Wizard” dialog that steps the user through the connection definition process. Select “Manual” as the type of connection the device uses. Model 9500 System Manual – Document #OM9500 - Edition 3.0 July 2022... - Page 302 Enter a unique name for the device. Select the number of manual data entries. Model 9500 System Manual – Document #OM9500 - Edition 3.0 July 2022...
- Page 303 Celsius, then the user enters manual values in degrees Celsius. If the system units are set to degrees Fahrenheit, the user must enter manual values in degrees Fahrenheit. Model 9500 System Manual – Document #OM9500 - Edition 3.0 July 2022...
- Page 304 Last, the user selects whether to connect to the device or exit without connecting. Note – The user can connect anytime by loading the device from the Connections menu. Model 9500 System Manual – Document #OM9500 - Edition 3.0 July 2022...
-
Page 305: Manual Connection Example
This example demonstrates the creation of a Manual connection that consists of three data items: Frost Point, Test Pressure, and Test Temperature. Start by selecting “New” from the Connections menu. Select “Manual” as the type of connection the device uses. Model 9500 System Manual – Document #OM9500 - Edition 3.0 July 2022... - Page 306 Enter “Manual Device” as the name for the device. We have three data items that we want to enter for this device manually. Model 9500 System Manual – Document #OM9500 - Edition 3.0 July 2022...
- Page 307 The first point is Frost Point, which is a temperature unit type. The second point is Test Pressure, which is a pressure unit type. Model 9500 System Manual – Document #OM9500 - Edition 3.0 July 2022...
- Page 308 The third point is Test Temperature, a temperature unit type. Save the newly created device to a file so that it can be recalled at a later time. Model 9500 System Manual – Document #OM9500 - Edition 3.0 July 2022...
- Page 309 Select to connect to the device now. Model 9500 System Manual – Document #OM9500 - Edition 3.0 July 2022...
- Page 310 Once completed, a new parameter tab and data tab are created. Model 9500 System Manual – Document #OM9500 - Edition 3.0 July 2022...
- Page 311 Note – The manual entries are not recorded in the data tab until all data item values have been manually entered. Enter the manual value into the Manual Entry box and select Ok. Model 9500 System Manual – Document #OM9500 - Edition 3.0 July 2022...
- Page 312 The manual entry is displayed in the value tile of the parameter tab. Repeat the process for the remaining data items. Model 9500 System Manual – Document #OM9500 - Edition 3.0 July 2022...
- Page 313 Once all data items have been manually entered, ControLog records the values and clears out the value tiles in preparation for the next set of manual entries. Model 9500 System Manual – Document #OM9500 - Edition 3.0 July 2022...
-
Page 314: Opening A Device Connection
EVICE ONNECTION Saved device connections can be loaded from previously saved device configuration files. To perform the open, select “Open” from the file menu and select Device Configuration. Model 9500 System Manual – Document #OM9500 - Edition 3.0 July 2022... -
Page 315: Data Backup
The default location for user data is under the following directory: …Documents\Thunder Scientific\ Note The user has complete control of where to save data, and the above directory may not be – their chosen location. Model 9500 System Manual – Document #OM9500 - Edition 3.0 July 2022... -
Page 316: System
The visual component provides the operator with a rich data experience, including real-time data values, graphs, uncertainty, and status. Model 9500 System Manual – Document #OM9500 - Edition 3.0 July 2022... -
Page 317: Controlog® Software
The HMI computer runs the ControLog and HumiCalc with Uncertainty software applications. 12.1.3 ControLog® Software ControLog is an embedded software application that fully automates the operation of the Model 9500 Humidity Generation System and allows various device connections through several different interfaces. -
Page 318: Humicalc With Uncertainty® Software
HumiCalc with Uncertainty can easily calculate complex humidity uncertainties. This allows the software to calculate real-time uncertainty for the 9500 Humidity Generation System. Key features of the HumiCalc with Uncertainty software are: Highly accurate formulas that replace charts and tables: •... -
Page 319: Electrical System
The Air/Gas Supply ON/OFF Solenoid Valves (SOL3 & SOL14), when activated, allow supply pressure into the system. The 9500 supports two supply pressure inputs for when a pressure booster is needed to achieve high pressure. The Low-Pressure Supply Solenoid Valve (SOL3), when activated, allows the low range supply pressure (<325 psiG) directly from the air supply source into the system. - Page 320 The Bath Holding Tank Fill Solenoid Valve (SOL11), when activated, allows distilled water to flow from the fill port near the countertop's middle back to the bath holding tank. Model 9500 System Manual – Document #OM9500 - Edition 3.0 July 2022...
-
Page 321: Pneumatic System
NEUMATIC YSTEM The pneumatic system of the Model 9500 is designed as an open-loop two-pressure system. Clean instrument quality air enters the generating system at the pressure inlet and is admitted through the air supply ON/OFF solenoid valve (SOL3 & SOL14) and air supply filter (FLT) to the pressure regulator (REG). -
Page 322: Pressure Measurement
T8 = REFRIGERATION HIGH-SIDE 12.3.1.1 Air / Gas Supply Pressure Transducer The Air/Gas Supply Transducer (T1) is powered by +15 VDC from the ±15 VDC power supply (DC2) and Model 9500 System Manual – Document #OM9500 - Edition 3.0 July 2022... -
Page 323: Mass Flow Rate Measurement
The air exits the tubing coil and is directed onto the water surface, causing a circular flow pattern within the pre-saturator Model 9500 System Manual – Document #OM9500 - Edition 3.0 July 2022... -
Page 324: Reservoir
The operator is notified with a low reservoir warning if a low-level water condition is sensed during the humidity generator's operation. RESERVOIR FILL LIQUID LEVEL PROBE RESERVOIR BATH PRESSURE BLEED PRESAT FILL WATER LEVEL PRESATURATOR Model 9500 System Manual – Document #OM9500 - Edition 3.0 July 2022... -
Page 325: Saturators
Model 9500 System Manual – Document #OM9500 - Edition 3.0 July 2022... -
Page 326: Chamber Pressure Control Valve
PULSES=1 (Refer to Series MP Electronic Metering Pump – Installation Operation Maintenance Manual). This means the pump strokes once for each pulse sent by the 9500. The pump stroke length setting is 100% (indicated by the center dial setting). Stroke length adjustments must only be made while the pump is running and the solenoid is activated. -
Page 327: Fluid System
Water Reservoir. The other analog liquid level is used to measure the Holding Tank. The three liquid level indicators are used to determine the indication of water for the pre-saturator full, upper bath level, and lower bath level. Model 9500 System Manual – Document #OM9500 - Edition 3.0 July 2022... -
Page 328: Fluid Flow Measurement
FS1 = FLUID FLOW 12.4.3 Temperature Controlled Bath The Model 9500 humidity generating system incorporates a computer-controlled temperature bath, utilizing distilled water as the heat transfer medium. The test chamber, saturators, heat exchanger, and connecting tubing are immersed in approximately 20 gallons of distilled water circulated at 50 gallons per minute by a magnetically coupled centrifugal pump (PV1). -
Page 329: Temperature Measurement
RTD1 = BATH FLUID RTD2 = TEST CHAMBER RTD3 = SATURATOR RTD4 = PRE-SATURATOR RTD5 = EXPANSION VALVE RTD6 = CABINET Model 9500 System Manual – Document #OM9500 - Edition 3.0 July 2022... -
Page 330: Maintenance
13 M AINTENANCE The Model 9500 Humidity generator requires little periodic maintenance. Following the proper operating procedures as given in this manual will help assure trouble-free operation of this system. CAUTION! ALWAYS PROPERLY SHUTDOWN THE TOUCH PANEL PC VIA WINDOWS BEFORE SWITCHING OFF THE GENERATORS POWER. -
Page 331: Pressure Regulator
2) Locate the LL1 housing and remove the black housing cover. 3) Press the main system “POWER” switch to ON. 4) Allow the touch panel PC to boot and ControLog to connect to the generator. Model 9500 System Manual – Document #OM9500 - Edition 3.0 July 2022... - Page 332 Turn off the system from the File menu, and switch the main system “POWER” to OFF. 12) Replace LL1 housing cover. 13) Replace the front console access panel. Model 9500 System Manual – Document #OM9500 - Edition 3.0 July 2022...
-
Page 333: Holding Tank Liquid Level Adjustment
9) Remove the level probe cable at the probe and attach a .001µF ceramic capacitor between it and the chassis ground. Adjust the P1 adjustable potentiometer for an output of 5.00 (±0.01) volts displayed in the LL6 expanded parameter. Model 9500 System Manual – Document #OM9500 - Edition 3.0 July 2022... -
Page 334: Bath Liquid Level Checkout
Catastrophic errors will result in an automatic shutdown. While it is not necessary to understand the error message, it is vital to write down the error message exactly as it appears when contacting Thunder Scientific for technical support. 13.8.1 Bath Temperature at Minimum Limit This error indicates that the bath fluid temperature probe is reading below its minimum value for a specific amount of time. -
Page 335: Bath Temperature Over Range Or At Maximum Limit
Model 9500 System Manual – Document #OM9500 - Edition 3.0 July 2022... - Page 336 This error indicates that the flow meter T5 is reading below its minimum value for a specific time. A wet flow meter is the most common cause of this error. Other causes include a failed flow meter or incorrect calibration. Model 9500 System Manual – Document #OM9500 - Edition 3.0 July 2022...
- Page 337 It is important to relay the number displayed after this error when contacting Thunder Scientific for technical support. 13.8.22 Flow Valve Failed to Find Home Position This error indicates that valve V1's stepper motor cannot find its home position.
- Page 338 Possible causes include a failed heater (H1), tripped heat limit switch (HL1), or the pre-saturation temperature probe (RTD4) is not installed or is installed in the wrong location. Model 9500 System Manual – Document #OM9500 - Edition 3.0 July 2022...
- Page 339 This warning indicates that the bath fluid holding tank is empty and needs to be filled. For more information on adding water, refer to section 5.3.1 Fill Holding Tank Model 9500 System Manual – Document #OM9500 - Edition 3.0 July 2022...
- Page 340 If this warning does not clear once the system has stabilized at its humidity and temperature setpoints, then a mass flow rate setpoint reduction is recommended to remove the warning. Model 9500 System Manual – Document #OM9500 - Edition 3.0 July 2022...
- Page 341 14.2 G ET AND OMMANDS Commands to Get and Set values to the Model 9500. Please note that the values are not specific and vary based on the actual reading of the 9500. 14.2.1 %RH To get the current value you send: get %rh<CR><LF>...
- Page 342 20<CR><LF> 14.2.4 PPMv To get the current value you send: get ppmv<CR><LF> You receive: Setpoint: 14120<LF> Actual: 14120.3867<CR><LF> To set a new value, you send: set ppmv 14120<CR><LF> Model 9500 System Manual – Document #OM9500 - Edition 3.0 July 2022...
- Page 343 14.2.8 Saturation Temperature To get the current value you send: get saturation temperature<CR><LF> You receive: Actual: 23<CR><LF> To set a new value, you send: set saturation temperature 23<CR><LF> Model 9500 System Manual – Document #OM9500 - Edition 3.0 July 2022...
- Page 344 To get the current value you send: get cabinet temperature<CR><LF> You receive: Actual: 30.1<CR><LF> 14.2.13 Expansion Valve Temperature To get the current value you send: get expansion valve temperature<CR><LF> You receive: Actual: 23.5<CR><LF> Model 9500 System Manual – Document #OM9500 - Edition 3.0 July 2022...
-
Page 345: Bath Reserve Level
To get the current value you send: get bath level<CR><LF> You receive: Actual: 100<CR><LF> 14.3 R OMMANDS Commands to operate the generator. 14.3.1 Generate You send: generate<CR><LF> 14.3.2 Shutdown You send: shutdown<CR><LF> Model 9500 System Manual – Document #OM9500 - Edition 3.0 July 2022... -
Page 346: Run State Commands
You receive: Expanded: X.X<CR><LF> Where X.X can be the following: Request to Generate = 0.1 Generate = 1 Request to Shutdown = 1.1 Shutdown = 0 Model 9500 System Manual – Document #OM9500 - Edition 3.0 July 2022... -
Page 347: Group Commands
14.5.2 Actuals To get the current list of actual values you send: get actuals<CR><LF> You receive 21 actual values: “%rh”<LF> “frost point”<LF> “dew point”<LF> “PPMv”<LF> “PPMw”<LF> “saturation pressure”<LF> Model 9500 System Manual – Document #OM9500 - Edition 3.0 July 2022... - Page 348 You receive 21 actual values: 49.9848614617792<LF> 12.0307560817887<LF> 12.0307560817887<LF> 14119.0297431908<LF> 8784.02582376005<LF> 29.48623339<LF> 14.7<LF> 22.9983457854<LF> 23.0033463644<LF> 23.0010032846<LF> 50.7071233593023<LF> 29.48824255<LF> 29.48623339<LF> 28.3574358438<LF> 23.4548343478<LF> 49.2342457546<LF> 100.016<LF> 2.48492523665688<LF> 0<LF> 0<LF> 100<CR><LF> Model 9500 System Manual – Document #OM9500 - Edition 3.0 July 2022...
-
Page 349: Drawings And Diagrams
RAWINGS AND IAGRAMS This section contains drawings and diagrams of the Model 9500 Humidity generator to assist the user in better understanding the operation and location of components of the system. Note – All drawings and diagrams contained within this manual are proprietary information protected by copyright. - Page 350 PROPRIETARY NOTICE THIRD ANGLE PROJECTION FROM DRAWING THIS DRAWING AND INFORMATION CONTAINED 623 Wyoming S.E. Albuquerque, NM 87123 WITHIN IS PROPRIETARY TO THUNDER SCIENTIFIC AND CANNOT BE COPIED OR REPRODUCED WITHOUT SPECIFIC WRITTEN PERMISSION 9500 Generator Components TOLERANCES FURRY 4/7/2016...
-
Page 351: 9500D901-2 - Dimensional Drawing
PROPRIETARY NOTICE THIRD ANGLE PROJECTION FROM DRAWING THIS DRAWING AND INFORMATION CONTAINED 623 Wyoming S.E. Albuquerque, NM 87123 WITHIN IS PROPRIETARY TO THUNDER SCIENTIFIC AND CANNOT BE COPIED OR REPRODUCED WITHOUT SPECIFIC WRITTEN PERMISSION 9500 Dimensional Drawing TOLERANCES FURRY 4/7/2016... - Page 352 Thunder Scientific Corporation PROPRIETARY NOTICE THIRD ANGLE PROJECTION FROM DRAWING THIS DRAWING AND INFORMATION CONTAINED 623 Wyoming S.E. Albuquerque, NM 87123 WITHIN IS PROPRIETARY TO THUNDER SCIENTIFIC AND CANNOT BE COPIED OR REPRODUCED WITHOUT SPECIFIC WRITTEN PERMISSION 9500 Components TOLERANCES FURRY 4/7/2016...
- Page 353 Thunder Scientific Corporation PROPRIETARY NOTICE THIRD ANGLE PROJECTION FROM DRAWING THIS DRAWING AND INFORMATION CONTAINED 623 Wyoming S.E. Albuquerque, NM 87123 WITHIN IS PROPRIETARY TO THUNDER SCIENTIFIC AND CANNOT BE COPIED OR REPRODUCED WITHOUT SPECIFIC WRITTEN PERMISSION 9500 Components TOLERANCES FURRY 4/7/2016...
- Page 354 Thunder Scientific Corporation PROPRIETARY NOTICE THIRD ANGLE PROJECTION FROM DRAWING THIS DRAWING AND INFORMATION CONTAINED 623 Wyoming S.E. Albuquerque, NM 87123 WITHIN IS PROPRIETARY TO THUNDER SCIENTIFIC AND CANNOT BE COPIED OR REPRODUCED WITHOUT SPECIFIC WRITTEN PERMISSION Pneumatic Schematic TOLERANCES FURRY 4/7/2016...
-
Page 355: 9500D901-6 - Fluid Schematic
Thunder Scientific Corporation PROPRIETARY NOTICE THIRD ANGLE PROJECTION FROM DRAWING THIS DRAWING AND INFORMATION CONTAINED 623 Wyoming S.E. Albuquerque, NM 87123 WITHIN IS PROPRIETARY TO THUNDER SCIENTIFIC AND CANNOT BE COPIED OR REPRODUCED WITHOUT SPECIFIC WRITTEN PERMISSION Fluid Schematic TOLERANCES FURRY 4/7/2016... -
Page 356: 9500D901-7 - Refrigeration Schematic
Thunder Scientific Corporation PROPRIETARY NOTICE THIRD ANGLE PROJECTION FROM DRAWING THIS DRAWING AND INFORMATION CONTAINED 623 Wyoming S.E. Albuquerque, NM 87123 WITHIN IS PROPRIETARY TO THUNDER SCIENTIFIC AND CANNOT BE COPIED OR REPRODUCED WITHOUT SPECIFIC WRITTEN PERMISSION Refrigeration Schematic TOLERANCES FURRY 4/7/2016... - Page 357 Thunder Scientific Corporation PROPRIETARY NOTICE THIRD ANGLE PROJECTION FROM DRAWING THIS DRAWING AND INFORMATION CONTAINED 623 Wyoming S.E. Albuquerque, NM 87123 WITHIN IS PROPRIETARY TO THUNDER SCIENTIFIC AND CANNOT BE COPIED OR REPRODUCED WITHOUT SPECIFIC WRITTEN PERMISSION Pneumatic Components TOLERANCES FURRY 4/7/2016...
- Page 358 PROPRIETARY NOTICE THIRD ANGLE TEMP PROJECTION FROM DRAWING THIS DRAWING AND INFORMATION CONTAINED 623 Wyoming S.E. Albuquerque, NM 87123 WITHIN IS PROPRIETARY TO THUNDER SCIENTIFIC AND CANNOT BE COPIED OR REPRODUCED WITHOUT SPECIFIC WRITTEN PERMISSION Pneumatic Components TOLERANCES FURRY 4/7/2016...
-
Page 359: 9500D901-10 - Fluid Components
Thunder Scientific Corporation PROPRIETARY NOTICE THIRD ANGLE PROJECTION FROM DRAWING THIS DRAWING AND INFORMATION CONTAINED 623 Wyoming S.E. Albuquerque, NM 87123 WITHIN IS PROPRIETARY TO THUNDER SCIENTIFIC AND CANNOT BE COPIED OR REPRODUCED WITHOUT SPECIFIC WRITTEN PERMISSION Fluid Components TOLERANCES FURRY 4/7/2016... - Page 360 Thunder Scientific Corporation PROPRIETARY NOTICE THIRD ANGLE PROJECTION FROM DRAWING THIS DRAWING AND INFORMATION CONTAINED 623 Wyoming S.E. Albuquerque, NM 87123 WITHIN IS PROPRIETARY TO THUNDER SCIENTIFIC AND CANNOT BE COPIED OR REPRODUCED WITHOUT SPECIFIC WRITTEN PERMISSION Refrigeration Components TOLERANCES FURRY 4/7/2016...
-
Page 361: 9500D901-12 - Electrical Main Panel
PROPRIETARY NOTICE THIRD ANGLE PROJECTION FROM DRAWING THIS DRAWING AND INFORMATION CONTAINED 623 Wyoming S.E. Albuquerque, NM 87123 WITHIN IS PROPRIETARY TO THUNDER SCIENTIFIC AND CANNOT BE COPIED OR REPRODUCED WITHOUT SPECIFIC WRITTEN PERMISSION Electrical Main Panel TOLERANCES FURRY 4/7/2016... - Page 362 PROPRIETARY NOTICE THIRD ANGLE PROJECTION FROM DRAWING THIS DRAWING AND INFORMATION CONTAINED 623 Wyoming S.E. Albuquerque, NM 87123 WITHIN IS PROPRIETARY TO THUNDER SCIENTIFIC AND CANNOT BE COPIED OR REPRODUCED WITHOUT SPECIFIC WRITTEN PERMISSION Electrical Sub Panel TOLERANCES FURRY 4/7/2016...
- Page 363 Thunder Scientific Corporation PROPRIETARY NOTICE THIRD ANGLE PROJECTION FROM DRAWING THIS DRAWING AND INFORMATION CONTAINED 623 Wyoming S.E. Albuquerque, NM 87123 WITHIN IS PROPRIETARY TO THUNDER SCIENTIFIC AND CANNOT BE COPIED OR REPRODUCED WITHOUT SPECIFIC WRITTEN PERMISSION Computer Components TOLERANCES FURRY 4/7/2016...
-
Page 364: 9500D903 - Counter Top Mounting Locations
#10 EXTERNAL TOOTH LOCK WASHER STEEL ** N S I ** #10-32 X 1 7/8" SOCKET HEAD CAP SCREW STAINLESS STEEL D9500M299 9500 COUNTER TOP - .50 1/2" GRAY PHENOLIC RESIN Thunder Scientific Corporation DO NOT SCALE PROPRIETARY NOTICE THIRD ANGLE... -
Page 365: 9500S911 - Exp. Heat / Solenoid Valve Control
THIRD ANGLE PROJECTION FROM DRAWING THIS DRAWING AND INFORMATION CONTAINED 623 Wyoming S.E. Albuquerque, NM 87123 WITHIN IS PROPRIETARY TO THUNDER SCIENTIFIC AND CANNOT BE COPIED OR REPRODUCED WITHOUT SPECIFIC WRITTEN PERMISSION Exp. Heat / Solenoid Valve Control TOLERANCES FURRY... -
Page 366: 9500S912 - Pre Saturator Heater Schematic
PROPRIETARY NOTICE THIRD ANGLE PROJECTION FROM DRAWING THIS DRAWING AND INFORMATION CONTAINED 623 Wyoming S.E. Albuquerque, NM 87123 WITHIN IS PROPRIETARY TO THUNDER SCIENTIFIC AND CANNOT BE COPIED OR REPRODUCED WITHOUT SPECIFIC WRITTEN PERMISSION Pre Saturator Heater Schematic TOLERANCES FURRY... -
Page 367: 9500S913 - Bath Heater Schematic
PROPRIETARY NOTICE THIRD ANGLE PROJECTION FROM DRAWING THIS DRAWING AND INFORMATION CONTAINED 623 Wyoming S.E. Albuquerque, NM 87123 WITHIN IS PROPRIETARY TO THUNDER SCIENTIFIC AND CANNOT BE COPIED OR REPRODUCED WITHOUT SPECIFIC WRITTEN PERMISSION Bath Heater Schematic TOLERANCES FURRY 5/11/2016... -
Page 368: 9500S914 - Solenoid Valve Control Schematic
COMMON THIRD ANGLE PROJECTION FROM DRAWING THIS DRAWING AND INFORMATION CONTAINED 623 Wyoming S.E. Albuquerque, NM 87123 WITHIN IS PROPRIETARY TO THUNDER SCIENTIFIC AND CANNOT BE COPIED OR REPRODUCED WITHOUT SPECIFIC WRITTEN PERMISSION Solenoid Valve Control Schematic TOLERANCES FURRY 5/12/2016... -
Page 369: 9500S915 - Transducer Schematic
DO NOT SCALE PROPRIETARY NOTICE THIRD ANGLE PROJECTION FROM DRAWING THIS DRAWING AND INFORMATION CONTAINED 623 Wyoming S.E. Albuquerque, NM 87123 WITHIN IS PROPRIETARY TO THUNDER SCIENTIFIC AND CANNOT BE COPIED OR REPRODUCED WITHOUT SPECIFIC WRITTEN PERMISSION Transducer Schematic TOLERANCES FURRY 5/12/2016... -
Page 370: 9500S916 - Pres Tran / Stepper Drive Schematic
PROPRIETARY NOTICE THIRD ANGLE PROJECTION FROM DRAWING THIS DRAWING AND INFORMATION CONTAINED 623 Wyoming S.E. Albuquerque, NM 87123 WITHIN IS PROPRIETARY TO THUNDER SCIENTIFIC AND CANNOT BE COPIED OR REPRODUCED WITHOUT SPECIFIC WRITTEN PERMISSION Pres Tran/Stepper Drive Schematic TOLERANCES FURRY... - Page 371 f i t c i t . ± . ± ± °...
- Page 372 f i t c i t . ± . ± ± °...
- Page 373 f i t o i t . ± . ± ± °...
- Page 374 THIRD ANGLE PROJECTION FROM DRAWING THIS DRAWING AND INFORMATION CONTAINED 623 Wyoming S.E. Albuquerque, NM 87123 WITHIN IS PROPRIETARY TO THUNDER SCIENTIFIC TYPICAL OF 4 AND CANNOT BE COPIED OR REPRODUCED WITHOUT HANDLES SPECIFIC WRITTEN PERMISSION 5 Port Chamber Lid Assembly...
Need help?
Do you have a question about the 9500 and is the answer not in the manual?
Questions and answers