Advertisement
Quick Links
Direct replacement Emax / Emax 2
Прямая замена Emax/Emax 2
Retrofitting between Emax and Emax 2
Замена Emax на Emax 2
ATTENTION!
The instructions in this retrofit kit refer to circuit-
breakers designed for racking in/out operations
with the switchgear door closed.
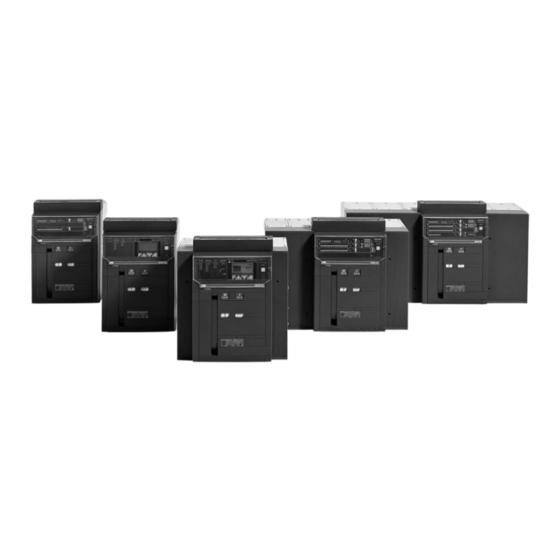
This retrofit kit has been designed for replacing
800A to 6300A Emax E1 — E6 air circuit– breakers
withdrawable version. It allows an Emax 2 circuit-
breaker of the same size, as indicated in table A, to
be racked into the fixed part of Emax.
Table A — Табл. A
800
E1B
E2.2B* E2.2B* E2.2B*
E1N
E2.2N
E2B
E2N
E2S
E2.2S
E3N
E3S
E3H
E4.2V* E4.2V* E4.2V* E4.2V* E4.2V* E4.2V* E4.2V
E3V
E4S
E4H
E4V
E6H
E6V
Emax 2
1000
1250
1600
2000
E2.2B
E2.2N
E2.2N
E2.2N
E2.2B
E2.2B
E2.2N
E2.2N
E2.2N
E2.2N
E2.2S
E2.2S
E2.2S
E2.2S
E4.2H* E4.2H* E4.2H* E4.2H* E4.2H* E4.2H
E4.2V* E4.2V* E4.2V
ВНИМАНИЕ!
Указания по данному комплекту для замены
автоматических выключателей касаются
аппаратов, вкатываемых и выкатываемых
при закрытых дверцах НКУ.
Этот комплект предназначен для замены
воздушных автоматических выключателей
Emax E1–E6 с номинальным током от 800
до 6300 А выдвижного исполнения. Он
позволяет вставить в неподвижную часть
от Emax автоматический выключатель Emax 2
того же размера в соответствии с табл. A.
2500
3200
4000
5000
E4.2N* E4.2N
E4.2V**
E4.2V E4.2V**
E4.2V E4.2V**
E6.2H
E6.2H E6.2H
E6.2V
E6.2V E6.2V
(1)
6000
* Use Rating plug
* Используйте модуль
номинального тока
** Derating 3800A
** Снижение
номинального тока
до 3800 A
Advertisement

Related Manuals for ABB Emax


Summary of Contents for ABB Emax
- Page 1 при закрытых дверцах НКУ. This retrofit kit has been designed for replacing Этот комплект предназначен для замены 800A to 6300A Emax E1 — E6 air circuit– breakers воздушных автоматических выключателей withdrawable version. It allows an Emax 2 circuit- Emax E1–E6 с номинальным током от 800 breaker of the same size, as indicated in table A, to до...
- Page 2 Instructions regarding the retrofitting kit assembling Указания по монтажу комплекта для замены are not intended as replacement of the installation не заменяют собой инструкцию по установке and maintenance manuals of the Emax 2 new и техническому обслуживанию нового circuit breaker. автоматического выключателя Emax 2.
- Page 3 выключателя Emax 2 без нагрузки, как указано в инструкции по установке. – Verify that the Emax 2 new circuit breaker is in open position and discharged springs. – Убедитесь, что новый автоматический выключатель Emax 2 находится в положении...
- Page 4 a) before any operation of insertion o withdraw a) Прежде чем вкатывать или выкатывать open the circuit breaker. автоматический выключатель, отключите его. b) circuit breaker (moving part) and fixed part are b) Автоматический выключатель (его provided with a locking device that prevent the выдвижная...
- Page 5 – Vertical axis E4.2 4P – Вертикальная ось 3-полюсного E4.2 – Вертикальная ось 4-полюсного E4.2 – Door aperture axis – Ось проема дверцы X [mm/мм] Emax Emax2 Fig. 3 Рис. 3 – Circuit-breaker's bearing base – Установочная поверхность – Vertical axis –...
- Page 6 – Cut the door along the unbroken red line and drill – Сделайте в дверце вырез вдоль сплошной in the position marked by the red holes. красной линии и просверлите отверстия в местах, отмеченных красным цветом. E1 — E2 — E3 — E6 / E2.2 — E4.2 — E6.2 E4/E4.2 3-ПОЛЮСН.
- Page 7 – Assemble the dust-guard flange of the compartement door. – Установите пыленепроницаемый фланец дверцы отсека НКУ. E1 — E2 — E3 — E6 / E2.2 — E4.2 — E6.2 1 Nm 1 Нꞏм Fig. 7 Рис. 7 Е4/Е4.2 1 Nm 1 Nm 1 Нꞏм...
- Page 8 – Fit the pins (A) and, if present, replace the components (D-E-F) as shown in the figure 8 – Вставьте штифты (A) и, если есть, замените элементы (D-E-F), как показано на рис. 8 40 Nm 40 Нꞏм 40 Nm 40 Нꞏм Fig. 8 Рис. 8 New Emax Новый Emax (Old) Emax (Старый) Emax...
- Page 9 A) Switching from the «removed» position to the A) Перевод из извлеченного в выкаченное «racked out» position положение Lift the moving part and fit it into the guides of the Поднимите выдвижную часть и с наклоном fixed part, tilting it as shown in fig. 9. The circuit– установите...
- Page 10 B) Switching from the “racked out” position to the B) Перевод из выкаченного положения «disconnected» position. в положение DISCONNECT (отсоединен). Push the moving part through to the stop point in Нажав на выдвижную часть, вставьте ее the «disconnected» position (1). до...
- Page 11 C) Перевод из положения DISCONNECT C) Switching from the «disconnected» position to (отсоединен) в TEST (отсоединенное the “test isolated” position. контрольное положение). Разблокируйте привод выключателя кнопкой Unlock the operating mechanism by pressing the разблокировки (2). unlocking lever/push-button (2). Вставьте рукоятку (1) в посадочное место Insert the handle (1) into its seat (fig.
- Page 12 D) Switching from the “test isolated” position to the D) Перевод из положения TEST (отсоединенное “connected” position. контрольное положение) в CONNECT (вкачен). Повторяйте действия, описанные в п. С, пока не достигнете положения автоматической Repeat the operation described in point «C» until блокировки.
- Page 13 E) Switching from the «connected» position to the E) Перевод из положения CONNECT (вкачен) в «test isolated" position. TEST (контрольное положение). Repeat the operations indicated in point «D» in Выполните действия, указанные в п. D, reverse order. в обратном порядке. F) Switching from the «test isolated"...
- Page 14 – Putting into service and maintenance of the new нового автоматического выключателя. circuit– breaker. Consult the installation and См. в Инструкции по установке и техническому maintenance manuals of the Emax 2 new circuit- обслуживанию нового автоматического breaker (1SDH001000R0002), except for the выключателя Emax 2 (1SDH001000R0002), racking-in/racking-out operations that are contained кроме...
- Page 15 приведены габаритные размеры отсека the external dimensions of a circuit-breaker автоматического выключателя для установки compartment for installation in an L.V. switchboard. в панели НКУ. Dimensions (mm) Размеры (мм) Emax E1 — E2 Emax 2 E2.2 (3-ПОЛЮСН.) (4-ПОЛЮСН.) (3-ПОЛЮСН.) (4-ПОЛЮСН.) Emax E3 Emax 2 E4.2...
- Page 16 После установки дугогасительных камер приведите выключатель в первоначальное состояние. E1 — E2/E2.2 E3 — E4 — E6 / E4.2 — E6.2 Fig. 17 Рис. 17 —————————————————————————————————————— © Copyright 2019-2020 ABB. All rights reserved www.abb.com © ABB, 2019–2020 гг. Все права защищены. www.abb.com...
Need help?
Do you have a question about the Emax and is the answer not in the manual?
Questions and answers