Table of Contents
Advertisement
Advertisement
Table of Contents

Summary of Contents for Pro Vision BODYCAM BC-300
- Page 1 BC-300 HD BODY CAMERA USER GUIDE...
-
Page 2: Table Of Contents
Contents Section Foreword Product Guarantee . . . . . . . . . . . . . . . . . . . . . . . . . . . . . . . 1 Important Notes . -
Page 3: Foreword
Foreword Thank you for choosing BODYCAM by PRO-VISION ® ® Please read this guide carefully and keep it for future reference . Understanding this entire guide prior to making advanced changes to the BODYCAM or your computer system will ensure functionality and reliability . ®... -
Page 4: Product Functions
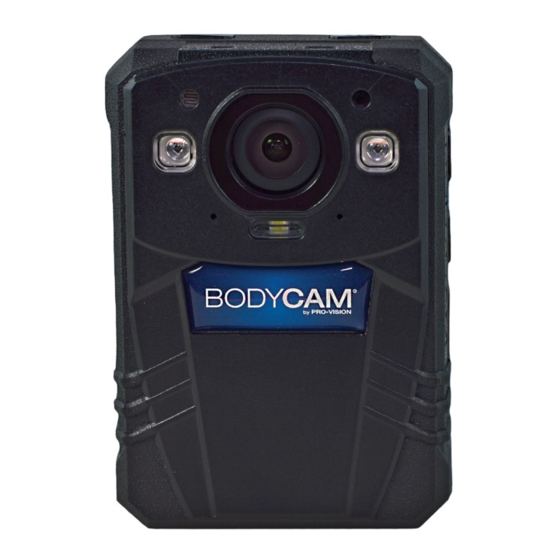
3. Product Functions: Controls in Normal / Preview Mode: Night Vision / Flashlight Power Custom Label Area Camera / LCD Screen Power Lens Light Sensor Night Vision LEDs Video Record Microphones (1 of 2) Flashlight LED Event / Wi-Fi Power USB Port Power / Charging Status (GREEN / BLUE) -
Page 5: Product Operation
4. Product Operation 4.1 Basic Operation Press and hold the Power button for 3 seconds to turn the camera ON . The camera can also be turned ON by pressing the Record button on either side of the camera for 2 seconds; this will turn the camera ON and automatically begin recording . - Page 6 4. Product Operation The LCD Screen will display the following Preview mode screen when the BC-300 is powered ON: Resolution Frames/Second Battery Status Memory Card Present Wi-Fi Status Personal Identifier Serial Number Time Available Recording Time Date To turn the camera OFF, press and hold the Power button for 3 seconds .
- Page 7 Personal Identifier (PID): The PID displays the preset device name that is used to associate the user to the camera . It is in the lower left corner of the LCD screen . Date: The date is displayed in the default format of MM/DD/YYYY in the lower left corner of the LCD screen .
-
Page 8: Video Recording
4.2 Video Recording Press a Video Record button located on either side of the camera to begin video recording . The indicator LED on the top of the camera will be solid red for video and audio recording or solid red with a flashing amber LED for “video only”... -
Page 9: Capturing Photos
4.3 Capturing Photos In Video Record mode, pressing the Photo button will take a photo . The LCD screen will continue displaying the video being recorded, however, the LCD screen will indicate that a photo was taken with a ghosted shutter appearing then disappearing on the screen . -
Page 10: Playback / Viewing On Lcd Screen
4.5 Playback / Viewing on the LCD Screen Depending on the camera rights given by the administrator, the camera has the ability to be used to playback video, audio, and photo files that are stored on the camera . While the camera is in Preview mode, press the OK button to enter the playback menu . -
Page 11: Button Functionality
4.6 Button Functionality Power Button Functions: Button When Camera is When Camera is Location Short Press Long Press Short Press Long Press Top of Camera Turn Camera Toggle LCD Screen Turn Camera ON or OFF While Recording While Playing In Menu Video Video Short Press... - Page 12 Photo Button Functions: Button When Camera is When Camera is Location Short Press Long Press Short Press Long Press Middle Button on Side of Camera Take a Photo Take a Photo While Recording While Playing In Menu Video Video Short Press Long Press Short Press Long Press...
- Page 13 Event Button Functions: Button When Camera is When Camera is Location Short Press Long Press Short Press Long Press Bottom Button Turn Wi-Fi on Side of Camera ON or OFF While Recording While Playing In Menu Video Video Short Press Long Press Short Press Long Press...
- Page 14 Menu Button Functions: Button When Camera is When Camera is Location Short Press Long Press Short Press Long Press Left Button Open Settings Open Settings Below LCD Screen Menu Menu While Recording While Playing In Menu Video Video Short Press Long Press Short Press Long Press...
- Page 15 Right Arrow Button Functions: Button When Camera is When Camera is Location Short Press Long Press Short Press Long Press Right Center Button Below LCD Screen Zoom In Zoom In While Recording While Playing In Menu Video Video Short Press Long Press Short Press Long Press...
- Page 16 Controls in Playback & Settings Menu: Select Right/Down Left/Up Back Controls During Audio & Video Playback Menu: Play/Pause Fast Forward Rewind Back...
-
Page 17: Status Indicators
4.7 Status Indicators Indicator LEDs The camera has 4 LED indicators that show the status of the camera. Blue LED: This light will turn ON solid blue when the camera is being charged . When the camera is finished charging, the blue LED will turn OFF . - Page 18 Vibration Indicators: The camera provides feedback on certain actions through vibration indicators . These vibrations can be disabled through the menu by setting “Vibration” to “OFF .” Power On ......2 Second Vibration Power Off .
-
Page 19: Protecting & Deleting Photos, Videos, And Audio Files
4.8 Protecting & Deleting Photos, Videos, and Audio Files Depending on the privileges set by the administrator, the user may or may not be able to access files on the camera . Files cannot be deleted from the camera without using 1 or 2 software programs . When using the BODYCAM ®... -
Page 20: Camera Settings
5. Camera Settings Menu Setting Name Options W1080p . . . . . . . . . .30fps 1296p . . . . . . . . . . .30fps 1080p . -
Page 21: Changing Camera Settings
6. Changing Camera Settings To change camera settings, the user must have Administrator privileges . If the user has Supervisor or User privileges, the camera settings may NOT be changed . To change camera settings, press the Menu button while in Preview mode . Use the Left and Right buttons to navigate and the OK... - Page 22 Post-Event Record: When activated, the camera automatically continues recording video for a pre-set time period after video recording is turned OFF . When a Video Record button is pressed to end video recording, the LCD screen will display the amount of time left of Post-Event video recording . Record Mode: The camera records videos in two modes: Video with Audio (default) or Video only .
-
Page 23: Photo Settings
6.2 Photo Settings Photo Resolution: The amount of pixel data recorded per photo . For example, 18M (5632 x 3168) means that photos are 18 megapixels and have a pixel dimension of 5632 x 3168 . Photo Quality: This is preset to Good . However, it can be changed to Bet- ter or Best by the Administratior . -
Page 24: System Settings
6.3 System Settings LCD Brightness: The brightness level of the camera LCD display . Speaker Volume: The volume of the camera audio in playback mode . Auto Power Off: To conserve battery life, the camera will automatically turn OFF if no camera functions have been detected within the set time frame . - Page 25 Vibrations: When enabled, the camera will vibrate when powering the camera ON or OFF, starting or stopping audio or video recording, and when low disk space or low battery is detected . The amount of vibrations and length of each vibration is based on the function taking place . Wi-Fi: This setting has 2 options: On / Off .
- Page 26 USB Mode: When the camera has entered USB Mode or USB Mass Stor- age Mode, the following screens will appear: USB MODE USB MASS STORAGE PID:123 SN:6G003 PID:123 SN:6G003 System Information: When this option is selected camera information will display on the LCD screen .
-
Page 27: Computer Playback / File Transfer
7. Computer Playback / File Transfer Depending on the administrative rights given to the camera user, video playback and file transfer can be done by connecting the camera to a computer using the included USB cable or optional docking station . To transfer files and view video, complete the following steps: 1 . -
Page 28: Technical Specifications
8. Technical Specifications CAMERA Field-of-View: 150 Degrees Dimensions: ~ 3 .1” x 2 .0” x 1 .0” Waterproof: IP68 - Rated for All Climates Weight: 5 .6oz Yes – Two, Built-in High-Intensity Infrared Illuminators with Night Vision: Selectable Auto-Activation Drop Testing: 10 ft Drop Test [3 .048M] Military Standard: Meets or Exceeds MIL-STD-810G... - Page 29 8. Technical Specifications RECORDING Pre-Event Recording: Yes - 35 Seconds - Configurable On/Off and Audio On/Off Post-Event Recording: Yes - 30 Seconds - Configurable One-Touch Activation: Video Format: Video Resolution: Multiple Options - 1296p, 1080p, 720p, 480p Video Frame Rate: 30, or 60 frames per second Video Stamp: Yes - Configurable Time/Date, User/ID, Serial Number...
- Page 30 9. Zulu Time Conversion LOCAL Midnight 0400 0500 0500 0600 0600 0700 0700 0800 1 a.m. 0500 0600 0600 0700 0700 0800 0800 0900 2 a.m. 0600 0700 0700 0800 0800 0900 0900 1000 3 a.m. 0700 0800 0800 0900 0900 1000 1000...
Need help?
Do you have a question about the BODYCAM BC-300 and is the answer not in the manual?
Questions and answers