
Related Manuals for Sharper Image HF757


Summary of Contents for Sharper Image HF757
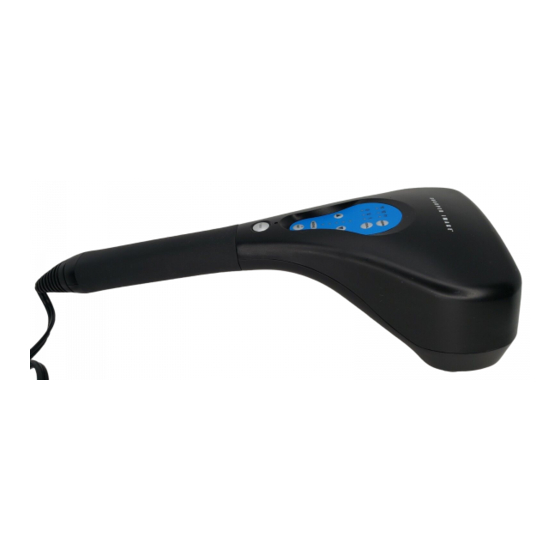
- Page 1 Hand-Held Percussion Massager HF757 Instructions Read and save these instructions.
- Page 2 We offer generous return privileges and excellent warranties on all our products. For more than 25 years, The Sharper Image has shared the fun of discovering innovative products that make life easier and more enjoy- able.
- Page 3 Warnings IMPORTANT SAFEGUARDS WHEN USING ELECTRICAL PRODUCTS, ESPECIALLY WHEN CHILDREN ARE PRESENT, BASIC SAFETY PRECAUTIONS SHOULD ALWAYS BE FOLLOWED, INCLUDING THE FOL- LOWING: READ ALL INSTRUCTIONS BEFORE USING. DANGER - TO REDUCE THE RISK OF ELECTROCUTION: • Always unplug the appliance from the electrical outlet immedi- ately after using and before cleaning.
- Page 4 Warnings • Unplug from outlet when not in use and before putting on or taking off parts or attachments. • Close supervision is necessary when this appliance is used by, on or near children, invalids or disabled persons. • Do not use outdoors. •...
- Page 5 Warnings • Never use while sleeping or fall asleep while using the mas- sager. • Never drop or insert any object into any opening. • Do not operate where aerosol (spray) products are being used or where oxygen is being administered. •...
- Page 6 Warnings Caution: Please read all instructions carefully before operating. •If you have any concerns regarding your health, consult your doctor before using this product. •Individuals with pacemakers should consult a doctor before use. •Never leave the appliance unattended, especially if children are present.
- Page 7 Warnings •Never use this product while in bed. •This product should never be used by any individual suffering from any physical ailment that would limit the user’s capacity to operate the controls. •This unit should not be used by children or invalids without adult supervision.
-
Page 8: Quick Start
Quick Start 1. Plug the unit into a polarized wall outlet. 2. Select and attach the desired massage head. 3. To turn the unit on, press the POWER button located above the handle. 4. For steady massage, press the MASSAGE button on the con- trol panel. - Page 9 Instructions for Use To reduce the risk of electric shock, this appliance has a polar- ized plug (one blade is wider than the other). This plug fits in a polarized outlet only one way. If the plug does not fit fully in the outlet, reverse the plug.
- Page 10 Instructions for Use of LEDs lit above the MASSAGE button (1-5) indicates the intensity level. 6. For a programmed massage, press the PROGRAM button on the upper right-hand side of the control panel until the desired program is lit. Choose any of the three program options: •...
- Page 11 Instructions for Use Note: In the programmed massage mode, an interval level may be chosen by pressing the INTERVAL button under the PRO- GRAM button on the control panel. There are three interval options: Interval 1 = low (left LED), Interval 2 = moderate (center LED), and Interval 3 = high (right LED).
- Page 12 Auto-Spacing Feature The spacing between the massage heads can be adjusted to fit various body frames and areas. (See Figure 2.) Figure 2 1. To adjust the spacing between the massage heads, turn the unit on and push and hold the button on the underside of the massager.
- Page 13 Auto-Spacing Feature Button Figure 3 2. As soon as you find the desired spacing for maximum com- fort, release the button. Your massager comes with four custom massage head attach- ments. Each set has a different level of firmness: Hard = light grey Medium = medium grey Soft = black Heat = red...
- Page 14 Massage Head Attachments 1. To remove the massage heads from the unit, rotate each counterclockwise. 2. To attach the massage heads, rotate clockwise. (See Figure 4.) Figure 4 Massage with Thermal Heat 1. Locate the two red (heat) attachments. Attach one to each massage head by turning clockwise to secure.
-
Page 15: Maintenance
Massage with Thermal Heat Note: To eliminate the risk of being burned, never use the heat function without the heat attachments. Do not use the thermal heat continuously for more than 15 minutes. Do not use the thermal heat if you have sensitive skin, poor circulation, discol- ored areas, swelling, burning, inflammation or an area where skin eruptions or sores are present. -
Page 16: Warranty
The Sharper Image will repair any defects in materials or workmanship. In the event repair is not possible, The Sharper Image will either replace this product with one of similar features and price, or refund the full purchase price of the product, whichever you prefer.
Need help?
Do you have a question about the HF757 and is the answer not in the manual?
Questions and answers