Table of Contents
Advertisement
Available languages
Available languages
Quick Links
Advertisement
Table of Contents

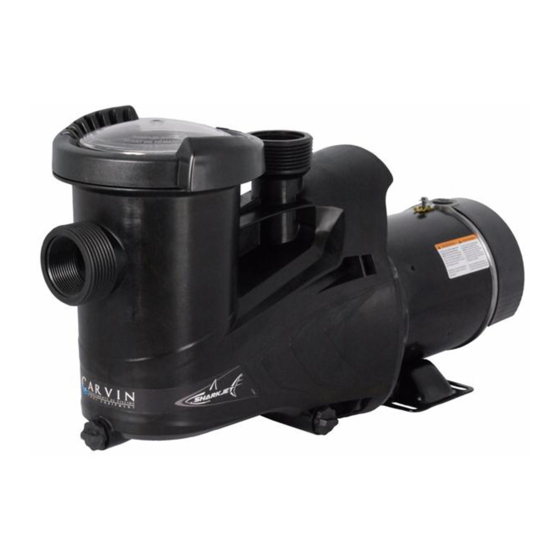
Summary of Contents for CARVIN SHARK
- Page 1 Above Ground Pool Pump Owner’s Manual Use Only Genuine Replacement Parts WARNING - READ THIS MANUAL BEFORE INSTALLING AND OPERATING SHARK PUMP. IT INCLUDES IMPORTANT INFORMATION ABOUT SAFE USE OF THIS PRODUCT. WWW.CARVINPOOL.COM M22904246...
-
Page 2: Important Safety Instructions
PLEASE read this manual before installing the pump Before installation, be sure to read all instructions and warnings carefully. Refer to product dataplate(s) for additionnal op Important Safety Instructions When installing and using this electrical equipment, basic safety precautions should always be followed , including the followi RISK OF SUCTION ENTRAPMENT HAZARD To reduce risk of injury, do not permit W ARNING! -
Page 3: Installation
GENERAL This is a self-priming pump, which means that it can raise water to backwashing and vacuuming, HIGH SPEED is required. If the pump itself through a dry suction line without using valves, provided the pump case and strainer body are full of water before the motor is started. procedure described in the separate instructions for the complete We recommend the use of a swing check valve in the suction pipe, at or cases, proceed as follows:... -
Page 4: Frequently Asked Questions
STRAINER NUT INSTALLATION (Fig.1) 1.INSERTION 2.TIGHTENING TURN STRAINER NUT 1/4 TURN CLOCKWISE TO TIGHTEN ALIGN MARKERS OF THE STRAINER BODY AND INSERT. TO DISMANTLE THE PUMP or chemical reaction. Make sure that the pump parts are clean, but be IMPORTANT: BE SURE THE ELECTRICAL POWER IS DISCONNECTED careful not to scratch the surfaces that come into contact with the seal. -
Page 5: Impeller Removal
DISMANTLING (Fig. 3) (Fig. 4) 1. BOLT REMOVAL 2. DIFFUSER REMOVAL INSERT A SMALL SCREWDRIVER BETWEEN THE TWO SNAPS ON THE USING A 9/16’’ SOCKET, REMOVE MOTOR BRACKET. lIFT GENTLY THE THE FOUR NUTS/BOLTS HOLDING DIFFUSER’S TAB TO RELEASE. THE MOTOR TO THE BODY (REPEAT ON THE OTHER SIDE) (Fig. -
Page 6: Replacement Parts
Shark Strainer Body Main O-ring 47-0361-08-R liability for any unauthorized warranties made in connection 47-0214-06-R with the sale of its products. ‘’CARVIN’’ will not be responsi- 06-0517-39-R ble for any statements that are made or published, written or 10-1462-07-R Floating eye seal... -
Page 7: Manual Del Usuario
Bomba Para Piscinas Elevadas Manual Del Usuario Utilice sólo piezas de repuesto originales ADVERTENCIA: LEA ESTE MANUAL ANTES DE INSTALAR Y OPERAR LA BOMBA SHARK. INCLU INFORMACIÓN IMPORTANTE SOBRE EL USO SEGURO DE ESTE PRODUCTO. WWW.CARVINPOOL.COM M22904246... - Page 8 POR FAVOR lea este manual antes de instalar la bomba Antes de la instalación, asegúrese de leer detenidamente todas las instrucciones y advertencias. Instrucciones de seguridad importantes Durante la instalación y utilización de este artefacto eléctrico, se deberán observar las medidas de seguridad de base, especialmente las siguientes: RIESGO DE APRISIONAMIENTO POR SUC- ATENCIÓN! ATENCIÓN!
-
Page 9: Instalación
Localice y corrija motor, el soporte, el sello, el impulsor y el difusor se retiren como una cualquier fuga inmediatamente. unidad. Los conjuntos Shark se simplificaron para facilitar el manten- Nunca haga funcionar la bomba sin agua imiento y la reparación. - Page 10 INSTALACIÓN DEL GIRANDO EL ANILLO ANILLO DE BLOQUEO (Fig.1) 2. APRIETE 1/4 DE VUELTE EN SENTIDO HORARIO PARA APRIETE 1. INSERCIÓN ALINEAR LAS MARCAS PARADAS Y INSERT. DESMANTELAMIENTO DE LA BOMBA IMPORTANTE: ASEGÚRESE DE QUE LA ENERGÍA ELÉCTRICA ESTA DESCONECT- superficies que entran en contacto con el sello.
- Page 11 DESMONTAJE (Fig. 3) (Fig. 4) 1. DESMONTAJE DEL TORNILLO 2. DESMONTAJE DEL DIFUSOR INSERTE UN PEQUEÑO DESTORNILLA- DOR ENTRE LOS DOS CHASQUIDO EN USANDO UN ZÓCALO DE 9/16 '', EL SOPORTE DEL MOTOR. LEVANTE QUITE LAS CUATRO NUECES / LENTAMENTE LA LENGUA DEL PERNOS QUE SOSTENEN EL DIFUSOR PARA LIBERARLA.
- Page 12 31-1609-06-R2 Tapones de Drenaje ( 2 Por Bolsa) errónea o inconsistente con los hechos publicados en los 47-0361-08-R Junta tórica del cuerpo Principal SHARK Carvin Pool textos y especificaciones de “ ”. 47-0214-06-R Junta tórica del Difusor...


Need help?
Do you have a question about the SHARK and is the answer not in the manual?
Questions and answers
How to order replacement power toggle switch for Carvin pool pump 1SHJ-25-S1