Table of Contents
Advertisement
Advertisement
Table of Contents

Related Manuals for Haier AC182ACABA


Summary of Contents for Haier AC182ACABA
-
Page 1: Operation Manual
CONVERTIBLE TYPE ROOM AIR CONDITIONER Operation Manual AC182ACMBA AU182AFMBA (HCFU-18CC03) AC182ACABA AU182AFABA (HCFU-18HC03) AC182ACNAA AU182AFNBA (HCFU-18CA03/R1) AC182ACBBA AU182AFBBA (HCFU-18HC03/R1) Please read this instruction manual before using the air conditioner No. 0010541266... -
Page 2: Table Of Contents
CONTENTS CAUTIONS ... FEATURES AND FUNCTIONS ... NAME OF PARTS ... INTRODUCTION TO SPARE PARTS ... REMOTE CONTROLLER OPERATION ... GUIDE TO OPERATION ... CLEANING AND CARE ... TROUBLE SHOOTING ... WHEN PROBLEMS OCCUR ... OPERATING TIPS ... 8-15 16-17... -
Page 3: Cautions
Damaged air conditioners are not to be put into operation. In case of doubt, consult your supplier. Use of the air conditioner is to be carried out in strict compliance with the relative instructions set forth in the User's Guide. -
Page 4: Cautions
Do not obstruct or cover the ventilation grille of the air conditioner. Do not put fingers or any other things into the inlet/outlet and swing louver. Do not allow children to play with the air conditioner. -
Page 5: Features And Functions
Heating, Cooling and Blow modes as appropriate, in accordance with the thermostat setting and the actual temperature of the room. WIRELESS REMOTE CONTROL UNIT The WIRELESS REMOTE CONTROL UNIT allows convenient control of air conditioner operation. MILDEW-RESISTANT FILTER The AIR FILTER has been treated to resist mildew growth, thus allowing cleaner use and... -
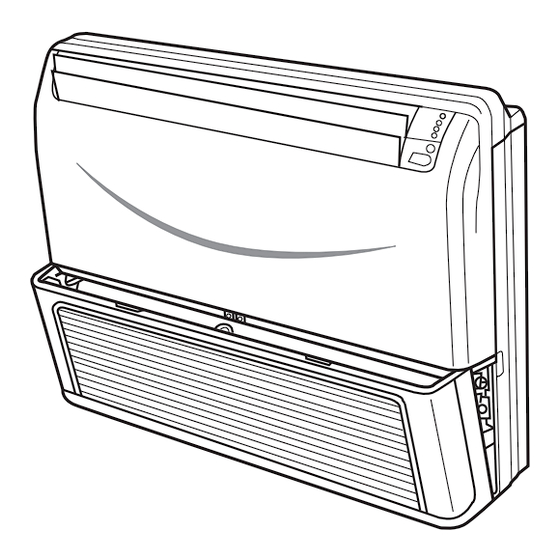
Page 6: Name Of Parts
NAME OF PARTS Fig.1 Fig.1 Indoor Unit Operating Control Panel (Fig.2) Emergency switch Remote Control Signal Receiver Power Indicator Lamp (Red) OPERATION Indicator Lamp (Green) TIMER Indicator Lamp (Yellow) Compressor Run Lamp (Green) Intake Grill (Fig.3) Air Filter UP/DOWN Air Direction Flaps RIGHT/LEFT Air Direction Louvers (behind UP/DOWN Air Direction Flaps) Power Plug... -
Page 7: Introduction To Spare Parts
INTRODUCTION TO SPARE PARTS Operation Buttons and display of the remote Power ON/OFF Used for unit start SWING Used to set auto MODE Used to select AUTO run, COOL,DRY,HEAT and CLOCK Used to set correct Used to set correct TIMER Used to select TIMER ON, TIMER OFF, TIMER ON/OFF. -
Page 8: Introduction To Spare Parts
INTRODUCTION TO SPARE PARTS Operation COOL AUTO SWING FAN SPEED AUTO AUTO SLEEP Clock set When unit is started for the first time and after replacing batteries in remote controller, clock should be adjusted as follows: Press CLOCK button, "AM" or "PM" flashes. Press to set correct time. -
Page 9: Remote Controller Operation
REMOTE CONTROLLER OPERATION Remote controller's operation When in use, put the signal transmission head directly to the receiver hole on the indoor unit. The distance between the signal transmission head and the receiver hole should be within 7m without any obstacle as well. Don't throw the controller, prevent it from being damaged. -
Page 10: Guide To Operation
GUIDE TO OPERATION FAN operation (1) Unit start Press ON/OFF button, unit starts. Previous operation status appears on display. (Not Timer setting) Power indicator on indoor unit lights up. (2) Select operation mode Press MODE button. For each press, operation mode changes as follows: AUTO COOL... - Page 11 GUIDE TO OPERATION AUTO run, COOL,HEAT and DRY operation Recommendations (1) Unit start Press ON/OFF button, unit starts. Previous operation status appears on display.(Not Timer setting) Power indicator on indoor unit lights up. (2) Select operation mode Press MODE button. For each press, operation mode changes as follows: AUTO COOL...
-
Page 12: Fan Speed Selection
GUIDE TO OPERATION (4) Fan speed selection Press FAN button. For each press, fan speed changes as follows: Unit runs at the speed displayed on LCD. In HEAT mode, warm air will blow out after a short period of time due to cold-draft prevention function. In DRY mode, when room temp. -
Page 13: Timer Operation
GUIDE TO OPERATION TIMER operation Set Clock correctly before starting Timer operation(refer to page 6) You can let unit start or stop automatically at following times: Before you wake up in the morning, or get back from outside or after you fall asleep at night. TIMER ON/OFF (1)After unit start, select your desired operation mode. - Page 14 GUIDE TO OPERATION TIMER ON-OFF (1)After unit start, select your desired operation mode Operation mode will be displayed on LCD. Power indicator on indoor unit lights up. (2)Press TIMER button to change TIMER mode Every time the button is pressed, display changes as follows: TIMER ON TIMER OFF TIMER ON-OFF...
- Page 15 GUIDE TO OPERATION Adjusting up/down air flow direction Up/down direction can be adjusted by using the SWING button on the remote controller. Each time pressing this button, the mode changes in the following sequence. Change to the AIRFLOW mode. SWING Louver moves in upward downward directions continuously.
- Page 16 Press SLEEP button once to make the air conditioner have the previous-set sleep time (first power-on is "1h"), the sleep symbol will appear. Press time button , you can choose the time in 1~8 hours.
- Page 17 GUIDE TO OPERATION C o n o t e R e m u n i o o r i n d c t i t r u i n s a f a r - a w a y p l a c e . c o n t r o l l e d f r o m c o m p u t e r i z e d a n d u r e...
-
Page 18: Cleaning And Care
CLEANING AND CARE Before cleaning the air conditioner ,be sure to turn it off and di CAUTION! the Power Supply Cord. Be sure the Intake Grill is installed securely. When removing and replacing the air filters, be sure not to touch exchanger, as personal injury may result. -
Page 19: Cleaning And Care
CLEANING AND CARE Dote: If the fuse on the PC board is broken, please change it with the type of 50F, 2... -
Page 20: Trouble Shooting
TROUBLE SHOOTING Followings are not problems Sound of water flowing is not a problem. Sound of cracking is heard. Smell are generated. During operation, white fog or steam comes out from the indoor unit. In cooling operation, unit switches to blowing operation. -
Page 21: When Problems Occur
Is there any direct sunlight If there are unexpected heat in the room? sources in the room? Cold air blows out (in heating mode) Is air conditioner in standby condition in heating mode? activated? This is very dangerous, please Power disconnect power supply... -
Page 22: Operating Tips
Cooling Heating If the air conditioner is used under higher temperature condition than those listed, protection circuit may operate to prevent internal circuit damage. Also, during Cooli modes, if the unit is used under conditions of lower temperature than those listed ab heat-exchanger may freeze, leading to water leakage and other damage.
Need help?
Do you have a question about the AC182ACABA and is the answer not in the manual?
Questions and answers