Table of Contents
Advertisement
Quick Links
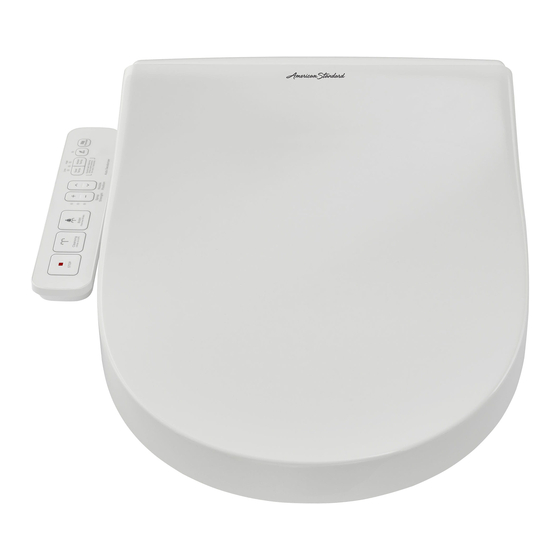
INSTALLATION & USER'S MANUAL
Advanced Clean
SpaLet
™
Side Panel
Remote Panel
Thank you for purchasing this product.
After reading this manual, please keep it in a place where you can refer to it easily.
BE SURE TO FOLLOW THE SAFETY PRECAUTIONS.
Failure to follow the safety precautions may result in serious accidents in some circumstances.
Each of these items are extremely important for safety, and should be strictly observed.
In the event that an accident occurs as a result of improper usage, INAX
will assume no responsibility for damages.
©2017 AS America Inc.
SPALET is a trademark of AS America, Inc.
INAX is a registered trademark of Lixil Corporation
760230-100
Advertisement
Chapters
Table of Contents

Subscribe to Our Youtube Channel
Related Manuals for Inax SpaLet Series


Summary of Contents for Inax SpaLet Series
- Page 1 Failure to follow the safety precautions may result in serious accidents in some circumstances. Each of these items are extremely important for safety, and should be strictly observed. In the event that an accident occurs as a result of improper usage, INAX will assume no responsibility for damages.
-
Page 2: Table Of Contents
INSTALLATION TABLE OF CONTENTS 1. Important Safeguards ............2. Product Description ............. 3. Installing This Product ............Installation Requirements ..............6 Contents ......................6 Ground Fault Circuit Breaker ................7 Power Supply ....................7 Grounding ....................... 7 Installation Location ..................7 Water Supply .................... -
Page 3: Important Safeguards
1. IMPORTANT SAFEGUARDS When using electrical products, especially when children are present, the basic safety precautions should always be observed. READ ALL THE INSTRUCTIONS BEFORE USING THIS PRODUCT The following safety terms are used in this manual to warn against different hazardous situations: DANGER–... - Page 4 6. Never block the air openings of the product. If lint or hair, etc. is stuck in the air openings, remove it immediately. 7. Never use while sleeping or feeling drowsy. 8. Never drop or insert any object into any opening or hose. 9.
-
Page 5: Product Description
2. Product Description This product incorporates a set of features to improve personal toilet hygiene and comfort. These features include rear cleansing, front cleansing and a seat heater as well as the required controls for these features. This product includes a seat unit (with heated toilet seat, toilet seat lid, warm water tank, and power cord), hardware for installing the seat unit on a toilet and connecting it to the water supply and this installation and user's manual. -
Page 6: Installing This Product
3. Installing This Product Installation Requirements Before installing this product, ensure that each of the following installation requirements are met. Contents Remove the parts from the box and make sure all the parts in the parts list (below) are present. Inspect the parts carefully to make sure they are in good condition. -
Page 7: Ground Fault Circuit Breaker
GROUNDING INSTRUCTIONS This product should be grounded. In the event of an electrical short circuit, grounding reduces the risk of electric shock by providing an escape wire for the electric current. This product is equipped with a cord having a grounding wire with a grounding plug. The plug must be plugged into an outlet that is properly installed and grounded. -
Page 8: Measure The Size Of The Toilet
1. Measure the size of the toilet. 5-1/8" to 8-1/2" Depending on the size of the toilet, it may not be (130 to 215 mm) possible to mount this product on it. Make sure the toilet's dimensions are as shown in the figure on the right. -
Page 9: Illustrated Parts Breakdown
Illustrated Parts Breakdown Overview Lid Bumper Toilet Tank Power Plug Seat Sensor (built-in) Nozzle Shutter Seat T-Junction Nozzle Water Hose (posterior cleansing) (with T-Junction) Bowl Water Valve Control Panel Nozzle (feminine cleansing) Strainer Strainer * The strainer removes impurities and debris from the tap water. -
Page 10: Operating Panel
Operating Panel SPRAY NOZZLE POWER STRENGTH POSITION Power saving Controls POWER Adjusts Feminine There are 5 modes to the seat and Posterior for nozzle position Remote spray strength adjustment SEAT WATER BIDET CLEANSING MASSAGE STOP TEMPERATURE TEMPERATURE Stops cleansing Use for Posterior Use for Feminine Massage cleaning Adjusts seat... -
Page 11: Installation
Installation 1. Required tools Have the following tools for installing this product: adjustable end wrench, Phillips head screwdriver, flat-blade screwdriver. 2. Install the junction fitting Bowl Cock Side Box Nut 1) Close the toilet water shutoff valve fully. Tank Water Supply Hose 2) Flush the toilet and empty all the water from the tank. - Page 12 3. Installation of water supply hose to the bidet 1) Remove the protective cover Installation from the end of the water supply Figure hose, and pull out the cap from the water supply connection socket. 2) Connect the water supply hose Water supply for the bidet to the water supply joint...
- Page 13 4. Installation of the bidet (1) Remove the existing seat. Installation Figure 1) Remove the nuts from the seat Body mounting bolts, the slip washers, mounting bolt and rounded packing. 2) Raise the seat and remove it by Bracket lifting the seat mounting bolts. Mounting plate Seat mounting bolts...
- Page 14 5. Install the remote control unit * For Remote Version Only (1) Open the back cover of the remote control unit and insert the 2 size AA batteries. CAUTION • Insert each battery so its positive pole touches a positive connector in the battery compartment and its negative pole touches a negative connector.
- Page 15 If mounted either in plywood paneling 0.20 in. (5 mm) or less in thickness or in gypsum board: Plywood paneling : 0.24 in. (6 mm)-dia. Gypsum board : 0.20 in. (5 mm)-dia. 1) In plywood paneling, drill holes with a Plastic Anchor diameter of 0.24 in.
-
Page 16: Operational Check
Operational Check Operational Check Follow the procedure below after the installation work has been completed. 1. Insert the power plug into the outlet. Confirm that the LED on the seat unit is lit. Power plug Side Panel Version Remote Control Version 2.Check the Feminine and Posterior cleansing spray. -
Page 17: Operation Manual / Table Of Contents
OPERATIONAL MANUAL TABLE OF CONTENTS Additional Important Information..................18 Product Functions .................19 Side Panel / Remote Control...................19 Preparations Before Use ....................20 How to Use the Basic Functions ..................21 How to Use the Convenient Functions ................24 Maintaining This Product ..............28 Cleaning the Seat Unit....................28 Cleaning the Nozzles......................28 Changing the Nozzle Tip ....................28 Cleaning &... -
Page 18: Additional Important Information
Additional Important Information Before and after cleansing and when the water • The capacity of the warm water tank is 0.88 L. Water temperature gradually drops when rear temperature adjustment button is pressed, etc., cleansing or front cleansing is used. If the water water is sprayed from the nozzle. This occurs by drops below a comfortable temperature, press design and is not a cause for concern. -
Page 19: Product Functions
Product Functions Side Panel Remote STOP POWER STOP Power On/Off Stop function Power On/Off Stop function CLEANSING For posterior cleansing only. Press twice for oscillating function. BIDET For feminine cleansing. Press twice for oscillating function. Press twice for super oscillating function. SPRAY STRENGTH Adjusts spray strength for cleansing and bidet settings. -
Page 20: Preparations Before Use
Preparations Before Use Performing the following operations before using the bidet allows you to use the toilet comfortably. STOP (Turning the power on/off) Press the STOP button to turn the power ON or OFF. * If the power is ON, the power LED on the indicator panel will light up. be on. -
Page 21: How To Use The Basic Functions
How to Use the Basic Functions Cleansing Bidet Water is sprayed from the feminine Water is sprayed from the posterior cleansing nozzle. cleansing nozzle. Press the Cleansing button. Press the Bidet button. Side Panel Press the STOP button to stop Press the [+] or [-] Spray Strength the spraying. - Page 22 Massage Cleansing Water pressure alternates between high and low during rear cleansing, providing a massaging effect. Side Panel Press the Massage button during posterior cleansing. To stop the massage spray, press the Massage button again. Remote Control...
- Page 23 Deodorizing To disable the deodorizer Deodorizing starts when a person sits on the toilet seat. Press the STOP and Bidet buttons simultaneously for 2 seconds. * This product is equipped with a deodorizer cartridge which absorbs odors from the toilet. * When the deodorizer feature is disabled, the power LED on the seat unit flashes momentarily.
-
Page 24: How To Use The Convenient Functions
How to Use the Convenient Functions ECO button One-Touch Power Save: Reduces power consumption by turning off the water and seat heater for 8 hours. n i t i t a y l l One-touch power save (8 hours) Press the ECO button. For side panel, the power save ECO LED lights up. - Page 25 High Efficiency Power Savings When the product is not in use, it lowers the temperature of warm water and seat to control power consumption until the product is put back into use. Press [Water Temp] and [Power Saving] button, and hold for 2 seconds or more. Power saving indicator flashs once activated.
- Page 26 Other convenient functions (For side panel version of bidet seat only) Seat Temp. expand from 3 to 5 modes 3 modes 5 modes Indicator Seat temp. Indicator Seat temp. Press Seat Temp. and Nozzle position UP (arrow up) for 2 seconds to expand the seat temperature adjustments from 3 to 5 modes.
- Page 27 If freezing weather or long term absence is Turn clockwise. anticipated, drain the water. (1) Turn the water shutoff valve clockwise to shut off the water supply to the tank. (For draining in cold areas, operate the indoor drain plug.) (2) Press the flush lever on the tank to drain water from the tank.
-
Page 28: Maintaining This Product
Maintaining This Product Cleaning the Seat Unit Cleaning the Nozzles a) Bidet Seat must be powered ON to clean Periodically, wipe off the seat unit with nozzle tip. a soft cloth dampened with water. b) For side panel type, under non-seated situation to clean nozzles manually, press "Seat Temp"... -
Page 29: Cleaning & Maintenance Of The Deodorizing Screen
Cleaning & Maintenance of the Deodorizing Screen Cleaning the Deodorizing Screen 1. Disconnect the power plug from the outlet 5. Install the strainer back into the base and shut off the water supply at the valve. plate of the toilet seat. 2. -
Page 30: Cleaning The Inlet Strainer
Cleaning the Inlet Strainer If the water pressure weakens over time, clean the strainer using the following procedure. Cleaning the Inlet Strainer 1. Close the water shutoff valve to cut off 3. Remove the dirt adhering the water supply. to the inside of the strainer by rinsing it with water. -
Page 31: Cleaning Areas Covered By The Toilet Seat Lid & Unit
Cleaning Areas Covered by the Toilet Seat Lid & Unit When cleaning this product, be sure to unplug the power plug from the wall outlet. CAUTION Removing the toilet seat lid 1. Move the pin hole on the right side 2. -
Page 32: Change Batteries For The Remote Control
Change Batteries for the Remote Control When batteries are about to run out, the battery indicator LED display begins to flash. The indicator only flashes when batteries are low. The batteries included were used in testing of product and may not have the normal lifecycle. The lighting in the room area may make it difficult to see the low battery LED flashing. -
Page 33: Troubleshooting
Troubleshooting You can easily correct some of the problems with this product. Before requesting repairs, please check the following items. If you are unable to correct the problem using the troubleshooting procedures shown below, please contact your local customer service representative. All functions Remedy Symptom... - Page 34 Heated Toilet Seat Remedy Symptom Cause Seat temperature is not set to an Adjust the seat temperature to the appropriate appropriate level. level. The toilet seat is not warm. ECO mode is activated. Disable power save. Others Remedy Symptom Cause The seat unit becomes The seat unit is not locked.
-
Page 35: Specifications
Specifications Product Type Remote Control Side Panel Control Rated Voltage AC120V 60Hz Rated Power 300W±10% Min. 9 psi (0.06MPa) Flow pressure Inlet Water Pressur Range Max. 108 psi (0.75MPa) Hydrostatic pressure Ambient Temperature Range 32°F~104°F (0°C~40°C L 21-1/16" x W 17-3/16" x H 6-7/8" L 21-1/16"... -
Page 36: Warranty Information & After-Sales Support
AS AMERICA, INC. ONE YEAR LIMITED WARRANTY If inspection of this AS America, Inc. (“American Standard”) plumbing product, within one year after its initial purchase, confirms that it is defective in materials or workmanship, American Standard will repair or, at its option, exchange the product for a similar model. - Page 37 Si no lo hace, podría haber accidentes graves en algunas circunstancias. Cada uno de los puntos es de suma importancia para la seguridad y debe cumplirse estrictamente. En caso en que ocurriera un accidente como resultado de uso inapropiado, INAX no asumirá ninguna responsabilidad por los daños.
Need help?
Do you have a question about the SpaLet Series and is the answer not in the manual?
Questions and answers