Table of Contents
Advertisement
Advertisement
Table of Contents

Related Manuals for Compaq Compaq 1610


Summary of Contents for Compaq Compaq 1610
- Page 2 The information in this guide is subject to change without notice. COMPAQ COMPUTER CORPORATION SHALL NOT BE LIABLE FOR TECHNICAL OR EDITORIAL ERRORS OR OMISSIONS CONTAINED HEREIN; NOR FOR INCIDENTAL OR CONSEQUENTIAL DAMAGES RESULTING FROM THE FURNISHING, PERFORMANCE, OR USE OF THIS MATERIAL.
-
Page 3: Table Of Contents
preface For More Information...xi For Updated Information...xii Locating Information Quickly...xii Ordering Software on Diskette...xiii Customer Registration...xiii In North America ...xiii Outside of North America...xiii Symbols and Conventions...xiv chapter 1 Unpacking the Box...1-2 Setting Up for the First Time ...1-3 C-Series at a Glance ...1-8 Screen and Left Side Components...1-8 Front and Right Side Components...1-9 Top and Rear Panel Components...1-10... - Page 4 chapter 3 Special Keyboard Features ... 3-2 Using the Application Launch Keys... 3-4 Using the Dual Brightness Backlight Button ... 3-5 Using the Stylus ... 3-6 chapter 4 Using Battery Power... 4-2 Checking Battery Power Levels ... 4-2 Recognizing Low Battery Indicators... 4-2 Conserving Battery Power...
- Page 5 chapter 7 Establishing an Infrared Connection...7-2 Step 1: Configure the Software...7-2 Step 2: Set Up the Infrared Devices...7-2 Step 3: Transfer Information...7-3 Printing with the IR Port ...7-4 chapter 8 Using Voice Memo ...8-2 Recording A Message ...8-3 Playing a Message...8-3 Managing Messages...8-4 Adjusting Audio Levels ...8-4 Using Internet Setup Utility ...8-5...
- Page 6 chapter 9 Routine Care ... 9-2 Travel Guidelines... 9-3 International Travel ... 9-3 Shipping Guidelines... 9-4 chapter 10 Tips for Maximizing Performance... 10-1 Adjusting Memory... 10-1 Increasing the Data Transfer Speed... 10-2 Troubleshooting ... 10-3 Solving Battery and Power Problems... 10-4 Solving Keyboard and Stylus Problems ...
- Page 7 preface Congratulations on your selection of the Compaq C-Series, the first professional handheld PC. Before using your C-Series, be sure to read this chapter for information about: documentation and online help customer registration symbols and conventions used in this guide References are provided as printed materials and as online information that is accessible from your handheld PC.
- Page 8 The following online and electronic references are also available. Microsoft H/PC Help Microsoft Windows CE Services Help Microsoft Handheld PC Home Page C-Series Home Page To learn about updates that may have occurred to your C-Series device after this document was printed, tap the Start menu on your handheld device, then tap My Documents and select Compaq Updates.
-
Page 9: Outside Of North America
If the computer on which you are installing Microsoft Windows CE 2.0 does not have a CD-ROM drive, you can purchase diskettes containing the Windows CE software necessary for operating your handheld PC. To order Windows CE software diskettes, contact Compaq at 1-800-841-2761 (U.S. - Page 10 Some or all of the following format conventions may be used in this guide to distinguish elements of text: Names of keys are shown in bold type as they appear on the keyboard, for example, Keys that you should press at the same time are represented by the key names and the plus (+) symbol, for example, Commands are presented in lowercase, bold type as shown here:...
-
Page 11: Unpacking The Box
chapter This chapter provides information about getting started with your C-Series handheld PC, such as: unpacking the box setting up for the first time learning about the handheld PC features... - Page 12 Before setting up your handheld PC, be sure your shipping box includes the following items: handheld PC AC Adapter stylus (housed in the handheld PC) auto-sync cable batteries (two AA alkaline or one rechargeable NiMH, depending on your C-Series model) Not pictured: modem cable (available with some models) CD-ROM discs (2)
-
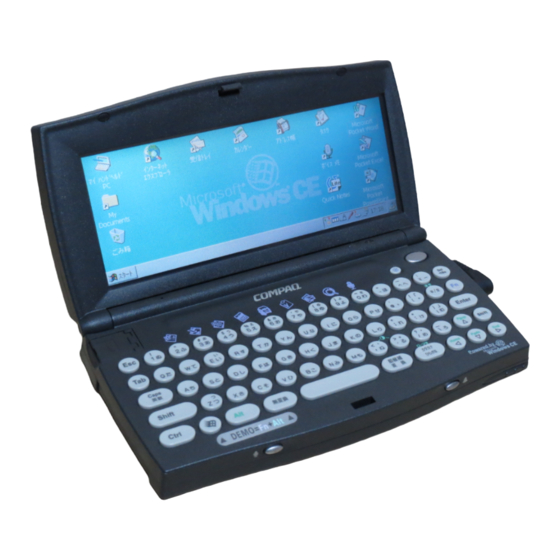
Page 13: C-Series At A Glance
To set up your handheld PC for the first time, follow the instructions below. When it is ready to use, read “C-Series at a Glance” later in this chapter to learn more about the special features of your device. 1. Turn over the handheld PC. 2. - Page 14 If your C-Series comes with a rechargeable NiMH battery pack, follow the steps in the illustration below. Be sure the flat side of the battery is facing in toward the battery compartment as indicated.
- Page 15 Replace the main battery cover. Pull out the backup battery tape to activate the backup battery.
- Page 16 If using a rechargeable NiMH battery pack, connect the unit to AC power and allow the battery pack to charge for three hours. If using AA alkaline batteries, proceed to step 6. Turn over the handheld PC and raise the lid.
- Page 17 Press the power button to turn on power. Follow the instructions on the screen to complete the setup process. To learn more about your handheld PC, take the Welcome Tour by pressing Once setup is complete, you may want to connect your handheld PC to a computer and load valuable Compaq software.
- Page 18 Your handheld PC is equipped with many convenient features that make using it quick and easy. This section familiarizes you with the location and function of these features. Screen Modem connector PC Card slot Displays on-screen information and interprets stylus taps. Connects an RJ-11 modem cable (available on some models only).
- Page 19 Dual brightness Provides increased lighting for better backlight button viewing of the screen. For more information, see “Using the Dual Brightness Backlight Button” in Chapter 3. Power button Press once to turn on the device. Press again to turn off. AC power Connects to external (AC) power via the connector...
- Page 20 Battery charge light (amber) Alarm light (green) Speaker Produces sound for the alarm, playback of voice memos, and other audio effects. For information on setting the speaker level, see “Controlling Volume” in Chapter 8. Microphone Speak into the microphone while pressing the record button to record a voice memo.
- Page 21 Backup battery Contains the CR2032 lithium coin battery compartment which acts as a backup battery when the main batteries are drained or removed. Main battery Holds two AA alkaline batteries or a compartment rechargeable NiMH battery pack for supplying primary battery power to the device.
-
Page 22: Step 1: Determine Computer Requirements
chapter Your C-Series handheld PC acts much like a “computer assistant”—it supplements the capabilities of your regularly used computer when you cannot be at your desk. The handheld PC does this through “partnering” with your regular computer. A partnership is the process of establishing a connection with your regularly used computer for the purpose of synchronizing and transferring data between the computer and the handheld PC. - Page 23 Before establishing a partnership, be sure your computer meets the minimum configuration requirements listed below: 486/33DX or higher processor Microsoft Windows 95 (or later) Windows NT Workstation 4.0 (or later) 8 MB of memory (Windows 95) 12 MB of memory (Windows NT Workstation 4.0) 10 MB of available hard disk space Available 9- or 25-pin serial port (adapter required for 25-pin serial port)
- Page 24 Windows CE Services is the software that allows you to synchronize data between your handheld PC and your computer. Follow the steps below to install Windows CE Services on your computer. Before installing this software, be sure your computer meets the minimum configuration requirements listed earlier in this chapter.
- Page 25 Once Windows CE Services is installed on your computer and the communications port is configured, you are ready to connect your handheld PC to the computer. To do so, follow the steps below. 1. Connect the 16-pin end of the auto-sync cable to the serial connector on your handheld PC 2.
- Page 26 After connecting to the computer, follow the steps below to install the Compaq software. Some software will be installed on your computer and some on your handheld PC. 1. Insert the Compaq CD into the computer’s CD-ROM drive. 2. Follow the instructions included with the CD and on the computer screen to install the Compaq software.
- Page 27 chapter Your C-Series handheld PC contains several keys and buttons that perform special functions. This chapter describes the following features: special keyboard keys and buttons stylus functions...
- Page 28 Location and legends of keys vary by geographic region. Power button Press once to turn on the device. Press again to turn off. Dual Provides increased lighting for better brightness viewing of the screen. For more backlight information, see “Using the Dual button Brightness Backlight Button”...
-
Page 29: Using The Application Launch Keys
Windows key Press once to bring up the Start menu. Application Press in conjunction with the launch keys open applications quickly. For more on this, see “Using the Application Launch Keys” in the following section. Press in conjunction with the number keys (2–9 and 0) to open applications quickly. - Page 30 The application launch keys provide a fast and convenient way to get to many of your favorite programs. To start a program, hold down the key and press the number key below the icon for the program you want to start. (For example, press Pocket Word.) For instructions on using a program once it’s started, see The Handheld PC Companion or the online Help included with the program.
- Page 31 The dual brightness backlight button provides you with two levels of backlighting (the light that illuminates the screen). The following table describes how to use the backlight button according to the handheld PC model you have. Press backlight button Press Fn + backlight button Using the backlight drains battery power.
-
Page 32: Using The Stylus
Compaq recommends using the stylus to touch the screen and when pressing the reset button. There's no harm in using your fingertip, but many features require the stylus for finer pointing. Below are some tips for using the stylus: Make sure the screen is calibrated so that the device interprets the stylus taps correctly. -
Page 33: Using Battery Power
chapter This chapter discusses the following topics: using battery power replacing batteries disposal and recycling of used batteries using AC power resetting the C-Series handheld PC... -
Page 34: Conserving Battery Power
Your C-Series has a dual power supply that consists of: main batteries (two AA alkaline batteries or a rechargeable NiMH battery pack) backup battery (CR2032 lithium cell battery). The main batteries power the handheld PC when it is not connected to an external power source. The backup battery, which comes preinstalled in the handheld PC, protects your saved data when the main batteries are drained or have been temporarily removed (for example, when you are replacing the main... - Page 35 The C-Series displays various battery icons in the status area of the taskbar when batteries are low. When you see a low or very low battery icon, save your work, turn off the device, and replace the old batteries with fresh ones as soon as possible. If no action is taken to resolve the low battery condition described above, a critical low battery warning will appear on the screen when the batteries enter a very low state.
- Page 36 To get the longest life from your batteries, follow these guidelines when using your C-Series: Use external power for PC Card operations PC Card modems and other PC Cards use large amounts of power to operate and can quickly drain the batteries in your device.
-
Page 37: Replacing Batteries
Enable suspend while on external power To auto-suspend the device while it is connected to AC power or automobile power, follow these steps: Tap Start Settings Control Panel, then double-tap the Power icon. Tap the Power Off tab, then place a check in the appropriate checkbox. -
Page 38: Replacing The Main Batteries
When replacing the main batteries, use two AA alkaline batteries or a rechargeable NiMH battery pack. To protect against data loss, be sure you have fresh batteries on hand before removing the old ones. Also connect the device to external power before removing the batteries. To replace the main batteries, follow these steps: 1. - Page 39 5. Do one of the following: If replacing with AA alkaline batteries, follow the steps in the illustration below. Be sure the positive and negative ends of the batteries are oriented correctly.
- Page 40 If replacing with a rechargeable NiMH battery pack, follow the steps in the illustration below. Be sure the flat side of the battery is facing in toward the battery compartment as indicated. If using a rechargeable NiMH battery pack, connect the device to AC power and allow the battery pack to charge for three hours.
- Page 41 A CR2032 lithium coin backup battery (available through your local reseller) comes preinstalled in the handheld PC. Be sure to replace the backup battery as soon as possible when it shows signs of low power (such as when the low battery icon appears in the status area of the taskbar).
- Page 42 5. Remove the compartment cover and old battery. Wipe the surface of the new backup battery with a soft cloth, then place it in the backup battery compartment with the positive (+) side facing up. Replace the compartment cover and tighten the screw. Turn over the handheld PC, open it, and press the power button to resume operation.
- Page 43 Disposal of batteries should comply with country, state, province, and local regulations. For information about disposal and recycling requirements, see Appendix C, “Agency Regulatory Notices.” The AC Adapter included with your handheld PC allows you to connect to AC power via an electrical outlet. When connected to AC or other external power (such as automobile power), the device functions normally, except that battery power is not used.
- Page 44 It is not necessary to turn off your handheld PC before connecting to AC power. To connect to AC power, follow the steps below. 1. Connect one end of the AC Adapter cable to the AC connector on your handheld PC 2.
- Page 45 During a severe system lockup or when a malfunction cannot be corrected any other way, you may need to completely reset and restart your handheld PC. Your C-Series can be reset two different ways, depending upon your situation and the action that is called for: normal reset, which does not affect data that has been saved in memory, and full reset, which erases memory contents and settings.
- Page 46 A full reset restarts your device and removes all information that was stored in memory, such as your data files and your system settings. If you saved your data using one of the backup and restore utilities provided with your C-Series, it is possible to restore your saved data after performing a full reset.
- Page 47 chapter Depending on your model and geographic region, your C-Series handheld PC may include a built-in modem for making dial-up connections over an analog telephone line (the kind used in most homes and offices). You can use the modem to send and receive e-mail, explore the Internet, send faxes, and connect to other services.
- Page 48 Always follow these basic safety precautions when using a modem or telephone that is not cordless. Using the Modem...
-
Page 49: Connecting The Modem
To connect the built-in modem, follow these steps: 1. Lift up the modem jack cover (indicated by a telephone icon) 2. Plug one end of the modem cable that came with your handheld PC into the modem jack 3. Plug the other end of the modem cable into the analog telephone jack Connecting the Modem Establish a dial-up connection through the Remote... -
Page 50: Using An External Modem
An external modem can be used when you do not have a built-in modem in your handheld PC or when you do not have a PC Card modem. An external modem can also be used when you want to consume less battery power than using other modem alternatives. To use an external modem, you must provide a null-modem cable and a 9-pin to 25-pin adapter. - Page 51 To use the Internet with your handheld PC, you will need to do the following: 1. Connect and configure your modem. 2. Establish an Internet Service Provider (ISP) profile using the Internet Setup Utility. (See Chapter 8, “Using Compaq Software,” for more on this.) 3.
- Page 52 chapter Your C-Series handheld PC comes equipped with a versatile feature that allows you to connect credit-card sized options called PC Cards (PCMCIA Cards). PC Cards expand the capability of your handheld PC by providing modem, network, ATA flash storage, VGA, and other capabilities. And because they are small and light-weight, PC Cards are mobile.
- Page 53 Your handheld PC automatically recognizes a wide range of PC Cards approved for use with Windows CE. If you are instructed to install card-specific device drivers provided by a PC Card manufacturer, be sure to install only device drivers specifically designed for Windows CE.
- Page 54 To insert a PC Card, follow these steps: 1. With the 68-pin connector facing in and the label containing the arrow facing up, insert the card into the PC Card slot. 2. Gently push the card into the slot until it is seated. If inserted correctly, the card is ready to use right away.
- Page 55 You do not have to stop a PC Card from running before removing it from the card slot. However, you should wait until a PC Card operation is complete before attempting to remove the PC Card. To remove a PC Card, follow these steps: 1.
- Page 56 chapter The built-in infrared (IR) port on your C-Series handheld PC provides a convenient, “wireless” way to send and receive data. Through the lens on the back of the device, an invisible beam of IR light creates a point-to-point link with other infrared-equipped devices such as computers, printers, and other handheld PCs.
-
Page 57: Establishing An Infrared Connection
Establishing an infrared connection involves three steps: Step 1: Configure the software Step 2: Set up the infrared devices Step 3: Transfer information To set up the IR communications ports on the sending and receiving devices, refer to “Connecting with an Infrared Port” in the Windows CE Services Help that you installed on your computer. - Page 58 Your handheld PC is designed to transfer information to other computers and handheld devices that have Windows CE installed. To transfer files from your C-Series once the devices have been properly set up, follow these steps: 1. On the device sending the file, go to Windows CE Explorer and select the file you want to transfer.
- Page 59 Your C-Series handheld PC can print directly to a printer equipped with an IR port. You can print the following kinds of information from your handheld PC: Pocket Word and Pocket Excel files Contacts and Tasks lists A view of your schedule or agenda in Calendar Inbox messages For more information about printing, see “Printing”...
- Page 60 chapter This chapter provides information on using the Compaq applications included with your C-Series handheld PC. Some Compaq applications are preinstalled on your C-Series, and some are installed from the Compaq CD. For instructions on installing applications, refer to “Step 5: Install the Compaq C-Series Software”...
- Page 61 The Voice Memo application allows you to record, play, and manage voice messages much like you would manage data files in Windows CE Explorer. When a voice message is recorded, your handheld PC automatically saves it in .WAV format. However, you can choose to save your messages in other formats as well.
- Page 62 To record a voice message, follow these steps: 1. Press and hold the record button (located on the left front panel of the device). 2. After you hear the beep, speak into the microphone to record your message. 3. When finished recording, release the record button. You can also record a message by launching Voice Memo via the application launch keys ( tap the Record button at the top of the screen to start recording.
- Page 63 You can manage voice messages much like you manage files in Windows CE Explorer—you can view, rename, delete, copy, and organize messages by dragging and dropping them into folders that you create. This flexibility provides a quick and easy way to keep track of your messages.
- Page 64 Configuring a device for Internet access can be a complicated, time-consuming process. The Internet Setup Utility simplifies this process by automating the way you set up profiles to use when accessing the Internet on your handheld PC. The Internet Setup Utility allows you to transfer your existing Internet service provider (ISP) profile information from your computer to your handheld PC, select profiles from a list of pre-defined ISPs, or create new, custom profiles for use on your...
- Page 65 5. When the profiling options screen appears, select the type of profiling you want: Express—Select this to automatically transfer your computer ISP profile to the handheld PC with very little involvement from you. Pre-Defined—Select this when you don’t have any ISP information on your computer or when you want a different ISP configuration for your handheld device.
- Page 66 The Internet Favorites Synchronizer lets you share favorite Internet addresses (bookmarks) between the browser on your computer and the browser on your handheld PC. Using this program, you can: synchronize bookmarks (put the same list of bookmarks and folders on the computer and handheld PC) copy selected bookmarks and folders by dragging and dropping them between the two devices.
- Page 67 To copy selected bookmarks or folders from one device to another, follow these steps: 1. Be sure the Internet Favorites Synchronizer is installed on your computer. For more on this, see “Step 5: Install the Compaq C-Series Software” in Chapter 2. 2.
- Page 68 The Dictionary Synchronizer lets you synchronize the custom dictionary used in Microsoft Word with the custom dictionary used in Pocket Word on the handheld PC. Sharing a custom dictionary is useful when performing spell checking in either application. To synchronize dictionary terms, follow these steps: 1.
- Page 69 The handheld PC stores your personal information (data you have entered and third-party applications you have installed) in the device’s RAM (random access memory). However, a power loss or other disruption of power can cause your data to be deleted from the handheld PC.
- Page 70 You can back up and restore your C-Series data using the following utilities: Microsoft Backup/Restore. For comprehensive and secured backup protection, use this Windows CE Services utility to periodically back up your handheld PC data onto your computer’s hard drive. You can manually back up data or set this utility to back up automatically each time you connect to your handheld PC.
- Page 71 Use the Compaq Backup and Restore utilities to save the entire contents of your handheld PC memory to a PC Card (purchased separately), which can be carried everywhere your handheld PC goes for easy retrieval while on the road. These utilities are designed for use with ATA Flash RAM PC Cards which are approved by Microsoft as Windows CE 2.0 compatible.
- Page 72 Backup Tips Use dual backup mode if you have sufficient space on your PC Card. If you run out of space on your PC Card when using dual backup mode, delete the \BackupB folder on the PC Card and use single backup mode. To restore a backup onto your C-Series, follow these steps: 1.
- Page 73 Compaq Flash Memory Manager is a collection of programs that allows you to track and manage the information unique to your handheld PC. The Flash Memory Manager consists of: Database Backup/Restore utility Flash Memory Manager Control Panel application. The Database Backup/Restore utility icon always resides in the system tray of the handheld PC.
- Page 74 Use the Flash Memory Manager Control Panel application to track and manage information unique to your handheld PC, as well as to specify periodic backups of data. To use Flash Memory Manager, follow these steps: 1. Tap Start Settings Control Panel and double-tap Flash Memory Manager.
- Page 75 To help protect against unauthorized use of your handheld PC, four levels of password security are provided. For immediate protection, Compaq recommends setting up the first two levels of security (login password and password reminder) through the Password utility in the Control Panel of your handheld PC.
- Page 76 Lockout—If an administrator password has been enabled, the device enters Lockout mode. To gain access to the device again, the administrator password or the unlock key (a character combination) must be entered. After ten unsuccessful entries in succession, the device transitions to Administrator Lockout mode.
- Page 77 For maximum security, you can set three different kinds of passwords on your C-Series. All passwords are set through the Control Panel. The login password and password reminder are set in the Passwords application. The administrator password is set in the Flash Memory Manager application.
- Page 78 To set the password reminder, follow these steps: 1. Tap Start Settings Control Panel. Double-tap the Passwords icon. 2. In the Password box, type the login password you previously set. Asterisks will appear as you type. 3. Tap the Check Password box to verify the password and gain access to the other password fields.
- Page 79 To set the administrator password, follow these steps: 1. Tap Start Settings Control Panel. Double-tap the Flash Memory Manager icon, then select the Administration tab. 2. Type the password in the appropriate box. 3. Tap the Check Password button verify the password. : If you are updating your administrator password, you will be prompted to enter your original administrator password before being allowed to create a new one.
- Page 80 The Owner Control Panel Application allows you to display personal identification information in the login screen of your handheld PC. To enter your information in the Owner Control Panel Application, follow these steps: 1. Tap Start Settings Control Panel. Double-tap the Owner icon.
- Page 81 You can print files that reside on your handheld PC by: connecting to a printer equipped with a serial port using the auto-sync cable. sending files through the IR port to an IR-equipped printer. transferring files to a Windows CE–equipped computer and printing from the computer.
- Page 82 To print a file directly from your handheld PC, follow these steps: 1. Turn on the printer and establish a connection using either an IR link or the auto-sync cable. 2. On the handheld PC, open Windows CE Explorer and select the file you want to print.
- Page 83 chapter This chapter provides recommended guidelines for taking care of your C-Series handheld PC. Following these guidelines will help ensure the longevity of your device and reduce the risk of damage. They include: routine care travel guidelines shipping guidelines...
- Page 84 To keep your handheld PC in good condition and working properly, follow these guidelines: Operate the device with the main and backup batteries installed, even when using external power. This ensures that it will have the necessary power to operate when disconnected from external power.
- Page 85 For safety and convenience when traveling with your handheld PC, follow these guidelines: Back up your data before you leave. (For more about using the Backup and Restore utilities, see Chapter 8, “Using Compaq Software.”) Take a backup copy of your data with you. (For more about backing up data onto an optional ATA Flash RAM PC Card, see Chapter 8, “Using Compaq Software.”) Disconnect all external equipment from the device.
- Page 86 When shipping the handheld PC, follow these guidelines: Safeguard your data by making a backup copy. If shipping the backup copy, be sure that the medium (diskette, tape, or PC Card) is not exposed to electrical or magnetic impulses while stored or in transit. Be sure the PC Card slot is empty.
- Page 87 chapter This chapter provides tips on getting the best performance from your C-Series handheld PC, as well as information on identifying and solving typical problems that may occur while using your handheld PC. Memory allocation in the handheld PC is comprised of storage memory and program memory.
- Page 88 To increase the amount of available program memory, follow these steps. Increasing program memory will decrease the amount of available storage memory. 1. Delete any unnecessary files. 2. Close any applications that are open. 3. Tap Start Settings icon. 4. Tap the Memory tab and adjust the memory slider to increase the amount of program memory.
- Page 89 While your handheld PC is configured just for you, problems you encounter while working may not be unique. Eliminating the typical problems described in this section can save you time and money. See the categories on the following pages to find the possible solution to your problem.
- Page 90 The handheld PC goes When operating on into auto-suspend after battery power, the a short period of handheld PC suspends inactivity. operation after three minutes of idle time (the default setting). Device won’t turn on Batteries are too low to when not connected to run device.
- Page 91 drain the batteries quickly. conserving battery power.
- Page 92 The stylus is not The screen is not working properly. calibrated correctly to interpret the screen taps. The device does not Device is locked up. respond to taps or keystrokes. Cannot get sound from Volume is muted or device. too low. Press the Windows key + i to open the stylus calibration page,...
- Page 93 Device will not turn on Memory expansion or the device does not module is installed recognize the incorrectly or not memory. seated properly. There is an unstable connection between the memory expansion module and the device. Memory has failed. Insufficient memory Device ran out of error occurs during an program memory for...
- Page 94 Continued The device gets Too many document slower each time shortcuts are taking up I use it. memory. Memory needs to be refreshed. Not enough space to Device ran out of save my work. storage memory. 1. See how many recently used document shortcuts exist by pressing...
- Page 95 PC Card is not recognized as part of the system. Device shuts down while the PC Card is in use. PC Card does not work properly. Drivers must be installed. Cables or power cords attaching the PC Card are loose or unplugged.
- Page 96 Screen appears to be The screen contrast is off, even though power extremely light. is on. Items on the screen do Angle of screen needs not display clearly. to be adjusted. Characters are dim. Screen is too light or too dark.
- Page 97 Can’t transfer files The IR devices are not using the IR port. set up properly. The sending or receiving device is not configured properly for IR. The receiving device is not compatible with the sending device. Can’t transfer more The handheld PC is than one file at a time designed to transfer one using the IR port.
- Page 98 Can’t establish a The auto-sync cable connection between may be loose or the handheld PC and defective. the computer. There are problems with the serial communications configuration. Can’t synchronize data There are problems when connected to the with the serial computer.
- Page 99 Can’t connect my There may be static or modem at the specified other forms of baud rate. interference on the telephone line. The bandwidth of the Internet service provider (ISP) is limited. Dial-up connection is The modem cable is not unreliable.
- Page 100 Cannot access the You are using the system using my login wrong login password. password. Cannot access the You are entering the system using my wrong response response phrase. phrase. You are not entering the correct punctuation. Enter the correct password or move to the next stage in the password process by...
- Page 101 To get help from Compaq Customer Support or to find a Compaq authorized reseller or service provider, call one of the numbers listed in Appendix A, “Worldwide Telephone Numbers.” Your Compaq authorized reseller or service provider is available to answer your questions and service your device when necessary. If you return the device for servicing, remember to provide all necessary passwords or, if possible, disable the passwords prior to delivery to the service provider.
- Page 102 appendix Locate your geographical area in the following table and use one of the telephone numbers for Compaq assistance. General Information Numbers—Product information, technical assistance, and the location of your nearest Compaq authorized dealer, reseller, or service provider. Technical Support Numbers—Hardware technical support in analyzing system configuration and diagnostic problems or troubleshooting.
- Page 103 Argentina General Information Technical Support Australia General Information Technical Support PaqFax Austria General Information* Technical Support* Order Software Backup Belgium / Luxembourg Compaq Care Center General Fax Infoline (resellers, brochures) QuickLine (BBS) Order Software Backup Order Software Backup by Fax Brazil General Information Canada...
- Page 104 Caribbean General Information Technical Support Chile General Information Technical Support China General Information Technical Support Colombia General Information Technical Support Czech Republic General Information Technical Support Denmark General Information Technical Support Finland General Information Technical Support* QuickLine (BBS) France General Information Technical Support * Indicates toll-free domestic numbers.
- Page 105 Germany Hotline Hotline Fax Infoline Infoline Fax QuickLine PaqFax Order Software Backup* Hong Kong General Information Technical Support PaqFax Hungary General Information Technical Support India General Information PaqFax Israel General Information Technical Support PaqFax Italy General Information Technical Support Japan General Information* Technical Support* Windows 95 Support*...
- Page 106 Korea General Information Technical Support Malaysia General Information Technical Support Mexico General Information Technical Support PaqFax Netherlands General Information Customer Support* Fax* QuickLine Bulletin Board New Zealand General Information Norway General Information Technical Support Poland General Information Technical Support Portugal General Information Technical Support Russia...
- Page 107 Singapore General Information Customer Support Center PaqFax South Africa General Information Technical Support Spain General Information Technical Support Sweden General Information Technical Support PaqFax (hämtfax) QuickLine (BBS) Switzerland General Information Technical Support QuickLine Bulletin Board Order Software Backup Taiwan General Information Technical Support Thailand General Information...
- Page 108 United Kingdom General Information FaxPaq QuickLine Bulletin Board United States Product Information* Technical Support* PaqFax* Download Facility (modem access only) Order Software Backup* Battery Pack Recycling* Venezuela General Information * Indicates toll-free domestic numbers. 0990-134456 0181-332-3550 0181-332-9499 1-800-345-1518 1-800-OKCOMPAQ (1-800-652-6672) 1-800-345-1518, Option 1 1-281-518-1418 1-800-952-7689...
- Page 109 appendix Processor Video Memory Slots Display Display contrast Batteries Power consumption Audio IrDA Communications Size Weight High performance MIPS-based RISC processor designed for Windows CE 8 MB or 16 MB, expandable to 32 MB 16 MB Integrated in RAM 1 PC Card, 1 expansion RAM 640 ×...
- Page 110 appendix For regulatory identification purposes your product is assigned a Compaq Series number. The Compaq Series number for this product is Series 2930A. This series number should not be confused with the marketing name (Compaq C-Series). The modem series number can be found on the product label, along with the approval marks where the modem is approved for use.
- Page 111 The following accessories have been evaluated for use with your device. These Compaq-approved accessories can be identified by their assigned series numbers listed below. To ensure continued reliable and safe operation of your handheld device, use only the accessories listed below with your Series 2930A handheld PC. Handheld PC Cradle Rechargeable NiMH Battery Pack...
- Page 112 Part 15 of the Federal Communications Commission (FCC) Rules and Regulations has established Radio Frequency (RF) emission limits to provide an interference-free radio frequency spectrum. Many electronic devices, including computers, generate RF energy incidental to their intended function and are, therefore, covered by these rules.
- Page 113 This equipment has been tested and found to comply with the limits for a Class A digital device, pursuant to Part 15 of the FCC Rules. These limits are designed to provide reasonable protection against harmful interference when the equipment is operated in a commercial environment.
- Page 114 The FCC requires the user to be notified that any changes or modifications made to this device that are not expressly approved by Compaq Computer Corporation may void the user's authority to operate the equipment. Connections to this device must be made with shielded cables with metallic RFI/EMI connector hoods in order to maintain compliance with FCC Rules and Regulations.
- Page 115 This Class A digital apparatus meets all requirements of the Canadian Interference-Causing Equipment Regulations. Cet appareil numérique de la classe A respecte toutes les exigences du Règlement sur le matériel brouilleur du Canada. This Class B digital apparatus meets all requirements of the Canadian Interference-Causing Equipment Regulations.
- Page 117 As an Energy Star Partner, Compaq Computer Corporation has determined that this product meets the Energy Star guidelines for energy efficiency. The Energy Star Computers Program was created by the EPA to promote energy efficiency and reduce air pollution through more energy-efficient equipment in homes, offices and factories.
- Page 118 This equipment complies with Part 68 of the FCC rules. Located on the bottom of the Series 2930A is a label that contains, among other information, the FCC Registration Number and Ringer Equivalence Number (REN) for this equipment. Upon request, you must provide this information to your telephone company.
- Page 119 An FCC Compliant 6-position modular plug is provided with this equipment. This equipment is designed to be connected to the telephone network or premises wiring using a compatible 6-position modular jack which is FCC Part 68 Compliant (jack type: RJ-11C). If your telephone equipment causes harm to the telephone network, the telephone company may discontinue your service temporarily.
- Page 120 The Telephone Consumer Protection Act of 1991 makes it unlawful for any person to use a computer or other electronic device to send any message via a telephone facsimile machine unless such message clearly contains, in a margin at the top or bottom of each transmitted page, or on the first page of the transmission, the date and time it is sent and an identification of the business, or entity, or individual sending the message and the...
- Page 121 The Ringer Equivalence Number (REN) assigned to each terminal device provides an indication of the maximum number of terminals allowed to be connected to a telephone interface. The termination on an interface may consist of any combination of devices, subject only to the requirement that the sum of the Ringer Equivalence Numbers of all the devices does not exceed 5.
- Page 122 The Series 2930A provides an integrated modem. For the purposes of BABT approval, the Series 2930A is classified as a host-dependent product. The modem is suitable for connection to the Public Switched Telephone Network (PSTN) direct exchange lines and relevant branch systems (PBXs). A ringer equivalent number (REN) is a value given to all apparatus to be connected to the PSTN.
- Page 123 This apparatus has been approved for the following facilities: Simple modem Facsimile Automatic call initiation Detection of initial proceed indication Automatic dialing Tone detection of busy tone, dial tone, or number unobtainable tone Auto clear from the call origination end Loop disconnect (pulse) dialing Multifrequency (tone) dialing Any other usage will invalidate the approval of the apparatus if,...
- Page 124 When entering telephone numbers, ensure that the number that appears on the screen is correct before beginning to dial. The following lists the modem approval statements: This modem is approved as a host-dependent product. This approval number is a general approval number. APPROVED for connection to the telecommunications systems specified in the instructions for use, subject to the conditions set out in them.
- Page 125 1. When entering telephone numbers, ensure that the number that appears on the screen is correct before beginning to dial. 2. Some parameters required for compliance with AUSTEL specifications are dependent on the Telecommunications apparatus provided with the Compaq Series 2930A. The Series 2930A shall be set to operate within the following limits for compliance with AUSTEL Specifications.
- Page 126 The Series 2930A provides an integrated modem. For the purposes of New Zealand Telecom approval, the Series 2930A is classified as a host-dependent product. The grant of a New Zealand Telepermit for a device in no way indicates NZ Telecom acceptance of responsibility for the correct operation of that device under all operating conditions.
- Page 127 This equipment shall not be used in any manner which could constitute a nuisance to other New Zealand Telecom customers. 1. The modem is suitable for connection to the Public Switched Telephone Network (PSTN) direct exchange lines and relevant branch systems (PBXs). 2.
- Page 128 6. This apparatus has been approved for the following facilities: Simple modem Facsimile Automatic call initiation Detection of initial proceed indication Detection of secondary proceed indication Operation in the absence of proceed indication Automatic dialing Tone detection of busy tone, dial tone, or number unobtainable tone Auto clear from the call origination end Loop disconnect (pulse) dialing...
- Page 129 1. When entering telephone numbers, ensure that the number that appears on the screen is correct before beginning to dial. 2. Some parameters required for compliance with Telecom’s PTC Specifications are dependent on the telecommunications apparatus provided with the Compaq Series 2930A handheld PC.
- Page 130 A person calling your modem will hear a short burst of ringing before the modem answers. This confirms that the call has been successfully switched through the network. Caller Identification Information (which occurs between the first and second rings cadences) is not destroyed. Sofern Sie das Compaq 2930A series an einer Nebenstellenanlage benutzen wollen, erkundigen Sie sich bitte bei Ihrem Fachhändler nach der Möglichkeit, die Amtsholung einzustellen.
- Page 131 Dieses Gerät ist mit einem mindestens 4-adrigen Anschlußkabel mit TAE-Stecker mit Kodierung N ausgestattet und verfügt über weiterführende Sprechadern. Es kann als einzige Endeinrichtung oder mit weiteren Endeinrichtungen am Netzanschluß betrieben werden. Weitere Endeinrichtungen, die sich an dem Telefonanschluß befinden, werden beim Einstecken des Gerätes nicht von der Leitung getrennt.
- Page 132 Compaq-modemet 2930A series understøtter ikke impulssignalering. Både opkaldskode P (impulssignalering) og T (tonesignalering) tvinger modemet til at anvende tonesignalering. 1. Het modem is geschikt voor aansluiting op het openbare geschakelde telefoonnetwerk en op (analoge) telefooncentrales binnen bedrijven en instellingen. 2. De aansluitfactor is een waarde die wordt toegekend aan alle apparaten die op het openbare telefoonnetwerk kunnen worden aangesloten.
-
Page 133: Replacing The Backup Battery
AC Adapter, 4-11, 4-12 AC power, 4-11 AC power connector, 1-9 accessing the Internet, 5-5, 8-6 adjusting contrast, 3-2 adjusting memory, 10-1 administrator lockout mode, 8-17 administrator password setting, 8-20 agency regulatory notices, C-3 alarm setting, 8-23 turning off, 8-23 alarm button, 1-9 alarm light, 1-10 alkaline batteries... -
Page 134: Connecting An External Modem
types of backup and restore utilities, 8-10 Voice Memo, 8-2 Components. See identifying components computer connection, 2-4 computer partnership requirements, 2-2 configuring an external modem, 5-4 configuring the communications port, connecting an external modem, 5-4 connecting the internal modem, 5-3 connecting to a computer, 2-4 connecting to AC power, 4-12 connection. - Page 135 information locating, xii obtaining additional, xi online references, xii printed references, xi infrared, 7-1 configuring IR software, 7-2 establishing a connection, 7-2 printing with IR, 7-4 problems, 10-10 setting up IR devices, 7-2 transferring information, 7-3 infrared port, 1-10 inserting a PC Card, 6-3 installing Compaq software, 2-5 installing Windows CE Services software, 2-3...
-
Page 136: Using Ac Power
PaqFax, A-1 partnership, 2-1 problems, 10-11 password delay feature, 8-20 password reminder, 8-16 setting, 8-19 passwords, 8-16 administrator, 8-20 login, 8-16 password delay, 8-20 password reminder, 8-16 PC Card, 6-1 Compaq-tested list, 6-1 eject lever, 1-11 inserting, 6-3 installing PC Card software, 6-2 operating guidelines, 6-2 problems, 10-8 removing, 6-4... -
Page 137: Tips For Maximizing Performance
setting passwords, 8-18 administrator password, 8-20 login password, 8-18 password delay feature, 8-20 password reminder, 8-19 setting the alarm, 8-23 setting up an ISP profile, 8-5 setting up your device, 1-3 shipping guidelines, 9-4 software installing Compaq software, 2-5 installing Microsoft software, 2-3 sound adjusting, 8-4 controlling, 8-21...
Need help?
Do you have a question about the Compaq 1610 and is the answer not in the manual?
Questions and answers