Table of Contents
Advertisement
Available languages
Available languages
Quick Links
HARBOR BREEZE and logo design are
trademarks or registered trademarks of
LF, LLC. All rights reserved.
Purchase Date
Questions, problems, missing parts? Before returning to your retailer, call our customer
service department at 1-888-251-1003, 8 a.m. - 8 p.m., EST, Monday - Sunday. You could
also contact us at partsplus@lowes.com or visit www.lowespartsplus.com.
AS21677
1
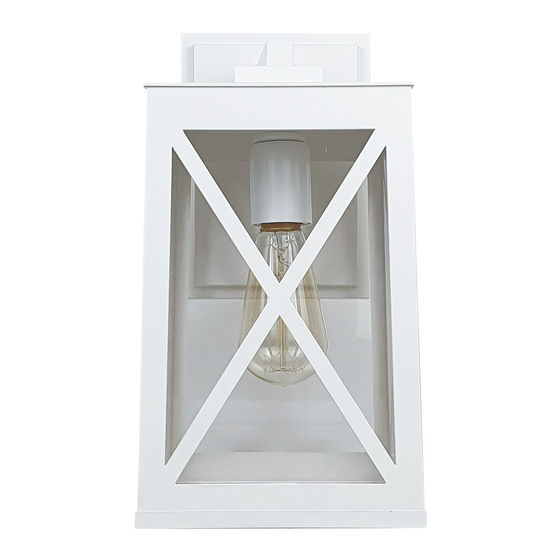
ITEM #4145468
WALL LANTERN
MODEL #WL137MW
Español p. 10
ATTACH YOUR RECEIPT HERE
ADJUNTE SU RECIBO AQUÍ
3187807
APPROVED FOR USE
IN WET LOCATIONS
Advertisement
Chapters
Table of Contents

Subscribe to Our Youtube Channel
Related Manuals for Harbor Breeze WL137MW


Summary of Contents for Harbor Breeze WL137MW
- Page 1 ITEM #4145468 WALL LANTERN MODEL #WL137MW Español p. 10 HARBOR BREEZE and logo design are trademarks or registered trademarks of ATTACH YOUR RECEIPT HERE LF, LLC. All rights reserved. ADJUNTE SU RECIBO AQUÍ 3187807 APPROVED FOR USE Purchase Date IN WET LOCATIONS Questions, problems, missing parts? Before returning to your retailer, call our customer service department at 1-888-251-1003, 8 a.m.
-
Page 2: Table Of Contents
TABLE OF CONTENTS Package Contents ....................... 2 Hardware Contents ......................3 Safety Information ........................ 3 Preparation .......................... 4 Assembly Instructions ......................5 Care and Maintenance ......................9 Troubleshooting........................9 Warranty ..........................9 PACKAGE CONTENTS PART DESCRIPTION QUANTITY Fixture Mounting Plate (preassembled to fixture (A)) Mounting Plate Screw (preassembled to fixture (A)) -
Page 3: Hardware Contents
HARDWARE CONTENTS (shown actual size) Wire Machine Connector Screw Qty. 3 Qty. 2 SAFETY INFORMATION READ AND SAVE THESE INSTRUCTIONS. DANGER • For your protection and safety, carefully read and understand the information provided in this manual completely before attempting to assemble, install or operate this product. Failure to do so could lead to fire, electrical shock or other injuries that could be hazardous or even fatal. -
Page 4: Preparation
SAFETY INFORMATION WARNING • To avoid personal injury, the use of gloves may be necessary while handling fixture parts with sharp edges. • DO NOT suspend any fixture by the house wires. A fixture must always be mounted directly to an outlet box or to a mounting strap which is first attached to the outlet box. -
Page 5: Assembly Instructions
ASSEMBLY INSTRUCTIONS Turn off circuit breakers and wall switch to the fixture supply line leads. DANGER: Failure to disconnect power supply prior to installation may result in serious injury or death. Remove existing fixture and disconnect all electrical wiring. Outlet Box Remove mounting plate (B) from fixture (A) by removing mounting plate screws (C) from the fixture (A). - Page 6 ASSEMBLY INSTRUCTIONS 4. Attach mounting plate (B) to outlet box (not included) using the existing washers and outlet Outlet Box box screws or the machine screws (BB). NOTE: If the outlet box screws required for your outlet box are of a different size than the machine screws (BB), consult with a licensed electrician before proceeding.
- Page 7 ASSEMBLY INSTRUCTIONS 5b. Connect BARE/GREEN ground wire from outlet BLACK box to BARE ground wire from fixture (A) with WHITE wire connector (AA). Connect WHITE wire from fixture (A) to WHITE wire from outlet box using existing wire connector or wire connector (AA). Connect BLACK wire from fixture (A) to BLACK wire from outlet box using existing wire connector or wire connector (AA).
- Page 8 ASSEMBLY INSTRUCTIONS 7. Attach fixture (A) to mounting plate (B) using the mounting plate screws (C) previously removed (Step 3, Page 5). NOTE: Before tightening mounting plate screws (C) completely, use level to check fixture (A) -- adjust if necessary. 8.
-
Page 9: Care And Maintenance
ASSEMBLY INSTRUCTIONS 10. After completing installation, caulk mounting surface of fixture (A) with silicone weather sealant (not included). WARNING: Failure to caulk fixture mounting surface with silicone weather sealant may result in water damage in outlet box, which may cause electrical malfunction or electrical shock. - Page 10 ARTÍCULO #4145468 FAROL DE PARED MODELO #WL137MW HARBOR BREEZE y el logotipo son marcas o marcas registradas de LF, LLC. Todos los derechos reservados. 3187807 HOMOLOGADO PARA UBICACIONES MOJADAS Fecha de compra ¿Preguntas, problemas, piezas faltantes? Antes de volver a la tienda, llame a nuestro Departamento de Servicio al Cliente al 1-888-251-1003, de lunes a domingo de 8 a.m.
-
Page 11: Contenido Del Paquete
ÍNDICE Contenido del paquete ......................11 Aditamentos ..........................12 Información de seguridad ...................... 12 Preparación ...........................13 Instrucciones de ensamblaje....................14 Cuidado y mantenimiento ...................... 18 Solución de problemas ......................18 Garantía ..........................18 CONTENIDO DEL PAQUETE PIEZA DESCRIPCIÓN CANTIDAD Lámpara Placa de montaje (preensamblada a la lámpara [A]) Tornillo de la placa de montaje (preensamblado a la lámpara [A]) -
Page 12: Aditamentos
ADITAMENTOS (se muestran en tamaño real) Tornillo Conector de cables para metal Cant. 2 Cant. 3 INFORMACIÓN DE SEGURIDAD LEA Y GUARDE ESTAS INSTRUCCIONES. PELIGRO • Por su propia protección y seguridad, lea atentamente y comprenda la información de este manual en su totalidad antes de intentar ensamblar, instalar o usar este producto. -
Page 13: Preparación
INFORMACIÓN DE SEGURIDAD ADVERTENCIA • Para evitar lesiones personales, puede ser necesario usar guantes al manipular las piezas del ensamble con bordes filosos. • NUNCA cuelgue lámparas de los cables de la casa. Siempre se debe montar la lámpara directamente en una caja de salida o una placa de montaje que primero esté... -
Page 14: Instrucciones De Ensamblaje
INSTRUCCIONES DE ENSAMBLAJE Apague los interruptores de circuito y el interruptor de pared para interrumpir el suministro de electricidad hacia la lámpara. PELIGRO: si no interrumpe el suministro de electricidad antes de la instalación, pueden producirse lesiones graves o la muerte. Retire la lámpara existente y desconecte el cableado eléctrico. - Page 15 INSTRUCCIONES DE ENSAMBLAJE 4. Fije la placa de montaje (B) a la caja de salida Caja de (no se incluye) con las arandelas existentes y los Oreja salida tornillos de la caja de salida o los tornillos para metal (BB). NOTA: si el tamaño de los tornillos de la caja de salida requeridos para su caja es diferente al de los tornillos para metal (BB), consulte a un electricista certificado antes de...
- Page 16 INSTRUCCIONES DE ENSAMBLAJE Conecte el conductor DESNUDO/VERDE de NEGRO puesta a tierra de la caja de salida al conductor BLANCO DESNUDO de puesta a tierra de la lámpara (A) con el conector de cables (AA). Conecte el conductor BLANCO de la lámpara (A) al conductor BLANCO de la caja de salida con el conector de cables existente o el conector de cables (AA).
- Page 17 INSTRUCCIONES DE ENSAMBLAJE 7. Fije la lámpara (A) a la placa de montaje (B) usando los tornillos de la placa de montaje (C) que retiró anteriormente (paso 3, página 14). NOTA: antes de apretar completamente los tornillos de la placa de montaje (C), examine la lámpara (A) con un nivel y ajústela si es necesario.
-
Page 18: Cuidado Y Mantenimiento
INSTRUCCIONES DE ENSAMBLAJE Luego de completar la instalación, calafatee la superficie de montaje de la lámpara (A) con sellador de silicona para todo clima. ADVERTENCIA: si no calafatea la superficie de montaje de la lámpara con un sellador de silicona para todo clima, se pueden producir daños causados por el agua en la caja de salida, lo que, a su vez, puede causar un mal funcionamiento...
Need help?
Do you have a question about the WL137MW and is the answer not in the manual?
Questions and answers