Advertisement
THA-101
1
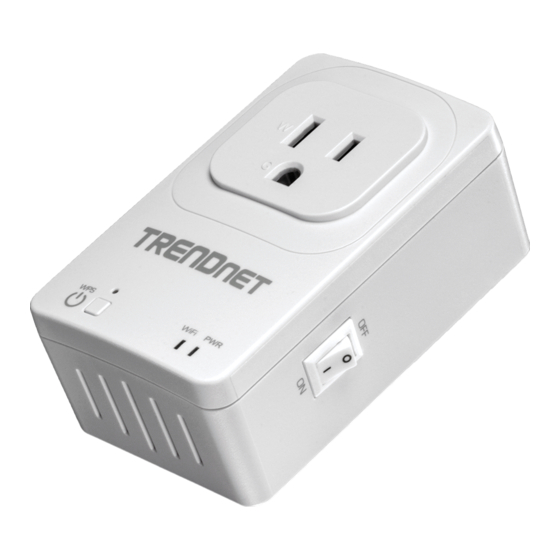
Power on the Extender
Step1. Plug your Wireless Extender into an
electrical socket.
Step2. Check the LEDs: the power LED
should be always on when system is
ready.
2
Connect to the Wireless
Extender
Notes:
The Wireless Extender is designed as a pure wireless
device, so there are no any RJ-45 ports for Ethernet
cable to connect to. Please prepare any IEEE802.11
ac/b/g/n compliant wireless adapter for next setup
step.
Step1. Default SSID is "THA-101" and
security key is "12345678".
Step2. Set your wireless adapter in DHCP
client and waiting for getting IP
Address from the Wireless Extender.
Step3. Open a web browser and enter
"192.168.1.254" in URL field to open
the configuration page.
Step4. Default user name is "admin" and
password is "password" to access
WEB GUI.
"The product shall be used in the residential
environment notwithstanding use in commercial,
business environments. If you want to use other
than the above environments, please contact
AboCom first."
WiFi Smart Plug
Q u i c k
I n s t a l l
3
Setup for Repeater Mode
Manually Configuration:
Step1. Open Wireless Settings / AP Client
page.
Step2. Setup the SSID and Security of AP
that you want to connect to: Click
APPLY to finish.
OR you can use "SCAN" to refresh the
wireless network and select an AP to
connect to.
WPS Configuration:
Step1. Press the WPS button of the Wireless
Extender over 3 seconds.
Step2. Then press the WPS button of the
wireless router/AP over 3 seconds
too. Step 1 and Step 2 need to be
done in 200 seconds.
G u i d e
Advertisement
Table of Contents

Related Manuals for TRENDnet THA-101


Summary of Contents for TRENDnet THA-101
- Page 1 OR you can use “SCAN” to refresh the step. wireless network and select an AP to connect to. Step1. Default SSID is “THA-101” and security key is “12345678”. Step2. Set your wireless adapter in DHCP client and waiting for getting IP Address from the Wireless Extender.
- Page 2 Check if Connected The green–checked icon ahead is the Wireless Router/AP which the Wireless Extender is working to. Hardware Button Behavior WPS button behavior: Less than 2 sec → N/A, WPS LED no blinking. More than 2 sec → Do WPS, WPS LED start blinking Reset button behavior: Less than 2 sec →...
- Page 3 FCC Caution: Any changes or modifications not expressly approved by the party responsible for compliance could void the user’s authority to operate this equipment. This device complies with Part 15 of the FCC Rules. Operation is subject to the following two conditions: (1) This device may not cause harmful interference, and (2) this device must accept any interference received, including interference that may cause undesired operation.
Need help?
Do you have a question about the THA-101 and is the answer not in the manual?
Questions and answers