Table of Contents
Advertisement
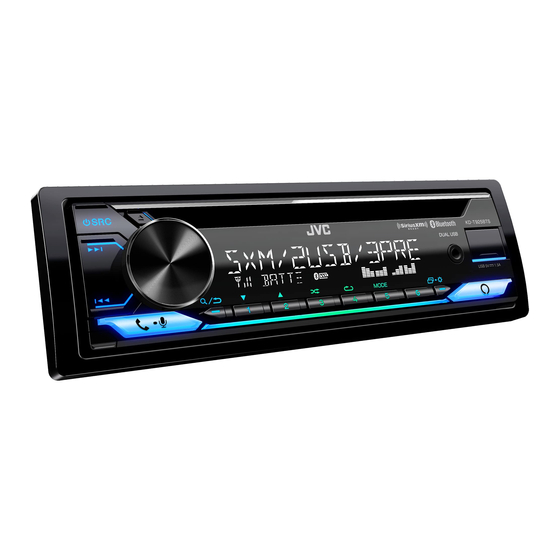
KD-T925BTS / KD-T920BTS / KD-T720BT
CD RECEIVER
INSTRUCTION MANUAL
RÉCEPTEUR CD
MANUEL D'INSTRUCTIONS
RECEPTOR CON CD
MANUAL DE INSTRUCCIONES
For customer Use:
Enter below the Model No. and Serial No. which are
located on the top or bottom of the cabinet. Retain this
information for future reference.
Model No.
Serial No.
ENGLISH
FRANÇAIS
ESPAÑOL
B5A-3880-00 [K]
Advertisement
Table of Contents

Related Manuals for JVC KD-T925BTS


Summary of Contents for JVC KD-T925BTS
- Page 1 ENGLISH FRANÇAIS ESPAÑOL KD-T925BTS / KD-T920BTS / KD-T720BT CD RECEIVER INSTRUCTION MANUAL RÉCEPTEUR CD MANUEL D’INSTRUCTIONS RECEPTOR CON CD MANUAL DE INSTRUCCIONES For customer Use: Enter below the Model No. and Serial No. which are located on the top or bottom of the cabinet. Retain this information for future reference.
- Page 2 útil, deberán ser reciclados en instalaciones que puedan dar el tratamiento Products: CD RECEIVER adecuado a estos productos y a sus subproductos residuales correspondientes. Model Name: KD-T925BTS/KD-T920BTS/KD-T720BT Póngase en contacto con su administración local para obtener información sobre el Responsible Party: JVCKENWOOD USA CORPORATION punto de recogida más cercano.
- Page 3 SOFTWARE LICENSE AGREEMENT ISED Caution This device contains licence-exempt transmitter(s)/receiver(s) that comply with Innovation, Science and Economic Development Canada’s licence-exempt RSS(s). Operation is subject to the following two The software embedded in the Product (hereinafter the "Licensed Software") provided by Licensor is conditions: copyrighted to or sublicensable by the Licensor, and this Agreement provides for the terms and conditions 1.
- Page 4 Article 4 Right pertaining to the Licensed Software Article 9 Destruction of the Licensed Software Any and all copyrights and other rights pertaining to the Licensed Software and related documents If this Agreement is terminated pursuant to the provision of Article 8, the User shall destroy the Licensed shall belong to the Licensor or the original holder of the right who granted to the Licensor the license or Software, any related documents and copies thereof within two (2) weeks from such date of termination.
- Page 5 Important Notice concerning the Software -CMP The MIT License (MIT) Copyright (c) 2014 Charles Gunyon -jansson Permission is hereby granted, free of charge, to any person obtaining a copy of this software and associated Copyright (c) 2009-2012 Petri Lehtinen <petri@digip.org> documentation files (the "Software"), to deal in the Software without restriction, including without Permission is hereby granted, free of charge, to any person obtaining a copy of this software and associated limitation the rights to use, copy, modify, merge, publish, distribute, sublicense, and/or sell copies of the...
- Page 6 sha2 Copyright (c) 1995, 1996 Carnegie-Mellon University. All rights reserved. AUTHOR: Aaron D. Gifford - http://www.aarongifford.com/ Author: Chris G. Demetriou Copyright (c) 2000-2001, Aaron D. Gifford Permission to use, copy, modify and distribute this software and its documentation is hereby granted, All rights reserved.
- Page 7 T-Kernel 2.0 This product uses the source code of T-Kernel 2.0 under T-License 2.0 granted by T-Engine Forum (www.tron.org) BSD-3-Clause Copyright (c) 2000-2001, Aaron D. Gifford All rights reserved. You may obtain a copy of the license at https://opensource.org/licenses/BSD-3-Clause THE SOFTWARE IS PROVIDED “AS IS”, WITHOUT WARRANTY OF ANY KIND, EXPRESS OR IMPLIED, INCLUDING BUT NOT LIMITED TO THE WARRANTIES OF MERCHANTABILITY, FITNESS FOR A PARTICULAR PURPOSE AND NONINFRINGEMENT.
-
Page 8: Table Of Contents
Specifications ..................43 CD/USB/iPod..................... 8 AUX......................11 SiriusXM® Radio ..................12 JVC Remote Application ............... 15 How to read this manual Bluetooth® ....................16 • The displays and faceplates shown in this manual are examples used to provide clear explanations of the operations. For this reason, they may Bluetooth - Connection be different from the actual displays or faceplates. -
Page 9: Before Use
Before Use IMPORTANT • If a disc error occurs due to condensation on the laser lens, eject the disc and wait for the moisture to evaporate. • To ensure proper use, please read through this manual before using this • Depending on the types of cars, the antenna will automatically extend product. -
Page 10: Basics
Volume knob Loading slot Display window* Detach How to reset Reset the unit within 5 seconds after KD-T925BTS: detaching the faceplate. Detach button USB cable from the rear of the unit * Only for illustration purpose. On the faceplate Press B SRC. -
Page 11: Getting Started
Getting Started Basics Remote control (RM-RK52) (for KD-T925BTS/KD-T920BTS) This unit can be remotely controlled with an optionally purchased remote control. Remote sensor (Do not expose to bright sunlight.) Acknowledge the crossover type and cancel the demonstration When you turn on the power for the first time (or [FACTORY RESET] is set to [YES], see page 6), the display shows: “2-WAY X’OVER”... -
Page 12: Set The Basic Settings
For details on how to update the firmware, visit To return to the previous setting item, press <https://www.jvc.net/cs/car/>. [FACTORY RESET] [YES]: Resets the settings to default (except the stored station). ; Set the basic settings [NO]: Cancels. -
Page 13: Radio
Radio Select a stored station Press one of the number buttons (1 to 6). (or) Press Turn the volume knob to select a preset number, then press the knob. Other settings Search for a station Press and hold Press B SRC repeatedly to select FM or AM. Turn the volume knob to select an item (see the following table), then Press S / T (or press H / I on the remote control) to search for a press the knob. -
Page 14: Cd/Usb/Ipod
[PERSNLTY] (personality), [PUBLIC], [COLLEGE], [HABL ESP] (Spanish talk), [MUSC ESP] USB device (Spanish music), [HIP HOP], [WEATHER] and/or KD-T925BTS: You can also connect to the USB cable from the rear of the unit (USB input terminal). The source changes to USB FRONT/USB REAR/USB automatically and playback starts. - Page 15 [SHUFFLE OFF]/[SHUFFLE ON]: iPod * For CD: Only for MP3/WMA/AAC files. This does not work for iPod. Selectable source: • KD-T925BTS: CD/USB FRONT/USB REAR/iPod FRONT/iPod REAR or iPod BT • KD-T920BTS/KD-T720BT: CD/USB/iPod USB or iPod BT For playable audio file, see “Playable files” on page 34...
- Page 16 CD/USB/iPod Default: [XX] Select music drive [USB] While in USB FRONT/USB REAR/USB source, press 5 MODE repeatedly. [IPHONE SETUP] [BT]: iPod BT source is available if iPod/iPhone is connected via Bluetooth. Stored songs in the following drive will be played back. •...
-
Page 17: Aux
CD/USB/iPod You can listen to music from a portable audio player via the auxiliary input Alphabet search (applicable only for iPod FRONT/iPod REAR/iPod USB source jack. and iPod BT source) You can search for a file according to the first character. Preparation: Select [ON] for [BUILT-IN AUX] in [SOURCE SELECT]. (Page 6) Press Turn the volume knob to select a list, then press the knob. -
Page 18: Siriusxm® Radio
SiriusXM® Radio (for KD-T925BTS/KD-T920BTS) Only SiriusXM® brings you more of what you love to listen to, all in one place. Start listening Get over 140 channels, including commercial-free music plus the best sports, news, talk, comedy and entertainment. Welcome to the world of satellite Press B SRC repeatedly to select SIRIUS XM. - Page 19 SiriusXM® Radio (for KD-T925BTS/KD-T920BTS) During Replay... Settings in memory On the faceplate On the remote control You can store up to 18 channels. Press d. Play back/pause Press the volume knob. Store a channel Skip backward/forward* Press S / T. Press H / I.
- Page 20 SiriusXM® Radio (for KD-T925BTS/KD-T920BTS) Using SiriusXM Vehicle Tuner later than SXV200: This unit can assign TuneScan™ a maximum of 18 SmartFavorites channels. Initially, all preset channels are assigned as SmartFavorites. You can get a short preview of the songs that you have missed on each of •...
-
Page 21: Jvc Remote Application
5 Repeat step 1 to step 4 to reconfirm the pass code. Preparation: • Make a note of the new pass code to enter channel lock settings for Install the latest version of JVC Remote application on your device before next time. connecting. -
Page 22: Bluetooth
Bluetooth® JVC Remote Application Default: [XX] • Depending on the Bluetooth version, operating system and the firmware version of your mobile phone, Bluetooth features may not [REMOTE APP] work with this unit. [SELECT] Selects the device ([IOS] or [ANDROID]) to use the application. - Page 23 • Once the pairing is completed, the Bluetooth device will remain registered in the unit even if you reset the unit. To delete the paired device, see Search and select the name of your receiver (“KD-T925BTS”/ [DEVICE DELETE] on page 21.
-
Page 24: Bluetooth - Mobile Phone
When there is an incoming call: J / K / H / I. or the volume knob. • KD-T925BTS/KD-T920BTS: The buttons will blink in the color you have selected in [RING COLOR]. While talking on the first incoming call... (Page 19) - Page 25 [AUTO ANSWER] [01 SEC] to [30 SEC]: Answers an incoming call automatically in the selected time (in seconds). ; [OFF]: Cancels. Improve the voice quality [RING COLOR] (For KD-T925BTS/KD-T920BTS) While talking on the phone... [COLOR 01] to [COLOR 49] ([COLOR 08]): Selects the illumination color for Press and hold the buttons as notification when there is an incoming call and during a call.
- Page 26 Bluetooth® Store a contact in memory [RECENT CALL] (Applicable only if the phone supports PBAP.) 1 Press the volume knob to select a name or a phone number. You can store up to 6 contacts into the number buttons (1 to 6). •...
- Page 27 [DEVICE DELETE] 1 Turn the volume knob to select a device to delete, then press the knob. Search and select the name of your receiver (“KD-T925BTS”/ 2 Turn the volume knob to select [YES] or [NO], then press the knob.
-
Page 28: Bluetooth - Audio
Bluetooth® The connectivity result flashes on the display. Bluetooth — Audio “PAIRING OK” and/or “HANDS-FREE OK”*1 and/or “AUD.STREAM OK”*2 and/ • Operations and display indications may differ according to their availability or “PBAP OK”*3: Compatible on the connected device. *1 Compatible with Hands-Free Profile (HFP) •... -
Page 29: Amazon Alexa
• See “Set the playable source for iPod/iPhone” on page 10 for further information. information. Pair this unit to Alexa mobile application. Perform Option A or Option B. Option A: Direct Link Access the following URL or scan the QR code with your smartphone: https://www.jvc.net/car/alexa ENGLISH... - Page 30 Tap the “ + “ icon at the top right corner. Tap “Add Device”. Tap “Automotive Accessory” or “Headphones” from the list of device types. Tap the name of your receiver (“KD-T925BTS”/“KD-T920BTS”/ “KD-T720BT”) and follow the instructions. Basic operations Once the setup process is completed, the Alexa mobile application will For Alexa supported languages, see page 34 for more information.
- Page 31 AMAZON ALEXA • To return to the previous source before ALEXA, press B SRC (or press Start listening SOURCE on the remote control). While in Alexa idle state... • To activate Alexa, press or speak “Alexa”. • To cancel current listening state, press . Speak the word “Alexa”...
-
Page 32: Audio Settings
Audio Settings [PRO EQ] Adjusts your own sound settings for each source. • The settings are stored to [USER] in [PRESET EQ]. • The settings made may affect the current settings of [EASY EQ]. [62.5HZ] [LEVEL –09] to [LEVEL +09] ([LEVEL 00]): Adjusts the level to memorize for each source. (Before making an adjustment, select the source you want to adjust.) [ON]: Turns on the extended bass. - Page 33 Audio Settings [FADER] (Not applicable when 3-way crossover is selected.) [X ‘ OVER TYPE] Caution: Adjusts the volume before changing the [X ‘ OVER TYPE] to avoid [POSITION R15] to [POSITION F15] ([POSITION 00]): Adjusts the front the sudden increase or decrease of the output level. and rear speaker output balance.
- Page 34 Front speakers output Rear speakers output – [POSITION R02] is selected in [FADER] and selectable range is [POSITION R15] to [REAR/SUB.W] (default) Front speakers output Subwoofer output [POSITION 00]. (Page 27) [SUB.W/SUB.W] Front speakers output Subwoofer output * Except for KD-T925BTS. ENGLISH...
- Page 35 Audio Settings 2-way crossover setting items Crossover settings Below are the available setting items for 2-way crossover and 3-way [SPEAKER SIZE] crossover. [FRONT] [SIZE] [3.5"]/[4"]/[4.75"]/[5"]/[6.5"]/[6.75"]/[7"]/ CAUTION [4×6]/[5×7]/[6×8]/[6×9]/[7×10] Select a crossover type according to how the speakers are connected. [TWEETER] [SMALL]/[MIDDLE]/[LARGE]/[NONE] (not (Page 41, 42) connected) If you select a wrong type:...
- Page 36 [TWEETER] [HPF FRQ] [1KHZ]/[1.6KHZ]/[2.5KHZ]/[4KHZ]/[5KHZ]/[6.3KHZ]/ [8KHZ]/[10KHZ]/[12.5KHZ] *1 Displayed only when [SPK/PRE OUT] is set to [REAR/REAR] or [REAR/SUB.W]. (Page 28) *2 Except KD-T925BTS: Displayed only when [SPK/PRE OUT] is set to [REAR/SUB.W] or [SLOPE] [–06DB]/[–12DB] [SUB.W/SUB.W]. (Page 28) [PHASE] [REVERSE] (180°)/[NORMAL] (0°) *3 Displayed only when [SUBWOOFER SET] is set to [ON].
- Page 37 Audio Settings Digital Time Alignment settings Determining the delay time automatically If you specify the distance from the currently set Digital Time Alignment sets the delay time of the speaker output to create a listening position to every speaker, the delay time more suitable environment for your vehicle.
-
Page 38: Display Settings
Display Settings Zone identification for brightness settings Press to exit. KD-T925BTS/KD-T920BTS: To return to the previous setting item, press Default: [XX] [DISPLAY] [DIMMER] Dims the illumination. [OFF]: Dimmer is turned off. Brightness changes to [DAY] setting. [ON]: Dimmer is turned on. Brightness changes to [NIGHT] setting. -
Page 39: References
References Display Settings Maintenance [COLOR] (for KD-T925BTS/KD-T920BTS) [PRESET] Selects illumination colors for the buttons on different zones separately. Cleaning the unit 1 Select a zone ([ZONE 1], [ZONE 2], [ALL ZONE]). (See the illustration on Wipe off dirt on the faceplate with a dry silicone or soft cloth. - Page 40 • For detailed information and notes about the playable audio files, visit – iPhone 5S, 6, 6 Plus, 6S, 6S Plus, SE, 7, 7 Plus, 8, 8 Plus, X, XS, XS MAX, XR, 11, 11 Pro, 11 Pro <https://www.jvc.net/cs/car/audiofile/>. Max, SE (2nd generation), 12, 12 mini, 12 Pro, 12 Pro Max •...
-
Page 41: Change The Display Information
For FM Radio Broadcast Data System stations only: Station name/Program type (Date) Station name/Program type *2 For KD-T925BTS/KD-T920BTS: During Music Synchronization Effect, the illumination color or (Date) with Music Synchronization Effect*2 Radio text (Date) brightness level of the buttons changes and synchronizes with the music level (depending on... -
Page 42: Troubleshooting
Troubleshooting Symptom Remedy Symptom Remedy Sound cannot be heard. • Adjust the volume to the optimum level. Playback order is not as Optical disc, the files are played in the order which they • Check the cords and connections. intended. were recorded. - Page 43 Troubleshooting Symptom Remedy Symptom Remedy “LOADING” appears when This unit is still preparing the iPod/iPhone music list. It “CODE ERROR” Make sure you have entered the correct pass code. you enter search mode by may take some time to load, try again later. (Page 14) pressing “NO CONTENT”...
- Page 44 Reset the unit (page 4) Contact (USA only) No response from Alexa Amazon cloud was unable to analyze the voice input. Call: 1-800-252-5722 ( or ) visit: <https://www.jvc.com> after the voice input. Wrong response from Alexa misunderstood what was said or did not catch Alexa.
-
Page 45: Installation/Connection
Installation/Connection Part list for installation This section is for the professional installer. For safety’s sake, leave wiring and mounting to professionals. Consult the car audio dealer. (A) Faceplate (×1) (B) Trim plate (×1) WARNING • The unit can only be used with a 12 V DC power supply, negative ground. •... - Page 46 Installation/Connection Installing the unit (in-dash mounting) Do the required wiring. (Page 41) Hook on the top side Orientate the trim Dashboard of plate as illustrated your car before fitting. Bend the appropriate tabs to hold the sleeve firmly in place. Installing the unit (without mounting sleeve) Removing the unit 1 Remove the mounting sleeve and trim plate from the unit.
- Page 47 Installation/Connection Wiring connection IMPORTANT We recommend installing the unit with a commercially available custom wiring harness specific for your car and leave this job to professionals for your safety. Consult your car audio dealer. Antenna terminal Vehicle Fuse (10 A) dashboard Factory wiring harness (vehicle)
- Page 48 JVC Amplifier* Output terminals Remote wire (not supplied) No Part For KD-T925BTS: USB cable (DC 5 V 1.5 A) (approx. 1 m/3.3 feet) To remote lead (blue/white) of the Output terminals (See “Connect external amplifiers via output terminals”.) wiring harness. (Page 41) Microphone input jack (page 16) * Firmly connect the ground wire of the amplifier to the car’s chassis to avoid damaging the unit.
-
Page 49: Specifications
Specifications FM Frequency Range 87.9 MHz — 107.9 MHz (200 kHz step) USB Standard USB 1.1, USB 2.0 (High speed) 87.5 MHz — 108.0 MHz (50 kHz step) Compatible Devices Mass storage class Usable Sensitivity (S/N = 30 dB) 8.2 dBf (0.71 μV/75 Ω) File System FAT12/16/32 Quieting Sensitivity (DIN S/N = 46 dB) - Page 50 -8/ -7/ -6/ -5/ -4/ -3/ -2/ -1/ 0 dB Full Bandwidth Power 22 W × 4 (at less than 1 % THD) Preout Level/Load KD-T925BTS: 5 000 mV/10 kΩ Speaker Impedance 4 Ω — 8 Ω KD-T920BTS/KD-T720BT: 2 500 mV/10 kΩ...
- Page 51 • Windows Media is a registered trademark or trademark of Microsoft Corporation in the United States and/or other countries. This product is protected by certain intellectual property rights of Microsoft. Use or distribution of such technology outside of this product is prohibited without a license from Microsoft. •...
- Page 52 ENGLISH FRANÇAIS ESPAÑOL KD-T925BTS / KD-T920BTS / KD-T720BT CD RECEIVER For detailed operations and information, refer to the INSTRUCTION MANUAL on the following Quick Start Guide website: RÉCEPTEUR CD Pour les opérations et les informations détaillées, reportez-vous au MANUEL D’INSTRUCTIONS sur Guide de démarrage rapide...
- Page 53 útil, deberán ser reciclados en instalaciones que puedan dar el tratamiento Products: CD RECEIVER adecuado a estos productos y a sus subproductos residuales correspondientes. Model Name: KD-T925BTS/KD-T920BTS/KD-T720BT Póngase en contacto con su administración local para obtener información sobre el Responsible Party: JVCKENWOOD USA CORPORATION punto de recogida más cercano.
- Page 54 SOFTWARE LICENSE AGREEMENT ISED Caution This device contains licence-exempt transmitter(s)/receiver(s) that comply with Innovation, Science and Economic Development Canada’s licence-exempt RSS(s). Operation is subject to the following two The software embedded in the Product (hereinafter the "Licensed Software") provided by Licensor is conditions: copyrighted to or sublicensable by the Licensor, and this Agreement provides for the terms and conditions 1.
- Page 55 Article 4 Right pertaining to the Licensed Software Article 9 Destruction of the Licensed Software Any and all copyrights and other rights pertaining to the Licensed Software and related documents If this Agreement is terminated pursuant to the provision of Article 8, the User shall destroy the Licensed shall belong to the Licensor or the original holder of the right who granted to the Licensor the license or Software, any related documents and copies thereof within two (2) weeks from such date of termination.
- Page 56 Important Notice concerning the Software -CMP The MIT License (MIT) Copyright (c) 2014 Charles Gunyon -jansson Permission is hereby granted, free of charge, to any person obtaining a copy of this software and associated Copyright (c) 2009-2012 Petri Lehtinen <petri@digip.org> documentation files (the "Software"), to deal in the Software without restriction, including without Permission is hereby granted, free of charge, to any person obtaining a copy of this software and associated limitation the rights to use, copy, modify, merge, publish, distribute, sublicense, and/or sell copies of the...
- Page 57 sha2 Copyright (c) 1995, 1996 Carnegie-Mellon University. All rights reserved. AUTHOR: Aaron D. Gifford - http://www.aarongifford.com/ Author: Chris G. Demetriou Copyright (c) 2000-2001, Aaron D. Gifford Permission to use, copy, modify and distribute this software and its documentation is hereby granted, All rights reserved.
- Page 58 T-Kernel 2.0 This product uses the source code of T-Kernel 2.0 under T-License 2.0 granted by T-Engine Forum (www.tron.org) BSD-3-Clause Copyright (c) 2000-2001, Aaron D. Gifford All rights reserved. You may obtain a copy of the license at https://opensource.org/licenses/BSD-3-Clause THE SOFTWARE IS PROVIDED “AS IS”, WITHOUT WARRANTY OF ANY KIND, EXPRESS OR IMPLIED, INCLUDING BUT NOT LIMITED TO THE WARRANTIES OF MERCHANTABILITY, FITNESS FOR A PARTICULAR PURPOSE AND NONINFRINGEMENT.
- Page 59 Installation/Connection Basic procedure Remove the key from the ignition switch, then disconnect the terminal of the car battery. This section is for the professional installer. Connect the wires properly. See “Wiring connection” on page 3. For safety’s sake, leave wiring and mounting to professionals. Consult the car audio dealer. Install the unit to your car.
- Page 60 Installing the unit (without mounting sleeve) Wiring connection Remove the mounting sleeve and trim plate from the unit. Vehicle dashboard Antenna terminal Align the holes in the unit (on both sides) with the vehicle mounting bracket and secure the unit with screws (commercially available).
- Page 61 • Please keep the Guide in a safe and accessible place for future terminal reference. WARNING KD-T925BTS: USB cable from Detach button the rear of the unit Do not operate any function that takes your attention away from safe driving.
- Page 62 Getting Started Set the basic settings Press and hold Acknowledge the crossover type and cancel the Turn the volume knob to select an item (see the following table), then demonstration press the knob. Repeat step until the desired item is selected or activated. When you turn on the power for the first time (or [FACTORY RESET] is set to Press to exit.
- Page 63 Radio CD/USB/iPod Selectable source: Search for a station • KD-T925BTS: Press B SRC repeatedly to select FM or AM. CD/USB FRONT/USB REAR/iPod FRONT/iPod REAR or iPod BT Press S / T to search for a station automatically. • KD-T920BTS/KD-T720BT: (or) CD/USB/iPod USB or iPod BT Press and hold S / T until “M”...
- Page 64 • Refer to the INSTRUCTION MANUAL on the following website for the detailed explanation of each item: <https://www.jvc.net/cs/car/> • The availability of each item vary depending on the model. Turn the volume knob clockwise to select [SUBWOOFER SET], then press Menu items the knob.
- Page 65 [RELAX]/[SUNSET]: The selected color pattern is Illumination Color Setting shown. (Selectable only when [ALL ZONE] is selected in step 4.) For KD-T925BTS/KD-T920BTS, you can set your preferred illumination color for each zone. Repeat step 4 and step 5 to set color for other zones. Press to exit.
- Page 66 Press the volume knob. Press B SRC to turn on the unit. Select group or folder Press 2 J / 1 K. Search and select the name of your receiver (“KD-T925BTS”/ “KD-T920BTS”/“KD-T720BT”) on the Bluetooth device. Press S / T. Reverse skip/Forward skip Perform (A) or (B) depending on what appears on the display.
- Page 67 • Windows Media is a registered trademark or trademark of Microsoft Corporation in the United States and/or other countries. This product is protected by certain intellectual property rights of Microsoft. Use or distribution of such technology outside of this product is prohibited without a license from Microsoft. •...
Need help?
Do you have a question about the KD-T925BTS and is the answer not in the manual?
Questions and answers