Advertisement
1.
Unpack and Check ReadyNAS 600 Contents
If you purchased a diskless ReadyNAS, please see the Disk Installation Guide before continuing to Step 2
☼
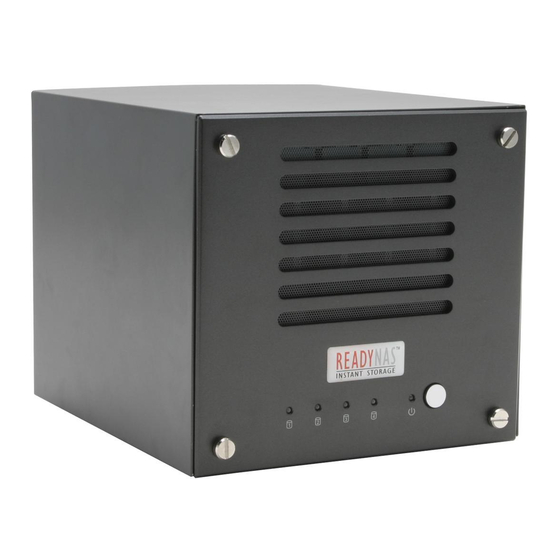
About ReadyNAS 600
2.
Connect ReadyNAS and Power On
Getting Started
Important setup information and guide to ReadyNAS documentation
Infrant Technologies Inc.
3065 Skyway Ct, Fremont, CA 94539 USA
Phone: (510) 438-7982
Email: support@infrant.com
Website: www.infrant.com
Contents
ReadyNAS 600 Appliance
ReadyNAS 600 Getting Started
ReadyNAS 600 Disk Installation Guide
ReadyNAS Installation CD
AC Power Cable
Ethernet Cable
Warranty Card
• On/Off Switch – Press once to turn on when device is off. Make sure the
power switch on the back is turned on. Press for 5 seconds to gracefully
shutdown device. Always use the On/Off switch to turn off system when
possible to avoid data loss.
• Status LED – Blinks slowly, about once every 4 seconds, during boot. LED
becomes solid then the system is ready. A disk fault in the system will blink
this LED at a faster rate, about once a second.
• Disk LEDs – Blinks green for normal disk activity. Solid amber for disk
failure.
• Power Switch – Controls AC power to the ReadyNAS. Use the On/Off
switch in the front to turn system off gracefully to avoid data loss.
• Power Connector – When Power Switch is in the On position, attaching
the power cable will automatically turn on the ReadyNAS. This enables the
ReadyNAS to boot up in the event that power returns after a power-failure.
• MAC Address – The MAC address assigned to the Ethernet interface. Use
the MAC address to identify this system in RAIDar listing.
• Ethernet Ports – Auto-switching 10/100/1000. Use a Cat-5 network cable
to connect to your network.
• USB Ports - The ReadyNAS supports USB printer, UPS, and wireless
network adapters.
• System Reset Switch – Depressing this switch for 30 seconds while
powering up the system will set the system back to factory default state. See
"System Reset Switch" chapter in ReadyNAS User Guide for details.
© 2005 Infrant Technologies, Inc. All rights reserved.
ReadyNAS, RAIDar and FrontView are trademarks of Infrant
Technologies, Inc. All other product names are the properties
of their respective owner.
Printed in U.S.A. P/N: IT-05-1-1060-U-08
Connect ReadyNAS
07/2005
Advertisement
Table of Contents

Subscribe to Our Youtube Channel
Related Manuals for Infrant Technologies ReadyNAS 600

Summary of Contents for Infrant Technologies ReadyNAS 600
- Page 1 "System Reset Switch" chapter in ReadyNAS User Guide for details. Connect ReadyNAS and Power On Connect ReadyNAS © 2005 Infrant Technologies, Inc. All rights reserved. Infrant Technologies Inc. ReadyNAS, RAIDar and FrontView are trademarks of Infrant 3065 Skyway Ct, Fremont, CA 94539 USA Technologies, Inc.
- Page 2 Install RAIDar and Setup ReadyNAS ReadyNAS Installation CD Contents • Setup.exe • ReadyNAS Quick Installation Guide • ReadyNAS User Guide • End-users License Agreement • Backup Software - GBM Pro Network Install and start RAIDar. Follow instructions in ReadyNAS Quick Installation Guide on the CD. If you purchased a complete ReadyNAS system with pre-installed disks, you will see the ReadyNAS system in the RAIDar scan list, and you can click Setup to start the setup wizard.
Need help?
Do you have a question about the ReadyNAS 600 and is the answer not in the manual?
Questions and answers