Advertisement
Quick Links
INSTALLATION INSTRUCTION
TECHNICAL DATA
Working
Temperature
Input Voltage
Output
Connection Mode
Static Power
Consumption
Output current
Output power
INTRODUCTION & WARRANTY
Thank you for selec�ng and buying V-TAC product. V-TAC will serve you the best. Please read
these instruc�ons carefully before star�ng the installing and keep this manual handy for future
reference. If you have any another query, please contact our dealer or local vendor from
whom you have purchased the product. They are trained and ready to serve you at the best.
The warranty is valid for 2 years from the date of purchase. The warranty does not apply to
damage caused by incorrect installa�on or abnormal wear and tear. The company gives no
warranty against damage to any surface due to incorrect removal and installa�on of the
product. The products are suitable for 10-12 Hours Daily opera�on. Usage of product for 24
Hours a day would void the warranty. This product is warranted for manufacturing defects
only.
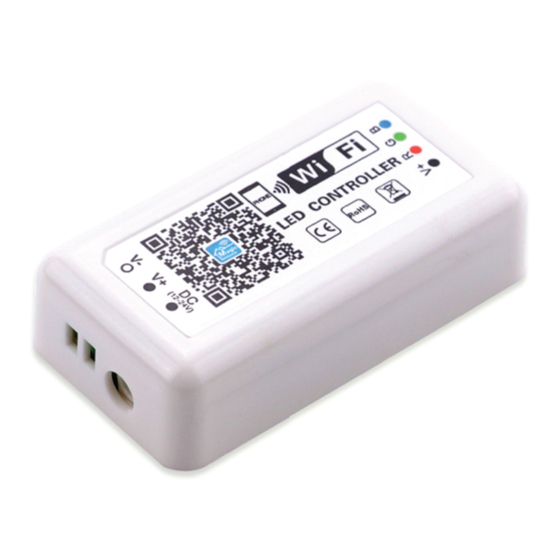
WIFI RGB CONTROLLER
-20 to +60°C
DC12-24V
3 Channels
Common anode
<0.5W
<4A(each circuit)
12V:<144W,
24V:<288W
1
WEEE Number: 80133970
works with
2
WARRANTY
*
Advertisement

Related Manuals for V-TAC 3322


Summary of Contents for V-TAC 3322
- Page 1 INTRODUCTION & WARRANTY WARRANTY Thank you for selec�ng and buying V-TAC product. V-TAC will serve you the best. Please read these instruc�ons carefully before star�ng the installing and keep this manual handy for future reference. If you have any another query, please contact our dealer or local vendor from whom you have purchased the product.
-
Page 2: Product Features
WARNING 1. Please make sure to turn off the power before star�ng the installa�on. 2. Installa�on must be performed by a cer�fied person. This marking indicates that this product should not be disposed Cau�on, risk of electric shock. of with other household wastes. PRODUCT FEATURES 1. -
Page 3: App Installation
POWER SUPPLY RGB WIFI CONTROLLER LED STRIP LIGHT APP INSTALLATION 1.Product so�ware APP name: Magic Home Pro a. Apple users can search "Magic Home Pro” in "APP Store"; Android users can search "Magic Home Pro" in "Google Play Store" or from browsers. -
Page 4: Usage Description
USAGE DESCRIPTION 1.Please use this product in a dry environment 2.Please use the voltage for dc current of dc9-28v,and not to use 220V alterna�ng current. 3.The product is a common anode connec�on.A�er installed the WIFI controller,open mobile WIFI network signal, find “LED net*****”signal and connect, open the Magic Home Pro APP ,there are three kinds of connec�on mode to connect the controller. - Page 5 2. Add the controller's signal to the router for connec�on control. When registering the account ,please connect the controller's WIFI signal to the router (make sure the network is accessible)
- Page 7 3. Remote connec�on se�ngs When making remote Se�ngs, make sure the account is logged in properly...
- Page 8 The apple opera�ng interface instruc�ons:In the use of the APP,please make sure that the controller circuit and power supply is normal connec�on 1.Single connec�on: do not need to register account, open cell phone WIFI network, find“LED net…”signal and connect.
- Page 9 2. Add the controller's signal to the router for connec�on control. When registering the account, please connect the controller's WIFI signal to the router (make sure the network is accessible)
- Page 11 Note: if you want to add controller WIFI to the router network in the APP interface, you should connect the controller signal in network connec�on first. 3.Remote connec�on se�ngs. When making remote se�ngs,make sure the account is logged in properly...
- Page 13 ALEXA SETTINGS Step 1: Create your Magic Home cloud account In order to control your smart light with the Amazon Echo or control them remotely, you need to create a MagicHome cloud accountand sign in. Step 2:Add your light and modify the name Make sure there is at least one smart light in device list, and enable your lights for remote control.
- Page 14 Step 3: Enable Alexa Skill The next step is to download the Amazon Alexa app , open the Amazon Alexa app and under the skills sec�on, search for the Magic Home skill. The account and password must be same as you created in Magic Home Pro APP Step 4: Login and Discover Devices Use your MagicHome cloud account you created in step 1 to sign in to "Magic Home"...
- Page 15 Step 5: Control your light Here, you finish all setups. You can now control your lights by issuing voice commands.Sup- ported Commands: These are some of the currently supported Alexa voice commands for the smart light.Al- exa, set [light name] to [0-l00]%Alexa, turn [light name] on/off Alexa, dim/brighten [light name] - Alexa, increase/decrease [light name]Alexa, set the [light name] light to red - Alexa, change the [light name] to the color blue Alexa, make the [light name] warm white...
- Page 16 GOOGLE SETTING Step 1: Create your Magic Home cloud account In order to control your smart light with the Amazon Echo or control them remotely, you need to create a MagicHome cloud account and sign in. Step 2:Add your light and modify the name Make sure there is at least one smart light in device list, and enable your lights for remote control.
- Page 17 Step4: Login with your app account Enter your app account and password to finish the account linking. (Use the Magic Homecloud account you used on step 1). Your lights will be listed on Home Control interface.
-
Page 18: Remote Control
Step 5: Control your light Here, you finish all setups. You can now control your lights by issuing voice commands.- Supported Commands: Say "Ok Google" or "Hey Google", then...Turn on <light name>Dim <light name> Brighten <light name>Set <light name> to [50%] Dim/Brighten <light name>... - Page 19 3, Overload are prohibited. In case of any query/issue with the product, please reach out to us at: support@v-tac.eu For More products range, inquiry please contact our distributor or nearest dealers. V-TAC EUROPE LTD. Bulgaria, Plovdiv 4000, bul.L.Karavelow 9B...
Need help?
Do you have a question about the 3322 and is the answer not in the manual?
Questions and answers