Table of Contents
Advertisement
Quick Links
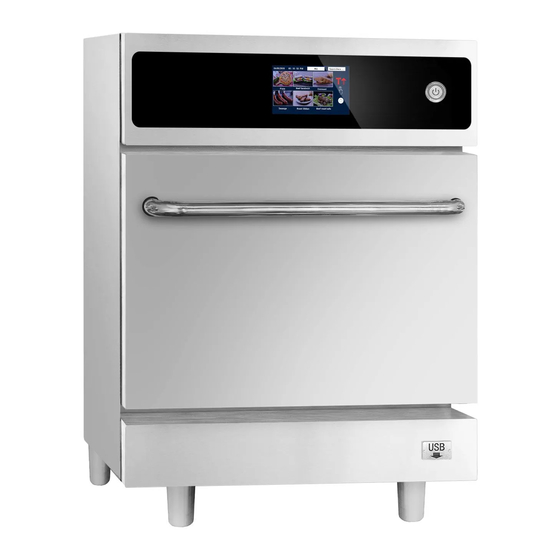
Installation and User Manual
Touch screen oven series:
EHONP17
Note!
Before use and operation, please read the operation manual carefully and operate in strict accordance
with the operation manual. We reserve the right to change the relevant information (including design and parts)
in this instruction book without further notice when the product is upgraded or adjusted for use.
1
Advertisement
Table of Contents

Subscribe to Our Youtube Channel
Related Manuals for GGMgastro EHONP17


Summary of Contents for GGMgastro EHONP17
- Page 1 Installation and User Manual Touch screen oven series: EHONP17 Note! Before use and operation, please read the operation manual carefully and operate in strict accordance with the operation manual. We reserve the right to change the relevant information (including design and parts)
-
Page 2: Key Symbols
Key symbols DANGER! WARNING! This symbol highlights dangerous This symbol highlights potential situations which could lead to dangerous situations which might serious injury or death lead to serious injury or death CAUTION! DANGER! This symbol highlights potential Be careful. Life is at risk. Failure dangerous situations which could to comply may result in electrical lead to light injury... -
Page 3: Introduction
Introduction Speed Oven series reduce a lot of cooking time when we compare it with traditional ovens, without compromising with quality. It is easy for multiply repeated operation once each recipes’ parameters are set and stored. It is capable for up to 1024 recipes. Programmable cooking steps: Adjustable programing parameters and stages provide various combination to tackle... - Page 4 ※IMPORTANT SAFETY INSTRUCTIONS WARNING Before use and operation, please carefully read the operating manual, and operate in strict accordance with the safety instructions to reduce the risk of burns, electrical shock, fire, personal injury, exposed to overdose microwave radiation 1. READ all instructions before using equipment. 19.
- Page 5 IMPORTANT SAFETY INSTRUCTIONS Please read this instruction carefully before operation Same as other electric appliance, this product needs an overall checking of electric wiring connection at least once every year; Follow cleaning chapter within this book to clean chamber and door seal frequently, in order to prevent potential fires and leaking hazards;...
- Page 6 Chart of Suitable Containers Manufacturer will list a few containers that allowed under specific conditions below, please check carefully and be aware before use. Heat-resistant containers √ Tempered glass Containers with metal ornaments √ Glass ceramics cannot be used √ Pottery (enamel, pottery, ceramics) Metal plate Only on a shelf inside the chamber.
-
Page 7: Table Of Contents
CONTENTS Key symbols ........................2 Introduction ........................3 1. Installation ........................8 1.1 Receipt Note:......................8 1.2 The location and position of the oven ..............8 1.3 Power supply installation ..................9 1.3.1 Power supply ....................9 1.3.2 Power supply installation ................9 1.3.3 Single phase .................... -
Page 8: Installation
1. Installation 1.1 Receipt Note: 1. At the time of receipt, check for apparent shipping damage. Contact the shipping company directly if necessary; 2. Open the package, tear off/remove the protective tape from the chamber top AND stainless steel protective film. Then dispose the package waste in a proper way. -
Page 9: Power Supply Installation
1.3 Power supply installation 1.3.1 Power supply Strongly recommend oven connects to leakage protector, its decoupling current will be not less than 30 mA. At least choose electrical signal sensitive standard type (B class standard) circuit breaker. Jump signal will occur when user open a freezer, fridge and other appliance (includes microwave). Strongly recommend Circuit Breaker (C class standard), which is designed for products like this oven. -
Page 10: Three Phases
1.3.4 Three phases The connection of three-phase power supply is shown in the picture. The rated current of the circuit breaker (class C standard) is 20A per phase. Consult a qualified electrician if doubt exists on electric connection. -
Page 11: Device Parameters
DO NOT The back of the equipment has an equipotential CONNECT POWER CORDS ground point for separate grounding (GND) TOGETHER FOR EXTENTSION 2. Device parameters 2.1 Product parameters table EHONP17 Model Dimension(mm) 460X675X660 Chamber(mm) 305X305X185 Capacity(L) Net Weight(KG) Voltage(V) - Page 12 Frequency 50/60Hz Rated Power(KW) 5” Touch Screen Controller Menu Storage 1024 Cooking stage Hot Air Impingement+ Microwave Cooking Mode *Microwave power (KW) Hot air power 0-100% Microwave range Wind grades IPX Rating IPX3 Max. Temperature Approximation microwave power output...
-
Page 13: Features
3. Features Turn On/ Off Power switch Touch screen will be light up. Notice: Turn off switch does not mean cut off internal power supply; Touch Screen controller Details please refer to “Operation Instruction” section; Rating plate Locate at the back, it contains product model, series number, and power specification;... -
Page 14: Operation Instruction
USB port location It locates underneath the front air filter. Step 1: Take off air filter Air filter is mounted with cover by magnet; pull out with some strength; Step 2: Open USB dust cap Rotate left or right to open Step 3: Insert U disk to download or upload recipe, picture, etc. -
Page 15: Operation Interface
4.2 Operation interface 4.2.1. Interface 1. Switch on power button, screen light up, enter stand by interface as below: Cooling Mode, when cavity temperature is over 70℃, follow notice window to open the door meanwhile fan keeps working; when temperature drops down to70℃, it automatically exits back to standby interface, or you cancel cool down mode by pressing 2. -
Page 16: Editing Menu
:Set Preheat temperature, press this :Switch off button, it requires a long press to return back to standby interface 4.2.2. Editing Menu 1. Tap on dish photo to enter setting: :view parameters of each stage. - Page 17 :Click on timer to edit cooking time for this time, not saved; :Click to edit cooking temperature for this time, not saved; :Hold pressing this icon can view real cavity temperature. :Continually tap to change microwave percentage. (0%- 100% then recycle) :Click to adjust wind speed.
- Page 18 : Pause/Resume, Pause/resume cooking process :Stop, Exit cooking Caution: Open the door during cooking process will result in warning sound and pop up notice” DOOR OPEN”, but it will continue cooking after closing the door. If the temperature has not reached to preset temperature, system will pop out this: If click on √, but did not open door and place food inside oven.
-
Page 19: A Quick Customized Menu
3. Finish cooking, it will pop up a window. Click “+10” to add 10 second increment at a time, as below 4. When door is open, it will appear a warning notice as picture: 4.2.3. A quick Customized menu : Customized mode used for recipes testing and development, all parameter are editable. -
Page 20: System Setting
Click on , add another cooking stage. After finish, click to save it. 4.2.4 System setting : click to enter system setting interface:... - Page 21 1. Click “Recipe Setting”, enter screen like below: : Read & Write Recipe. Write: copy USB recipes into Oven; Read: copy Oven recipes into USB; : Delete Menu; : Set up a new menu, click into a screen like below: Click to edit every factor accordingly, then click to enter into the second cooking stage as per requirement.
- Page 22 saving. The screen will be like this: Click to add dish picture. Category range from breakfast, lunch, dinner, supper and all day. You can click on name to edit name for this recipe as well, like below: Can use pinyin input Chinese name, or directly input English name; Direct input letter can input English, if input pinyin, then need to select Chinese text.
- Page 23 “Stage Index” can choose to set alarm for stage 1, 2, 3 (if you have more than 3 stages); Alarm Enable: click on “yes” ; click on “cancel” can select means of cancelling alarm, either manual or automatic; click on “name” to edit name for this alarm (Must set!). Manual: When alarm rings, there must be a physical action to stop alarm Automatic: After ringing for a few seconds it will automatically stop After setting, click on...
- Page 24 “Auto Start”, click to set an auto start time for cooking a recipe “System passcode”, set up password for entering system setting 3. Click “Service”, the password is ****** (please contact the dealer or manufacturer to obtain password authorization) “Product Count”, click here to view how many times of using every menu “Run Time Count”, total running time of all parameters record, for example “Power on time”...
- Page 25 “Copy Appliance From USB”: copy appliance data from USB to Oven “Copy Appliance To USB”: copy appliance data from Oven to USB “Display Brightness”: higher of the number is brighter “Beeper Volume”: volume for alarm, higher is louder “Alarm Sound”: alarm tone “Temperature Unit”: interchange between ℃...
-
Page 26: Cleaning
“Show recipe detail”: set “NO” to hide parameter details of cooking “Use Expiration”: Set the usage period of the device. When the time is up, you need to enter the password to enter the work page of the touch screen. 5. -
Page 27: Trouble Shooting
6. Trouble shooting This section provides an easy reference guide to some of the common problems that may occur during the operation of this equipment. The troubleshooting guides that follow are intended to help correct, or at least accurately diagnose, problems with this equipment. Although the chapter covers the most common problems reported, you may encounter problems that are not covered. - Page 28 Food SPEC is not correct Ensure food weight and size are standard Shown temperature Temperature probe is Call for service support probe is broken malfunction Cleaning daily to ensure they are not Check if these following part are blocked blocked: Note: there is no warranty for glass or Jet plate, return air inlet, oil filter ceramic oven parts.
Need help?
Do you have a question about the EHONP17 and is the answer not in the manual?
Questions and answers