Advertisement
Quick Links
Installation and Owner's Manual
Manual de Instrucciones y del Propietario
Manuel d'Installation et d'Utilisation
Manual de Instalação e do Proprietário
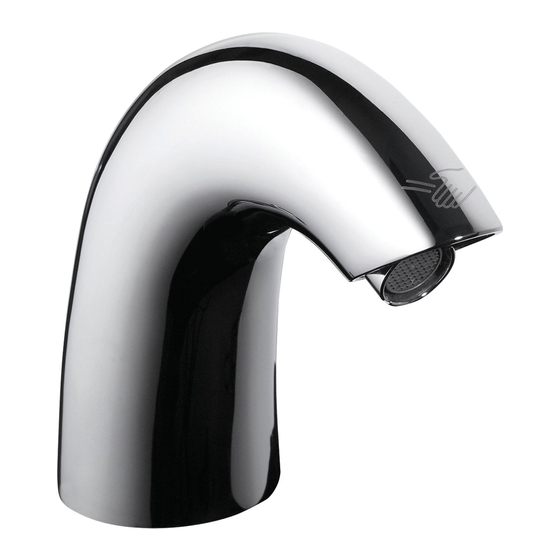
EcoPower Automatic Faucets
Grifos Automáticos EcoPower
Robinets Automatiques EcoPower
Torneiras e Misturadores Eletrônicos Self Power
Warranty Registration and Inquiry
For product warranty registration, TOTO U.S.A. Inc. recommends online warranty registration. Please visit our web site
http://www.totousa.com.If you have questions regarding warranty policy or coverage, please contact TOTO U.S.A. Inc.,
Customer Service Department, 1155 Southern Road, Morrow, GA 30260 (888) 295-8134 or (678) 466-1300 when calling
from outside of U.S.A.
Advertisement

Summary of Contents for Toto STD TELS10 Series
- Page 1 Torneiras e Misturadores Eletrônicos Self Power Warranty Registration and Inquiry For product warranty registration, TOTO U.S.A. Inc. recommends online warranty registration. Please visit our web site http://www.totousa.com.If you have questions regarding warranty policy or coverage, please contact TOTO U.S.A. Inc., Customer Service Department, 1155 Southern Road, Morrow, GA 30260 (888) 295-8134 or (678) 466-1300 when calling from outside of U.S.A.
-
Page 2: Table Of Contents
Rough-In Dimensions ........38 THANKS FOR CHOOSING TOTO! The mission of TOTO is to provide the world with healthy, hygienic and more comfortable lifestyles. We design every product with the balance of form and function as a guiding principle. Congratulations on your choice. -
Page 3: Warnings
WARNINGS Please read and adhere to the following notes. Failure to do so could result in personal injury and/or property damage. No person other than a service engineer should disassemble, repair or modify this faucet, unless it is specifically described in this manual. Failure to do so may result in electric shock or product malfunction. -
Page 4: Installation Procedures
INSTALLATION PROCEDURE Install the Controller NOTE: Before installing the product, be sure to thor- NOTE oughly flush the supply pipes of dirt and debris. Shut off the water supply at the stop valves after flushing. 1. See the rough-in dimension page to determine the proper location for the controller. - Page 5 INSTALLATION PROCEDURE To Install Helix and Libella Wall-Mounted Models (ill. 5): NOTE: The addition of a 2 x 4” stringer behind the spout installation location is highly recommended. STEP 8 1. Place mounting template on wall at desired ill. 5 2 x 4 location and mark all holes.
- Page 6 INSTALLATION PROCEDURE 2. Install the mounting bracket using the rubber washer, brass washer, and both brass nuts on back side of the installation surface. Install the included set screw (for sheet metal installation) or 30 mm machine screw (for drywall installations). 3.
- Page 7 INSTALLATION PROCEDURE Testing After Installation Turn on the water supply at the stop valves and ill. 1 inspect all the connections for any leaks (see ill. 1). Place hand under the sensor to activate. For “C” type controller (ex. TELC105R-C20E): Water will CLOSE run for the time period indicated by the model.
-
Page 8: Specifcations
PERIODIC MAINTENANCE Cleaning the Inlet Screen and Nozzle When the inlet screen is clogged, the flow rate will decrease. Decreased flow rate can lead to insufficient power generation, which will deplete the backup battery prematurely. Cleaning the screen (see ill. 1 & 2): ill. -
Page 9: Troubleshooting
TROUBLESHOOTING Problem Cause Solution The surface of the sensor is dirty. Clean the surface of the sensor. There is an obstruction in front of Remove the obstruction. the sensor. The stop valve is turned off. Turn on the valve. Backup battery connector is discon - Connect the backup battery connector. -
Page 10: Warranty
FROM STATE TO STATE, PROVINCE TO PROVINCE OR COUNTRY TO COUNTRY. 6. To obtain warranty repair service under this warranty, you must take the Product or deliver it prepaid to a TOTO service facility together with proof of purchase (original sales receipt) and a letter stating the problem, or contact a TOTO distributor or products service contractor, or write directly to TOTO U.S.A., INC., 1155 Southern Road,... - Page 11 ROUGH-IN DIMENSIONS / BOSQUEJO / ROBINETTERIE BRUTE/DIMENSÕES APROXIMADAS Helix TELS115 TELS105 TELS111 TELS101 TELS113 TELS103 30° 60° 2-15/16" (74mm) 2" 2” (50mm) (50mm) 4" (101mm) 4-15/16” (125mm) L=41-5/16” L=43-5/16" (L=1100mm) (L=1050mm) L=29-9/16” L=25-9/16" (L=650mm) (L=750mm) Faucet hole Ø1-1/4” (Ø32mm)- Ø1-3/8” (Ø35mm) Faucet hole Ø1-1/4”...
-
Page 12: Rough-In Dimensions
ROUGH-IN DIMENSIONS / BOSQUEJO / ROBINETTERIE BRUTE/DIMENSÕES APROXIMADAS Controllers Gooseneck-Wall TELC105R-###E TELS165 TELS165 TELC101R-###E TELS161 TELC103R-###E 3-5/8”(94mm) TELS163 4-5/8”(117mm) 3-5/16”(83mm) Ø1-1/8” (Ø29mm) 80° 2” 7” (50mm) (177mm) L=26-3/4” (L=680mm) 2” (50mm) G1/2 Max Wall thickness 1-11/16” (42mm) L=37-3/8” (L=950mm) Libella-M Libella TELS1B5 TELS1A5... - Page 13 TOTO U.S.A., Inc. 1155 Southern Road, Morrow, Georgia 30260 Tel: 888-295-8134 Fax: 800-699-4889 www.totousa.com 0GU3069 Rev. D 0G400XRS Warranty Registration and Inquiry r . c n i l t i s our web site http://www.totousa.com. If you have questions regarding warranty policy or coverage, please con- , .


Need help?
Do you have a question about the STD TELS10 Series and is the answer not in the manual?
Questions and answers