Table of Contents
Advertisement
Available languages
Available languages
Quick Links
Installation and Owner's Manual
Manual de Instrucciones y del Propietario
Manuel d'Installation et d'Utilisation
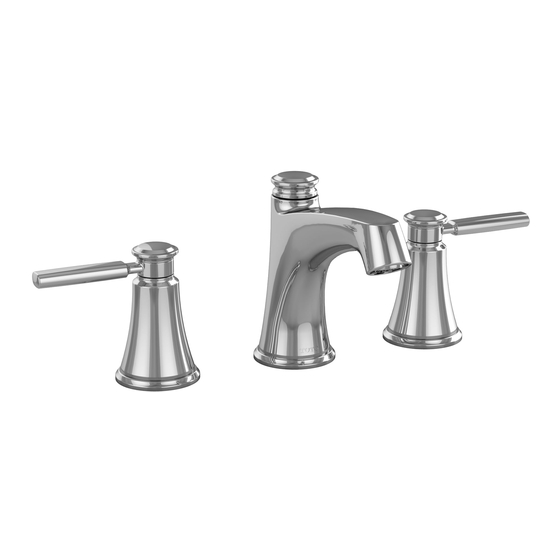
Widespread Lavatory Faucet
Grifo Mezclador Ensamble 8" para Lavabo
Robinet Mélangeur de Lavabo
Warranty Registration and Inquiry
For product warranty registration, TOTO U.S.A. Inc. recommends online warranty registration. Please visit
our web site http://www.totousa.com. If you have questions regarding warranty policy or coverage, please con-
tact TOTO U.S.A. Inc., Customer Service Department, 1155 Southern Road, Morrow, GA 30260
(888) 295-8134 or (678) 466-1300 when calling from outside of U.S.A.
™
Keane
TL211DD
TL211DD12
Advertisement
Chapters
Table of Contents

Related Manuals for Toto Keane TL211DD


Summary of Contents for Toto Keane TL211DD
- Page 1 TL211DD12 Warranty Registration and Inquiry For product warranty registration, TOTO U.S.A. Inc. recommends online warranty registration. Please visit our web site http://www.totousa.com. If you have questions regarding warranty policy or coverage, please con- tact TOTO U.S.A. Inc., Customer Service Department, 1155 Southern Road, Morrow, GA 30260...
-
Page 2: Table Of Contents
Rough-In Dimensions ..................20 THANK YOU FOR CHOOSING TOTO! The mission of TOTO is to provide the world with healthy, hygienic and more comfortable lifestyles. We design every product with the balance of form and function as a guiding principle. Congratulations on your choice. -
Page 3: Common Tools Needed
„ Make sure the water supply is shut off. „ Read these instructions carefully to ensure proper installation. „ TOTO reserves the right to update product design without notice. „ Check to make sure you have the following parts indicated below:... -
Page 4: Installation Procedure
INSTALLATION PROCEDURE - Valves Thread a mounting nut to the bottom Gasket of the valve. Place a washer and gasket Gasket (Rubber) (Rubber) as shown. Washer Washer NOTE: the hot water valve has a red (Metal) (Metal) marking on side of body. Mounting Mounting Pass the valve up through the... - Page 5 INSTALLATION PROCEDURE - Spout Orient the spout as needed. From below the mounting surface, place Mounting Stud Mounting Stud the crescent shaped gasket and Gasket (rubber) Gasket (Rubber) washer over the mounting stud as Washer (metal) shown. Washer (Metal) Mounting Nut Mounting Nut Fasten the mounting nut to the stud to secure the spout.
- Page 6 INSTALLATION PROCEDURE - Drain 10. Remove the plunger, flange and gasket (flat) from the drain assembly by unfastening the flange and pulling these parts from the drain. Insert the drain body up through the drain Plunger hole from below the lavatory. If necessary, Plunger turn the nut and push the washer and gasket (thick) down to allow for clearance.
-
Page 7: Warranty
TOTO reserves the right to make such inspections as may be necessary in order to determine the cause of the defect. TOTO will not charge for labor or parts in connection with warranty repairs or replacements. TOTO is not responsible for the cost of removal, return and/or reinstallation of the Product. -
Page 8: Gracias Por Elegir Toto
Dimensiones Preliminares ................20 ¡GRACIAS POR ELEGIR TOTO! La misión de TOTO es dar al mundo estilos de vida más saludables, higiénicos y cómodos. Diseñamos cada producto guiándonos por el principio del equilibrio entre forma y función. Felicitaciones por su elección. -
Page 9: Herramientas Necesarias
Asegúrese de que el suministro de agua esté cerrado. „ Lea estas instrucciones con atención para asegurar una instalación „ correcta. TOTO se reserva el derecho de actualizar el diseño del producto sin „ previo aviso. Verifique para asegurarse de tener las piezas que se indican a „... -
Page 10: Procedimiento De Instalación
PROCEDIMIENTO DE INSTALACIÓN - Válvulas Enrosque una tuerca de montaje en la parte inferior de la válvula. Coloque Junta (hule) una arandela y junta como se muestra. Arandela (metal) NOTA: la válvula del agua caliente tiene una marca roja de un lado del cuerpo. - Page 11 PROCEDIMIENTO DE INSTALACIÓN - Grifo Coloque el anillo en O debajo del surtidor. Surtidor Pase las mangueas de suministro y la tachuela de montaje hasta que el surtidor quede apoyado. Anillo en O Oriente el surtidor según se Tachuela de montaje Mounting Stud necesite.
- Page 12 PROCEDIMIENTO DE INSTALACIÓN - Desagüe Inserte la barra de elevación del drenaje a través de la abertura en el surtidor. Barra de elevación del drenaje * 10. Retire el pistón, reborde y junta (plana) del montaje del drenaje aflojando el reborde y jalando estas partes del drenaje.
-
Page 13: Garantía
7. Para obtener el servicio de reparación de esta garantía, debe llevar el Producto o enviarlo prepagado a un modulo de servicios TOTO junto con la prueba de compra (recibo de compra original) y una carta en la que plantee el problema, o póngase en contacto con un distribuidor TOTO o el contratista de servicio de los productos, o escriba directamente a TOTO U.S.A., INC., 1155 Southern Road, Morrow, GA 30260 (888) 295... -
Page 14: Merci D'avoir Choisi Toto
Dimensions Brutes .................... 20 MERCI D’AVOIR CHOISI TOTO! La mission de TOTO est d’offrir au monde entier un style de vie sain, hygiénique et plus confortable. Comme principe de base, nous concevons chaque produit avec un équilibre entre la forme et la fonction. Félicitations pour votre choix. -
Page 15: Outils Nécessaires
„ Assurez-vous que l’alimentation d’eau est coupée. „ Lisez ces instructions attentivement afin d’assurer une installation adéquate. „ TOTO se réserve le droit de modifier la conception du produit sans préavis. „ Vérifiez pour vous assurer d’avoir toutes les pièces ci-dessous à portée de main: PIÈCES INCLUSES... -
Page 16: Procédure D'installation
PROCÉDURE D’INSTALLATION- Valves Enfilez un écrou de montage Joint torique au fond de la valve. Placez une (caoutchouc) Joint (caoutchouc) rondelle et un joint torique comme indiqué. La rondelle (métal) La rondelle (métal) REMARQUE: Le robinet d’eau Ecrous de montage chaude a une marque rouge Ecrous de montage sur le côté... - Page 17 PROCÉDURE D’INSTALLATION - Bec Placez le joint torique sous le bec. Passez les tuyaux d’approvisionnement et le goujon de montage à travers le trou de montage jusqu’à ce que le bec verseur se retrouve en position finale. Joint Torique Orientez le bec, au besoin. Du Goujon de montage Mounting Stud dessous de la surface de montage,...
- Page 18 PROCÉDURE D’INSTALLATION - Vidage Insérez la tige de levage du drain par l’ouverture du bec. Tige de levage du drain* 10. Retirez le piston, la bride et le joint (plat) de l’ensemble du drain en déserrant la bride et en tirant ces pièces du drain. Insérez le corps du drain à...
-
Page 19: Garantie
466-1300, si en dehors de L’Etat Unis. Si, à cause de la taille du produit ou de la nature du défaut, il n’est pas possible de renvoyer le produit à TOTO, la réception par TOTO d’un avis écrit du défaut avec preuve d’achat (reçu de caisse original) constitue livraison. -
Page 20: Rough-In Dimensions
ROUGH-IN DIMENSIONS / DIMENSIONES PRELIMINARES / DIMENSIONS BRUTES TL211DD... - Page 24 Rev B Warranty Registration and Inquiry For product warranty registration, TOTO U.S.A. Inc. recommends online warranty registration. Please visit our web site http://www.totousa.com. If you have questions regarding warranty policy or coverage, please con- tact TOTO U.S.A. Inc., Customer Service Department, 1155 Southern Road, Morrow, GA 30260...
Need help?
Do you have a question about the Keane TL211DD and is the answer not in the manual?
Questions and answers