Advertisement
IMPORTANT: PLEAsE READ THEsE INsTRUCTIONs CAREFULLY. NOTE THE sAFE OPERATIONAL REQUIREMENTs, WARNINGs AND CAUTIONs. UsE THIs
PRODUCT CORRECTLY AND WITH CARE FOR THE PURPOsE FOR WHICH IT Is INTENDED. FAILURE TO DO sO MAY CAUsE DAMAGE AND/OR PERsONAL
INJURY AND WILL INVALIDATE THE WARRANTY. KEEP THEsE INsTRUCTIONs FOR FUTURE UsE.
1. sAFETY INsTRUCTIONs
Keep the compressor clean and in good condition.
Replace or repair damaged parts. Use recommended parts only. Unauthorised parts may be dangerous and will invalidate the warranty.
Keep children and non-essential persons away from the work area.
WARNING! This compressor is capable of producing a high pressure. DO NOT inflate any item beyond its maximum specified pressure.
The 12volt cigarette lighter plug must not be replaced with any other type of plug or electrical supply.
DO NOT use near flammable solids, liquids or gases.
DO NOT direct inflation hose connector head at yourself, others or animals.
DO NOT leave the compressor operating unattended. Always monitor the inflation pressure.
DO NOT carry by the hose, or yank the hose from an inflation valve.
DO NOT pull the plug from the cigarette lighter socket by the lead.
DO NOT get the compressor wet or use in the rain.
DO NOT use the compressor for a task it is not designed for.
DO NOT operate the compressor when you are tired or under the influence of alcohol, drugs or intoxicating medication.
DO NOT operate the compressor if any parts are missing or the compressor is damaged, as this may cause failure and/or personal injury.
DO NOT open the unit.
2. INTRODUCTION
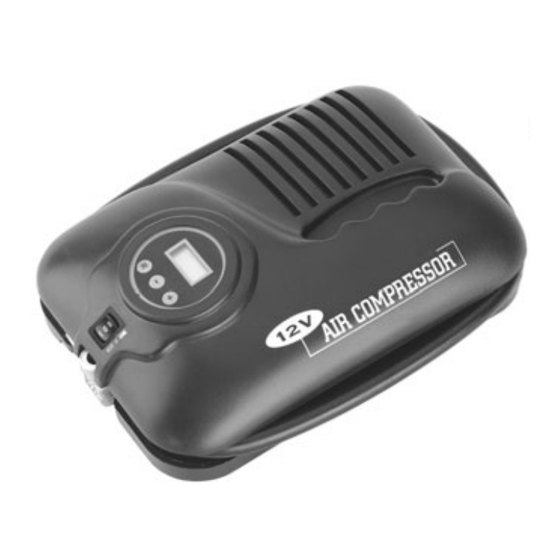
Housed in a rugged composite case, the MAC2250 is suitable for inflating tyres on cars, vans and 4x4s. It is supplied with an integral gauge
that can display in psi, bar, or kPa. Simple operation enables desired pressure to be preset.
Two adaptors for other inflatable equipment. Hose Length: 600mm and Power Cord Length: 3.5m.
3. OPERATION
WARNING! Ensure you have read and understood the safety instructions.
3.1
Preperation
3.1.1. Position compressor on a firm, flat surface so that the air hose reaches the tyre valve.
3.1.2. Check that the compressor switch is in the 'Off' position and plug the 12V plug
into the vehicle cigarette lighter socket.
3.1.3. The LCD will display '2888' and change to '0.0 psi' after 2 seconds.
3.1.4. Press R repeatedly until the desired unit of measure (psi, bar, or kPa) is achieved.
NOTE: The display will be subject to fluctuation whilst pumping.
3.2.
To operate the compressor in normal mode without the preset function turned on.
3.2.1. Connect the 12V plug into the cigarette lighter socket.
3.2.2. If you wish to change the unit of pressure measured follow steps 3.1.3. to 3.1.4 above.
3.2.3. Remove the valve dust cap and lift the connector locking lever into the upright position (fig. 1).
3.2.4. Push connector fully onto valve and lock and seal in place by pressing down the locking lever (fig. 2).
IMPORTANT: Inflation will only be effective if the connector is fully fitted and locked onto the valve.
3.2.5. Press the compressor power switch to NORMAL position and the compressor will begin to operate.
Inflate your tyre to the desired pressure and turn off the compressor by pressing the compressor power
switch to the Off position. Remove the air hose form the tyre, taking care not to lose any air in the
process, and disconnect the power supply.
WARNING! The compressor must be switched off for ten minutes after each ten minute period of continuous operation to
prevent excessive heat build-up.
3.3.
To operate compressor using the preset automatic shut-off feature.
3.3.1. Connect the 12V plug into the cigarette lighter socket.
3.3.2. If you wish to change the unit of pressure measured follow steps 3.1.3. to 3.1.4 above.
3.3.3. The gauge is factory pre-set to 30psi. This means the compressor will automatically shut off when it reaches 30psi. Press the + or -
to change the shut off setting to the desired pressure (maximum 100psi).
3.3.4. Remove the valve dust cap and lift the connector locking lever into the upright position (fig. 1).
3.3.5. Push connector fully onto valve and lock and seal in place by pressing down the locking lever (fig. 2). The gauge will display the
current tyre pressure.
3.3.7. For automatic shut off press the compressor switch to PRESET. In the preset mode the compressor will automatically switch off when
it reaches the preset pressure setting.
3.3.8. Press the compressor power switch to the off position and remove the air hose from the tyre, ensuring not to lose any air in the
process and disconnect the power supply.
IMPORTANT: Inflation will only be effective if the connector is fully fitted and locked onto the valve.
INSTRuCTIONS FOR:
AUTOMATIC AIR COMPREssOR 12V
MODEL No:
Original Language Version
MAC2250.V2
fig. 2
MAC2250.V2
fig. 1
Issue: 2 - 02/11/09
Advertisement
Table of Contents

Summary of Contents for Sealey MAC2250.V2
- Page 1 INSTRuCTIONS FOR: AUTOMATIC AIR COMPREssOR 12V MAC2250.V2 MODEL No: IMPORTANT: PLEAsE READ THEsE INsTRUCTIONs CAREFULLY. NOTE THE sAFE OPERATIONAL REQUIREMENTs, WARNINGs AND CAUTIONs. UsE THIs PRODUCT CORRECTLY AND WITH CARE FOR THE PURPOsE FOR WHICH IT Is INTENDED. FAILURE TO DO sO MAY CAUsE DAMAGE AND/OR PERsONAL INJURY AND WILL INVALIDATE THE WARRANTY.
- Page 2 WARRANTY: Guarantee is 12 months from purchase date, proof of which will be required for any claim. INFORMATION: For a copy of our latest catalogue and promotions call us on 01284 757525 and leave your full name and address, including postcode. sole UK Distributor, sealey Group, www.sealey.co.uk...


Need help?
Do you have a question about the MAC2250.V2 and is the answer not in the manual?
Questions and answers