Table of Contents
Advertisement
Quick Links
Advertisement
Table of Contents

Related Manuals for Blaupunkt BP4000HDV7100


Summary of Contents for Blaupunkt BP4000HDV7100
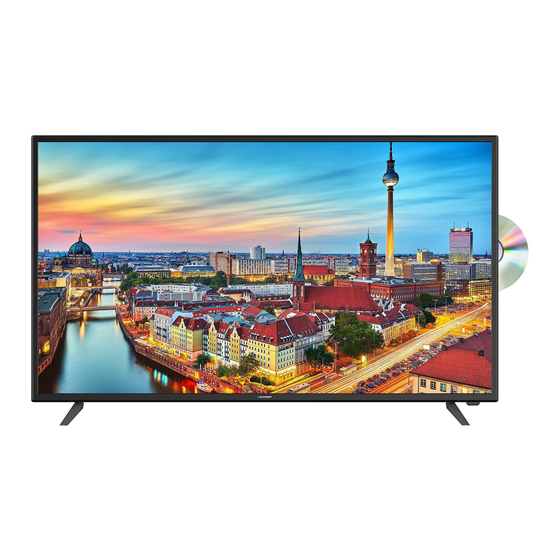
- Page 1 Instruction Manual 40” Full HD TV with Built-in DVD Player - BP4000HDV7100...
-
Page 3: Table Of Contents
CONTENTS General Safety Installation Controls and Connections Remote Control Basic Operations Recording Media Menus Channel Settings Tuning Settings Picture Settings Sound Settings Lock Settings Time Settings Setup Settings FAQs Specifications Customer Support... -
Page 4: General Safety
GENERAL SAFETY Read this manual thoroughly before you start using the TV. Store this manual, the completed warranty card, your receipt and the product packaging. The safety precautions instructions reduces the risk of fire, electric shock and injury when correctly complied to. Please follow all instructions and take notice of all warnings. - Page 5 GENERAL SAFETY INSTRUCTIONS (Cont.) IMPORTANT INFORMATION • Do not expose this appliance to rain or moisture as it may result in fire or an electric shock hazard • Do not temper or change or modify the product in any way. •...
- Page 6 GENERAL SAFETY INSTRUCTIONS (Cont.) • Please beware that Dust could accumulate over time on the unit and cause it to generate heat and or deteriorate insulation, which in turn may result in an electrical fire. • The product is not intended for use by persons (including children) with reduced physical, sensory or mental capabilities, or young children of any age, They must be supervised product by a person responsible for their safety.
- Page 7 GENERAL SAFETY INSTRUCTIONS (Cont.) Please make sure upon positioning this product, the place is: • Not wet or damp and Well ventilated • Away from direct sunlight or heaters. • Away from splashes or food. • Protected from excessive dust or grease. •...
-
Page 8: Installation
INSTALLATION Install the stand as described below, or if you want to mount it to a wall, please contact a professional installer. Please ensure the TV is not plugged into the wall socket and furthermore we recommend to get another person to assist in the following task. Attaching the stand Step 1 Place a soft cushioned material on... - Page 9 INSTALLATION (Cont.) Wall-Mounting Instructions Please ensure the TV is not plugged into the wall socket and furthermore we recommend to get another person to assist in the following task. • We recommend you use a professional installer as we assume no liability for any eventual damage to the product or injury to yourself if you mount the TV on your own.
-
Page 10: Controls And Connections
CONTROLS AND CONNECTIONS... - Page 11 CONTROLS AND CONNECTIONS (Cont.) HDMI 2 PC AUDIO INPUT HDMI 3 VIDEO AUDIO LEFT Y/PB/PR AUDIO RIGHT HEADPHONE JACK ANTENNA (RF) OPTICAL HDMI 1 (ARC) USB connection Insert a USB storage device into the USB port to record, playback of video/music/ photo...
-
Page 12: Remote Control
REMOTE CONTROL... - Page 13 REMOTE CONTROL (Cont.)
- Page 14 REMOTE CONTROL (Cont.) Using the Remote Control • Battery should normally last for about one year. • Do not mix old and new batteries in the remote • Do not use different types of battery • If you do not intend to use the unit for a long time, please remove batteries from the remote to avoid accident.
-
Page 15: Basic Operations
BASIC OPERATIONS SELECTING AN INPUT SOURCE • Press the SOURCE button on the remote control, to display the input source list. buttons to select the input source, and then press OK to confirm. • Press the • You can access connected USB drives by selecting MEDIA. NOTE: The first time you use this TV, make sure to go through the first time installation and auto-search for all the DTV channels. -
Page 16: Recording
RECORDING NOTE: Before you can record with this TV, make sure you have the USB you wish to use formatted as a FAT32 USB storage device. Then insert the device into your TV. Insert your USB device into the USB Port When watching Digital TV, Press the RECORD button on the remote control to start recording. -
Page 17: Media
MEDIA MEDIA PLAYBACK • First insert a USB Device into the TV • Press “MEDIA” on the remote control. • Use the directional arrow keys to go through folders within your USB device to access Photo’s, Music, Movies or text. •... -
Page 18: Channel Settings
MENUS (cont.) CHANNEL SETTINGS To access CHANNEL settings, press the MENU button and go to CHANNEL. -
Page 19: Tuning Settings
MENUS (cont.) TUNING SETUP To auto scan your TV to find your local channels, make sure the Antenna (RF) cable is connected to the TV. Then proceed to tune your TV by following the below. Make sure to select your country “Australia”, then go to tune type and change the “TUNE TYPE”... -
Page 20: Picture Settings
MENUS (cont.) PICTURE SETTINGS To access Picture settings, press the MENU button and go to picture. -
Page 21: Sound Settings
MENUS (Cont.) SOUND SETTINGS To access Sound settings, press the MENU button and go to Sound. -
Page 22: Lock Settings
MENUS (Cont.) LOCK MENU To access LOCK settings, press the MENU button and go to Lock. Default password is “0000”, then you can set your own password to lock the TV. -
Page 23: Time Settings
MENUS (Cont.) TIME SETTINGS To access TIME settings, press the MENU button and go to TIME. -
Page 24: Setup Settings
MENUS (Cont.) SETUP SETTINGS To access Setup settings, press the MENU button and go to SETUP. -
Page 25: Faqs
FAQs GENERAL PROBLEMS WITH TV SET If any issues persist, please contact us at info@ayonz.com... -
Page 26: Specifications
SPECIFICATIONS Display Device 40” Full HD TV WITH BUILT-IN DVD PLAYER Resolution 1920 x 1080 Display Colours 16.7M Contrast ratio: 5000 : 1 Aspect Ratio 16 : 9 Movie: avi/mpg/ts/mov/mkv/dat/mp4/vob Multimedia Playback Format under Music: mp3/aac USB Mode Photo: jpg/jpeg/bmp/png Supported Discs DVD, CD Power Source... -
Page 28: Customer Support
CUSTOMER HELPLINE: info@ayonz.com DISTRIBUTED BY: Ayonz Pty Ltd...
Need help?
Do you have a question about the BP4000HDV7100 and is the answer not in the manual?
Questions and answers