Table of Contents
Advertisement
Quick Links
Important
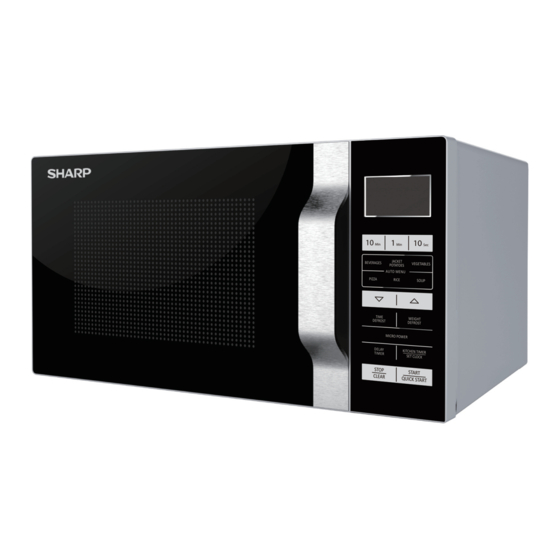
R-360M
900W
(IEC 60705)
MICROWAVE OVEN
OPERATION MANUAL
This operation manual contains important information which you should read carefully before using
your microwave oven.
IMPORTANT: There may be a serious risk to health if this operation manual is not followed or if the ov
so that it operates with the door open.
Advertisement
Table of Contents

Related Manuals for Sharp R-360M


Summary of Contents for Sharp R-360M
- Page 1 Important R-360M 900W (IEC 60705) MICROWAVE OVEN OPERATION MANUAL This operation manual contains important information which you should read carefully before using your microwave oven. IMPORTANT: There may be a serious risk to health if this operation manual is not followed or if the ov...
-
Page 2: Operation Manual
If the product is used for business purposes and you want to discard it: Please contact your SHARP dealer who will inform you about the take-back of the product. You might be charged for the costs arising from take-back and recycling. Small products (and small amounts) might be taken back by your local collection facilities. -
Page 3: Heating Category
HEATING CATEGORY The heating category (a letter A to E) developed by MAFF (Ministry of Agriculture, Microwave output power Microwave output power in Watts (based on in Watts (based on Fisheries and Food) with microwave oven and food manufacturers indicates the international (IEC 60705) international (IEC 60705) ability of the oven to heat small quantities of food (up to 500g [ I lb 2oz]). -
Page 4: Table Of Contents
CONTENTS Operation manual INFORMATION ON CORRECT DISPOSAL .........................................1 HEATING CATEGORY ................................................2 HOW YOUR OVEN WORKS ..............................................2 CONTENTS ....................................................3 SPECIFICATIONS ..................................................3 OVEN AND ACCESSORIES ..............................................4 CONTROL PANEL ..................................................5 IMPORTANT SAFETY INSTRUCTIONS ...........................................6-9 INSTALLATION ..................................................10 BEFORE OPERATION ................................................11 SETTING THE CLOCK ................................................11 KITCHEN TIMER FUNCTION .............................................. -
Page 5: Oven And Accessories
OVEN OVEN Door handle Oven lamp Door hinges Door safety latches Door Door seals and sealing surfaces Glass flat tray Oven cavity Control panel 10. Power supply cord 11. Outer cabinet GB-4... -
Page 6: Control Panel
CONTROL PANEL 1.DIGITAL DISPLAY and INDICATORS MICROWAVE indicator DELAY TIMER indicator KITCHEN TIMER indicator WEIGHT DEFROST indicator TIME DEFROST indicator CHILD LOCK indicator 2.AUTO MENUS INDICATORS BEVERAGES JACKET POTATOES VEGETABLES PIZZA RICE SOUP 3.NUMBER keys 4.AUTO MENU keys 5.AUTO MENU A1 key as well as increase wieght key 6.WEIGHT DEFROST key 7.MICRO POWER key 8.KITCHEN TIMER/SET CLOCK key... -
Page 7: Important Safety Instructions
Do not place the a special cord. The exchange must be oven in a cabinet. made by an authorised SHARP service agent. 2. The oven door may become hot during cooking. Place or mount the oven so that 12. - Page 8 7. Do not store or use the oven outdoors. 22. Do not use harsh abrasive cleaners 8. Clean the waveguide cover, the oven or sharp metal scrapers to clean the cavity, the turntable and turntable glass on the oven door since they can support after use.
- Page 9 4. Always stand back from the oven door yourself or allow anyone who is not an when opening it to avoid burns from electrician authorised by SHARP to do so. escaping steam and heat. If the oven lamp fails, please consult your 5.
- Page 10 IMPORTANT SAFETY INSTRUCTIONS NOTE: Other warnings If you are unsure how to connect your oven, 1. Never modify the oven in any way. 2. Do not move the oven while it is in please consult an authorised, qualified operation. electrician. Neither the manufacturer nor the dealer can accept any liability for damage 3.
-
Page 11: Installation
• If the power supply cord is damaged, it • A minimum space of 20cm is required must be replaced by a Sharp approved between the oven and any adjacent walls. service facility or a similarly qualified •... -
Page 12: Before Operation
BEFORE OPERATION Plug in the oven. The oven display will display: “1:00” a n d “ ” , an audible signal will sound once. This model has a clock function and the oven uses less than 1.0W in stand by mode. To set the clock, see below. -
Page 13: Manual Operation
MICORWAVE POWER LEVELS Generally the following recommendations apply: P100 used for fast cooking or reheating e.g for casseroles, hot P40 - Defrost setting to defrost,select this power setting,to ensure beverages,vegetables etc. that the dish defrosts evenly.This setting is also ideal for simmering used for longer cooking of dense foods such as roast joints, rice, pasta, dumplings and cooking egg custard. -
Page 14: Other Convenient Functions
OTHER CONVENIENT FUNCTIONS 1. DELAY TIMER With this function, you can preset the program and the microwave oven will start to work according to the program automatically later. In standy by mode, set your desired cooking program. • • Press the DELAY TIMER key once, the time of the day will display and the delay timer indicator will illuminate. •... -
Page 15: Time Defrost Function
TIME DEFROST FUNCTION TIME DEFROST This function quickly defrosts food while enabling you to choose a suitable defrost period, depending on the food type. Follow the example below for guidance on how to operate this function. The time range is 0:10 – 99:50. Example: To defrost food for 10 minutes. -
Page 16: Auto Menu Chart
AUTO MENU CHART AUTO MENU DISPLAY WEIGHT/ PORTION COOKING TIME POWER LEVEL Beverages 1(200 ml) 1:30 P100 2:40 2(400 ml) 3(600 ml) 3:50 Potatoes 1(230 g) 6:00 P100 9:00 2(460 g) 3(690 g) 13:00 Vegetables 200 g 3:00 4:00 300 g P100 400 g 5:00... -
Page 17: Suitable Ovenware
Do not Open the door before cleaning to de-activate the control panel. use harsh abrasive cleaners or sharp metal scrapers to clean the Care should be taken in cleaning the control panel. Use a cloth glass oven door since they can scratch the surface, which may result damp with water only, gently wipe the panel until it becomes clean. -
Page 18: Troubleshooting
If there is no tted with a lamp access cover. If the lamp fails, do fault with either, check against the troubleshooting chart below. not attempt to replace the lamp yourself, call a SHARP approved service facility. •... -
Page 19: Calling For A Service
Sharp Electronics (UK) Ltd. ("Sharp") guarantees that for a period of 12 months from the date of purchase the enclosed product will be free from defects in materials and workmanship. Sharp agrees to provide for the repair or, at its option, the replacement of a defective product. - Page 20 Vestel UK London, UK UK: 0333 014 3055 Website: www.sharphomeappliances.com/support Printed in China PN:16170000A11165...
Need help?
Do you have a question about the R-360M and is the answer not in the manual?
Questions and answers