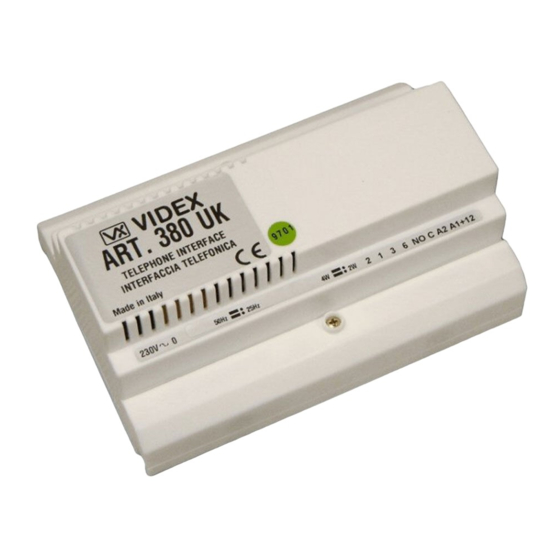
Summary of Contents for Videx ART380
- Page 1 ART380 TELEPHONE INTERFACE MANUAL Installation and programming manual Version 1.6 07/2009 1 of 19...
-
Page 2: Table Of Contents
CONTENTS DESCRIPTION PAGE Introduction ------------------------------------------------- Mounting Instructions ------------------------------------------------- Safety notes ------------------------------------------------- Connections to the telephone line ------------------------------------------------- Dealing with other telephone equipment ------------------------------------------------- Dealing with Broadband ------------------------------------------------- Wiring directions ------------------------------------------------- Connecting more than one handset ------------------------------------------------- Lock release back EMF protection ------------------------------------------------- Cable size -------------------------------------------------... -
Page 3: Introduction
Dial in facility which allows the Art380 to be activated from an incoming telephone call. Mounting instructions The Art380 can be either mounted to a DIN rail or mounted directly to a wall. Begin by removing the terminal side covers by unscrewing the retaining screws. Either clip the Art380 to a DIN rail or screw directly to the wall using two screws and suitable wall plugs. - Page 4 Only one master socket should be connected after the Art380. If there are more than one fitted they must be replaced with secondary (Slave) sockets. (Also note: The Art380 is only capable of ringing two handsets with a REN value of 1 each).
-
Page 5: Wiring Directions
Wiring directions Please follow the appropriate wiring diagram from one of the pages at the rear of this manual. For information purposes, the connections on the Art380 have the following functions:- CONNECTION DESCRIPTION EXPECTED OUTPUT 230V Live terminal for mains input to This should be connected to the mains via a the device. -
Page 6: Connecting More Than One Handset
ART380 Interface If more telephones are required. They should be connected to the Art380 via a REN booster (The REN booster is a third party product not supplied by Videx). IMPORTANT NOTE: When using a REN boost the Art.380 must be put into PABX mode. It will then be necessary to press ‘0’... -
Page 7: Cable Size
100M. Jumper settings There are four jumpers on the Art380 labelled S1, S2, S3 and S4. Jumpers S1 & S2 are used to setup the telephone ringing frequency as either 50Hz or 25Hz:- Jumpers S3 & S4 are for setting the speech circuit type to either 2 wire or four wire. A four wire system would be either a 837, 836, 831K, 537 or 536, 2280 amplifier in the door panel and a 2 wire system would be either a 831M or a 835 amplifier in the door panel. -
Page 8: Tones Overview
understood and so is required to be entered again. If during the programming, a mistake is made, simple hang up the telephone and start again. Tones overview • Upon lifting the handset you should hear the telephone line tone. (If the system is in PABX mode you will still hear a line tone but this will be a higher frequency to the one normally heard on a telephone line. -
Page 9: Initial Setup
Programming & User functions explained Initial setup: Begin by resetting the Art380 to the factory defaults: ** 33 1111 Note: If you are unable to reset using this process because you have enabled a code but are not sure what it is then follow the following manual reset procedure:... -
Page 10: Optional Call Adjustments
4. Remove the short between terminals - & SK 5. The Art380 has now been reset to factory default settings. This method will also switch the Art380 into PABX mode and so to revert the unit back to normal mode, pickup the handset and type ** 14 0. -
Page 11: Advanced Speech Setup Options
Dial in facility setup The dial in facility can be used to allow a caller from a telephone line to dial into the Art380 and access the functions available. This could be to open the door or activate an auxiliary output. -
Page 12: Divert Call Setup
The divert facility allow a call to be diverted to another telephone number. When in divert mode it is recommended you use a four digit access code to restrict the functions of the Art380 to authorised callers. Also see box above for divert time which is the time allowed before a call will clear. -
Page 13: Access Code Setup
** [Code] 14 1 Activated telephone line but needs to be Note: It is also possible to put the Art380 into PABX isolated from it. When this is mode by following these steps: activated it will be necessary to 1. -
Page 14: Approval
User commands The following commands can be used to activate functions of the Art380. Note: If the code facility is active, this will be required before the command will work. Command Function Either 0, 8 or 9 Open the door during a call. - Page 15 REN value has been exceeded and the number of telephone on the system must be reduced. Option 2 : A master socket has not been fitted to the output of the ART380. The telephone will not ring if this is a secondary socket or a faulty master socket.


Need help?
Do you have a question about the ART380 and is the answer not in the manual?
Questions and answers