HP Compaq t1000 series User Manual
Windows-based terminal
Hide thumbs
Also See for Compaq t1000 series:
- Supplementary manual (320 pages) ,
- Reference manual (100 pages) ,
- Installation manual (17 pages)
Table of Contents
Advertisement
Quick Links
Advertisement
Chapters
Table of Contents

Related Manuals for HP Compaq t1000 series


Summary of Contents for HP Compaq t1000 series
- Page 1 T1000/T1010 Series Windows -based Terminal ® Users Guide Software Version 3.5...
- Page 2 T1000/T1010 Series Windows Users Guide Written and published by: Compaq Computer Corporation, February 2001 Created using FrameMaker ® Multiprotocol Windows Created using FrameMaker The on-line book is provided in both PDF and HTML versions, presented on both CD-ROM and a website. ®...
-
Page 3: Users Guide
T1000/T1010 Series ® Windows -based Terminal Users Guide Software Version 3.5 February 2001... -
Page 4: Patents
Copyright Notice The information in this document is subject to change without notice. COMPAQ COMPUTER CORPORATION SHALL NOT BE LIABLE FOR TECHNICAL OR EDITORIAL ERRORS OR OMISSIONS CONTAINED HEREIN; NOR FOR INCIDENTAL OR CONSEQUENTIAL DAMAGES RESULTING FROM THE FURNISHING, PERFORMANCE, OR USE OF THIS MATERIAL. This document contains information protected by copyright. -
Page 5: Software License
In the absence of a separate end user license agreement for particular component(s) of the DESKTOP SOFTWARE, you may install and use only one (1) copy of such component(s) on a single computer with which you use the SYSTEM. - Page 6 • Use of Windows CE Operating System for Windows-based Terminal Devices with Microsoft Windows NT Server, Terminal Server Edition If the SOFTWARE is Windows CE operating system for Windows-based Terminal devices, the following special provisions apply. In order to use the SYSTEM in connection with Windows NT Server, Terminal Server Edition, you must possess (1) a Client Access License for Windows NT Server, Terminal Server Edition and (2) an end user license for Windows NT Workstation or an...
- Page 7 • Single EULA The package for the SYSTEM SOFTWARE may contain multiple versions of this EULA, such as multiple translations and/or multiple media versions (e.g., in the user documentation and in the software). Even if you receive multiple versions of the EULA, you are licensed to use only one (1) copy of the SYSTEM SOFTWARE.
- Page 8 5. Product Support Product support for the SOFTWARE is not provided by MS, its parent corporation, Microsoft Corporation, or their affiliates or subsidiaries. For product support, please refer to MANUFACTURER’s support number provided in the documentation for the SYSTEM. Should you have any questions concerning this EULA, or if you desire to contact MANUFACTURER for any other reason, please refer to the address provided in the documentation for the SYSTEM.
- Page 9 8. Limited Warranty • Limited Warranty MANUFACTURER warrants that the SOFTWARE will perform substantially in accordance with the accompanying written materials for a period of ninety (90) days from the date of receipt. Any implied warranties on the SOFTWARE are limited to ninety (90) days.
- Page 10 If this EULA was acquired outside the United States, then local law may apply. Should you have any questions concerning this EULA, please contact the MANUFACTURER of your SYSTEM. U.S. GOVERNMENT RESTRICTED RIGHTS The SOFTWARE and documentation are provided with RESTRICTED RIGHTS. Use, duplication, or disclosure by the Government is subject to restrictions as set forth in subparagraph (c)(1)(ii) of the Rights in Technical Data and Computer Software clause at DFARS 252.227-7013 or subparagraphs (c)(1) and (2) of the...
-
Page 11: Fcc Statement
FCC Statement This equipment has been tested and found to comply with the limits for either Class A or Class B digital devices (refer to “Terminal Requirements Compliance”), pursuant to Part 15 of the FCC Rules. These limits are designed to provide reasonable protection against harmful interference in a residential installation. - Page 12 The Medium-Performance IWBT meets Class B requirements. IEC/EN Compliance Models T1000 and T1010 terminals meet Class B requirements. The Low-Profile, Mid-Level MWBT and the High-Performance MWBT meet Class B requirements. The Medium-Performance IWBT meets Class B requirements. Canadian DOC Notices Refer to the previous section, “Terminal Requirements Compliance,”...
- Page 13 T1000/T1010 Windows-based Terminals High-Performance MWBT and Medium-Performance IWBT For use with External Power Supply DVE Model DSA-0301-05 or Potrans Model UP01811050A or certified equivalent model supplied by the manufacturer, rated minimum 5V/4A. Noise Suppressor A noise suppressor (ferrite bead) must be installed on the network cable of your terminal.
-
Page 14: License Agreement
License Agreement YOU SHOULD CAREFULLY READ THE FOLLOWING TERMS AND CONDITIONS BEFORE USING THIS SOFTWARE (TOGETHER WITH ANY SUPPLIED DOCUMENTATION, HEREAFTER "SOFTWARE"), WHICH IS OWNED BY THE MANUFACTURER OR ITS LICENSORS. USING THIS SOFTWARE INDICATES YOUR ACCEPTANCE OF THE FOLLOWING TERMS AND CONDITIONS. - Page 15 SOME STATES DO NOT ALLOW LIMITATIONS ON HOW LONG AN IMPLIED WARRANTY LASTS SO THE ABOVE LIMITATION MAY NOT APPLY TO YOU. THIS WARRANTY GIVES YOU SPECIFIC LEGAL RIGHTS. YOU MAY ALSO HAVE OTHER RIGHTS WHICH VARY FROM STATE TO STATE. Limit of Liability UNDER NO CIRCUMSTANCES SHALL MANUFACTURER BE LIABLE FOR LOSS OF DATA, COST OF COVER, OR ANY INCIDENTAL OR...
-
Page 16: Table Of Contents
Contents Patents ii About the Users Guide Guide Overview 1 Guide Conventions 2 Text Format 2 User Interface Menu Control 3 Introducing the T1000/T1010 Windows-based Terminals Models Summary 5 T1000 Terminal 6 T1010 Terminal 8 T1000/T1010 WBT Terminal Features 10 General Terminal Information Logging On 13 Access Levels 14... - Page 17 xvii Making a Connection 33 Ending a Connection 34 Shutting Down the Terminal 34 Browser Configuration Adding a Browser Connection 38 Multiple Sessions Setting Up Multiple Sessions 41 Managing Multiple Sessions 41 Manipulating Multiple Sessions 41 Getting Help Troubleshooting Your Terminal 43...
-
Page 18: About The Users Guide
About the Users Guide The T1000/T1010 Windows-based Terminal Users Guide contains the information you will need to use and troubleshoot a WBT (Windows-based Terminal). This guide is written primarily for desktop users and covers the Models T1000 and T1010. Guide Overview The users guide consists of the following chapters: •... -
Page 19: Guide Conventions
Guide Conventions Text Format Table 1 lists the text format conventions used in this document. Table 1 Text Format Convention Italic Bold Note Caution Where Used New term, book title, or emphasis. Screen display, keycaps, and user input. Indicates a note. A note adds information. Indicates a caution. -
Page 20: User Interface Menu Control
User Interface Menu Control Table 2 describes the command buttons used for user interface menu control on a T1000/T1010 WBT. Table 2 User Interface Menu Control Command Button Cancel Apply Next or Accept Back Finish Function Found in the upper right corner of a dialog box. Click on this command button to quit a dialog box or properties sheet without saving changes. -
Page 21: Introducing The T1000/T1010 Windows-Based Terminals
Introducing the T1000/T1010 Windows-based Terminals Compaq T1000/T1010 WBTs (Windows-based Terminals) are terminals that display windows rather than the classic text-based display. They are designed to connect to Windows 2000 servers via RDP (Remote Desktop Protocol), to Windows NT servers via ICA (Independent Computing Architecture), or to legacy servers using various terminal emulations such as TN3270 or TN5250. -
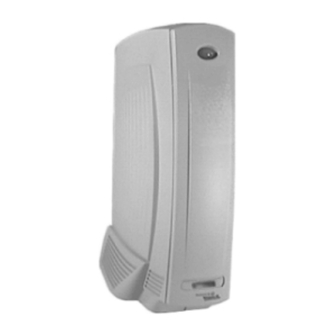
Page 22: T1000 Terminal
Chapter 1 T1000 Terminal The Model T1000 terminal is a medium-performance modular-type terminal. The connections for peripherals such as the monitor, keyboard, and mouse are on the back of the terminal. The following figures show a T1000 modular terminal its connectors. - Page 23 Introducing the T1000/T1010 Windows-based Terminals The following items are provided with T1000 terminals: • Power supply • Power cord (with domestic versions only) • Desktop mounting stand (integral) • Keyboard (with domestic versions only) and mouse • Installation and user information (call 1-800-OKCOMAPQ)
-
Page 24: T1010 Terminal
Chapter 1 T1010 Terminal The Model T1010 terminal is a high-performance modular-type terminal. The connections for peripherals such as the monitor, keyboard, and mouse are on the back of the terminal. The following figures show a T1010 modular terminal and its connectors. - Page 25 Introducing the T1000/T1010 Windows-based Terminals The following items are provided with T1010 terminals: • Power supply • Power cord (with domestic versions only) • Desktop mounting stand • Keyboard (with domestic versions only) and mouse • Installation and user information (call 1-800-OKCOMAPQ)
-
Page 26: Terminal Features
Chapter 1 T10x0 Series WBT Terminal Features Each T1000/T1010 model comes with its own set of features. The following table outlines the possible features. Table 1-1 Terminal Features Feature Windows 3.1, Windows 95, Windows 98, and Windows NT applications via Windows 2000 RDP and ICA 3.x application... - Page 27 Introducing the T1000/T1010 Windows-based Terminals Table 1-1 Terminal Features, Continued Feature T1000 Print Spooling Secure RDP & ICA Media Player 16-bit color support PCMCIA support for CISCO Aironet™ Wireless Ethernet Card Network Time Services Microsoft Internet Explorer 4 support T1010...
-
Page 28: General Terminal Information
General Terminal Information Logging On When you turn on your WBT the Terminal Login dialog box shown (see Figure 2-1) displays, unless your system administrator has configured your terminal for automatic login with your User Name and Password. Type in your user name and password then click the OK button. -
Page 29: Access Levels
Chapter 2 Access Levels The terminal allows three different levels of access: Administrator, User, and Guest. These levels are assigned to specific User Names by your System Administrator. Each access level grants certain rights to the user according to the level specified, Administrator having total access and control over all functions of the terminal, User having control over all except the Security functions, and Guest having minimal rights. -
Page 30: User-Level Terminal Properties Screen
General Terminal Information Figure 2-3 User-Level Terminal Properties Screen... -
Page 31: Guest-Level Terminal Properties Screen
Chapter 2 Figure 2-4 Guest-Level Terminal Properties Screen Additionally the Configure tab in the Connection Manager window is only available to Administrator level users. Information regarding the use of Administrator-level functions is available in the Administrators Guide. Note If you turn on your WBT and the Setup Wizard displays, contact your system administrator. -
Page 32: Connection Manager
General Terminal Information system administrator, see the T1000/T1010 Windows-based Terminal Administrators Guide. The connection manager allows you to connect to one or more servers. See Chapters 6 and 8 for more information about connections and sessions. Figure 2-5 Connection Manager... -
Page 33: Version And Copyright Information
Chapter 2 Version and Copyright Information The General properties sheet includes information about the current software on your terminal and copyright statements. See Figure 2-6. The General properties sheet is the default for the dialog box. Figure 2-6 General Properties Sheet Read the information on this sheet. - Page 34 General Terminal Information Note The amount of RAM shown on this properties sheet depends on the model of terminal in use. Caution There is one function on the General properties sheet, Reset the Terminal to Factory Default Property Settings. Contact your system administrator before using this function.
-
Page 35: Network Information
Chapter 2 Network Information The SysInfo properties sheet contains network information. See Figure 2-7. Click on the SysInfo tab to invoke this properties sheet. Read the information on this sheet. Click on Cancel or Apply to return to the Connection Manager. Figure 2-7 SysInfo Properties Sheet... -
Page 36: Display Configuration
Display Configuration From the Connection Manager press F2 on your keyboard. The Terminal Properties dialog box displays (see Figure 3-1). The Display properties sheet available in this dialog box allows you to configure display screen resolution and turn on the energy savers functions. To invoke this properties sheet click on the Display tab in the Terminal Properties dialog box. -
Page 37: Display Screen Resolution
Chapter 3 Display Screen Resolution This paragraph discusses display screen resolution referring to Figure 3-1 and using Table 3-1. Figure 3-1 Display Properties Sheet... -
Page 38: Display Screen Resolution
Display Configuration Table 3-1 Display Screen Resolution Display Properties Sheet Area Called... Desktop Area and Refresh Frequency To Use... The scrolling list box displays the current terminal display screen resolution. Scroll and click on a selection to change the resolution. The default is 640 x 480 @ 60 Hz. - Page 39 Chapter 3 Table 3-1 Display Screen Resolution, Continued Display Properties Sheet Area Called... To Use... After several seconds the following dialog box displays: Follow the instructions in the dialog box. If you click on Yes, you will return to the Display properties sheet. If you click on No, the following dialog box will display: Follow the instructions in the dialog box.
-
Page 40: Energy Savers
Display Configuration Energy Savers This paragraph discusses energy saving features, referring to Figure 3-1 and using Table 3-2. Table 3-2 Energy Savers Display Properties Sheet Area Called... Enable Energy Savers To Use... Click on this check box to activate the energy saver functions. -
Page 41: Terminal Settings Change Dialog Box
Chapter 3 To finish, click on Apply, then Close. The following dialog box displays: Figure 3-2 Terminal Settings Change Dialog Box You can also click on Cancel to cancel any changes and return to the Connection Manager. -
Page 42: Keyboard And Mouse Configuration Keyboard
Keyboard and Mouse Configuration From the Connection Manager you can configure your terminal’s keyboard and mouse. Press F2 on your keyboard. The Terminal Properties dialog box displays. In this dialog box is a properties sheet you can use for setting up your keyboard and mouse. -
Page 43: Input Properties Sheet
Chapter 4 Figure 4-1 Input Properties Sheet... - Page 44 Keyboard and Mouse Configuration Keyboard This paragraph discusses configuring your keyboard, referring to Figure 4-1 and using Table 4-1. Table 4-1 Keyboard Input Properties Sheet Area Called... Keyboard To Use... This group box outlines the keyboard mappings supported by the firmware.
- Page 45 Chapter 4 Table 4-1 Keyboard, Continued Input Properties Sheet Area Called... Character Repeat To finish, click on Apply then Close to apply the changes you made and return to the Connection Manager. To Use... NumLock On Boot Click on this check box to enable the Num Lock function on your keyboard.
-
Page 46: Mouse
Keyboard and Mouse Configuration Mouse This section discusses configuring your mouse referring to Figure 4-1 and using Table 4-2. Table 4-2 Mouse Input Properties Sheet Area Called... Mouse To Use... Use the following dialog box to configure mouse attributes. Properties... Click on this command button to invoke the Mouse Properties dialog box. - Page 47 Chapter 4 Table 4-2 Mouse, Continued Input Properties Sheet Area Called... To finish, click on Apply then Close to apply the changes and return to the Connection Manager. To Use... Pointer Acceleration Use this slider control to adjust the acceleration of the mouse. Pointer Speed Use this slider control to adjust the speed of the mouse.
-
Page 48: Managing Connections
Managing Connections The Connection Manager is designed to help you manage your network connections. The manager consists of the Connections properties sheet and the Configure properties sheet. With it you can configure, make, and end connections, and gracefully shut down the terminal. The Connection Manager is automatically invoked when the terminal is turned on. -
Page 49: Ending A Connection
Chapter 5 Table 5-1 identifies and describes each of functions of the properties sheet. Table 5-1 Connections Properties Sheet Function Connection Name Type Status Connect Shutdown Ending a Connection Click on the End command button to end the connection process. When you press the End button and the connection is active, the End Task dialog displays. -
Page 50: Shutdown Window Dialog Box
Managing Connections Figure 5-1 Shutdown Window Dialog Box Click on the Shutdown command button in the Connection Manager to invoke this dialog box. The following table describes the functions of this dialog box. Table 5-2 Shutdown Window Dialog Box Function Description Logout Click on this radio button to invoke the Terminal Login... -
Page 51: Browser Configuration
Browser Configuration T1000/T1010 Windows-based terminals come with a local version of the Microsoft Internet Explorer web browser. This chapter of the Users Guide describes how to set the client-based browser as a connection using the Connection Manager. Figure 6-1 Internet Explorer Browser... -
Page 52: Adding A Browser Connection
Chapter 6 Adding a Browser Connection When you first power-up your Winterm you will see the Connection Manager. Figure 6-2 Connection Manager It is from the Connection Manager that you will configure your local browser. Click on the Configure tab to begin setting up your browser. A new set of buttons will appear at the bottom of the Connection Manager window. -
Page 53: Configure Tab Buttons
Browser Configuration Figure 6-3 Configure Tab Buttons Click the Add button and choose Internet Explorer from the drop down box and click on the OK button. Figure 6-4 New Connection Dialog... -
Page 54: Internet Explorer Setup Dialog Box
Chapter 6 Type a name for your browser connection in the title box of the Internet Explorer Setup dialog box and click OK. Figure 6-5 Internet Explorer Setup Dialog Box Click the Connections tab at the top of the Connection Manager window. If you want to have the browser automatically open when you start your terminal, click the Automatically start the selected connection at startup radio button in the Connection Startup dialog box, Figure 6-6. -
Page 55: Multiple Sessions
Multiple Sessions Setting Up Multiple Sessions To start multiple sessions: 1. Click on a connection in the Connection Name list in the Connection Manager to launch your first session. (See “Managing Connections” for more information about configuring connection parameters). 2. Press Ctrl+Alt+End while the connection is active to return to the Connection Manager. - Page 56 Chapter 7 • Press Ctrl+Alt+ to proceed to the previous session. • Press Ctrl+Alt+ to proceed to the next session. You can also return to the Connection Manager by pressing Ctrl+Alt+End.
-
Page 57: Getting Help
Getting Help Getting Help provides solutions to problems that may occur while you are using your terminal. Troubleshooting Your Terminal Troubleshooting Your Terminal, Table 8-1, lists some common problems and the solutions to those problems. Table 8-1 Troubleshooting the Terminal Problem When you turn on the terminal nothing happens. - Page 58 Chapter 8 Table 8-1 Troubleshooting the Terminal, Continued Problem You are not able to make a network connection using the Connection Manager. While connected to a server the keyboard and the mouse freeze. Note If any other error messages are displayed, you have any other problems, or you can not find a solution in this table, contact your network system administrator.
- Page 59 End 34 End Task 34 Energy Savers 25 Energy savers 21 Functions Character Repeat 30 Connect 34 Desktop Area and Refresh Frequency 23 Enable Energy Savers 25 End 34 Keyboard 29 Logoff 35 Repeat Delay 30 Repeat Rate 30 Reset the Terminal to Factory Default...
- Page 60 Connections 33 Display 21 General 13 Input 27 SysInfo 13 RAM 19 RDP 5 Remote Desktop Protocol 5 Security 14 Serial port 10 Shutdown 34 Shutting down and restarting the terminal 35 Shutting down the terminal 35 Status 34 Terminal features 10...
-
Page 61: List Of Figures
List of Figures T1000 Terminal and Connections 6 T1010 Terminal 8 Terminal Login Dialog Box 13 Administrator-Level Terminal Properties Screen 14 User-Level Terminal Properties Screen 15 Guest-Level Terminal Properties Screen 16 Connection Manager 17 General Properties Sheet 18 SysInfo Properties Sheet 20 Display Properties Sheet 22 Terminal Settings Change Dialog Box 26 Input Properties Sheet 28... - Page 62 List of Tables Text Format 2 User Interface Menu Control 3 Terminal Features 10 Display Screen Resolution 23 Energy Savers 25 Keyboard 29 Mouse 31 Connections Properties Sheet 34 Shutdown Window Dialog Box 35 Troubleshooting the Terminal 43...
Need help?
Do you have a question about the Compaq t1000 series and is the answer not in the manual?
Questions and answers