Table of Contents
Advertisement
Quick Links
Advertisement
Table of Contents

Subscribe to Our Youtube Channel
Related Manuals for thomann DP-140WH U


Summary of Contents for thomann DP-140WH U
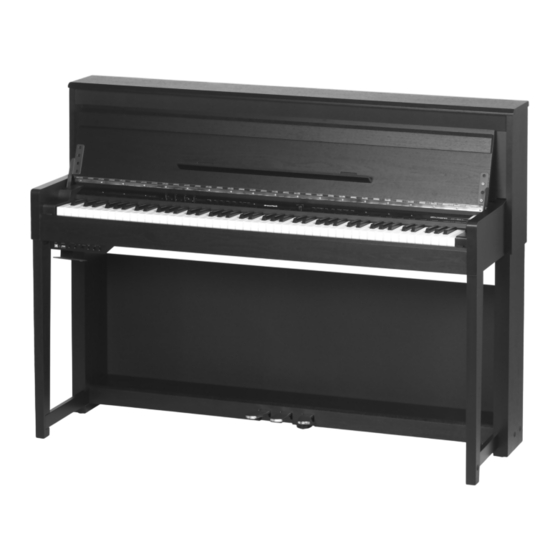
- Page 1 DP-140B U, DP-140WH U digital piano user manual...
- Page 2 Musikhaus Thomann Thomann GmbH Hans-Thomann-Straße 1 96138 Burgebrach Germany Telephone: +49 (0) 9546 9223-0 E-mail: info@thomann.de Internet: www.thomann.de 13.12.2021, ID: 516817, 533288...
-
Page 3: Table Of Contents
7.8.6 Equalizer........................30 7.8.7 String resonance......................31 7.8.8 Reverb effect....................... 31 7.8.9 Chorus effect....................... 32 7.8.10 Vocal effect........................ 32 7.8.11 Song playback......................33 7.8.12 Keyboard Local ON / OFF..................33 7.8.13 System settings......................34 Technical specifications....................36 DP-140B U, DP-140WH U... - Page 4 Table of contents Troubleshooting........................38 Voice list............................ 39 Song list............................ 40 MIDI implementation chart..................... 42 Protecting the environment................... 44 digital piano...
-
Page 5: General Information
1.1 Further information On our website (www.thomann.de) you will find lots of further information and details on the following points: Download This manual is also available as PDF file for you to download. -
Page 6: Symbols And Signal Words
General information Instructions The individual steps of an instruction are numbered consecutively. The result of a step is indented and highlighted by an arrow. Example: Switch on the device. Press [Auto]. ð Automatic operation is started. Switch off the device. Cross-references References to other locations in this manual are identified by an arrow and the speci‐... -
Page 7: Safety Instructions
(for example after transport at low outside temperatures). Dust and dirt inside can damage the unit. When operated in harmful ambient conditions (dust, smoke, nicotine, fog, etc.), the unit should be main‐ tained by qualified service personnel at regular intervals to prevent overheating and other malfunction. DP-140B U, DP-140WH U... - Page 8 Safety instructions NOTICE! External power supply The device is powered by an external power supply. Before connecting the external power supply, ensure that the input voltage (AC outlet) matches the voltage rating of the device and that the AC outlet is protected by a residual current circuit breaker. Failure to do so could result in damage to the device and possibly the user.
-
Page 9: Features
Dual and Split mode TWINOVA mode Transpose function Master EQ Connections: USB-MIDI, USB-to-device, headphones, Aux IN / OUT, microphone, Pedal box Loudspeaker load capacity: 2 × 30 watt + 2 × 20 watt Automatic shutoff, deactivatable DP-140B U, DP-140WH U... -
Page 10: Assembly Instructions
Assembly instructions Assembly instructions ö & You need a Phillips screwdriver (not supplied) for the assembly of the digital piano. Open the package and make sure before assembling that the entire scope of delivery is present, as posted here. Digital piano housing Left side panel Right side panel Pedal box... - Page 11 M6 × 40 (6) on each side to affix both side panels to the pedal box. Attach the six plastic caps (7). & Fasten the rear panel (5) to the pedal box and the side panels with ten screws 4 × 15PA (8). DP-140B U, DP-140WH U...
- Page 12 Assembly instructions Place the digital piano case (1) on the frame and fasten it with six screws 6 ´ 18BM (9) and the two thumbscrews (10) to the side panels. Fasten the headphone holder (12) with two screws 3 × 8BM (11) on the under‐ side of the digital piano housing.
- Page 13 If the digital piano is not in use or when a thunderstorm with danger of lightning threatens, disconnect the device from its mains power for safety. Pedals ö # $ Soft pedal Sostenuto pedal Sustain pedal DP-140B U, DP-140WH U...
-
Page 14: Connections And Controls
Connections and controls Connections and controls ö & Main switch. Turns the device on and off. 2 [MASTER] Rotary control to adjust the overall volume 3 [MIC] Rotary control to adjust the microphone volume 4 [BRILLIANCE] Rotary control to adjust the tone colour 5 [TEMPO] Rotary control for adjusting the tempo Press the rotary control to reset the tempo to the default setting. - Page 15 19 [TWINOVA] Button to activate / deactivate the TWINOVA function 20 [FUNCTION] Button to call up the Function menu Hold down the button to enter the system settings. 21 Button to activate / deactivate the Piano mode DP-140B U, DP-140WH U...
- Page 16 Connections and controls Connections < 22 [TO HOST] USB-to-host interface for connecting the keyboard to a computer (MIDI data) 23 [TO DEVICE] USB interface for connecting a USB flash drive (USB stick) 24 [PHONES 1 / 2] Signal output sockets for connecting a headset, designed as ¼" jack socket 25 [MIC / AUX IN] Slide switch for selecting the sensitivity of the input socket [AUX IN / MIC] Move the switch to [MIC] to connect a microphone.
-
Page 17: Connection Options
NOTICE! To prevent damage to the speakers, turn the volume down to ‘Mini‐ mum’ before you connect other devices to the digital piano. DP-140B U, DP-140WH U... - Page 18 Connection options Computer via USB-MIDI You can connect the keyboard to a PC for data exchange via the USB-to-host inter‐ face. NOTICE! The digital piano supports the computer operating systems Windows XP or higher and Mac OSX 10.8 or higher. Update your com‐ puter's operating system if necessary.
-
Page 19: Operating
Use the rotary control [BRILLIANCE] to set the sound character of the digital piano. Turn the rotary control [BRILLIANCE] clockwise to adjust the treble for the entire keyboard. Turn the rotary control [BRILLIANCE] counterclockwise to adjust the bass for the entire keyboard. DP-140B U, DP-140WH U... -
Page 20: Split Point Setting
Operating 7.4 Split point setting Using this function you can select a point to split the whole claviature into two areas. The preset split point is on piano key [F#3]. Hold down [SPLIT] and press a desired piano key that you want to be the split point. -
Page 21: Voices
To change the combination of voices, press repeatedly [VOICE] to toggle between the first and second right hand voices. Then use the rotary control to select the desired voice. Press [DUAL] again to exit the Dual mode. DP-140B U, DP-140WH U... -
Page 22: Split Mode
Operating 7.6.3 Split mode With Split mode, you can assign different voices to certain keyboard areas. The preset split point is on piano key [F#3]. If desired, individually specify the split point as described under Ä Chapter 7.4 ‘Split point setting’ on page 20. Assign the right hand voice as described under Ä... -
Page 23: Twinova
29. In addition to the preset split point [F#4] , you can also move the split point to [E3] . Press [SPLIT] or [TWINOVA] to move. Press [VOICE] to disable the TWINOVA mode. DP-140B U, DP-140WH U... -
Page 24: Songs
Operating 7.7 Songs 7.7.1 Playing songs The digital piano offers a choice of 90 songs to accompany your playing at perform‐ ances, while practising and recording. Press [SONG] to activate the song mode. ð The display shows the number of the selected song. Use the rotary control to select a desired song (see Ä... -
Page 25: Playing Songs Off A Usb Flash Drive
Press [REC] to call up the recording menu. ð If you have selected the digital piano's internal memory as the storage location, the display shows ‘Overwrite User Song?’ . DP-140B U, DP-140WH U... - Page 26 Operating Press [LEFT] (NO) to stop the recording. Press [RIGHT] (YES) to overwrite the existing user song. ð ‘REC’ is flashing in the display. Press [START / STOP] or play the keyboard to start recording. Press [START / STOP] or [REC] again to stop recording. ð...
-
Page 27: Function Menu
Press repeatedly [FUNCTION] to select a desired parameter that you want to change. Alternatively, hold down [FUNCTION] and use the rotary control to select a desired parameter that you want to change. Use the rotary control to change the desired parameter. DP-140B U, DP-140WH U... -
Page 28: Transposing
Operating The following table shows the adjustable options and parameters: Option Control range Transposing ‘TRANSPOSE’ -12 to +12 Octave shift Voice R1 ‘OCTAVE R1’ -1 to +1 Octave shift Voice R2 ‘OCTAVE R2’ -1 to +1 ‘OCTAVE L’ Octave shift Voice L -1 to +1 Touch velocity ‘TOUCH’... -
Page 29: Octave Shift
Soft 2 In this setting, the volume is higher than usual even when playing with a soft touch. Flat Touch sensitivity is off. This can be very recommendable when playing the organ voice. DP-140B U, DP-140WH U... -
Page 30: Volume
Operating The set velocity is automatically saved when the digital piano is switched off. 7.8.4 Volume With this function you can adjust the volume of the Voice R1, Voice R2 and Voice L parts as well as the volume of the songs being played. Press repeatedly [FUNCTION] and select ‘VOLUME R1’... -
Page 31: String Resonance
Press repeatedly [FUNCTION] and select ‘REVERB LEVEL’ . Alternatively, hold down [FUNCTION] and use the rotary control to select ‘REVERB LEVEL’ . Use the rotary control to set the desired reverb effects depth between ‘0’ and ‘32’ . DP-140B U, DP-140WH U... -
Page 32: Chorus Effect
Operating 7.8.9 Chorus effect 7.8.9.1 Selecting chorus effect The Chorus effect lets you simulate the acoustic effects of different environmental conditions. Press repeatedly [FUNCTION] and select ‘CHORUS TYPE’ . Alternatively, hold down [FUNCTION] and use the rotary control to select ‘CHORUS TYPE’... -
Page 33: Song Playback
[TO HOST] output. Use the rotary control to select ‘OFF’ . ð The internal sound generator is not triggered. The MIDI data is only sent via the [TO HOST] output. Make sure all external devices are properly connected. DP-140B U, DP-140WH U... -
Page 34: System Settings
Operating 7.8.13 System settings Hold down [FUNCTION] to call up the system settings. Press repeatedly [FUNCTION] to select a desired parameter that you want to change. Alternatively, hold down [FUNCTION] and use the rotary control to select a desired parameter that you want to change. Use the rotary control to change the desired parameter. - Page 35 Do not switch off the digital piano during the factory reset. Internal data and the digital piano can be damaged. After resetting to the factory default settings, all personal settings and the user song are irrevocably deleted and cannot be restored. DP-140B U, DP-140WH U...
-
Page 36: Technical Specifications
Technical specifications Technical specifications Input connections AUX IN / Microphone 1 × 1/4" jack socket Voltage supply 1 × Input socket for the 15 V plug-in power supply Output connections Headphones 2 × 1/4" jack socket AUX out 1 × 1/4" jack socket USB MIDI 1 ×... - Page 37 Technical specifications Further information Wooden keyboard Ivory-Feel keyboard Auto Accompaniment Number of rhythms DP-140B U, DP-140WH U...
-
Page 38: Troubleshooting
Troubleshooting Troubleshooting Problem Possible causes and solutions You hear a 'pop' sound from the speakers when switching the This is normal. No reason for concern. digital piano on and off. No sound can be heard when playing the piano. Make sure that the volume control is set appropriately. The volume of the individual parts Voice R1, Voice R2 and Voice L may be set too low. -
Page 39: Voice List
Alto Sax Rock Organ Tenor Sax Church Organ Baritone Sax Reed Organ Flute Accordion Pan Flute Tango Accordion Sitar Guitar & Bass 1 Banjo Guitar & Bass 2 Shamisen Bass & Vibra Koto Violin Bag Pipe DP-140B U, DP-140WH U... -
Page 40: Song List
Song list Song list Name Name The entertainer Robot Doll Rialto Ripples (Rag) Consolation Neapolitan Song 2-Part Invention #13 In A Minor.B.W. Iii Waltzes Minuet In G Major (BWV Anh. 114) Turkish March Barcarolle Schos Doll's Dance No. 2 Norwegian Dance No.2 Minuet In D Major Moseta Dance Inquietude... - Page 41 The two part inventions 1 Perpetuum mobile The two part inventions 2 The Nightingale was singing Gavotte Gipsy Rondo The angels singing Fountain Minuet Fur Elise Lyrical Rondo Prelude F-Dur/F major BWV927 Swallow Prelude d-Moll/D minor BWV935 Minute Waltz DP-140B U, DP-140WH U...
-
Page 42: Midi Implementation Chart
MIDI implementation chart MIDI implementation chart Function Sent Received Notes Basic Channel Default Changed 1 - 16 1 - 16 Mode Default Mode 3 Messages Mode 3 Altered *********** Note Number 0 - 127 0 - 127 True voice *********** 0 - 127 Velocity Note Note ON... - Page 43 Song Select Tune Request System Real Time Clock Commands Aux Messages LOCAL ON/OFF Active Sensing System Reset Notes: MIDI channel modes POLY MONO ON OMNI ON Mode 1 Mode 2 OMNI OFF Mode 3 Mode 4 DP-140B U, DP-140WH U...
-
Page 44: Protecting The Environment
Protecting the environment Protecting the environment Disposal of the packaging material For the transport and protective packaging, environmentally friendly materials have been chosen that can be supplied to normal recycling. Ensure that plastic bags, packaging, etc. are properly disposed of. Do not just dispose of these materials with your normal household waste, but make sure that they are collected for recycling. - Page 45 Notes DP-140B U, DP-140WH U...
- Page 46 Notes digital piano...
- Page 48 Musikhaus Thomann · Hans-Thomann-Straße 1 · 96138 Burgebrach · Germany · www.thomann.de...
Need help?
Do you have a question about the DP-140WH U and is the answer not in the manual?
Questions and answers