Table of Contents
Advertisement
Quick Links
Download this manual
See also:
User Manual
Advertisement
Table of Contents

Subscribe to Our Youtube Channel
Related Manuals for thomann DP-85


Summary of Contents for thomann DP-85
- Page 1 DP-85 ‘ wner s manual DIGITal PIanO...
-
Page 2: Important Safety Information
Risk of fire! • Never leave this device running unattended. • Never operate the device near flames, flammable, explosive materials, or hot surfaces. • Before a storm and/or a thunderstorm with a risk of lightning, disconnect the device from the mains power supply. DP-85... -
Page 3: Main Features
X Pedals: sustain pedal (immovable), sostenuto pedal (immovable), multifunctional pedal (soft, start/ stop, memory select) X Interface: midi in/out, USB, phone X Operational buttons: style control (sync start, sync stop, fill in a/normal, fill in b/variation, intro/ ending, fade, style record, record, play/stop, accomp, melody 1 ~ melody 5, style, voice, song. www.thomann.de... -
Page 4: Table Of Contents
One touch setting ..................... 28 Recording ........................28 Songs ......................... 37 Chord dictionary ......................39 The pedal function ..................... 41 SD function ........................ 41 MIDI function ......................47 Specifications ......................49 Troubleshooting ......................49 Appendix ........................50 Disposal ........................62 DP-85... -
Page 5: Setup Guide
7. Screws 6x24 (4 pcs) 2. Right leg 8. Screws 4x15 (5 pcs) 3. Left leg 9. Adhesive clamp (2 pcs) 4. Rear panel 10. Power cable 5. Pedal box 11. Screws 6x12 (2 pcs) 6. Hand screw (4pcs) 12. Pedal cable www.thomann.de... - Page 6 A Fix and tighten the left and right leg firmly to the pedal box using screws. Screws 6x24 (4 pcs) NOTE: Please use only the specified screws that are supplied with the piano. B Fix the rear panel to the pedal box using 5 screws and to the legs using 2 screws. screws 4x15 (# 8, 5 pcs.) screws 6x12 (# 11, 2 pcs.) DP-85...
- Page 7 Hand screws (# 6, 4 pcs.) D Attach 2 adhesive clamps on the stand and cabinet. Insert the DIN plug of the pedals cable into the proper socket of the cabinet. Fix the cables with the adhesive clamp. Place the piano in its final location and adjust the pedal clog under the pedals group on the floor. www.thomann.de...
-
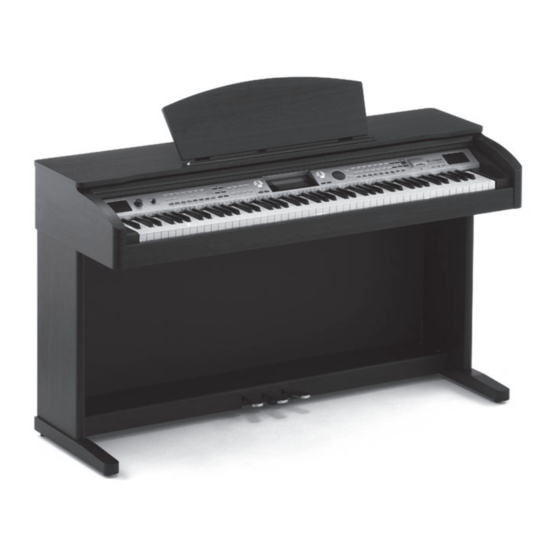
Page 8: General Guide
Top view q Control panel w Headphones jack e Music stand r Piano keyboard Rear view t USB jack y Pedal jack u Midi sockets i AUX outputs Front view o Multifunctional pedal a Sostenuto pedal s Sustain pedal DP-85... -
Page 9: Front Panel
- RECORD - PLAY/STOP - ACCOMP - MELODY 1 - MELODY 2 - MELODY 3 - MELODY 4 - MELODY 5 3# DUAL 3$ SPLIT 3% DSP 3^ TOUCH 3& SD MENU 3* SD EXECUTE 3( SD card slot www.thomann.de... - Page 10 TOUCH r DSP t VOICE/STYLE/DEMO/SONG y RECORD/STYLE RECORD u MEASURE i BEAT o TEMPO a CHORD s MEMORY/ONE TOUCH SETTING d LEFT/RIGHT HAND LESSON MODE f NOTE g FILL A/B h TREBLE CLEF j BASS CLEF k SD CARD DP-85...
-
Page 11: Connections
Using the AUX.OUT jack Connect the rear-panel AUX.OUT jack to amplified speakers, amplifiers or domestic hi-fi units for external amplification. NOTE! Connect both left (L) and right (R) channels to enjoy stereo sound. If you only connect either one of the channels, only that channel will be effective. www.thomann.de... -
Page 12: Usb Jack
MIDI OUT: To avoid damages, please be sure to turn off the Data produced by the Digital Piano is power switches before you disconnect the related transmitted to other MIDI instruments via MIDI devices from the piano. from this terminal. DP-85... -
Page 13: Basic Operation
2. Press the [STYLE] & the [VOICE] button again or press the [START/STOP] button to stop playing and quit current mode. 3. When playing, press the [+/YES] & the [-/NO] button or rotate the DIAL to select the song you want. www.thomann.de... -
Page 14: Voices And Effects
3. Press [DUAL] button again to turn off the DUAL VOICE. Voice R2 will be disabled and the note you play sounds with the single voice of Voice NOTE: • While the keyboard is splited, only the right hand area will respond to the dual voice, the left hand area produces sounds in chords. DP-85... -
Page 15: Split Point
OFF and the DSP flag goes out. 2. You can change the current setting by pressing the [DSP] button continuously, and by adjusting the REVERB and CHORUS level to change the current effect. (See Function menu for detail). www.thomann.de... -
Page 16: Touch Response
3. You can select and play the style by pressing the [STYLE] button and the direct select button. The LCD will then display the style name. Accompaniment control will respond in effect as usual only with the drum tracks. DP-85... -
Page 17: Style Control
3. FILL While the accompaniment is playing, you can fill in the rhythm/accompaniment by pressing the [FILL A] button or the [FILL B] button. This will automatically insert a fill section. 4. ENDING When you press the [INTRO/END] button, in process of accompaniment playing, it brings the ending section appropriate for the accompaniment, and then stops the performance. www.thomann.de... -
Page 18: Start A Style
When style is not playing, press the [INTRO/ ENDING] button, “A” or “B” flashes on LCD, indicating the intro section is ready to play. The length of the intro varies in different styles. Press the [START/STOP] button, then the style starts with an intro section, followed by the main section. DP-85... -
Page 19: Stop A Style
When SYNC STOP LED is lit and style is playing, press the [SYNC STOP] button, the SYNC STOP LED will go out. In this mode, the style will be playing continuously. NOTE: • [SYNC STOP] would be enabled only when CHORD MODE indicator is on. www.thomann.de... - Page 20 FADE IN state. Volume will increase to maximum on the basis of present volume. Style is played normally subsequently and the “FADE” lamp goes out. Keep FADE IN state unchanged, as the FADE IN state stops the STYLE. DP-85...
-
Page 21: Accomp Volume
When the style begins to play, the beat type follows the current style. 4. Metronome can be turned on together with the style. If the style plays at first, the metronome will respond with the next measure. Contrarily the metronome responds at once to the first beat of the style. www.thomann.de... -
Page 22: Recognizing Chords
C7 and Cm7” are shown as below: To play Multi Chords (Example in C chords) a total of 32 chords are provided as below: NOTE: When A.B.C. is on, press the keys left of split point. The chord will be recognized as single finger chord. DP-85... -
Page 23: Chord Basics
Chord names tell you just about everything you need to know about a chord (other than the inversion/voicing). The chord name tells you what the root of a chord is, whether it is major, minor, or diminished, whether it requires a major or flatted seventh, what alterations or tension does it use . . . all at a glance. • Some chord types www.thomann.de... -
Page 24: Function Menu
2. Pressing [+/YES] and [-/NO] together will set the TUNE value back to its default setting. Beat This function sets the beat value ranging from 0, 2-9. 1. The LCD displays the beat value. 2. Use [+/YES] / [-/NO] or DIAL to change the BEAT value. DP-85... -
Page 25: Reverb Level
2. Use [+/YES] / [-/NO] or DIAL to change the reverb level. Chorus level 1. The LCD displays the chorus level. The level ranges from 0 to 127. The default value is floating and follows the voice. 2. Use [+/YES] / [-/NO] or DIAL to change the chorus level. www.thomann.de... -
Page 26: Mixer Menu
2. Press the [MIXER] button continuously to select the option you want, then use the [+/YES] / [-/NO] button or the DIAL to set the parameters. Note: • If you don‘t press any button for 5 seconds after entering the MIXER menu, this menu will quit automatically. These are the options and parameters in detail: DP-85... -
Page 27: Memory
2. Press the [M1] button (or [M2 ~ [M6] ) to load the data from these memory spaces and to replace the current parameters. Note: • Press [STORE] and [M1] together while powering on the piano. Then the memory data will be set as the default value. www.thomann.de... -
Page 28: One Touch Setting
1. First press the [RECORD] button to enter the user song selection mode. The LCD displays the current song name and number. 2. Use the [+/YES] or [-/NO] button and DIAL to select the song you want to record. DP-85... - Page 29 If Accomp track is recording, press the [INTRO/ ENDING] button to stop recording after the ending accompaniment is over. If the capacity is full while recording, the recording will be stopped automatically and “FULL” will be displayed on the LCD. www.thomann.de...
-
Page 30: Song Playback
3. Press [RECORD] button, the LCD will display “DelUser” then. 4. Press [+/YES] button to delete the current user song. When completed, the LCD displays “OK!” and the cursor of the track will all darken simultaneously. DP-85... -
Page 31: Style Record
Start style recording 1. Press the [STYLE RECORD] button, and the LCD displays the current user style. 2. Use the [+/YES] or [-/NO] button and DIAL to select the others. 3. Then press the [FUNCTION/NEXT] button to enter next menu. At first the LCD displays the RECORD menu. www.thomann.de... - Page 32 DIAL to select a recording mode. 2 options for recording mode: overdub and replace. In Overdub mode, the newly recorded data will be added to the original style data. In Replace mode, the original style data will be overwritten with the newly recorded data. DP-85...
- Page 33 9. Press the [STYLE RECORD] button to exit from the current mode. You can also repeat the operation by pressing the [FUNCTION / BACK] button to return from the previous menu and to select other options. www.thomann.de...
-
Page 34: Copy A Style
Press [+/YES] or [-/NO] button or rotate the dial to select the accuracy for quantizing. Quantizing accuracy includes 1/4 (quarter), 1/4 Tri (Quarter Triplet), 1/8 (Eighth), 1/8 Tri (Eighth Triplet), 1/16 (Sixteenth), 1/16 Tri (sixteenth Triplet), 1/32 (32nd), 1/32 Tri (32nd Triplet). DP-85... - Page 35 3. Press the [FUNCTION / NEXT] button to enter the rename menu (full name). Use the keyboard to input the style’s whole name. It may include 26 characters. Press the [FUNCTION / BACK] button to return to the previous menu. Please refer to page 46 for naming function. www.thomann.de...
- Page 36 Press [+/YES], [-/NO] button or rotate the DIAL to select the track that needs to be deleted. If all is selected, the rhythm will be deleted. 4. Press the [FUNCTION / NEXT] button to enter next menu. LCD now displays “Sure?”. Press [+/YES] to confirm. Press [-/NO] to return to the previous menu. 5. Press [+/YES] to finish deleting. DP-85...
-
Page 37: Songs
[REPEAT A/B] again to quit loop playing status. 5. When the song is stopped, pressing [STYLE], [VOICE] and [DEMO] button will exit the song mode, or hold the [CHORD DICTIONARY] button to enter Chord Dictionary mode. NOTE: • The user songs do not offer the functions of REW, FF and PAUSE. www.thomann.de... -
Page 38: Lesson Mode
/ melody will sound. If [L] and [R] are selected, the melody on left and right hand will be muted. You will have to follow timing on both left and right hand. 3. Once completed, the result of evaluation will be voiced. DP-85... -
Page 39: Chord Dictionary
For example, if we want to play a Cm7 Chord, press the C key in the section of the keyboard labelled CHORDROOT (the note will not sound). The root note you set will be shown on the display. www.thomann.de... - Page 40 LCD to wait for the correct chord playing. If not, LCD displays the corresponding keyboard position automatically. Press [R] button for the third time to turn off the chord dictionary. 24 chords will be displayed in the dictionary mode as follows: DP-85...
-
Page 41: The Pedal Function
[+/YES] [-/NO] button to adjust the volume to play. 3. In SD card mode, you could press [MENU] button repeatedly to exit SD menu step by step. You also could press and hold the [MENU] button for 2 seconds to exit directly. www.thomann.de... - Page 42 3. When the file is playing, press the [START / STOP] button to stop playing. Also you can press the [MENU] button to return to the PLAY menu, or press the [MENU] button 2 seconds to exit the SD mode, then stop to play the file. DP-85...
- Page 43 SD are displayed on the LCD, the main name of the file includes 8 characters, the file extension is “MEM”. Press the [EXECUTE] button, “Sure?” will be displayed on the LCD. You just need to press the [EXECUTE] button to load the file. www.thomann.de...
- Page 44 Press the [EXECUTE] button to enter next step. The LCD will display the naming state, you can play the keyboard to input the filename. Press the [EXECUTE] button to enter the enquiry page, “Sure?” will be displayed on the LCD. You just need to press the [EXECUTE] button to save the file. DP-85...
- Page 45 You just need to press the [EXECUTE] button to delete the file. NOTE: • Directories can not be deleted. Format Select the menu “Format” and press the [EXECUTE] button, “Sure?” will be displayed on the LCD. Press the [EXECUTE] button to start formatting the card. www.thomann.de...
- Page 46 NOTES: • While in the SD mode, the [SHIFT] key has no function. • If you enter an already existing name, the LCD will display “SameName” temporarily, and then exit the SD mode to return to the previous state. • If there’s not enough space in the card after name input, the LCD will display “CardFull” temporarily, then exit the SD mode to return to the previous state. DP-85...
-
Page 47: Midi Function
(freeze), possibly causing corruption or losing • Connect the USB cable to the instrument and data. a computer before turning the power of the If the instrument or computer does hang up, turn instrument on. the power of both devices off and then turn them on again after a few seconds. www.thomann.de... -
Page 48: Midi Connection
Note that MIDI OUT cannot be connected with MIDI IN on the same equipment. 2. The method of connection Connect the MIDI interface to a PC. Connect the MIDI interface with another MIDI interface. MIDI application • The piano can control other equipment or electronic instruments. • Some equipment can be used to control the piano. • PC recorded data (MIDI) can be played back by the piano. DP-85... -
Page 49: Specifications
There is no sound even when the keyboard is connected to the PHONES jack on the played or when a song or style is being played. rear panel. When a set of headphonesis plugged into this jack, no sound is output. If the procedures recommended above do not succeed, please contact our Service Centre. You can find the contact information at “www.thomann.de”. www.thomann.de... -
Page 50: Appendix
Appendix 1 - Voice list DP-85... - Page 51 www.thomann.de...
- Page 52 DP-85...
- Page 53 www.thomann.de...
- Page 54 DP-85...
- Page 55 Appendix 2 - Style list www.thomann.de...
- Page 56 DP-85...
- Page 57 Appendix 3 - Song list www.thomann.de...
- Page 58 DP-85...
- Page 59 Appendix 4 - Demo list www.thomann.de...
- Page 60 Appendix 5 - Chord list DP-85...
- Page 61 When accompaniment is stopped, an FCH message is transmitted. When an FAH message is received, accompaniment is started. When an FCH message is received, accompaniment is stopped. MODE1: OMNI ON, POLY MODE2: OMNI ON, MONO O: YES MODE3: OMNI OFF, POLY MODE4: OMNI OFF, MONO X: NO www.thomann.de...
-
Page 62: Disposal
• Have the product disposed of by a professional disposal company of by your communal disposal facility. • Observe the currently applicable regulations. In case of doubt contact your disposal facility. • Dispose of packaging materials in an environmentally responsible manner. DP-85... - Page 63 www.thomann.de...
- Page 64 © 2011 • Musikhaus Thomann e. K. • Treppendorf 30 • 96138 Burgebrach • Germany • www.thomann.de...
Need help?
Do you have a question about the DP-85 and is the answer not in the manual?
Questions and answers