Table of Contents
Advertisement
Quick Links
Advertisement
Table of Contents

Subscribe to Our Youtube Channel
Related Manuals for CONTINENTAL EDISON CELED32HD22B7


Summary of Contents for CONTINENTAL EDISON CELED32HD22B7
- Page 1 CELED32HD22B7 TV LED HD 31.5 Guide d’utilisation – Instruction manual...
- Page 2 IMPORTANT WARNINGS AND SAFETY ADVICE We invite you to read this user manual carefully and completely before installing and using your device. It is important that this user manual be kept with the device for further consultation. If this device is to be transferred to another person, make sure the user manual follows the device so that the new user can be informed of the operation of the device.
- Page 3 CAUTION: - TO REDUCE THE RISK OF FIRE, ELECTRIC SHOCK OR SERIOUS INJURY: ● This device must only be connected to a mains network whose characteristics are identical to those shown on the device identification plate. ● If it is a class I appliance, the user’s protection is grounded. The appliance must be connected to a power supply base with a connection to the protective earth.
- Page 4 ● Do not place the device near water, for example in a bathroom or near a sink. ● No objects filled with liquids such as vases should be placed on or above the device. ● Never touch the mains cable with wet hands, this could cause a short circuit or electric shock.
- Page 5 ● Unplug the device from the electrical outlet before cleaning. Do not use liquid or aerosol cleaners. Use a dry, soft cloth for cleaning. CAUTION: TO AVOID RISK OF INJURY OR DAMAGE TO THE PRODUCT OR OTHER EQUIPMENT: ● This product is intended for household and personal use only. Do not use this product for commercial, industrial or other purposes.
- Page 6 placed between its base and the supporting furniture. The device could fall and be damaged or seriously injure a person. - Do not use or watch the TV while driving. This is dangerous, and illegal in some countries. - Explain to children the dangers they face when climbing on the furniture to reach the device or its controls.
- Page 7 SIMPLIFIED EU DCLARATION OF CONFORMITY: Continental Edison, declares that the radioelectric equipment type CELED32HD22B7 is in compliance with Dicrective 2014/53/EU. The full text of the EU declaration of conformity is available at the following internet address: https://notice.continentaledison.fr/...
-
Page 8: Table Of Contents
CONTENTS DESCRIPTION OF THE UNIT........................9 Description of the TV Set ........................9 Remote control ............................ 11 TECHNICAL SPECIFICATIONS........................13 III. INSTALLATION............................15 Unpacking ............................15 Wall mounting ............................. 15 Installing the stand legs ........................16 Basic connections ..........................17 IV. -
Page 9: Description Of The Unit
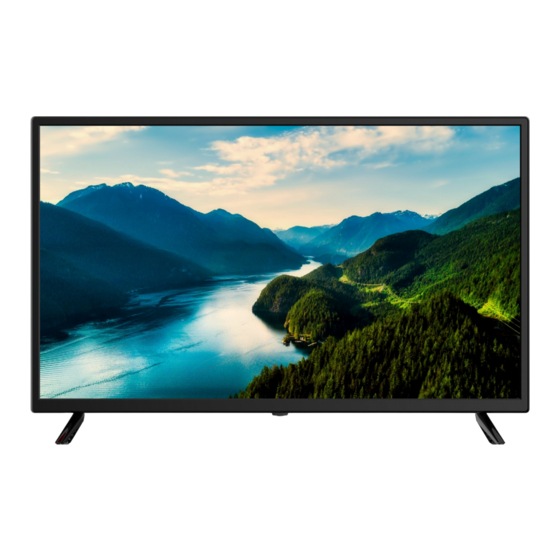
I. DESCRIPTION OF THE UNIT A. Description of the TV Set Front view of the TV set 1. LED display screen 2. Remote control sensor Power indicator- In standby mode the indicator light will display red color; when switching on the unit the indicator light will display blue color. - Page 10 Rear view of the TV set POWER CORD: to connect the TV to a power socket. EARPHONE or HEADPHONE OUTPUT: to connect a 3.5 mm earphone jack plug. HDMI1 / HDMI2 : allows the broadcasting of an uncompressed digital video and audio signal via a single cable.
-
Page 11: Remote Control
B. Remote control POWER (STANDBY) To turn the TV on or off. TV/RADIO To switch between TV and radio modes. COLORED Buttons The colored buttons are used in the sub-menus. SUBTITLE To show or hide subtitles. TEXT To display the teletext. To display the digital program guide. - Page 12 ▲/▼/◄/► Navigation keys. EXIT To exit the sub-menu page. ASPECT Press repeatedly to change the image size MUTE To mute the sound. VOL+/VOL- To raise or lower the volume. CH +/ CH – To display the next or previous channel. INFO To display the source and available information about a program.
-
Page 13: Technical Specifications
II. TECHNICAL SPECIFICATIONS Article number CELED32HD22B7 Model DVB-PM1320162HCAT Display 31.5" LED HD Resolution 1366 x 768 pixels Colour display 16.7M Contrast 3000 :1 Ratio 16 :9 Tuner DVB-T/T2/C TV power supply AC 100-240V~50/60Hz Consumption Dimensions 732 (W)×191(D)×480(H)mm Weight Approx. 3.41 Kg... - Page 14 .......................1 piece Instruction manual .......................1 piece The images provided in this manual are for information only, refer to the actual product for confirmation. ENERGY RATING LABEL Brand CONTINENTAL EDISON CELED32HD22B7 Article number (Model: DVB-PM1320162HCAT) Energy efficiency class Visible diagonal display 80 cm;...
-
Page 15: Installation
III. INSTALLATION A. Unpacking Your TV should be unpacked and handled by 2 people, to avoid any risk of deformation or impact on the LED display. Start by preparing a flat surface covered with a soft, thick fabric (a blanket, for example). The prepared surface area must be larger than the size of the TV. -
Page 16: Installing The Stand Legs
C. Installing the stand legs Your TV set comes with uninstalled stand legs. Before using this TV as a free-standing unit on a furniture, install the stand legs as shown below. Step 1 Place the TV flat, with the screen facing down, on a flat surface covered with a soft, thick cloth to prevent damage. -
Page 17: Basic Connections
D. Basic connections Make sure that all cables are disconnected from the main unit before connecting the power cord plug to the wall outlet. Read the instructions carefully before connecting any other device. Connect to an external antenna (ANT) Connect an antenna to the antenna terminal to obtain the best possible image quality. - Page 18 NOTE: when connecting an external device, match the color of the terminal to the color of the cable. Mini YPbPr connection YPbPr cable (not provided) AUDIO cable (not provided) Rear of the external terminal NOTE: when connecting an external device, match the color of the terminal to the color of the cable. CI input terminal The CI card is not provided.
- Page 19 PC/VGA connection Audio cable (Not included) VGA cable Use VGA cable and Audio (Not included) cable to connect the unit with TV or PC, and use this product as a monitor. HDMI connection HDMI cable (not provided) Use an HDMI cable to connect the TV to another device to receive a high-definition multimedia signal.
- Page 20 Coaxial connection Use coaxial cable (not included) to connect the unit with amplifier or other audio decoding devices for coaxial audio signal output. Earphone/headset connection Headphone and headset cable (not included) BEFORE PROCEEDING, MAKE SURE THAT ALL EQUIPMENT AND POWER CORDS ARE CONNECTED AND CONFIGURED PROPERLY.
-
Page 21: Use
IV. USE A. First-time installation Connect to power source and turn on this TV, welcome page will display on the screen. Press LEFT/RIGHT/UP/DOWN navigation buttons on remote control to select an option. Press OK button on remote control to confirm selection. Language : Select the on-screen menu language. -
Page 22: Basic Applications
C. Basic applications Press the POWER/STANDBY button on the TV or remote control to turn on the power. Press this button again to put the TV on standby. Press the SOURCE button on remote control to switch between the different sources available. ... - Page 23 TV GUIDE (FOR DTV MODE ONLY) Press the TVG button on the remote control to display the program guide. Press the UP/DOWN navigation button to select a preferred program Press the LEFT/RIGHT navigation button to switch between the left column and right column. ...
- Page 24 playing the teletext. TV/RADIO (FOR DTV MODE ONLY) Press the TV/RADIO button on the remote control to switch the unit between TV and radio mode. SUBTITLE Press the SUBTITLE button on the remote control repeatedly to select a desired subtitle. ...
- Page 25 MEDIA PLAYBACK Insert a USB memory device into USB slot. Press SOURCE button on the unit or remote control to switch this unit to Media mode. Press the UP/DOWN/LEFT/RIGHT navigation button to move the cursor. Press EXIT button on remote control to return to previous menu page. ...
- Page 26 3. MOVIE Press the LEFT/RIGHT navigation button to select “Movie” in the main menu and press the OK button to enter the selection. Use the navigation buttons to select a desired folder or file. To delete files, press the RED button to enter the submenu and you can delete a file accordingly. ...
-
Page 27: Settings
Settings 1. CHANNEL 1.1 Antenna - Press OK or RIGHT navigation button to enter it. - Use navigation buttons to select DVB-T or DVB-C. 1.2 Auto Tuning - Press the OK or RIGHT navigation button. - Use the navigation buttons to set the Country, Tune Type and LCN. Note: Scan type and following items are adjustable only when “Antenna”... - Page 28 1.4 DTV Manual Tuning - Press the OK or RIGHT navigation button. - Use the LEFT/RIGHT navigation button to select the channel. Then press the OK button to start searching. Note: Menu and operations here will vary for DVB-T and DVB-C. 1.5 Programme Edit - Press the OK or RIGHT navigation button.
-
Page 29: Picture
1.7 Recorded List Previously recorded programs should appear on this list. - Use the navigation buttons to select a program. - Press the OK button to play the highlighted program. - Press the button to stop playing. 1.8 Signal information (works under available TV signals) This item is used to display signal details, for example: channel number and strength. -
Page 30: Sound
2.3 Noise Reduction Available options: Off, Low, Medium, High 2.4 SCREEN (for PC/VGA mode only) 2.5 Dynamic CR Turn on/off dynamic contrast ratio. 3. SOUND 3.1 Sound Mode - Press the UP/DOWN/LEFT/RIGHT navigation buttons to select an option. Sound Mode: available options: Standard, Music, Movie, Sports, Personal. Treble / Bass: adjustable value: 0-100. -
Page 31: Time
3.5 SPDIF Mode Available options: Auto, PCM, Off. 3.6 AD Switch This item is used to set AD Switch ON or OFF. For Visually Impaired users, this function enables a user to know a certain scene or action through the narration, instead of seeing it. NOTE: AD Switch function works only when you are viewing programs that contain related narration information. -
Page 32: Setup
4.5 Sleep Timer This item is used to set the automatic sleep time. Available options: Off, 10min, 20min, 30min, 60min, 90min, 120min, 180min, 240min 4.6 Auto Standby This item is used to select a desired Auto Sleep (standby) duration when no operations are done through the remote control. - Page 33 5.4 Subtitle Language - Press the RIGHT navigation button. - Then you can select the preferred primary subtitle language and secondary subtitle language. 5.5 Hearing Impaired This item is used to turn on/off the Hearing Impaired function. For Hearing Impaired users, this function providescaptions to supplement the audio.
-
Page 34: Lock
5.11 Reset This item is used to recall factory default settings. 5.12 Software Update (USB) This item is used to update software through the USB memory device. 5.13 HDMI CEC - Press the RIGHT navigation button. To use the HDMI CEC function: - Make sure the HDMI device (Amplifier, etc.) is connected correctly. - Page 35 6.1 System Lock This item is used to turn on/off Lock System. 6.2 Set Password - Input the old password using number buttons on remote control and then input your private password twice to finish it. 6.3 Channel Lock - Press OK or RIGHT navigation button to enter it. - Press UP/DOWN navigation button to select the channel which you want to lock.
- Page 36 Hotel Mode: turn on/off Hotel Mode. Source Lock: turn on/off the lock of available sources. Default Source: set the default source. Default Prog: set the default digital program. Default Volume: set the default volume level. Max Volume: set the maximum volume level. Export DataBase: export database to USB device.
- Page 37 3. V-Offset This item is used to adjust the value of the vertical position. 4. Size This item is used to adjust the signals transfer speed. 5. Phase This item is used to adjust the picture applied to the TV. NOTE: For other menu operations in PC-RGB (VGA) mode, please refer to the menu operations of DTV mode.
-
Page 38: Maintenance And Cleaning
V. MAINTENANCE AND CLEANING Before servicing your TV, make sure it is turned off and the power cable is disconnected. Wipe the TV with a soft, dry cloth. If the surface is very dirty, wipe it with a soft cloth slightly soaked in water. Then wipe again with a dry, soft cloth. -
Page 39: Troubleshooting Tips
VI. TROUBLESHOOTING TIPS Some malfunctions can be easily resolved. Before calling on the service department or a repair technician, consult the following information: Symptoms Solutions ● Check the connection of the power supply cord. The TV does not turn on. ●... - Page 40 Symptoms (continued) Solutions (continued) ● Check that your area is covered by the DTV broadcast. ● Check if channels are not blocked by the "Block program" Only some channels are available. settings. ● Checks to be performed in case of poor image quality. ●...
-
Page 41: Warranty
4. Any improper maintenance operation, use not in accordance with the instructions concerning the product or connection to an incorrect voltage; 5. Any use of accessories not supplied or approved by CONTINENTAL EDISON. The warranty will be cancelled if the nameplate and/or product serial number is removed. -
Page 42: Disposal
As an end consumer, your role is essential in the reuse, recycling and other forms of recovery cycle of this Electrical and Electronic Equipment. You are required to use the selective collection systems available to you. Continental Edison – 120-126 Quai de Bacalan – CS 11584 – 33000 Bordeaux... - Page 43 CELED32HD22B7_IM_EN_09062022_V2...
Need help?
Do you have a question about the CELED32HD22B7 and is the answer not in the manual?
Questions and answers