Advertisement
Quick Links
Advertisement

Related Manuals for Aeotec Z-Stick Gen5


Summary of Contents for Aeotec Z-Stick Gen5
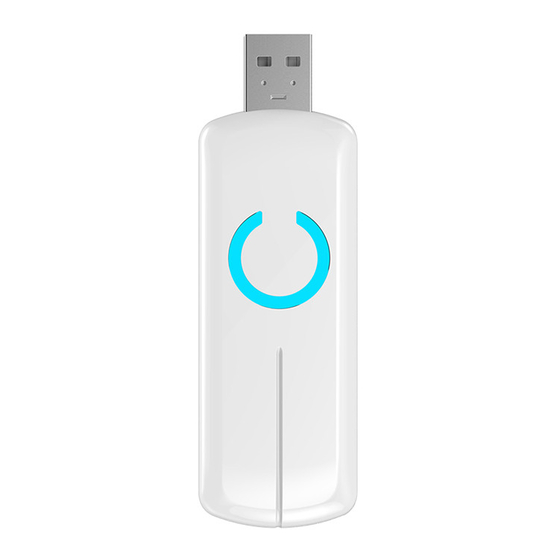
- Page 1 Aeotec Z‐Stick Gen5 (Z‐Wave USB Adapter)
- Page 2 Change history Revision Date Change Description 1 03/02/2015 Initial draft. ...
- Page 3 Engineering Specifications and Advanced Functions for Developers (V1.00) Aeotec Z‐Stick Gen5 is a self‐powered Z‐Wave USB adapter with remote network creation capabilities (independent from external power and host microprocessor). By being able to remotely include/remove Z‐ Wave devices, this greatly simplifies Z‐Wave network installation. When connected to a host controller (via USB), it enables the host controller to take part in the Z‐Wave Network.
-
Page 4: Button Action
Stick and press the button on the device you wish to include. (The blue LED on the Z‐Stick will blink fast during a network neighbour discovery and stay solid for 2 seconds to indicate successful inclusion of the device into the network.) 3. The blue LED will then return to blinking slowly, indicating readiness for further device inclusions. Repeat step 2 for each device as you wish to include. 4. Tap the Z‐Stick’s Action Button to turn it off or it will automatically exit the removal mode after 30 seconds. Removing/Excluding Z‐Wave Devices from the Z‐Wave Network: Press and hold 1. Unplug the Z‐Stick from the USB connector. Then press and hold the Action Button for 2 seconds and approximately 2 seconds. (The orange LED will blinking fast.) releasing 2. To remove a Z‐Wave device from the network, simply go to the device with the Z‐Stick and press the Action Button on the device you wish to remove. (The LED on the Z‐Stick will become blue and Immediately stay solid for 2 seconds to indicate successful removal from the network.) The orange LED will then return to blinking fast, indicating readiness for further device exclusions. Repeat step 1 for each device as you wish to exclude. Reset Z‐Stick to factory Default: Press and hold 1. Unplug the Z‐Stick from the USB connector. 20 seconds 2. Press and hold the Action Button for 20 seconds. 3. If holding time more than one second, the LED will become red, then blink faster and faster. If holding time more than 20 seconds, the LED will become blue and stay solid for 2 seconds, it indicates reset success, otherwise please repeat step 2. Note: Reset Z‐Stick to factory default Settings will: exclude the Z‐Stick from the Z‐Wave network; restore the configuration settings to the default. 4.2 Function of Reset Button Button action Description Click one time Reset the USB port. ... - Page 5 This function also must be done through the host software which takes control of the Z‐Stick USB adapter while the Z‐Stick is in SerialAPI‐Mode. Please consult the instruction manual of the host software to add the Z‐Stick to a pre‐existing Z‐Wave network (i.e. “Learn”, “Sync”, “Add as Secondary Controller”, etc.). 5.3 Support the functionality of SerialAPI The list functions of SerialAPI: Functions: SUPPORT_GET_ROUTING_TABLE_LINE SUPPORT_LOCK_ROUTE_RESPONSE SUPPORT_MEMORY_GET_BUFFER SUPPORT_MEMORY_GET_BYTE SUPPORT_MEMORY_GET_ID SUPPORT_MEMORY_PUT_BUFFER SUPPORT_MEMORY_PUT_BYTE SUPPORT_NVM_GET_ID SUPPORT_NVM_EXT_READ_LONG_BUFFER SUPPORT_NVM_EXT_READ_LONG_BYTE SUPPORT_NVM_EXT_WRITE_LONG_BUFFER SUPPORT_NVM_EXT_WRITE_LONG_BYTE SUPPORT_PWR_CLK_PD SUPPORT_PWR_CLK_PUP SUPPORT_PWR_SELECT_CLK SUPPORT_PWR_SETSTOPMODE SUPPORT_STORE_HOMEID SUPPORT_STORE_NODEINFO SUPPORT_ZW_ADD_NODE_TO_NETWORK SUPPORT_ZW_AES_ECB SUPPORT_ZW_ARE_NODES_NEIGHBOURS SUPPORT_ZW_ASSIGN_RETURN_ROUTE SUPPORT_ZW_ASSIGN_SUC_RETURN_ROUTE SUPPORT_ZW_CONTROLLER_CHANGE SUPPORT_ZW_CREATE_NEW_PRIMARY ...
- Page 6 SUPPORT_ZW_DELETE_RETURN_ROUTE SUPPORT_ZW_DELETE_SUC_RETURN_ROUTE SUPPORT_ZW_ENABLE_SUC SUPPORT_ZW_EXPLORE_REQUEST_INCLUSION SUPPORT_ZW_GET_CONTROLLER_CAPABILITIES SUPPORT_ZW_GET_LAST_WORKING_ROUTE SUPPORT_ZW_SET_LAST_WORKING_ROUTE SUPPORT_ZW_GET_NEIGHBOR_COUNT SUPPORT_ZW_GET_NODE_PROTOCOL_INFO SUPPORT_ZW_GET_PROTOCOL_STATUS SUPPORT_ZW_GET_PROTOCOL_VERSION SUPPORT_ZW_GET_RANDOM SUPPORT_ZW_GET_ROUTING_MAX SUPPORT_ZW_GET_SUC_NODE_ID SUPPORT_ZW_GET_VERSION SUPPORT_ZW_GET_VIRTUAL_NODES SUPPORT_ZW_IS_FAILED_NODE_ID SUPPORT_ZW_IS_NODE_WITHIN_DIRECT_RANGE SUPPORT_ZW_IS_PRIMARY_CTRL SUPPORT_ZW_IS_VIRTUAL_NODE SUPPORT_ZW_IS_WUT_KICKED SUPPORT_ZW_NEW_CONTROLLER SUPPORT_ZW_RANDOM SUPPORT_ZW_REDISCOVERY_NEEDED SUPPORT_ZW_REMOVE_FAILED_NODE_ID SUPPORT_ZW_REMOVE_NODE_FROM_NETWORK SUPPORT_ZW_REPLACE_FAILED_NODE SUPPORT_ZW_REPLICATION_COMMAND_COMPLETE SUPPORT_ZW_REPLICATION_SEND_DATA SUPPORT_ZW_REQUEST_NETWORK_UPDATE ...
- Page 7 SUPPORT_ZW_REQUEST_NEW_ROUTE_DESTINATIONS SUPPORT_ZW_REQUEST_NODE_INFO SUPPORT_ZW_REQUEST_NODE_NEIGHBOR_UPDATE SUPPORT_ZW_RF_POWER_LEVEL_GET SUPPORT_ZW_RF_POWER_LEVEL_REDISCOVERY_SET SUPPORT_ZW_RF_POWER_LEVEL_SET SUPPORT_ZW_SEND_DATA SUPPORT_ZW_SEND_DATA_ABORT SUPPORT_ZW_SEND_DATA_BRIDGE SUPPORT_ZW_SEND_DATA_META SUPPORT_ZW_SEND_DATA_META_BRIDGE SUPPORT_ZW_SEND_DATA_META_MR SUPPORT_ZW_SEND_DATA_MR SUPPORT_ZW_SEND_DATA_MULTI SUPPORT_ZW_SEND_DATA_MULTI_BRIDGE SUPPORT_ZW_SEND_NODE_INFORMATION SUPPORT_ZW_SEND_SLAVE_DATA SUPPORT_ZW_SEND_SUC_ID SUPPORT_ZW_SEND_TEST_FRAME SUPPORT_ZW_SET_DEFAULT SUPPORT_ZW_SET_EXT_INT_LEVEL SUPPORT_ZW_SET_LEARN_MODE SUPPORT_ZW_SET_LEARN_NODE_STATE SUPPORT_ZW_SET_PROMISCUOUS_MODE SUPPORT_ZW_SET_RF_RECEIVE_MODE SUPPORT_ZW_SET_ROUTING_INFO SUPPORT_ZW_SET_ROUTING_MAX SUPPORT_ZW_SET_SLAVE_LEARN_MODE SUPPORT_ZW_SET_SLEEP_MODE SUPPORT_ZW_SET_SUC_NODE_ID ...
- Page 8 SUPPORT_ZW_SET_WUT_TIMEOUT SUPPORT_ZW_SUPPORT9600_ONLY SUPPORT_ZW_TYPE_LIBRARY SUPPORT_ZW_WATCHDOG_DISABLE SUPPORT_ZW_WATCHDOG_ENABLE SUPPORT_ZW_WATCHDOG_KICK SUPPORT_ZW_WATCHDOG_START SUPPORT_ZW_WATCHDOG_STOP SUPPORT_ZW_NVR_GET_VALUE SUPPORT_FUNC_ID_CLEAR_TX_TIMERS SUPPORT_FUNC_ID_GET_TX_TIMERS 5.4 Installation and Maintenance Application (IMA) feature 1. When the Z‐Stick acts an independent/secondary controller that has been un‐plugged from the USB host, it also can measure the network health for each device in the network. The different colour of LED on the Z‐Stick indicates the communication quality between the Central Controller and devices in the network. Short press the Action Button 5 times, if the colour of LED is changed to purple and then it follows with fast blink, which means it goes into the IMA feature. The colour of LED will be changed according to the network health level. If the colour of LED is changed to green, which means the current communication quality is more than 95% on ‐7dBm. If the colour of LED is changed to yellow, which means the current communication quality is more than 95% on 0dBm. If the colour of LED is changed to purple, which means the current communication quality is less than 95% on 0dBm. If the colour of LED is changed to red, which means the current communication has failed. Short press the Action Button 5 times again, the Z‐Stick will automatically exit the IMA feature. 2. When the Z‐Stick is in Serial API‐Mode and acts a primary controller, it can measure the network health for each device in the network. The different colour of LED indicates the communication quality between the Z‐Stick Controller and devices in the network. Install the IMA tool software first (note: the IMA tool can be downloaded from here: http://www.aeotec.com/support). Select the node device and then click the IMA test button to start the IMA test between the Central Controller and the node devices. Your IMA tool client will receive the test result and use different colour of LED icon to indicate the network health level, its colour will be changed follow with the change of network health level. ...
- Page 9 5.5 Configuration 5.5.1 Set Command The Set Command used to set the value of configuration parameter(s), command format: Serial API: (refer to the below form) HOST‐>ZW: REQ | 0xf2 | Parameter Number | size | Value ZW‐>HOST: RES | 0xf2 | RetVal REQUEST: 7 6 5 4 3 2 1 0 Command = 0xF2 Parameter Number Default Size Value 1(MSB) Value 2 ……… Value n(LSB) Parameter Number (8 bits) The parameter number field specifies which configuration parameter is being set. The parameter numbers refer to the form at the end of the document. Default (1 bit) If the default bit is set to 1 the device is set to default factory setting and the configuration values is ignored. If the default bit is set to 0 then the configuration values is used. Size (7 bits) The size field indicates the number of bytes used for the configuration value. ...
- Page 10 The value is a unsigned field. The field can be 16 bytes in size. Please refer to the form at the end of the document. RESPONSE: RetVal : If the set is successful will return TRUE, otherwise it returns FALSE 5.5.2 Get Command This Get Command used to get the values of some configuration parameters. Serial API: HOST‐>ZW: REQ | 0xf3 | Parameter Number 1 | ……… | Parameter Number N ZW‐>HOST: RES | 0xf3 | Parameter Number 1 | size 1 | Value | ……… | Parameter Number N | size N | Value REQUEST: Parameter Number 1 ... Parameter Number N (variable) The parameter number field specifies which configuration parameter is being requested. The parameter numbers refer to the form at the end of the document. RESPONSE: Refer to explanation under the Set Command Request. ...
- Page 11 Parameter Number Definitions (8 bit): Description Default Value Size Parameter Number (Hex / Decimal) When the USB power supply, the LED indicator 0x51 (81) 1 1 light configuration (0 =disable, 1 = enable, other= ignore) Security network enabled 0 1 0xF2 (242) (0 =disable, 1 = enable, other= ignore) Security network key 0xF3 (243) N/A 16 Configuration of the RF power level 10 1 0xDC (220) 1~10, other= ignore. A total of 10 levels, level 1 as the weak output power, and so on, 10 for most output power level. Enable/disable Lock Configuration (0 =disable, 1 0xFC (252) 0 1 = enable, other= ignore). N/A ...
Need help?
Do you have a question about the Z-Stick Gen5 and is the answer not in the manual?
Questions and answers