Table of Contents
Advertisement
Getting to Know Your Drone
PLEASE READ ALL WARNINGS AND
INSTRUCTIONS PRIOR TO USE. KEEP THIS
DOCUMENT AS IT CONTAINS IMPORTANT
INFORMATION ABOUT YOUR DRONE.
1. PREPARE FOR FLIGHT
• Drone must be charged before each use (Cable included).
• Indicator light will turn off once fully charged.
• Install batteries in remote.
2. PAIR YOUR DRONE
Before each flight pair the remote with the drone:
• Turn your drone on and place on a flat, level surface.
• Turn on the remote on and move the left joystick up, then down.
• The beep will indicate successful pairing.
• Repeat steps 1 and 2 if necessary.
3. REMOTE CONTROL OVERVIEW
Practice flying your drone below 10 feet and at low speeds until comfortable with all controls to
avoid unnecessary damage or injury.
• Left joystick: left/right controls spin and Up/Down controls elevation.
• Right joystick: controls flight direction.
• Direction Trim: use to eliminate drift.
To cut power to drone, move left joystick to down position.
QUESTIONS OR CONCERNS?
PLEASE GIVE US A CALL ... WE'RE HERE TO HELP
CUSTOMER SUPPORT
(800) 374-2744
Before calling please locate the 10-digit
code printed on the back of your remote
Sharper Image
®
name and logo are registered trademarks. Distributed by
and © 2022 MerchSource, LLC. Irvine, CA 92618. All rights reserved.
Distributed by MerchSource, LLC, Irvine, CA 92618.
For technical support, please visit www.merchsource.com or call
1-800-374-2744.
The artwork and design of this manual are protected by US copyright law
and may not be reproduced, distributed, displayed, published or used for
any purpose without prior written permission. It is not permitted to alter,
remove or reproduce any trademarks or copyright notice from this manual.
Printed in China.
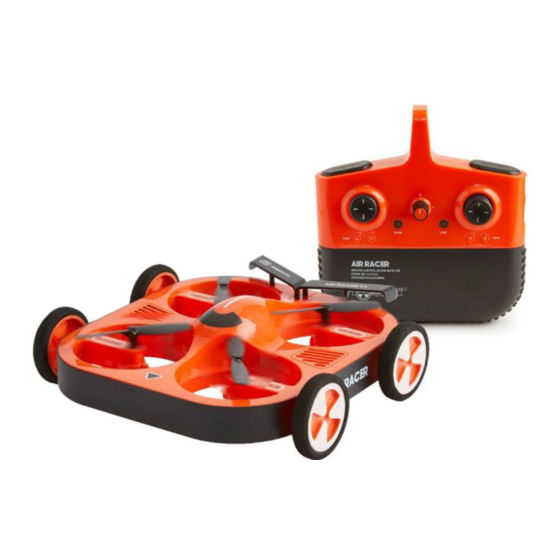
Drone Air Racer
KEEP THIS INSTRUCTION MANUAL AS IT CONTAINS IMPORTANT
INFORMATION FOR FUTURE REFERENCE.
Due to continuous product improvements, the picture on the manual may
differ slightly from the actual product.
PATENT PENDING
ADULT ASSEMBLY, CHARGING, AND
BATTERY INSTALLATION IS REQUIRED.
ADULT SUPERVISION IS REQUIRED.
14+
Advertisement
Table of Contents

Summary of Contents for Sharper Image Drone Air Racer
- Page 1 Drone Air Racer Getting to Know Your Drone PLEASE READ ALL WARNINGS AND INSTRUCTIONS PRIOR TO USE. KEEP THIS DOCUMENT AS IT CONTAINS IMPORTANT INFORMATION ABOUT YOUR DRONE. 1. PREPARE FOR FLIGHT • Drone must be charged before each use (Cable included).
-
Page 2: Specifications
Drone Air Racer INTRODUCTION SPECIFICATIONS Congratulations on your purchase of the Drone Battery: 800 mAh Li-po Rechargeable 2.4 GHz Fly+Drive Drone. Remote Controller Battery: 4 x 1.5V “AA” Get ready to soar to new heights. Master the art of drone flying with remote control Charging Time: 120 minutes maneuverability. - Page 3 Drone Air Racer READ ALL WARNINGS AND PRECAUTIONS BEFORE USE SAFETY WARNINGS • Not recommended for children under 14 years of age. As with all electrical products, precautions should be observed during handling and use to reduce the risk of electrical shock.
-
Page 4: Lithium-Polymer Battery Warning
Drone Air Racer CONTENTS REMOTE BATTERY INFORMATION 1. Unscrew the remote battery door using a Philips head screwdriver (not included). 2. Install 4 “AA” batteries as shown in the diagram above. Drone Air Racer 3. Replace and close battery compartment. -
Page 5: Charging Battery
Drone Air Racer CHARGING BATTERY Note: The charging light on the drone will light up Connect the Charge when it is charging and turn off when fully charged. Cable to the Drone Charge time is approximately 120 minutes. 1. Turn off the drone before charging. -
Page 6: Remote Overview
Drone Air Racer REMOTE OVERVIEW ON/OFF Button LED Light Align Auto Land Left Spin Trim Right Spin Trim Throttle Joystick: Increases or decreases drone elevation left/right controls spin Backward Adjustment Right Adjustment Forward Adjustment Left Adjustment Printed in China. -
Page 7: Step 1 - Pre-Flight Checklist
Drone Air Racer OPERATING DRONE 5 FEET 2. Pair remote to drone: 3. Use the Multi Directional Bring the Throttle all the Joystick to move way up then bring it all forwards, backwards or the way down, remote turn left and right. - Page 8 Drone Air Racer LEFT SPIN TRIM RIGHT SPIN TRIM OPERATING DRONE (Cont.) Step 5 – Operating Drone in Flight Follow this step if your drone begins to drift while take off or during flight. F. Drone drifts backwards: Press the Forward Adjustment Button.


Need help?
Do you have a question about the Drone Air Racer and is the answer not in the manual?
Questions and answers