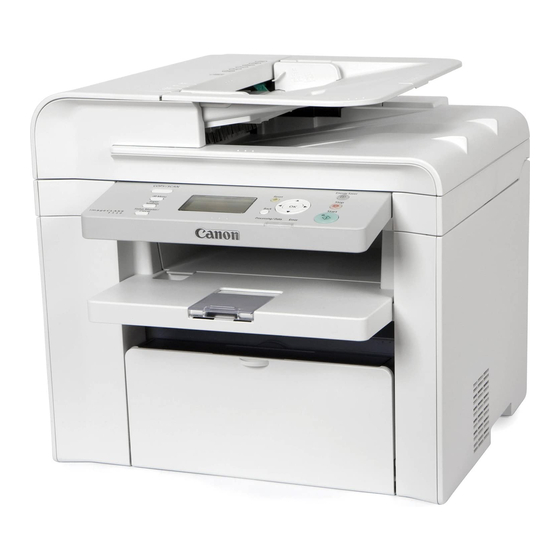
Canon imageCLASS D550 Basic Operation Manual
Black & white laser multifunction
Hide thumbs
Also See for imageCLASS D550:
- Starter manual (37 pages) ,
- Basic operation manual (164 pages) ,
- Starter manual (29 pages)
Table of Contents
Advertisement
Basic Operation Guide
Security Functions
Searching in Detail
See the e-Manual.
User Software CD-ROM
Searching the Installation and
Connection Procedure
See the Starter Guide.
Be sure to read the manual before using
the machine.
Keep the manual for future reference.
Quick View- Perform Useful Tasks
1
Before Using the Machine
2
Document and Paper Handling
3
Copying
4
Printing from a Computer
5
Using the Scan Functions
6
Maintenance
7
Troubleshooting
8
Registering/
Setting the Various Functions
9
Appendix
Next
Page
P.1-1
P.2-1
P.3-1
P.4-1
P.5-1
P.6-1
P.7-1
P.8-1
P.9-1
Advertisement
Chapters
Table of Contents

Related Manuals for Canon imageCLASS D550


Summary of Contents for Canon imageCLASS D550
-
Page 1: Basic Operation Guide
Basic Operation Guide Security Functions Searching in Detail See the e-Manual. User Software CD-ROM Searching the Installation and Connection Procedure See the Starter Guide. Be sure to read the manual before using the machine. Keep the manual for future reference. Quick View- Perform Useful Tasks Before Using the Machine Document and Paper Handling... - Page 2 Quick View- Perform Useful Tasks Copy There are a variety of copy functions that are explained in later pages of this manual as well as in the e-Manual. You can enlarge or reduce copies as well as copy multiple documents onto one sheet. Additionally, you can adjust the density and image quality before copying.
- Page 3 Copy There are a variety of print functions that are explained in later pages of this manual as well as in the e-Manual. Enlarge or reduce documents and print multiple-page data onto one sheet. You can also perform 2-sided printing. Below is a quick overview of highlighted print features that you can utilize in your everyday use.
- Page 4 Quick View- Perform Useful Tasks Copy There are a variety of scan functions that are explained in later pages of this manual as well as in the e-Manual. You can easily send scanned documents to your computer. Below is a quick overview of highlighted scan features that you can utilize in your everyday use. Saving in a Computer There are two methods for saving scanned documents in a computer.
-
Page 5: Table Of Contents
C o n t e n t s Contents Manuals for the Machine Available Features How to Use This Manual Important Safety Instructions Installation Requirements and Handling Legal Notices Laser Safety 1. Before Using the Machine Names and Functions on Each Part of the Machine Front Side Back Side Interior... - Page 6 5. Using the Scan Functions Basic Operation Methods for Scanning 6. Maintenance Cleaning the Machine Cleaning the Exterior Cleaning the Interior Cleaning the Fixing Unit Cleaning the Platen Glass Cleaning the Feeder Precautions When Cleaning the Machine Replacing Toner Cartridges About the Supplied Toner Cartridge About Replacement Toner Cartridge Handling Toner Cartridge...
-
Page 7: Manuals For The Machine
Manuals for the Machine Read this manual first. This manual describes the settings for setting up the machine and installing the software. Be sure to read this manual before using the machine. Read this manual next. This manual describes the basic use of the machine. -
Page 8: Available Features
Available Features The following features are available for each model. ○ : available — : not available Copy D550 ○ How to Use This Manual Symbols Used in This Manual Indicates a warning concerning operations that may lead to death or injury to persons if not performed correctly. To WARNING use the machine safely, always pay attention to these warnings. -
Page 9: Important Safety Instructions
(1) and disconnect the interface cable if it is connected (2). Then, unplug the power plug from the AC power outlet (3) and contact your local authorized Canon dealer. O F F O F F CAUTION •... - Page 10 Then, unplug the power plug from the AC power outlet and contact your local authorized Canon dealer. Continued use can result in a fire or electrical shock. • Do not use flammable sprays near the machine. If...
-
Page 11: Maintenance And Inspections
• Check the power cord and plug regularly. The following conditions may result in fire, so please contact your local authorized Canon dealer or the Canon help line. - There are burn marks on the power plug. - The blade on the power plug is deformed or broken. - Page 12 Consumables WARNING • Do not dispose of used toner cartridges in open flames. This may cause the toner to ignite, resulting in burns or fire. • Do not store toner cartridges or paper in a location exposed to open flames. This may cause the toner or paper to ignite, resulting in burns or fire.
-
Page 13: Temperature And Humidity Conditions
Installation Requirements and Handling In order to use this machine in a safe and trouble-free manner, install the machine in a place that fulfills the following conditions. Also, read the remarks carefully. Temperature and Humidity Conditions • Temperature range: 50 to 86°F (10 to 30°C) •... -
Page 14: Customer Support
Chapter 9. If you cannot solve the problem or if you think your machine needs servicing, contact Canon Customer Care Center at 1-800-OK-CANON between the hours of 8:00 A.M. to 8:00 P.M. EST Monday through Friday. On-line support for 24 hours is also available at the website. -
Page 15: Legal Notices
IPv6 Forum. Trademarks Canon, the Canon logo, and imageCLASS are registered trademarks of Canon Inc. in the United States and may also be trademarks or registered trademarks in other countries. Apple, Mac OS, and Macintosh are trademarks or registered trademarks of Apple Inc. - Page 16 Disclaimers The information in this document is subject to change without notice. CANON INC. MAKES NO WARRANTY OF ANY KIND WITH REGARD TO THIS MATERIAL, EITHER EXPRESS OR IMPLIED, EXCEPT AS PROVIDED HEREIN, INCLUDING WITHOUT LIMITATION, THEREOF, WARRANTIES AS TO MARKETABILITY, MERCHANTABILITY, FITNESS FOR A PARTICULAR PURPOSE OF USE OR NON-INFRINGEMENT.
-
Page 17: Laser Safety
Laser Safety This machine complies with 21 CFR Chapter 1 Subchapter J as a Class 1 laser product under the U.S. Department of Health and Human Services (DHHS) Radiation Performance Standard according to the Radiation Control for Health and Safety Act of 1968. -
Page 19: Before Using The Machine
Before Using the Machine This category describes the features of the machine and its useful functions. Names and Functions on Each Part of the Machine Front Side Back Side Interior Multi-purpose Tray Paper Cassette Operation Panel LCD (Standby Mode) Copy Mode Scan Mode Navigating the Menu Entering the Menu Screen... -
Page 20: Names And Functions On Each Part Of The Machine
Names and Functions on Each Part of the Machine This section describes the parts and functions of the machine. Front Side Document guides Adjust to the width of the document. Feeder cover Open this cover to clear paper jams. Lift handles Hold this handle to lift or transport the machine. -
Page 21: Back Side
Back Side Rating label The average values of the required voltage and current are specified. Rear cover Open this cover to clear paper jams. USB port Connect to a computer via a USB cable. Interior Scanning platform Open this platform to replace the toner cartridge or clear paper jams. -
Page 22: Multi-Purpose Tray
Multi-purpose Tray Paper guides Adjust to the width of the paper. Paper Cassette Dust cover Protects paper in the paper cassette from dirt and dust. Paper guides Adjust the paper guides to the paper. -
Page 23: Operation Panel
Operation Panel Mode switching keys [Menu] key [Paper Settings] key [Status Monitor/Cancel] key [Reset] key [Back] key ] key ] key ] key ] key [OK] key [Energy Saver] key [Stop] key [Start] key [Processing/Data] indicator [Error] indicator Press to switch the mode to copy or scan. Press to specify or register various settings. -
Page 24: Lcd (Standby Mode)
LCD (Standby Mode) This section describes the following screens. • Copy Mode • Scan Mode NOTE Display of the standby mode • You can change the standby display which appears when the power switch is turned ON. e-Manual → Basic Operation → Customizing Display Settings →... -
Page 25: Navigating The Menu
Navigating the Menu This section describes how to navigate the menu and specify values on the menu screen. Keys to be used for this operation Menu Back Entering the Menu Screen Press [ ] (Menu) to enter the menu screen. Scrolling Through Menu Items The scrollbar at the right side of the screen indicates that more items are available. -
Page 26: Specifying Values Using The Navigation Keys
Specifying values using the navigation keys Specifying values Situation When moving through the bars to adjust levels such as density When selecting a value to set a timer When entering a series of numbers or letters such as PIN Confirming the input To confirm the input: •... -
Page 27: Text Input Method
Text Input Method Enter information (text, symbols, and numbers) into the machine using the following keys. Keys to be used for this operation Entering text, symbols, and numbers Press [ ] or [ ] to select a character, symbol, or number, and then press [OK]. -
Page 28: Setting The Sleep Timer
Setting the Sleep Timer The machine returns to sleep mode automatically when it is idle for a specified length of time. Keys to be used for this operation Menu Press [ ] (Menu). Press [ ] or [ ] to select <Timer Settings>, and then press [OK]. -
Page 29: Setting The Current Date And Time
Setting the Current Date and Time Specify a display format for the date and time and set the current date and time. The specified date and time are used for reports. Keys to be used for this operation Press [ ] (Menu). - Page 30 1-12...
-
Page 31: Document And Paper Handling
Document and Paper Handling Document Requirements Scanning Range Copy Scan Placing Documents Placing Documents on the Platen Glass Loading Document in the Feeder Paper Requirements Paper Size Paper Type Printable Range Loading Paper In the Paper Cassette In the Multi-Purpose Tray Precautions when Loading Paper Paper Loading Capacity Paper Loading Orientation... -
Page 32: Document Requirements
Document Requirements • Plain paper • Heavy paper • Photograph Document type • Small documents (e.g., index cards) • Special types of paper (e.g., tracing paper, transparencies, etc.) • Booklet (Up to 3/4” (20 mm) thickness) Size (W x L) Maximum 8 1/2”... -
Page 33: Scanning Range
Scanning Range Ensure your document’s text and graphics fall within the area specified in the following diagram. * Note that the margin widths listed below are rough standards and there may be slight variations in actual use. * The loading orientation of documents is as follows. - Platen glass: With the document facing down - Feeder: With the document loaded in the document feeder tray Copy... -
Page 34: Placing Documents
Placing Documents This section describes placing the documents on the platen glass or loading them in the feeder. Placing Documents on the Platen Glass Open the feeder. Place a document face down. Align the document with the appropriate paper size marks. If your document does not match any of the paper size marks, align the center of your document with the arrow mark. - Page 35 Fan the document stack and align the edges of the pages. Thoroughly fan in Align the edges on a small batches flat surface a few times Neatly place the documents face up. • Load the document under the load limit guides (A). •...
-
Page 36: Paper Requirements
Paper Requirements Paper Size The available paper sizes are as follows. : Available : Not available ○ Paper size A4 (8 1/4” x 11 3/4” (210 mm x 297 mm)) B5 (7 1/8” x 10 1/8” (182 mm x 257 mm)) A5 (5 7/8”... -
Page 37: Paper Type
If you smell a burnt odor, however, immediately turn OFF the machine, unplug the power plug from the AC power outlet, and then contact your local authorized Canon dealer or the Canon help line. Continued use can result in a fire or electrical shock. Paper Capacity... -
Page 38: Printable Range
Printable Range The shaded area indicates the approximate printable area of A4 paper. Note that the margin widths listed below are rough standards and there may be slight variations in actual use. 1/4 in. (5 mm) 1/4 in. (5 mm) 1/4 in. -
Page 39: Loading Paper
Loading Paper This section describes how to load paper in the paper cassette and the multi-purpose tray. NOTE If you use paper of a different size or type The default paper size/type is set to <Letter> and <Plain (16 lb Bond-24 lb Bond)>... - Page 40 (3) Loosen any stiff corners of the envelopes and flatten curls as shown in the figure. (4) Align the edges of the envelopes on a flat surface. (5) Gently load the envelopes into the paper cassette with the print side face up, until the edge of the envelope stack meets the back of the paper cassette.
-
Page 41: In The Multi-Purpose Tray
In the Multi-Purpose Tray Before loading paper in the multi-purpose tray, see “Precautions when Loading Paper” (→P.2-12). Use the multi-purpose tray when you want to copy or print on a paper that is different from what is in the paper cassette. You can load a single sheet of paper in the multi-purpose tray. -
Page 42: Precautions When Loading Paper
Precautions when Loading Paper CAUTION Be careful when handling paper Handle paper carefully not to cut your hands with the edges of the paper. Precautions when inserting the paper cassette Be careful not to catch your fingers. IMPORTANT Be sure to align the paper guides with the width of the paper. -
Page 43: Paper Loading Orientation
Paper Loading Orientation NOTE Paper loading orientation when loading in the multi- purpose tray Paper loading orientation for the multi-purpose tray is same as which for the paper cassette. When printing paper with a letterhead or logo (previously printed paper) Load the paper as shown below. -
Page 44: Setting A Paper Size And Type
Setting a Paper Size and Type Whenever you change the paper size and type loaded in the cassette or tray, follow the procedure in this section to adjust the paper size and type settings. IMPORTANT If the setting is different from the size of the loaded paper An error message appears, or printing is not performed correctly. - Page 45 Specifies the size of <X> direction and <Y> direction. (1) Press [ ] or [ ] to select the direction, and then press [OK]. Specify Size <Apply> X: 0" Y: 0" (2) Press [ ] or [ ] to specify the size, and then press [OK]. You can also enter values using the numeric keys.
-
Page 46: Selecting Print Side
Selecting Print Side You can specify whether to match the sides to be printed for 2-sided printing and 1-sided printing. Depending on the setting for this item, the side to be printed changes. When using previously printed paper, read “Paper Loading Orientation”... - Page 47 When specifying <Print Speed Priority>, load paper as follows. : Feeding direction) * For details on the procedure for loading paper when printing pages of the landscape layout, see “Paper Loading Orientation” (→P.2-13). When performing When performing 1-sided printing 2-sided printing <Print Speed Load paper with the...
- Page 48 2-18...
-
Page 49: Copying
Copying This category describes the copying features. Basic Copying Method Checking and Canceling Copy Jobs Canceling using the Stop Key Checking and Canceling using the Status Monitor/Cancel Key Copy Settings Adjusting the Density Selecting Image Quality (Copy) 2-Sided Copying Enlarging/Reducing Copies Multiple Documents onto One Sheet (N on 1) Collating Copies Emphasize the Outline of an Image (Sharpness) -
Page 50: Basic Copying Method
Basic Copying Method This section describes the basic procedure for copying. Place documents. “Placing Documents” (→P.2-4) “Document Requirements ” (→P.2-2) * A maximum of 50 pages can be loaded into the feeder. Press [ ]. (Copy/Scan) until the copy mode screen appears. Specify the copy settings as needed. -
Page 51: Checking And Canceling Copy Jobs
Checking and Canceling Copy Jobs You can check detailed information about copy jobs. Also, you can cancel copy jobs while the jobs are in process. NOTE If the processing/Data indicator on the operation panel Turned on/blinking A job is being processed. Turned off No jobs are in the memory. -
Page 52: Copy Settings
Copy Settings Adjusting the Density Copy mode screen Copy: Press Start 100% No. of Copies: 1 Density: 0 Original Type: Text Press [ ] or [ ] to select <Density> Selecting Image Quality (Copy) Copy mode screen Copy: Press Start 100% No. -
Page 53: 2-Sided Copying
Copy Settings 2-Sided Copying Copy mode screen Copy: Press Start 100% Density: 0 Original Type: Text 2-Sided: Off Press [ ] or [ ] to select <2-Sided> ● 2-sided documents → 2-sided copies Setting screen 2-Sided 1 2-Sided 2 2-Sided 2 1-Sided Press [ ] or [... -
Page 54: Enlarging/Reducing Copies
Copy Settings Enlarging/Reducing Copies Copy mode screen Copy: Press Start 100% Original Type: Text 2-Sided: Off Copy Ratio: 100% Dir Press [ ] or [ ] to select <Copy Ratio> For custom ratio Press [ ] or [ → [OK] Copy Ratio Custom Ratio 100% Direct... -
Page 55: Collating Copies
Copy Settings Collating Copies Copy mode screen Copy: Press Start 100% Copy Ratio: 100% Di N on 1: Off Collate: Off Press [ ] or [ ] to select <Collate> Printouts of a complete job are grouped. For example, if you are copying three copies of a three-page <Off>... -
Page 56: Copying An Id Card
Copying an ID Card You can make a copy of a 2-sided card onto one side of a paper. Keys to be used for this operation Copy/Scan Place a card on the platen glass, and then close the feeder. Place the card with a 1/4” (5 mm) space created from the left edge of the platen glass. -
Page 57: Changing The Default Values
Changing the Default Values The default values of the copy are the function which is applied when [ ] (Reset) is pressed or the power is turned ON. You can change the default values to suit your needs. You can register the following types of settings as the default values. - Page 58 3-10...
-
Page 59: Printing From A Computer
Printing from a Computer This category describes how to print from computers. * If you are a Macintosh user, see the following. • To install the Print Driver → Starter Guide or Print Driver Guide • To view how to use each function →... -
Page 60: Installing The Printer Driver
Installing the Printer Driver The following procedures are required as the preparations for printing. Step 1 Install the printer driver. NOTE About the printer driver The printer driver is software required for printing from an application. The printer driver will convert application software’s print data to print data for the printer. -
Page 61: Printing From A Computer
Printing from a Computer Scaling Documents You can enlarge or reduce documents to match the output paper size. There are two methods for scaling a document: select the output size of the document to scale it automatically, or specify the scaling value manually. Click [Page Setup]. -
Page 62: 2-Sided Printing
Select the page layout from [Page Layout]. Select the page order from [Page Order]. The output image is displayed in the preview area. Click [OK]. NOTE • You cannot enlarge and reduce manually when using this function. • Although there may be a function for printing multiple copies depending on the application you are using, do not use it together with this function. -
Page 63: Checking And Canceling Print Jobs
Checking and Canceling Print Jobs You can check detailed information about print jobs in the middle of currently printing or waiting. NOTE Document name and user name displayed in the operation panel Some file name may be displayed incorrectly depending on the type of the file to be printed. -
Page 65: Basic Operation Methods For Scanning
Chapter Using the Scan Functions The documents scanned by the machine can be stored in a computer. * If you are a Macintosh user, see the Scanner Driver Guide. To view how to display the Scanner Driver Guide, see “For Macintosh Users” (→P.9-4). Basic Operation Methods for Scanning... -
Page 66: Basic Operation Methods For Scanning
Basic Operation Methods for Scanning You can scan a document using the keys on the operation panel. NOTE To scan documents by operating a computer See “Scan” in the e-Manual. Keys to be used for this operation Copy/Scan Place documents. “Placing Documents”... - Page 67 Note To change the scanner settings You can change the settings for the location to save, the file format, or the resolution from a computer. e-Manual → Scan → Using the MF Toolbox...
-
Page 69: Maintenance
Maintenance This section describes the maintenance of this machine, replacement of the toner cartridges, and so on. Cleaning the Machine Cleaning the Exterior Cleaning the Interior Cleaning the Fixing Unit Cleaning the Platen Glass Cleaning the Feeder Precautions When Cleaning the Machine Replacing Toner Cartridges About the Supplied Toner Cartridge About Replacement Toner Cartridge... -
Page 70: Cleaning The Machine
Cleaning the Machine Cleaning the Exterior Clean the exterior of the machine and ventilation slots. Turn OFF the power switch and disconnect the power cord. Clean the exterior of the machine with a soft, well wrung out cloth dampened with water or mild detergent diluted with water. -
Page 71: Cleaning The Fixing Unit
Remove the toner cartridge. Remove any toner or paper debris from interior of the machine, with a clean, soft, dry, and lint-free cloth. Insert the toner cartridge. Fit the protrusions (A) on each side of the toner cartridge into the guides located on each side of the machine, and then slide the toner cartridge into the machine until the toner cartridge meets the back of the machine. -
Page 72: Cleaning The Platen Glass
Cleaning the Platen Glass Follow this procedure to clean the platen glass and under surface of the feeder. Turn OFF the power switch and disconnect the power cord. Open the feeder. Clean the platen glass and the under surface of the feeder. - Page 73 CAUTION Precautions when cleaning the feeder Do not dampen the cloth too much, as this may tear the document or damage the machine. Precautions when closing the feeder Be careful not to get your fingers caught. Do not touch the fixing unit (A). Touching the fixing unit (A) may cause burns as it becomes very hot during use.
-
Page 74: Replacing Toner Cartridges
The average yield of the replacement toner cartridge is different from which of the supplied toner cartridge. About Replacement Toner Cartridge Purchase the toner cartridge at your local authorized Canon dealer. Replace the toner cartridge according to the description in the following charts. -
Page 75: Using The Toner Saver Mode
Be careful of counterfeit toner cartridges. Please be aware that there are counterfeit Canon toner cartridges in the marketplace. Use of counterfeit toner cartridges may result in poor print quality or machine performance. -
Page 76: Before Replacing The Toner Cartridge
Press [ ] or [ ] to select <Off> or <On>, and then press [OK]. Copy <Off> Do not use the toner saver mode. <On> Use the toner saver mode. NOTE When the <Toner Saver Mode> is set to <On> You may conserve toner, however, the output may be less clear and thin lines or light colors may be printed unclearly. -
Page 77: Replacing The Toner Cartridge
Gently shake the toner cartridge five or six times to evenly distribute the toner. Insert the toner cartridge. Fit the protrusions (A) on each side of the toner cartridge into the guides located on each side of the machine, and then slide the toner cartridge into the machine until the toner cartridge meets the back of the machine. - Page 78 Hold the grip on the left front side of the toner cover. Open the toner cover. Remove the toner cartridge. Take out the new toner cartridge from the protective bag. You can open the protective bag with your hands from the notch. 6-10 Gently shake the toner cartridge five or six times to evenly distribute the toner.
-
Page 79: Precautions When Replacing Toner Cartridge
Precautions when lowering the scanning platform Be careful not to catch your fingers. IMPORTANT About replacement toner cartridge For optimum print quality, replacement is recommended using genuine Canon toner cartridge. Supported Canon genuine toner Model name cartridge D550 Canon Cartridge 128... -
Page 80: Purchase Consumables
The packing materials may be changed in form or placement, or may be added or removed without notice. Collecting used toner cartridges “Recycling Used Cartridges” (→P.6-13) 6-12 Purchase Consumables Purchase at your local authorized Canon dealer. If you are not sure, contact the Canon help line. -
Page 81: Recycling Used Cartridges
Wildlife Federation, and The Nature Conservancy and in Canada through donations to the World Wildlife Fund Canada and The Nature Conservancy of Canada. Since its inception, The Canon Cartridge Recycling Program has collected huge amount of cartridges that otherwise would have been discarded into landfills or similar facilities. -
Page 82: Shipping
Shipping Apply the UPS authorized returning label provided in this guide. Residents of Alaska and Hawaii: Do not use the UPS authorized returning label. For Alaska and Hawaii Canon set up alternative mail service with the U.S. Postal Service. Please call 1-800-OK-Canon to receive U.S. Postal Service merchandise returning label. -
Page 83: Canada Program-Canada Programme
• Repackage the empty cartridge utilizing the wrapper and pulp mould end-blocks from the new cartridge’s box. • Place the empty cartridge in the box of your new cartridge. Seal the box. • Apply the Canon Canada Inc./Canada Post label provided in this brochure. Canon’s labels are specially marked so that Canon pays the postage. -
Page 84: Transporting The Machine
Transporting the Machine Before transporting the machine, see “Precautions when Transporting the Machine” (→P.6-17) When changing the location of the machine or moving the machine for maintenance, be sure to perform the following procedure. Turn OFF the machine and any connected computer. -
Page 85: Precautions When Transporting The Machine
Remove any paper from the paper cassette. NOTE If the paper guide at the front projects from the paper cassette Push the paper guide into the paper cassette. Lower the dust cover. Close the paper cassette. Move the machine. Ensure that all covers and trays are closed, and hold the lift handles with the front side of the machine facing you. - Page 86 6-18...
- Page 87 Troubleshooting This section describes solutions for cases such as paper jam and when problems are not solved. Clearing Jams Document Jams in the Feeder Paper Jams Inside the Machine Display Message Error Codes If <Incorrect Size/Setting> Appears Troubleshooting Check the Following First Is the power switched ON? Has the power switch been just turned ON? Is the machine in Sleep mode?
-
Page 88: Clearing Jams
• Ensure that you have removed all scraps of paper from the inside of the machine. Touching the transfer roller (A) may damage the machine. Contact your local authorized Canon dealer or the Canon help line for assistance, if needed. -
Page 89: Document Jams In The Feeder
Document Jams in the Feeder Referring to the procedure on the display, follow the steps below to remove jammed documents. Remove any document loaded in the feeder. Open the feeder cover. Lift the lock release lever (A). Remove any jammed document by pulling it gently. -
Page 90: Paper Jams Inside The Machine
Close the feeder cover. Place documents in the feeder. Paper Jams Inside the Machine Referring to the procedure on the display, follow the steps below to remove jammed paper. Hold the operation panel. Lift the scanning platform. If you cannot lift the scanning platform Ensure that the feeder is completely closed. - Page 91 Push up the green colored part (A), and then pull the paper exit guide to open. Remove any jammed paper by pulling it gently. If you do not see the leading edge of the jammed paper Do not force to pull the paper, and proceed to step 9. Lift the paper exit guide, and then firmly close it.
- Page 92 Remove any paper loaded in the paper cassette. Remove any jammed paper by pulling it gently. Reload paper into the paper cassette and lower the dust cover. Next, continue to clear jams in the rear cover. Open the rear cover. Remove any jammed paper by pulling it gently.
-
Page 93: Display Message
Display Message If messages appear, see the following and solve the problem. e-Manual → Troubleshooting → Display Messages Error Codes An error code is a 3-digit code recorded as an error log when an error occurs. You can view the code at the job history in the system status screen. For details on the error code, see the following. -
Page 94: If
If <Incorrect Size/Setting> Appears The message appears when the paper size specified in <Drawer 1>, or <MP Tray> in the <Paper Settings> menu is different from the size of the paper loaded in the paper cassette or multi-purpose tray. If the message appears, perform the following operations. NOTE When printing using the printer driver To ignore the message and proceed to print on paper that is currently set, press...Appears -
Page 95: Troubleshooting
Error indicator will turn off and the display will return to standby mode. If the Error indicator keeps blinking, unplug the power cord and contact your local authorized Canon dealer or the Canon help line. If there is no problem... -
Page 96: Does A Message Appear On The Display
Does a message appear on the display? If an error message appears on the display, refer to the following section to locate the appropriate corrective action. “Display Message” (→P.7-7) Print the transmission management report to see if any errors are listed. e-Manual →... -
Page 97: If A Power Failure Occurs
If a Power Failure Occurs The machine cannot be used while power supply is cut off. NOTE Charging the built-in battery It takes approximately 24 hours to fully charge the built-in battery after the machine is turned ON. If the built-in battery has not been charged fully charged, documents stored in the memory may not be properly backed up. 7-11... -
Page 98: If You Cannot Solve A Problem
If you attempt to repair the machine by yourself It may void the limited warranty. 7-12 Customer Support (Canada) Canon Canada Inc., offers a full range of customer technical support options*: * Support program specifics are subject to change without notice. • For step-by-step troubleshooting, e-mail technical support,... -
Page 99: Print Result Is Not Good
Contacting your local authorized Canon dealer If a problem that is not indicated in the e-Manual occurs, if none of the suggested measures solve the problem, or if you cannot determine the problem, contact your local authorized Canon dealer. Paper Curls Perform one of the following solutions according to the cause. -
Page 100: Printing Is Uneven
<Cause 1> The paper is not loaded properly. Load the paper properly. Solution “Loading Paper” (→P.2-9) <Cause 2> Damp paper is used. Replace the paper with new paper in an unopened package. Solution “Paper Requirements” (→P.2-6) <Cause 3> Appropriate paper is not being used. Replace the paper with which can be used with this printer. -
Page 101: White Specks Appear
<Cause 4> Unevenness may appear when thin lines are printed. Change the <Special Mode J> setting to <On> from the operation panel. e-Manual → Maintenance → Special Mode * If you use this mode, the following problems may occur. Solution •... -
Page 102: The Printed Paper Has Vertical Streaks
<Cause 1> Paper type setting is not specified properly. Properly specify the paper type setting. * If you are using coarse paper, select one of the followings. • <Rough 1 (16 lb Bond-24 lb Bond)> Solution • <Rough 2 (24 lb Bond-32 lb Bond)> •... -
Page 103: Patterns
<Cause 2> The toner cartridge was replaced, or the printer was not printed for a long period of time. Change the <Special Mode B> setting from the operation panel. e-Manual → Maintenance → Special Mode The level of improvement according to the setting option is as following. <Off>... -
Page 104: Copied Lines And Text Appear Faded
<Cause 2> The machine is exposed to direct sunlight or strong light . Move the machine. Solution e-Manual → Maintenance → Transporting the Machine Copied Lines and Text Appear Faded Perform the following procedure. <Cause> <Original Type> is set to <Text/Photo (High Speed)> (default). Set <Original Type>... -
Page 105: Registering/Setting The Various Functions
Registering/Setting the Various Functions You can set or change machine functions from the setting menu according to your purpose. Setting Menu List Printing a User Data List Contents of the Setting Menu Chapter... -
Page 106: Setting Menu List
Setting Menu List Printing a User Data List To see the contents of current settings, print out user’s data list. Keys to be used for this operation Menu Press [ ] (Menu). Press [ ] or [ ] to select <User Data List>, and then press [OK]. - Page 107 Paper Settings <How to display> Press [Paper Settings]. Keys to be used for this operation "Setting a Paper Size and Type" (P. 2-16) Menu <How to display> Press [Menu]. The setting menu is displayed. Keys to be used for this operation Preferences Display Settings CD-ROM...
- Page 108 Continues from the previous page System Management Settings System Manager Information Settings System Manager PIN: Up to seven digits Select Country/Region USB Device On/Off Update Firmware Initialize System Settings Preferences Timer Settings Copy Settings Special Processing Initialize All User Data List CD-ROM United States (US) Canada (CA)
-
Page 109: Appendix
Appendix This section describes the specifications of the machine and information for Macintosh users. Main Specifications Machine Specifications Copy Specifications Printer Specification Scanner Specifications For Macintosh Users Displaying Driver Guides (PDF Files) Displaying a Driver’s Help System Content of the e-Manual about Features that Are Unavailable on the Macintosh Index Chapter... -
Page 110: Main Specifications
Main Specifications Machine Specifications Machine Specifications Type Personal Desktop 120 to 127 V, 60 Hz (Power requirements Power Supply differ depending on the country in which you purchased the product.) • Maximum: 1,090 W or less Average consumption during standby Power Consumption mode: Approx. -
Page 111: Scanner Specifications
Scanner Specifications Scanner Specifications Type Color scanner • Platen glass: 8 1/2” x 11 5/8” Maximum Scanning (215.9 mm x 297 mm) Size • Feeder: 8 1/2” x 14” (215.9 mm x 355.6 mm) • Optical resolution Platen glass: 600 x 600 dpi Scanning Resolution Feeder: 300 x 300 dpi •... -
Page 112: For Macintosh Users
For Macintosh Users In this manual, methods to operate in the Windows environment are explained as examples. To view how to use printer drivers or utilities for Macintosh, see the following driver guides (PDF files) or driver help systems. Function Installing the Printer Driver Print function Printing... -
Page 113: Index
I n d e x Changing the Default Values Copy ... 3-9 Cleaning the Machine ... 6-2 Exterior ... 6-2 Fixing Unit ... 6-3 Platen Glass... 6-4 Contents of the Setting Menu ... 8-2 Copying ... 3-1 2-Sided Copying ... 3-5 Collating Copies ... - Page 114 Operation Panel ... 1-2, 1-5 Output tray ... 1-2 Paper Clearing Jams ... 7-2 Loading ... 2-9 Paper Size and Type... 2-14 Printable Range ... 2-8 Requirements ... 2-6 Paper Cassette ... 1-2, 1-4 Paper Requirements ... 2-6 Platen glass ... 1-2 Power Supply ...
- Page 116 30-2, Shimomaruko 3-chome, Ohta-ku, Tokyo 146-8501, Japan CANON MARKETING JAPAN INC. 16-6, Konan 2-chome, Minato-ku, Tokyo 108-8011, Japan CANON U.S.A., INC. One Canon Plaza, Lake Success, NY 11042, U.S.A. CANON EUROPA N.V. Bovenkerkerweg, 59-61, 1185 XB Amstelveen, The Netherlands CANON CHINA CO. LTD.
Need help?
Do you have a question about the imageCLASS D550 and is the answer not in the manual?
Questions and answers