Table of Contents

Related Manuals for Maytag MED7500YW


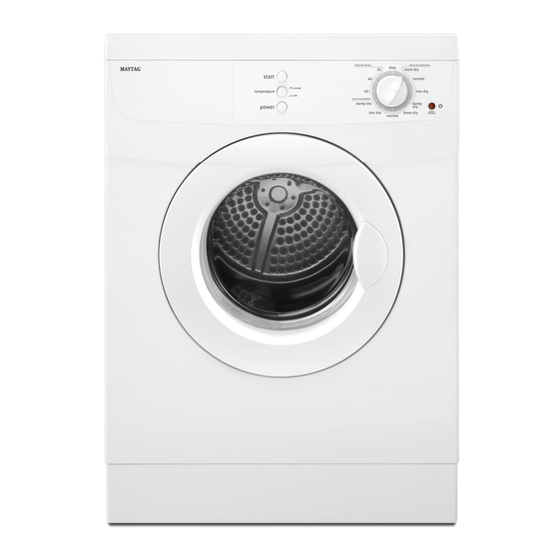
Summary of Contents for Maytag MED7500YW
-
Page 1: Electric Dryer
Use & Care Guide ELECTRIC DRYER Para obtener acceso al Manual de uso y cuidado en español, o para obtener información adicional acerca de su producto, visite: www.maytag.com. If you have any problems or questions, visit us at www.maytag.com W10445417B... -
Page 2: Table Of Contents
ELECTRIC DRYER TABLE OF CONTENTS DRYER SAFETY ...2 OPERATING INSTRUCTIONS ...4 CONTROL PANEL AND FEATURES ...4 CYCLE GUIDE ...5 USING YOUR DRYER ...6 DRYER CARE ...7 INSTALLATION INSTRUCTIONS ...9 INSTALLATION REQUIREMENTS ...9 LOCATION REQUIREMENTS ...10 ELECTRICAL REQUIREMENTS ...12 ELECTRIC INSTALLATION ...13 VENTING ...18 CONNECT VENT ...20 LEVEL DRYER ...21... -
Page 4: Operating Instructions
OPERATING INSTRUCTIONS CONTROL PANEL AND FEATURES START BUTTON Press to start a cycle. Indicator light will glow to indicate the cycle has started. TEMPERATURE BUTTON The Temperature Control button lets you choose between a normal and low drying temperature. NOTE: Always refer to the care label on the garment to determine whether it can be tumble dried. -
Page 5: Cycle Guide
CYCLE GUIDE — SENSOR DRY CYCLES Use Sensor Dry Cycles for better fabric care and energy savings When you are using the GentleBreeze dryness of the load. When there is moisture left in the clothes, the dryer will continue to run. As clothes begin to dry, the amount of water left in the clothes decreases, and the timer advances through the remainder of the cycle. -
Page 6: Using Your Dryer
USING YOUR DRYER WARNING: To reduce the risk of fire, electric shock, or injury to persons, read the IMPORTANT SAFETY INSTRUCTIONS before operating this appliance. Clean the lint screen Clean the lint screen before each load. Pull the lint screen straight up. -
Page 7: Dryer Care
Select the desired cycle Select the desired cycle for your load. See the “Cycle Guide” for more information about each cycle. NOTE: Most loads may be dried using the Normal dryness level, which is shown in bold letters on the control panel. Normal is the energy preferred dryness level and will use the least energy. - Page 8 CLEANING THE LINT SCREEN Every load cleaning The lint screen is located in the door opening of the dryer. The control panel has an indicator light to remind you to clean the lint screen before each load. A screen blocked by lint can increase drying time.
-
Page 9: Installation Instructions
Ask for Model Number LAB0050PQ. Stack kit Are you planning to stack your washer and dryer? Your dryer is shipped with Stack Kit W10178021, which fits Maytag washer models starting with MHWC. If you have any other washer model, call the dealer from whom you purchased your dryer or refer to the “Assistance or Service”... -
Page 10: Location Requirements
LOCATION REQUIREMENTS Check code requirements. Some codes limit, or do not permit, installing dryer in garages, closets, mobile homes, or sleeping quarters. Contact your local building inspector. You will need: n A location allowing for proper exhaust installation. See “Venting Requirements.” n A separate 30 amp circuit. - Page 11 Installation spacing for recessed area or closet installation n All dimensions show recommended and minimum spacing allowed. n Additional spacing should be considered for ease of installation and servicing. n Additional clearances might be required for wall, door, floor moldings, and dryer venting. n Additional spacing should be considered on all sides of the dryer to reduce noise transfer.
-
Page 12: Electrical Requirements
ELECTRICAL REQUIREMENTS It is your responsibility: n To contact a qualified electrical installer. n To be sure that the electrical connection is adequate and in conformance with the National Electrical Code, ANSI/NFPA 70 – latest edition and all local codes and ordinances. The National Electrical Code requires a 4-wire power supply connection for homes built after 1996, dryer circuits involved in remodeling after 1996, and all mobile home installations. -
Page 13: Electric Installation
ELECTRIC INSTALLATION For power supply cord installations: Before you start: disconnect power. Choose electrical connection type Power supply cord 4-wire receptacle (NEMA Type 14-30R). Go to “Power Supply Cord Connection.” Power supply cord 3-wire receptacle (NEMA Type 10-30R). Go to “Power Supply Cord Connection.” 4-wire direct connection: Go to “Direct Wire Connection.”... -
Page 14: Power Supply Cord Connection
Power Supply Cord Connection Power supply cord strain relief: Attach power supply cord to strain relief Unscrew the strain relief (A) from the terminal block cover. Unscrew the strain relief nut (B) from the strain relief (A). Put the power supply cord (C) through the strain relief nut (B), then the strain relief (A). -
Page 15: Wire Power Supply Cord Connection
Connect remaining wires Connect the other wires to outer terminal block screws. Tighten screws. Replace the terminal block cover on the back of the dryer. Tighten strain relief nut. Now, go to “Venting Requirements.” 3-Wire Power Supply Cord Connection Use where local codes permit connecting cabinet-ground conductor to neutral wire. -
Page 16: Direct Wire Connection
Direct Wire Connection If your wiring looks like this: 4-wire direct connection: Go to “4-Wire Direct Connection” on this page. If your wiring looks like this: 3-wire direct connection: Go to “3-Wire Direct Connection” on page 17. 4-Wire Direct Wire Connection IMPORTANT: A 4-wire connection is required for mobile homes and where local codes do not permit 3-wire connections. - Page 17 3-Wire Direct Wire Connection Use where local codes permit connecting cabinet-ground conductor to neutral wire. Prepare your 3-wire cable for direct connection Direct wire cable must have 5 ft. (1.52 m) of extra length so dryer may be moved if needed. Strip 3 "...
-
Page 18: Venting
VENTING Venting Requirements WARNING: To reduce the risk of fire, this dryer MUST BE EXHAUSTED OUTDOORS. IMPORTANT: Observe all governing codes and ordinances. Dryer exhaust must not be connected into any gas vent, chimney, wall, ceiling, attic, crawlspace, or a concealed space of a building. -
Page 19: Plan Vent System
Plan Vent System Choose your exhaust installation type Recommended exhaust installation: A. Dryer F. Rigid metal or flexible metal vent B. Elbow G. Vent length necessary C. Wall to connect elbows D. Exhaust hood H. Exhaust outlet E. Clamps Alternate installations for close clearances: Venting systems come in many varieties. -
Page 20: Connect Vent
Install Vent System Install exhaust hood 12" min. (305 mm) Install exhaust hood and use caulking compound to seal exterior wall opening around exhaust hood. Connect vent to exhaust hood Vent must fit over the exhaust hood. Secure vent to exhaust hood with 4"... -
Page 21: Level Dryer
LEVEL DRYER Level dryer Place level here Check levelness of dryer from side to side. Repeat from front to back. NOTE: The dryer must be level for the moisture sensing system to operate correctly. Not Level LEVEL Adjust leveling legs If dryer is not level, prop up using a wood block, use wrench to adjust legs up or down, and check again for levelness. -
Page 22: Troubleshooting
TROUBLESHOOTING First try the solutions suggested here or visit our website at www.maytag.com/help If you experience Possible Causes Dryer Operation Dryer will not run Door not closed completely. START button not pressed firmly or held long enough. Household fuse is blown or circuit breaker has tripped. - Page 23 TROUBLESHOOTING First try the solutions suggested here or visit our website at www.maytag.com/help If you experience Possible Causes Dryer Results Clothes are not drying Lint screen is clogged with lint. satisfactorily or drying The exhaust vent or outside times are too long exhaust hood is clogged with lint, restricting air movement.
- Page 24 TROUBLESHOOTING First try the solutions suggested here or visit our website at www.maytag.com/help If you experience Possible Causes Dryer Results (cont.) Stains on load Improper use of fabric softener. Loose dyes in clothes. Stains on drum Loads are wrinkled The load was not removed from dryer at the end of the cycle.
- Page 25 NOTES...
- Page 26 NOTES...
-
Page 27: Warranty
If you think you need repair service, rst see the “Troubleshooting” section of the Use & Care Guide. If you are unable to resolve the problem after checking “Troubleshooting,” additional help can be found by checking the “Assistance or Service” section or by calling Maytag. In the U.S.A., call... -
Page 28: Assistance Or Service
Please include a daytime phone number in your correspondence. Avant de faire un appel pour assistance ou service, veuillez vérifier la section “Dépannage” ou visiter le site www.maytag.com/ help. Cette vérification peut vous faire économiser le coût d’une visite de réparation. Si vous avez encore besoin d’aide, suivre les Lors d’un appel, veuillez connaître la date d’achat et les numéros au complet de modèle et de série de votre appareil.
Need help?
Do you have a question about the MED7500YW and is the answer not in the manual?
Questions and answers