Table of Contents
Advertisement
Quick Links
Advertisement
Table of Contents

Related Manuals for Ensy InoVent AHU-200 Series


Summary of Contents for Ensy InoVent AHU-200 Series
- Page 1 User manual and Installation Guide InoVent AHU-200-700...
- Page 2 393930-2 Rev 0: 01.04.2020 P a g e...
-
Page 3: Read This First
The contents of this manual are subject to change without notice. ENSY® holds the copyright to this user’s manual. The user shall follow any instructions given in this user manual entirely and not only partly. Any non-following of this user manual result in exclusion of all warranties, guarantees, and liabilities. -
Page 4: Functions Of The Air Handling Unit Controller
393930-2 Rev 0: 01.04.2020 Functions of the Air Handling Unit Controller The Air Handling Unit controller is designed for domestic and smaller industrial ventilation systems. Heat recovery can be either passive or active using a heat pump. Air heater can be added to either pre-heat or after-heating the inlet air. - Page 5 393930-2 Rev 0: 01.04.2020 Air heater (after-heater) The air heater (or after heater) heats up the air after the air has passed the heat exchanger. It must be enabled and configured in the Air heater menu. The heater can be None or Electrical. The electrical heater has a 0 –...
-
Page 6: Menu System
393930-2 Rev 0: 01.04.2020 Menu system 3.1 Overview of the menu system Main menu Unit on/off Fan speed User User selection Set Point 10⁰C...26⁰ Alarm Alar Unit Week Unit Information Week program Settings Main screen Normal / Password Reading Readings Service settings Servic Password... - Page 7 393930-2 Rev 0: 01.04.2020 3.2 Main menu The main screen is the default menu. The display returns to this screen after some minutes without user interaction. It shows the actual temperature, measured relative humidity and actual fan speed. A week program and an alarm are active on this example pressing button or the temperature will open the temperature set point menu Show the measured humidity...
-
Page 8: User Settings Menu
393930-2 Rev 0: 01.04.2020 4. User settings menu This is the user level of the menu system Show run-mode Touch to start and stop of the unit, On / Off Show fan speed. Touch to adjust fan speed; Off, MIN, NORM, MAX Sub-menu with setup for different user configurable inputs urn Party mode on/off. - Page 9 393930-2 Rev 0: 01.04.2020 Sub-menu with more user-settings Sub-menu with temperatures and other operation data Show and adjust date and time in a sub-menu Adjust backlight levels in active and idle mode Adjust display language. Select between English, German, French, Danish, Norwegian, Polish, Italian, Dutch and Lithuanian Week program sub-menu.
- Page 10 393930-2 Rev 0: 01.04.2020 4.1 User selection sub-menu The unit has a digital input which can trigger a user- configurable function, i. e. an increased fan speed when guests are coming. The input overrides the normal operation Select program: None, Fan boost, Supply air, Extract air, Extern alarm. Default None Menu only visible if a duration after activation can be set.
- Page 11 393930-2 Rev 0: 01.04.2020 List the software versions in the controller and display of the air handling unit Controller software version Display software version MAC address of the Wi-Fi radio 4.3 Settings for the air handling unit Sub-menu for configuration of the cooker hood function. The air handling unit will help push the steam towards the cooker hood Set the temperature were the air handling unit switches to summer mode Range 5⁰C..
- Page 12 393930-2 Rev 0: 01.04.2020 Sub-menu for cooling recovery Maximum rotor exchange speed Range 0% . 100%; default 100% 4.3.1 Cooker hood function The air handling unit has a digital input for the cooker hood. When the signal is active, the Supply and Extract fan speeds are set to the specified speeds in 0-100% Duration of the fan speeds after signal has disappeared.
- Page 13 393930-2 Rev 0: 01.04.2020 4.4 Readings sub-menu The menus contain readings for the sensors and outputs Measured relative humidity Supply air temperature Extract air temperature Air temperature at the air heater Fresh air temperature Exhaust air temperature (after the rotor heat exchanger) Supply fan speed in percentage Extract fan speed in percentage Air heater percentage...
- Page 14 393930-2 Rev 0: 01.04.2020 Speed of rotor heat exchanger Pressure difference over the inlet air filter Used for filter clogging monitoring (optional) 4.5 Date/time sub-menu The controller has a built-in real time clock used for alarm logging Set the year Set the month Set the day of month Set the hour (24h)
- Page 15 393930-2 Rev 0: 01.04.2020 4.6 Screen settings Set the backlight level when the display is active – being used Set the backlight level in idle mode Calibrate the touch panel only if the display responds unaligned with finger touches! Please note it must be done carefully as the display may else become impossible to use! 4.7 Week program The week program is used to program different fan speeds in up to 6 periods...
- Page 16 393930-2 Rev 0: 01.04.2020 Every weekday can have its own 6 different profiles, typically weekends are different Touch to edit settings for Monday Touch to edit settings for Tuesday Touch to edit settings for Wednesday Touch to edit settings for Thursday Touch to edit settings for Friday Touch to edit settings for Saturday Touch to edit settings for Sunday...
- Page 17 393930-2 Rev 0: 01.04.2020 Every function or profile has its own 3 settings: Start time, set point and fan speed. When start time is reached, the set point is set to the entered value and fan speed to the setting Overview of function 1 on Monday Touch to edit this function / profile Overview of function 2 on Monday...
- Page 18 393930-2 Rev 0: 01.04.2020 Every function / profile of the day has its own settings Start time of the profile in 15 minutes interval Range 00:15 to 23:45. 00:00 equals Off and means no function Fan speed Range Off, MIN, NORM, MAX Level is hidden if Start time is Off Desired temperature.
- Page 19 393930-2 Rev 0: 01.04.2020 Select if the main screen should be the house or the normal view with lines Accept or cancel 4.8 Service settings Service settings are for the service technician and are password protected. The default service password is 5 Accept change with or decline with Sub-menu with air handling settings...
- Page 20 393930-2 Rev 0: 01.04.2020 Sub-menu with air flow filter monitoring via pressure measurement Sub-menu to start a software update of the controller and display in the air handling unit Sub-menu with Wi-Fi settings Sub-menu with different handling in case of smoke See below Configure action if the smoke input becomes active.
- Page 21 393930-2 Rev 0: 01.04.2020 4.8.1 Air handling menu Air exchange sub-menu Air quality sub-menu Air heater sub-menu Defrosting sub-menu Room control sub-menu Inlet control sub-menu 4.8.2 Air exchange menu Set filter alarm method or timer setting Range Pressure, 30, 90, 180, 360 days; default 180 days Sub-menu with percentage fan speed per step Start delay of fans after start of the unit Range 0 –...
- Page 22 393930-2 Rev 0: 01.04.2020 Set filter alarm method or timer setting Range Pressure, 30, 90, 180, 360 days; default 180 days Pressure measures pressure drop over the inlet filter Level MIN – supply air fan speed Range 30% .. NORM-1% setting; default 30% Level MIN –...
- Page 23 393930-2 Rev 0: 01.04.2020 4.8.3 Air quality menus Fan speed setting at high humidity limit Range MIN, NORM, MAX; default High humidity level when to increase fan speed Off, 40%RH to 95%RH; default 60%RH Off means function disabled Max time to run fan at the high level Range Off, 1 min to 120 min; default Off Off means no time limit Settings for handling the air quality Sensor control mode.
- Page 24 393930-2 Rev 0: 01.04.2020 4.8.5 Room temperature control Settings for the room temperature control The controlling sensor is either the extract air or supply air temperature sensor Range Extract air, Supply air; default Extract air Select reaction speed to a temperature change.
- Page 25 393930-2 Rev 0: 01.04.2020 4.8.7 Temperature sensor calibration Menu for calibrating / offsetting the temperature sensors Adjust the AT Inlet temperature sensor Range -5.0⁰ .. +5.0⁰; default 0.0⁰ Adjust the EAT Exhaust temperature sensor Range -5.0⁰ .. +5.0⁰; default 0.0⁰ Adjust the OET Air heater temperature sensor Range -5.0⁰...
- Page 26 393930-2 Rev 0: 01.04.2020 4.8.9 Airflow menu Settings for the air flow pressure sensor for the filter monitoring. If the pressure drop at a fan speed is above the level for the specified time, a warning of clogged filter is issued Turn use of the airflow pressure sensor on or off Range On, Off;...
- Page 27 393930-2 Rev 0: 01.04.2020 4.8.10 Software update menu It is possible to update the software in the air handling unit through the USB port on the display. The new software and a USB cable must be available A X-modem capable software tool must be used Activate the software update process.
-
Page 28: Factory Menu
393930-2 Rev 0: 01.04.2020 5. Factory menus The factory menus are password protected. They are only to be used for service purposes Password is 50 for the factory menu Enter the password, 50 Menu only visible if unit is stopped Preset the controller with new settings Range Off, Factory (settings), Backup, Restore;... - Page 29 393930-2 Rev 0: 01.04.2020 Configure if the tacho signal in the extract fan is connected Range On, Off; default On Configure if the tacho signal in the rotor heat exchanger is connected Range On, Off; default Off User code sets if the user can stop the unit. Default the user cannot stop the unit = No OffKey.
- Page 30 393930-2 Rev 0: 01.04.2020 Mode of the software State of the software Number of resets Last reset cause Show the digital inputs DIN1,2,3,4 – rest unused DIN1,2 NO; DIN3,4 NC Active relays = 1 30 | P a g e...
- Page 31 393930-2 Rev 0: 01.04.2020 31 | P a g e...
-
Page 32: Drawings
Drawings Display Dimensions 7. Network (Wi Fi connection) 1. Download Bitzer Smart Connect app from Google play or App Store 32 | P a g e... - Page 33 393930-2 Rev 0: 01.04.2020 Create account: 3. After login, ADD PRODUCT: 4. Select Product: 5. Select Wi-Fi Network: 6. Enter Wi Fi Password: 7. Name your EnSy unit: 33 | P a g e...
- Page 34 8. After all steps are done the unit is connected to the internet: ® Ensy app allows users to remote control their AHU's and set temperature, fans speed or party mode on the unit. Read the temperatures that are at the location of the unit.
- Page 35 393930-2 Rev 0: 01.04.2020 10. Setting the ENSY® app On your first installation please fill in the information (MAC and UNIT NO) in ENSY® app. MAC address To obtain MAC address, please go to Menu – Unit Information: UNIT NO...
- Page 36 Terms and get on next pages! Conditions, that can be find on our website www.ensy.no If you don’t do it in the allocated time (10 sec) you need to start the process again Click, apply settings, if the information is until you do it correctly.
- Page 37 Accept the new set point value. Select and accept the temperature asked by the ENSY® app and leave it like that until all 10 seconds passed away. Actual temperature set on AHU. When you did this in the allocated time you will get validation.
- Page 38 After you finish the configuration it will open the TEMPERATURE menu on the ENSY® app. Select and accept the temperature asked by the ENSY® app and leave it like that until all 10 seconds passed away 38 | P a g e...
- Page 39 AHU unit in minimum settings, fan speed 1/Min and temperature 15°) • Ensy.no – will redirect you to our website. Here you will be able the read and modify settings on the unit like you can do on the normal control panel.
-
Page 40: Alarm System And Trouble Shooting
8. Alarm system and trouble shooting The unit controller is equipped with a failure and alarm diagnoses system. There are three alarm levels: Info, Warning and Critical. They all activate the alarm icon in the upper right corner of the main menu. An info message is just for information and does not affect operation;... - Page 41 393930-2 Rev 0: 01.04.2020 41 | P a g e...
-
Page 42: Ahu Wall Mounted
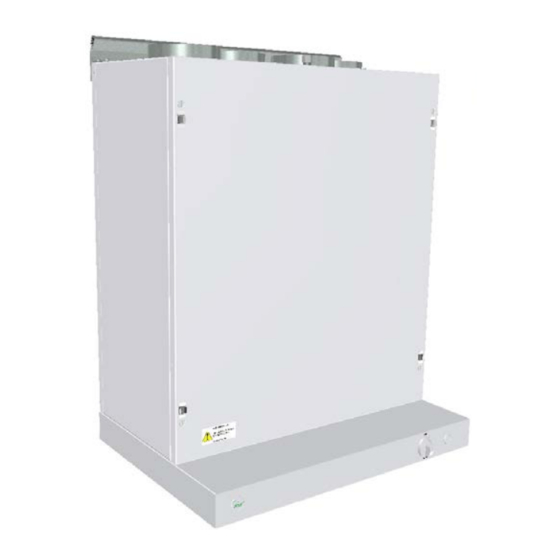
393930-2 Rev 0: 01.04.2020 AHU wall mounted (Pictures shows AHU wall mounted) To open the front hatch you will find a handle for the quarter turn latches. To open the locks, turn the handle toward the center of the unit. Left latch Right latch To close, after putting the hatch back on place, turn the... - Page 43 Should be extracted without use of any tools. To guarantee optimal properties of the ventilation unit, use the original filters from EnSy. The use of spurious filters will limit the warranty on the product. Ensy art number for filter set is: 011460850-2 SET FILTRE ENSY AHU 200 + 300 B.
- Page 44 393930-2 Rev 0: 01.04.2020 9.2 Cleaning the fans. This must be done by a qualified person. Before removing fans the main power must be disconnected by pulling out the main supply plug from the socket, or fans to be programmed to position “AV” or “OFF”...
- Page 45 393930-2 Rev 0: 01.04.2020 Rotor exchanger can easily be removed for cleaning, depending of AAHU model by unscrewing the 12 or 14 screws that holds it together. Clean parts with mild soap and water. Do not expose the rotor motor or connector to moisture/water.
-
Page 46: Ahu 200 Kv/Kh (Kitchen Model)
393930-2 Rev 0: 01.04.2020 AHU 200 KV/KH (Pictures shows AHU-200 KV SLIM) Be careful that the door can "be stuck" in the sealing on the hatch. For easier loosening of the hatch, release it first in one corner at the top. To operate this product people should have necessary skills, or under the supervision of a qualified person. - Page 47 Ensy art number for filter set is: 011460850-2 SET FILTRE ENSY AHU 200 + 300 B. F7: 120x280x94 * pressure sensor is an optional feature – to order use: Ensy art.
- Page 48 393930-2 Rev 0: 01.04.2020 10.2 Cleaning the fans. This must be done by a qualified person. Before removing fans the main power must be disconnected by pulling out the main supply plug from the socket, or fans to be programmed to position “AV”...
-
Page 49: Operation Of Kitchen Hood
393930-2 Rev 0: 01.04.2020 Operation of kitchen hood ON / OFF switch, for down lights. Using the damper in a kitchen hood. The switch has a spring retraction and will not work until it has passed "Min" No function Opens damper. Max time on timer Timer activated 60 min... - Page 50 The filter can be washed in soapy water. Must be completely dry before it is mounted in place again. If the filter material is damaged it must be ordered new original. (Ensy art no: 270081-2) 50 | P a g e...
-
Page 51: Ahu Ceiling Mounted
393930-2 Rev 0: 01.04.2020 AHU ceiling mounted (Pictures shows AHU ceiling model) To open the front hatch you will find a handle for the quarter turn latches. To open the locks, turn the key toward the center of the unit. Left latch Right latch To operate this product people... - Page 52 393930-2 Rev 0: 01.04.2020 The hatch has two hinges that holds it permanently to the housing. If the unit is placed high under a ceiling, then is mandatory to get help from another person to take down the hatch. It can be done by unscrewing 1 pcs of screw from the front hatch on one side and slide off from the other.
- Page 53 Should than be extracted without use of any tools. To guarantee optimal properties of the ventilation unit, use the original filters from EnSy. The use of spurious filters will limit the warranty on the product...
- Page 54 393930-2 Rev 0: 01.04.2020 12.3 Maintenance and cleaning of rotary heat exchanger This must be done by a qualified person. If the unit is placed high under a ceiling, then it might be an advantage to get help from another person to hold the rotor exchanger in correct position untill all four “safety”...
-
Page 55: Mounting Instructions
Ensy AHU. Ensy AHU is designed for heat recovery with air volumes from 200 m³ / h of up to 700 m³ / h. The energy from the exhaust air is transferred to supply air through the rotary heat exchanger where the air streams pass each other without making contact. - Page 56 393930-2 Rev 0: 01.04.2020 First, select how the unit should be mounted so that the piping system should be as easy as possible. (Sketch over shows AHU-200 H/300 BH) (Sketch over shows AHU-200 V/300 BV) (Sketch over shows AHU-200 KH) (Sketch over shows AHU-200 KV) (Sketch over shows AHU-350/400/700 KH) (Sketch over shows AHU-350/400/700 KV)
- Page 57 393930-2 Rev 0: 01.04.2020 (Sketch over shows AHU-300/400 HH) (Sketch over shows AHU-300/400 HV) English Norwegian Supply Air Tillluft Fresh Air Friskluft Exhaust Air Avtrekk Extract air Avkast 57 | P a g e...
- Page 58 393930-2 Rev 0: 01.04.2020 13.2.1 Brackets and vibration gasket wall mounted Suspension bracket screwed on top of the unit as shown. Use 8 pcs M5 x 16mm, supplied with the unit. (Sketch over show AHU-200 V, but applies to all wall mounted units) Mount the wall bracket with vibration gasket.
- Page 59 393930-2 Rev 0: 01.04.2020 Brackets and vibration gasket ceiling mounted Make sure that the gasket is placed on both brackets. Suspension brackets screwed on the unit as shown on both ends of the unit. Use 8 pcs M5 x 16mm, supplied with the unit.
- Page 60 The unit can also be placed on a wall. You then need the use of a separate wall bracket. This does not follow the unit and has to be ordered separate. (Ensy Art no: 01008045-2) To avoid vibration from the unit towards building constructions it here is important that there are placed 5 mm vibration damper on the back of the unit.
- Page 61 393930-2 Rev 0: 01.04.2020 13.2.3 Placement under concrete ceiling If the unit is to be mounted directly into concrete ceiling where there may be uneven or not level than it may be easiest to use expansion bolts fastened into the ceiling. That way, you can adjust with the nuts so that the unit is in level.
- Page 62 393930-2 Rev 0: 01.04.2020 13.2.4 Mounting of cooker hood If kitchen exhaust hood is to be used together with the unit If kitchen exhaust hood is to be connected into the top of the unit, you must remove the end cap in the top that is marked “COOKER HOOD”...
- Page 63 393930-2 Rev 0: 01.04.2020 13.2.5 Duct cover If you want to use a duct cover to hide the pipes you will need the distance of 296 mm from the roof and down to the top of unit. The duct cover has to be ordered separately from supplier. (Art: 0100107-2) DUCT COVER AHU-200 V/H_KV/KH, WHITE COATED (ACCESSORIES) (Art: 0100207-2) DUCT COVER AHU-300 BV/BH, WHITE COATED (ACCESSORIES) (Art: 0100307-2) DUCT COVER AHU-400 BV/BH, WHITE COATED (ACCESSORIES)
- Page 64 AHU 300H 972/1066** AHU 350B AHU 400B AHU 400H 1162/1240** AHU 700B 1004 *Dimensions with and without cooker hood **Dimensions with and without mounting brackets ***More dimensions can be found on each unit on www.ensy.no 64 | P a g e...
- Page 65 393930-2 Rev 0: 01.04.2020 13.2.7 Technical Data AHU 350/400 AHU 700 AHU200/300 AHU200 AHU 300 AHU 400 BH/BV BH/BV H/V/BH/BV KH/KV HH/HV HH/HV Power outlet 1 / 230 1 / 230 1 / 230 1 / 230 1 / 230 1 / 230 phase/voltage (50Hz/VAC)
- Page 66 393930-2 Rev 0: 01.04.2020 Demand controlled ventilation - adequate air quality Control panel: Motion Detector: Humidity sensor: Air handling units should be located in suitable rooms in Control panel placed at a When installed in a living Humidity sensor for central residence (utility / suitable place near the unit room, this will give the...
- Page 67 393930-2 Rev 0: 01.04.2020 13.3. Connections 13.3.1 Connections of sensors / external functions Plugs for connecting external sensors you find in the accessories bag supplied with the unit. 13.3.2 Duct connections The unit is mounted preferably in for example laundry room, storage room, utility room, etc. Air duct from cooker hood can be connected to separate "bypass channel"...
- Page 68 393930-2 Rev 0: 01.04.2020 13.3.3 Sound reduction To avoid disturbing noise from blowers in living area installation of sound-absorber (silencer) in the duct for supply and extract air recommended. (Length = 0.9 meters each section) To prevent sound transmission between rooms via the duct system, and reduce any noise that occurs in the duct system, is also is recommended a silencer in front of each supply diffuser in the living area.
-
Page 69: Warranty
Warranty Warranty: Ensy AHU unit has a warranty period according to the European directive 1999/44 CE, from the date of sale. For the warranty to be valid, the following documents received with the unit must be retained: - Warranty and User manual for Ensy® AHU-unit - Service reports, you can download from: http://ensy.no/en/service-and-... -
Page 70: Table Of Contents
393930-2 Rev 0: 01.04.2020 Content 1. Read this first……………………………………………………………………………………………..pag. 3 2. Functions of the Air Handling Unit Controller……………………………………………pag. 4 3. Menu system……………………………………………………………………………………………..pag. 6 4. User settings menu…………………………………………………………………………………..pag. 8 5. Factory menu……………………………………………………………………………………………pag. 28 6. Drawings………………………………………………………………………………………………….pag. 32 7. Network (Wi-Fi connection)…………………………………………………………………….pag. 32 8. -
Page 71: Notes
393930-2 Rev 0: 01.04.2020 Notes: ____________________________________________________________________________________ ____________________________________________________________________________________ ____________________________________________________________________________________ ____________________________________________________________________________________ ____________________________________________________________________________________ ____________________________________________________________________________________ ____________________________________________________________________________________ ____________________________________________________________________________________ ____________________________________________________________________________________ ____________________________________________________________________________________ ____________________________________________________________________________________ ____________________________________________________________________________________ ____________________________________________________________________________________ ____________________________________________________________________________________ ____________________________________________________________________________________ ____________________________________________________________________________________ 71 | P a g e... - Page 72 393930-2 Rev 0: 01.04.2020 Ensy AS Mohagasvingen 1 http://www.ensy.no N-2770 JAREN 72 | P a g e...
Need help?
Do you have a question about the InoVent AHU-200 Series and is the answer not in the manual?
Questions and answers