Advertisement
Quick Links
Advertisement

Related Manuals for Ensy AHU-400 BV


Summary of Contents for Ensy AHU-400 BV
- Page 1 User manual and Installation Guide AHU-400 BV AHU-400 BH...
- Page 2 Left latch Right latch To close, after putting the hatch back on place, turn the latches the opposite way. You may use some pressure towards the hatch to close it. Be careful that the door can "be stuck" in the sealing on the hatch. For easier loosening of the hatch, release it first in one corner at the top. To operate this product people should have necessary skills, or under the supervision of a qualified person. Children should be told to not play with the appliance. When you lift off the front hatch from the device, make sure the spiral cable that connects the device and the front hatch is not overstretching for a long period. This can damage the cable During commisioning of the appliance, when installed, the spiral cable has to connected in order to have access the control panel in front of the hatch. When servicing and cleaning, this spiral cable should be disconnected. Make sure that the spiral cable is disconnected and connected without the use of force. This to prevent contacts on cable to be damaged. If the spiral cable is out of position, then you will get an alarm called "Low voltage". To get the signal back into the display you must unplug and plug back in both hatch and ventilation unit. Note! If the spiral cable is broken, you have to order new original cable from supplier. Standard cable from store would not work. New spiral cable has art.no: 330541‐2 from supplier. Page 1 We reserve the right to change technical data without notice. http://www.ensy.no ...
- Page 3 If any electrical components are damaged, they must be replaced by the manufacturer, dealer or a qualified person in order to avoid dangerous situations.. Adjustment of the unit. A humidity sensor is, from factory, mounted inside the unit. It is set to “0” that means it is set to not active. After startup, where the unit is placed into a new building with high humidity, you can let this humidity sensor be turned off for a period to avoid the full speed of the fan at night. To get the humidity sensor to operate as intended, you need at one time to put it active. Than you need to set the switch in position "1". If the ventilation unit is placed in a house without high humidity, you should switch to position "1" after you putting ventilation unit into operation. This switch will also affect any extra external humidity sensor that is plugged into the device. Adjusting the humidity sensor. If it is necessary to adjust the sensitivity of the humidity sensor then you must, on older models, remove the cover, which is over the control board where this adjustment is located. Unplug the supply before removing the cover. On newer models, you just can remove the black plug and you then can see the adjusting knob and the RH% scale. Pictures shows AHU‐400‐BV Page 2 We reserve the right to change technical data without notice. http://www.ensy.no ...
- Page 4 393805‐2 Rev 0: 05.05.2017. KJK The sensor is set to 80% RH from factory. If you do adjustments, this only affect the sensor integated inside the unit. The sensitivity for the integrated sensor you can adjusted from 50% (low) to 90% (high) in accordance to what are the needs. The arrow points the value chosen. If you have a second external sensor that means you need to adjust that one from its settings. Replace the cover and / or plug after finish adjusting. Replacing the filter. The filters should be replaced every 6. 9. or 12. months. Should be extracted without use of any tools.. Remember to enter the control panel menu (4.3 Filter) and press Filter OK after the filters has been replaced. To guarantee optimal properties of the ventilation unit, use the original filters from EnSy. The use of spurious filters will limit the warranty on the product. Ensy art number for filter set is: 011460862‐2 SET FILTRE ENSY AHU 350 BV/BH + 400 _BL/BR_BV/BH. F7: 165x370x94 Page 3 We reserve the right to change technical data without notice. http://www.ensy.no ...
- Page 5 393805‐2 Rev 0: 05.05.2017. KJK Cleaning the fans. AHU‐400 BV A qualified person must do this. Disconnect the 3‐pole and 5‐pole plugs. Before you can pull out the fans, you have to remove the brackets that holds the fans in correct position. Important that these brackets is placed back after cleaning. Clean with mild soap and water. AHU‐400 BH A qualified person must do this. Disconnect the 3‐pole and 5‐ pole plugs. The supply air fan can be pulled out of the ventilation unit without the need for any tools. Before you can pull out the extraxt air fan, you have to remove the bracket that holds the fan in correct position. Important that this bracket is placed back after cleaning Clean with mild soap and water Page 4 We reserve the right to change technical data without notice. http://www.ensy.no ...
- Page 6 Rotor exchanger can easily be removed for cleaning by dissolving the 14 screws that hold it together. Clean parts with mild soap and water. Do not expose the rotor motor or connector for moisture. The exchanger you also can clean with mild soap and water. Do not use ammonia‐containing detergent, as this will prey on and discolor aluminum in rotary heat exchanger. Flushed with hand shower and blow gently clean with compressed air. Ensure that the screws are tightened sufficiently so that they do not come loose during operation. Preferably use a screwdriver to tight the screws. If use of electrical screwdriver, make sure that you use low torque to prevent destroying the springs in the sheet metal parts. To make sure that the drive belt can adjust itself into correct position you must rotate the exchanger some few turns. Then insert back into the ventilation unit. Be sure that rotor exchanger is properly inserted in all the guides inside the unit. If not, this can lead to vibration in the system and internal air leak in the unit. Page 5 We reserve the right to change technical data without notice. http://www.ensy.no ...
- Page 7 The main screen consists of, from top, left: Time Indication, hour, minute Co2 over the fan symbol" indicates that the carbon sensor is activated. Timer, Weekly schedule (if programmed) Reheating coil (if connected) "Exclamation point" indicates that moisture recorded over the sensor Temperature readings, Outdoor / Indoor is higher than the set value. May also indicate that the motion Status airflow – fan speed setting sensor is activated if connected on OFF MIN NORM or MAX D2 signal output. Temperature set point, 15 ‐ 21 °C This symbol indicates that the rotary heat exchanger is activated Reheating coil – (here refers active element) and will be rotated Rotary exchanger Indicator ‐ (here refers active rotary wheel) Page 6 We reserve the right to change technical data without notice. http://www.ensy.no ...
- Page 8 2. Temperature 1.1 Fan boost Choose from pre‐programmed temperature settings set point between 15 ‐ 21 °C. Setting Forced ventilation, fan speed increases to max is changed by operating the switch buttons speed. (Means to the speed that is set in below ‐ / + symbols. menu 4.5.1.3.) The function is for use if high humidity in bathrooms and laundry room. Forced ventilation can be activated with button then Interval adjustable from 10 ‐ 240 min with + and ‐ Indicator for activated heating coil. Small picture show not activated. Heating element can here be set ON or OFF by operating the switch button 4 in this screen, but only if heater is connected. This picture shows 10 min forcing time, but (To see if heating coil is connected or not activated. disconnected, see 4.5.1.1 Heater) To activate the fan boost use control button 4. Page 7 We reserve the right to change technical data without notice. http://www.ensy.no ...
- Page 9 3. Information / 3.1.Alarms been chosen. When alarm you can find a source of error here, as well as info on how the alarm is reset. (See pages 28 and 29 in this manual) (See 4.5.1.9 if you want to change mode.) 4. Preferences 3. Information / 3.2 Program version To navigate within the various sub‐menus when using the control buttons below the up / Information about the software version. This information must be provided to down cursor key that displays on the display. service personnel at the failure of the unit. 4. Preferences / 4.1 Time/date Which display is defined as Display 1 or Setting menu for Time/date. This setting is Display 2 appears here if the plant has important since the information forming the mounted two displays. basis for the weekly schedule function if this is to be activated. Also for the filter alarm See 4.5.1.10 selection of the displays. function it is needed. Page 8 We reserve the right to change technical data without notice. http://www.ensy.no ...
- Page 10 Monday ‐ a period of time, select the start time. To activate the period, X ‐ over period number is removed, use the ‐ / + keys. Use enter to move between the different fields. You can also adjust how long it should be light in the display after the operation. 4. Preferences / 4.5 Setup To proceed, use PIN code 1000 Choose airflow (fan speed) Speed dialing ‐ MIN when one fan blade on the indicator is black. NORM = two black fan blades on the indicator. MAX speed = three black fan blades on the indicator. Select the desired supply air temperature you want during the period. Settings between 15 ‐ Press once till it shows 1000 in 21°C. display. Then press 4 times on If weekly schedule looks something like this without any reason then you must punch in all the data again. It do not help to update software. Then press button 3 for OK.. Page 9 We reserve the right to change technical data without notice. http://www.ensy.no ...
- Page 11 Here you preprogrammed wanted ppm value and the boost speed for the fans. Note: To get balanced ventilation is a prerequisite that Supply and Extract air fan 4.5.1.2 Cooling recovery has the same value as the MAX value under 4.5.1.3 Activation of the cooling recovery: It is pre‐programmed two options for use 4.5.1.5 Cooker hood when the outside temperature is higher than the indoor temperature, heat recovery system Menu for programming of fan speeds by will activate the function start and supply air activation of the kitchen hood. KV connector will be cooled by exhaust air. Engagement on the top of the unit (see page 23 in this when the outdoor temperature is 2 °C or 3 °C manual) should always get signal from the higher than room temperature. Use button 4 kitchen hood when this is activated. This to to change setting for Off. Press + to activate prevent rotor alarm. (On). Use button 4 to change setting for 2°C. Press + to change to to 3°C, if wanted. Page 10 We reserve the right to change technical data without notice. http://www.ensy.no ...
- Page 12 Then adjust so that supply air delivers more air than extract air fan. In this case you must 4.5.1.8 Calibration use a switch and not impulse switch. Menu reading of embedded temperature 4.5.1.6 Extern alarm sensors. If the unit has been connected to an external humidity sensor or motion sensor. Use the D2 connector on top of the unit. (See page 23 in this manual). Note! In order for this feature to work, you need the one‐pole switch marked RH% ON / OFF inside the unit to be set in position 1. (See page 2 of this manual for the location of this switch). These temperature sensors are delivered calibrated from the Supply and Extract air should have the same manufacturer and should not be attempted value as the MAX value under 4.5.1.3 (Set to change in here. 100% from factory.) The «Outside air» sensor normally shows 3‐6°C highter temperaature then the reel outside temperature. This is due to heating of the air in the duct network from the intake grille to the intake of the unit where the sensor are placed Page 11 We reserve the right to change technical data without notice. http://www.ensy.no ...
- Page 13 The unit is set in mode OFF from factory. If it is needed to change the defrost mode to another mode then press button 4 and scroll down to Configuration Modus 3: at high humidity. with button 3. Defrosting function start at ‐10°C. The function when defrosting starts is that Press enter button and follow procedure each hour the supply air fan stops for 6 as in Menu 4.5 Setup to continue. minutes. The heater EV turns off. Extract air fan reduces speed to 30% and the rotary exchanger will run as normal. To avoid that the rotary exchanger will stop when the cycle goes back to normal function, the supply air fan will start up the last minute of the defrosting mode cycle. (Supply air fan reacts delayed relative to the Press enter button control signals and rotary exchanger so that the heater will not engage until the speed of Defrost mode OFF from factory. the supply air fan has passed 250 r/min, in normal operation). Page 12 We reserve the right to change technical data without notice. http://www.ensy.no ...
- Page 14 393805‐2 Rev 0: 05.05.2017. KJK 4.5.1.10 Display number If two control panels should be used, then from this menu it has to be specified that one of the control panels is «Display 1» and the other one is «Display 2». This to avoid delay in the signals between the control panels and main control board inside the unit. It does not matter which of the control panels that are called Display 1 or Display 2. Page 13 We reserve the right to change technical data without notice. http://www.ensy.no ...
-
Page 15: Table Of Contents
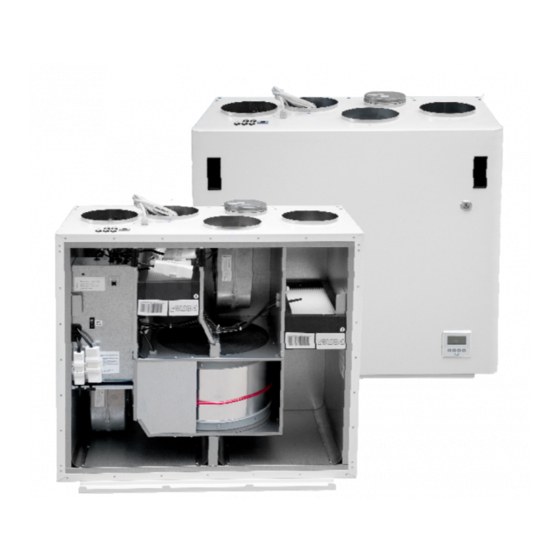
2.1 Brackets and gaskets to avoid vibration 2.2 Stopper brackets 2.3 Mounting of cooker hood 2.4 Duct cover 2.5 Dimensions and technical data 3. Connections 3.1 Electrical connections 3.2 Duct connections 4. Setting the airflow 5. Alarms 1. General This guide is made to provide installation and user instructions regarding the correct installation of AHU 400‐BV and BH. AHU‐400 BV and BH is designed for heat recovery with air volumes of up to 400 m³ / h. The energy from the exhaust air is transferred to supply air through the rotary heat exchanger where the air streams pass each other without making contact. The unit has a built in‐heater for supplementary heating of supply air. Humidity sensor for forced ventilation is integrated into ventilation unit. Control panel is integrated into the front hatch. Option for a second control panel to be connected is made outside the unit. The unit can also connect additional equipment cooker hood over the stove, pulse switch for controlling the forced ventilation, for example, wet rooms or bathrooms, sensor for carbon management and switch management away / home function. Control of these options are integrated into AHU‐400 BV and BH. AHU 400‐BV and BH is supplied in painted finish, tested and ready for operation. Installation, commissioning and tuning must be performed by authorized personnel. 2. Mounting Together with the unit is delivered the following equipment: 1. Suspension bracket and stoppers 2. Wall Bracket with vibration dampening gasket 3. Self‐adhesive vibration damping 4. Accessories bag containing the necessary screws 5. 5 pcs. plugs for connecting additional equipment. 6. Key for opening the front hatch. Page 14 We reserve the right to change technical data without notice. http://www.ensy.no ... - Page 16 (Sketch over show AHU‐400 BV) Cooker Exhaust Supply air to Extract air Fresh air hood air room from room from outside (Sketch over show AHU‐400 BH) Page 15 We reserve the right to change technical data without notice. http://www.ensy.no ...
- Page 17 393805‐2 Rev 0: 05.05.2017. KJK The unit can also be placed on the floor. It is then important that there are placed at least 50 mm insulation under the unit to prevent vibration to the building. If ventilation unit will be placed as the sketch shows it must not be covered so that service is prevented. If placed at the attic make sure that there are at least 500 mm clearance over the front hatch so there will be room for service. 2.1 Brackets and vibration gasket Suspension bracket screwed on top of the unit as shown. Use 8 pcs M5 x 16mm, supplied with the unit (Sketch over show AHU‐400 BV) Make sure that the edge protection gasket is placed on the wall bracket. Page 16 We reserve the right to change technical data without notice. http://www.ensy.no ...
-
Page 18: Stopper Brackets
393805‐2 Rev 0: 05.05.2017. KJK To get the unit in right position use the following brackets and screws. In order to relief the hanger bracket on the top it is important however also to mount the bracket to be under the unit. Ensure that the screws hit the beams behind the wall if the unit is to be hung on a light wall. Use 6 pcs wood screws 5 x 40mm, supplied with the unit, for each bracketMonter veggfestet med vibrasjonspakning. Påse at vibrasjonspakningen er intakt. Mount the wall bracket with vibration gasket. Be sure that the vibration gasket is intact Glue vibration gasket to the back of the unit, see illustration. Approx. 60mm from the bottom of the unit. 2.2 Stopper brackets To prevent the unit to be lifted out of the brackets should be installed two stoppers. Use two pcs of wood screws 5 x 40mm, supplied with the unit, for each bracket. In order not to transmit vibration, it is glued vibration material on these brackets Page 17 We reserve the right to change technical data without notice. http://www.ensy.no ... -
Page 19: Mounting Of Cooker Hood
393805‐2 Rev 0: 05.05.2017. KJK 2.3 Mounting of cooker hood If kitchen exhaust hood is to be used together with the unit If kitchen exhaust hood is to be connected into the top of the unit, you must remove the end cap in the top that is marked “COOKER HOOD” (Sketch shows AHU‐400 BV) (Sketch shows AHU‐400 BH) Page 18 We reserve the right to change technical data without notice. http://www.ensy.no ... -
Page 20: Duct Cover
393805‐2 Rev 0: 05.05.2017. KJK 2.4 Duct cover If you want to use a duct cover to hide the pipings you will need the distance 296 mm from the roof and down to the top of unit. The duct cover has to be ordered separately from supplier. (Art: 0100307‐2) The instruction how to mount this duct cover you will find together with the duct cover. Page 19 We reserve the right to change technical data without notice. http://www.ensy.no ... - Page 21 393805‐2 Rev 0: 05.05.2017. KJK 2.5 Dimensions (Sketch shows AHU‐400 BV) (Sketch shows AHU‐400 BH) All ducts are Ø160 mm except the one for the cooker hood. That one is Ø125 mm. Page 20 We reserve the right to change technical data without notice. http://www.ensy.no ...
- Page 22 Electric heating coil. High efficiency and low noise EC fans. Adjustable 30 to 100 % speed. Adjustable supply air temperature between 15 and 21°C. Acoustic and thermal‐insulated housing. Integrated control system with "Touch Panel" for the control of the unit supplied as standard. The unit is designed for optional connection of a cooker hood in top of the unit. In top of the unit there is: (Look at page 23) Junction point of contact for connection for an extra control panel. Junction point of contact for cooker hood. (KV) Junction point of contact for Co² sensor. (CO ²) Junction point of contact for puls switch. (D1) Junction point of contact for an external humidity sensor or motion detector. (D2) Junction point of contact for connection for home / away function. (D3) ACCESSORIES: Extra control panel, desire more control points. Including 10meters signal cable (Art. no: 0100051‐2) Duct Cover for the encapsulation piping in the top. (Art. no: 0100307‐2) Wireless puls switch. (Art. no: 0100052‐2) COOKER HOOD. WHITE SLIM with LED Downlights (Art.no: 0101405‐2) COOKER HOOD. Stainless steel SLIM with LED Downlights (Art.no: 0102405‐2) Page 21 We reserve the right to change technical data without notice. http://www.ensy.no ...
- Page 23 The unit is designed Stove / Fireplace / Bathroom CO² sensor: for connection of Wireless control panel / pulse switch can Can be installed in the external kitchen be used to increase supply by use of a living room and will give hood. stove. signal to the unit if the This is an alternative pollution level in the Mounted in a suitable location in relation solution if problems room is too hight. to the unit. Can also be placed near the with piping from bathroom for easy operation by forced cooker hood through ventilation (max airflow) the outer wall. Page 22 We reserve the right to change technical data without notice. http://www.ensy.no ...
-
Page 24: Connections
AHU‐400 BV and BH is supplied with approximately 1.7 m cable and plug for 10A / 230V outlet. Extra control panel: The control panel comes complete with signal cable, length 10m. The signal cable to the control panel must have at least 10 cm distance to high voltage cables The control panel is put into a box and can be attached directly to the wall. Make a suitable hole for the wire in the recess for wire in the box. The control panel can also where concealed wiring be attached to standard wall box where the fastening screws in the wall box have 60 mm cc. In order to dismantle the "touchpad" disc and display this can easily be done by using a knife with thin blade gently inserted between the jacket and the front plate. Then flip the knife down so that the frame loosens. When installing this extra control panel, remember to define it as Display 2. Look at page 13 in this manual. Connections of sensors / external functions See the following wiring diagram for details Sketch shows AHU‐400 BH) (Sketch shows AHU‐400 BV) Plugs for connecting external sensors you find in the accessories bag supplied with the unit. Page 23 We reserve the right to change technical data without notice. http://www.ensy.no ... -
Page 25: Duct Connections
The choice of placement must be taken into account that the unit requires periodic maintenance. Be sure that it is possible to open / remove the unit inspection hatch, and that there is sufficient room to remove the main components. If the unit is mounted on the lightweight wall construction to the living room, for example bedroom / living room, recommended wall insulated / constructed so that the risk of sound transmission avoided. Fresh air intake is to be placed primarily on the building's north and east and at a good distance from the exhaust openings for ventilation, central vacuum, Hoods and Vents, sewer vent, chimney or other contaminated source such as dust / exhaust from traffic etc. The return of the exhaust air should always be in good distance from fresh air intakes, close windows, etc Sketch for piping when mounting the cooker hood to the top of the unit. 1. Supply air bedroom 2. Supply air living area 3. Extract kitchen 4. Extract bathroom / utility room 5. Ventilation unit 6. Roof cowl/ exhaust air 7. Fresh air / outdoor air inlet 8. Cooker hood Instead of separat roof cowl for exhaust air and wall grid for fresh air there also can be used combi grids with inlet and outlet air are in the same box. Air to and from the unit will be led through the ducts. Best durability and capabilities for cleaning will be achieved by using ducts in galvanized steel. Short customizations (à 1 m length) with a flexible aluminum ‐ ducts can be used for piping between the unit and roof cowl / wall grid. In order to achieve effective, low energy consumption and proper airflow, the duct system designed with low air speeds and low pressure drop. Page 24 We reserve the right to change technical data without notice. http://www.ensy.no ... - Page 26 393805‐2 Rev 0: 05.05.2017. KJK Note! If the cooker hood is not connected, the end cap must not be remove. Tumble dryer must not be connected to the ventilation unit, but have its own duct to the open air. Duct should be kept covered during storage and installation. Location of the exhaust grid / roof cowl must also meet current building conditions, as well as any requirements of local building authorities. All inlet and outlet of the unit must be connected to the piping. Pairing of duct sections. All joints between ducts, T‐pipes, bends, reducers, etc. have to be “locked" by using special tape or at least 3 pieces of self‐tapping screws. Sound reduction To avoid disturbing noise from blowers in living area installation of sound‐absorber (silencer) in the duct for supply and extract air recommended. (length = 0.9 meters each section) To prevent sound transmission between rooms via the duct system, and reduce any noise that occurs in the duct system, is also is recommended a silencer in front of each supply diffuser in the living area. Flexible ducts. Flexible ducts can be used for adjustments between the unit and roof cowl / fresh air inlet. Alternatively, the flexible silencers used (remember requirements for outdoor sound level). Page 25 We reserve the right to change technical data without notice. http://www.ensy.no ...
- Page 27 393805‐2 Rev 0: 05.05.2017. KJK Condensation/isolation Isolation is necessary to safeguard thermal‐, sonic‐ and fire considerations at the plant. Most often it is a combination of these are due to isolate. Reasons for thermal insulation of ventilation ducts are: obtain good heat economy by limiting heat loss achieve a specific outlet temperature of the ventilation air. preventing condensation on either the inside or outside of the duct. Heating costs reduced by preventing the heat supplied in ventilation air can be transferred to unheated surroundings. If the ducts are positioned in a cold environment, such as in an attic, where the temperature is significantly lower than the ventilation air, there is a risk of condensation inside the ducts. This can be prevented by isolating the channel exterior. In this case, the channel wall being diffusion and would therefore insulate externally with a diffusion material of mineral wool. It can also be used insulation tubes (100 mm mineral wool) with plastic diffusion barrier pulled over the ducts. The same applies to insulation of pipings between the unit and diffusors, bringing the cooled air up to the rooms. Note! Remember good overlap of diffusion barrier and tape all joints with duct tape. Fresh air and exhaust duct should always be condensation insulated throughout its length. Proper performance of the unit connection is especially important. Similarly, isolate all other ducts for cold and uninsulated room. Page 26 We reserve the right to change technical data without notice. http://www.ensy.no ...
-
Page 28: Setting The Airflow
Note: Although the cooker hood connected to the unit it also must be mounted separate exhaust . louver in the kitchen The AHU 300 cooker hood outlet is led directly to the exhaust fan without the smell and pollutants carried through the heat exchanger. In order to achieve heat recovery from ventilation due to exhaust louver in the kitchen, therefore, this exhaust louver has to be connected together with the exhaust from the wet cells Cooker hood must be equipped with dampers which are dense in the closed position (without opening for the basic ventilation). If there are any «leakage» in the extract pipe from the cooker hood when the cooker hood isn’t activated then there will be a “Rotor fault” alarm. It is very important that there are a signal from cooker hood connected towards the KV plug outside the unit to avoid this “Rotor fault” alarm. Exhaust air louvers can be mounted in the ceiling or wall. Supply air diffuser can be mounted in the ceiling or "low wall". In "low wall" must sectorial aperture positioned so that supply airstream carried upwards along the sloping ceiling. Supply in the wall at the horizontal ceiling must have “throwing direction", so that air enters the room along the ceiling. Air supply via the outlet valve allows air jet throw length, and the exhaust air diffusers can therefore be used as supply air diffuser in the wall when there is ridge ceiling. The diffusers should be mounted in frames, so that they can be easily removed for cleaning. 4 Setting the airflow. As default setting may supply air diffusers core is opened from 5 to 7 turns from the closed position and locked with a centre nut. Exhaust louvers core is opened 10 turns from the closed position and locked with a centre nut. For adjustment of air flow to each room the settings for the diffusers must be measured. Balancing scheme (diagram) intended by design, or alternatively by balancing acc. flow measurements with equipment specifically designed for this. Supply air diffusor Exhaust louver Page 27 We reserve the right to change technical data without notice. http://www.ensy.no ... -
Page 29: Alarms
393805‐2 Rev 0: 05.05.2017. KJK 5. Alarms Alarms on Ensy AHU units Critical alarms. Red flashing lights in the control panel Description of what Alarm Possible causes Reset of alarm will happend Motor protection EV and RO is Supply Absence of signal from turnined off. Fan turns «OFF» and then back the fan TV and AV turns off to «NORM» Motor protection... - Page 30 Reprogram then to version 033 or newer/highter if it is posted on Ensy.no. 3. If the light is blinking faster than once per second than do the same procedure here as above in section.
- Page 31 ____________________________________________________________________________________ ____________________________________________________________________________________ ____________________________________________________________________________________ ____________________________________________________________________________________ ____________________________________________________________________________________ ____________________________________________________________________________________ ____________________________________________________________________________________ ____________________________________________________________________________________ ____________________________________________________________________________________ ____________________________________________________________________________________ ____________________________________________________________________________________ ____________________________________________________________________________________ ____________________________________________________________________________________ Page 30 We reserve the right to change technical data without notice. http://www.ensy.no ...
- Page 32 Ensy AS Mohagasvingen 1 N‐2770 JAREN http://www.ensy.no Page 31 We reserve the right to change technical data without notice. http://www.ensy.no ...
Need help?
Do you have a question about the AHU-400 BV and is the answer not in the manual?
Questions and answers