Table of Contents
Advertisement
Advertisement
Table of Contents

Subscribe to Our Youtube Channel
Related Manuals for FLIR A70 Series


Summary of Contents for FLIR A70 Series
- Page 1 User’s manual FLIR A50/A70 series nbn Austria GmbH...
- Page 2 Important note Before operating the device, you must read, understand, and follow all instructions, warnings, cautions, and legal disclaimers. Důležitá poznámka Před použitím zařízení si přečtěte veškeré pokyny, upozornění, varování a vyvázání se ze záruky, ujistěte se, že jim rozumíte, a řiďte se jimi.
-
Page 3: Table Of Contents
Table of contents Disclaimers ..................1 Legal disclaimer ............... 1 U.S. Government Regulations............1 Patents ................... 1 Quality assurance ..............1 Third-party licenses..............1 Usage statistics ................ 1 Copyright ................1 Safety information ................2 Notice to user ...................4 Register your camera..............4 Calibration................ - Page 4 11.3 RS232/RS485 connector............40 A-series connection board..............41 12.1 Connection examples .............. 43 Software supported byFLIR A50/A70 series cameras......49 Mechanical drawings ............... 50 EU Declaration of conformity ............52 Indicator LEDs and factory reset button ..........54 16.1 Power/error indicator LED and factory reset button ......54 16.2...
-
Page 5: Disclaimers
1.7 Copyright © 2021 FLIR Systems, Inc. All rights reserved worldwide. No parts of the software in- cluding source code may be reproduced, transmitted, transcribed or translated into any language or computer language in any form or by any means, electronic, magnetic, opti- cal, manual or otherwise, without the prior written permission of FLIR Systems. -
Page 6: Safety Information
WARNING Applicability: Digital devices subject to 15.21. NOTICE: Changes or modifications made to this equipment not expressly approved by FLIR Systems may void the FCC authorization to operate this equipment. WARNING Applicability: Digital devices subject to 2.1091/2.1093/KDB 447498/RSS-102. - Page 7 Safety information CAUTION Do not use too much force when you clean the infrared lens. Damage to the infrared lens or to the anti- reflective coating of the lens can occur. For cleaning, refer to 17 Cleaning the camera. CAUTION Applicability: Cameras where you can remove the lens and expose the infrared detector.
-
Page 8: Notice To User
To register the camera, go to www.flir.com/register. To access the registration form, you must log in to your FLIR account or sign up for a new account. You will also need the serial number of your camera, which is available on the calibration certificate. -
Page 9: Documentation Updates
3.7 Important note about this manual FLIR Systems issues generic manuals that cover several cameras within a model line. This means that this manual may contain descriptions and explanations that do not apply to your particular camera model. -
Page 10: Customer Help
• The communication protocol, or method, between the camera and your device (e.g., SD card reader, HDMI, Ethernet, USB, or FireWire). • Device type (PC/Mac/iPhone/iPad/Android device, etc.). • Version of any programs from FLIR Systems. • Full name, publication number, and revision number of the manual. 4.3 Downloads... -
Page 11: Introduction
Introduction The Smart Sensor and Image Streaming cameras of the FLIR A50/A70 series offer un- matched power and flexibility to tailor effective thermal monitoring that improves quality, productivity, maintenance, and safety. • The Smart Sensor cameras analyze the images and then deliver a result to the user. -
Page 12: Example System Overviews
5.1.1 Early fire detection Figure 5.1 Hot spot detection, self-combustible material on conveyor belt 1. Coal mine conveyor belt. 2. FLIR A50/A70 Smart Sensor camera. 3. Ethernet connector, X-coded. 4. Power I/O connector, A-coded. 5. Digital output to a programmable logic controller (PLC). -
Page 13: Quality Assurance
2. CAT-6 Ethernet cables. 3. Industrial Power over Ethernet (PoE) switches with fiber-optic posts. 4. Fiber-optic cable. 5. FLIR A50/A70 Image Streaming cameras. 6. Industrial process to be monitored, e.g. items on a conveyor belt. 7. Example of thermal image. -
Page 14: Condition Monitoring
1. Computer running custom-made software. 2. CAT 6 Ethernet cable. 3. Industrial power over Ethernet (PoE) switch. 4. FLIR A50/A70 Image Streaming cameras. 5. Industrial process to be monitored, e.g., a gasifier. 6. Example thermal image. #T810579; r. AB/78918/78918; en-US... -
Page 15: Research & Development
Figure 5.4 Checking heat dissipation on PCB during development 1. Computer running FLIR science software, e.g., FLIR Research Studio. 2. CAT 6 Ethernet cable. 3. Laboratory setup with a FLIR A50/A70 Advanced Image Streaming camera. 4. Example thermal image. #T810579; r. AB/78918/78918; en-US... -
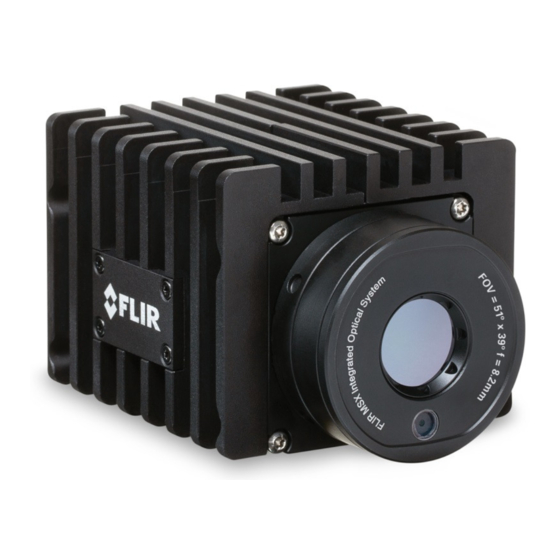
Page 16: Camera Parts
Camera parts Figure 6.1 View from the rear Figure 6.2 View from the front 1. Power/error indicator LED (blue/red). For details, see section 16 Indicator LEDs and factory reset button, page 54. 2. Ethernet communication indicator LED (green). 3. Antenna. 4. -
Page 17: Camera Installation
Connect the PoE cable to the camera, and then to a PoE switch on the same net- work as the computer. 3. The camera is set to use DHCP. On the computer, use FLIR IP Config to identify the camera on the network, and change the IP settings if necessary. -
Page 18: Mechanical Installation
It is recommended to not let the internal temperature exceed 70°C (158°F) for a longer period of time. The temperature sensors are available in the camera web interface or accessible by Software Development Kits (SDK). For further information regarding mounting recommendations, contact FLIR Systems. #T810579; r. AB/78918/78918; en-US... -
Page 19: Rtsp Streams
RTSP Streams It is possible to establish streaming sessions with the Smart Sensor, the Advanced Smart Sensor, and the Advanced Image Streaming cameras of the FLIR A50/A70 series. The following URLs can be used: • rtsp://<IP>/avc/ • rtsp://<IP>/mpeg4/ • rtsp://<IP>/mjpg/ •... -
Page 20: Camera Web Interface
Type the IP address of your camera into the address bar of a web browser. This displays the login view. 2. When logging in for the first time, log in with the username admin and the default ad- ministrator password provided by FLIR (available on the camera calibration certificate). Note •... -
Page 21: Camera Tab
Note Available functionality depends on the type of your FLIR camera; Image Stream- ing camera or Smart Sensor camera. 10.4.1 Working with measurement tools To measure a temperature, you can use one or more measurement tools, e.g., a spot, a... - Page 22 Camera web interface 10.4.1.2 Box A box measurement tool can show the minimum temperature, the maximum temperature, and the average temperature within a selected area of the image. It is possible to have up to ten boxes and masks at the same time. To add a box measurement tool, follow this procedure: 1.
- Page 23 Camera web interface 3. To configure Settings for the tool, click next to the tool in the Active measure- ments section. This displays the Settings dialog box. 3.1. To change the label of the tool, change the Mask name. 3.2. To select what measurement results to display, use the Maximum, Minimum, and Average check boxes.
-
Page 24: Working With Alarms
Camera web interface 2. In the image, click to insert the starting point of the polyline. Move the pointer and click to insert the next point. Continue until you have the desired shape. Finish by clicking Confirm. The tool is labeled with a number, and it is also displayed in the Ac- tive measurements section. - Page 25 Camera web interface When an alarm is triggered, the camera can perform one or more tasks, e.g. save an im- age or video sequence to camera memory, or send the image/video by e-mail to prede- fined recipients or to an FTP site. The camera can also further trigger a variety of external devices, using the digital output.
- Page 26 Camera web interface 10.4.2.2 Setting an alarm based on the digital input To configure an alarm based on the digital input, follow this procedure: 1. In the Active Measurements section, click the plus sign under Add alarm next to the digital input result to be used for the alarm.
-
Page 27: Changing Object Parameters
Camera web interface 5. In the Action section, select which actions the camera will perform when an alarm is triggered: Digital OUT Outputs a digital pulse. Also, type a pulse length (in millisec- onds) in the Pulse time box. E-mail Automatically sends the captured Image, Result, or Video to the recipients defined in Settings >... -
Page 28: Working With Image Modes
2. Change the parameter to the desired value, and then press Enter or click anywhere on the screen. 3. To reset the global parameters to the default values provided by FLIR, click Reset. 10.4.3.2 Local parameters The local parameter settings override the global values. To change the local parameters, follow this procedure: 1. -
Page 29: Colorizing The Image
Camera web interface • Visual: The camera displays the visual image captured by the visual camera. • FSX (Flexible Scene Enhancement): The camera displays the thermal image with en- hanced image details. This image mode is useful when higher contrast is required, for example when the camera is used in a surveillance application. - Page 30 Camera web interface • Below Applies a contrasting color (blue) to all pixels with a temperature below the specified temperature level. • Interval Applies a contrasting color (yellow) to all pixels with a temperature between two speci- fied temperature levels. To configure an isotherm, follow this procedure: 1.
-
Page 31: Auto-Adjust Region
Camera web interface 10.4.6 Auto-adjust region By using the Auto-adjust region feature it is possible to select an area of the image, and then have the colorization of the image adjusted based on the temperatures within that selected area. To configure an auto-adjust region, follow this procedure: 1. -
Page 32: Msx Alignment
For correct alignment of the thermal and visual images, the camera needs input on the distance to the objects of interest. Note that this is only required for the FLIR A50/A70 cameras with 29° and 51° lenses, since MSX is not supported by cameras with 95°... -
Page 33: Full Screen View
Camera web interface Vertical flip Horizontal + vertical flip To change the flip setting, follow this procedure: 1. On the toolbar and in the View modes section, click to flip the image horizontally or click to flip the image vertically. 10.4.12 Full screen view To view the image in full screen, follow this procedure: 1. -
Page 34: Administration Tab
Modbus server. The settings for the Modbus client are located under the Settings tab. If the camera should be used as a Modbus server, the registers can be downloaded from the FLIR Customer support site. • Pantilt server Enable this service when the camera is connected to a Pan &... -
Page 35: Web Protocols
Note When altering the network settings, the address of the camera might change. Make sure your settings are correct before saving them or the camera might not be reachable afterwards. If this occurs, you can use FLIR IP Config to locate the camera again or reset the camera to its default settings. -
Page 36: System And Firmware
Camera web interface 3. Click Apply. 10.5.7.2 Wireless The Wireless connection can be set to Off, Server mode, or Client mode. In Server mode, you configure the camera itself to act as a wireless server allowing other devices to connect, such as mobile phones or tablets. This is useful in situations where no other network exists. -
Page 37: Snmp Settings
Camera web interface 4. Browse to the location of the firmware file, select the file, and then click Open. 5. Click Upgrade firmware. 6. When the upgrade is completed, restart the camera. 10.5.9 SNMP settings Use the SNMP settings page to enable and disable Simple Network Management Proto- col (SNMP). -
Page 38: Scheduler
Camera web interface 3. In the Folder box, type the path to the folder where you want to save the notifications. This can be useful if you have multiple cameras connected to the same FTP server. 4. In the User and Password boxes, type the credentials for FTP access. 5. -
Page 39: Modbus
The topics will be updated when the data is updated, for ex- ample; if you subscribe to the topic FLIR/ec501-xxxxxx/alarm1, your MQTT client will receive an update when alarm1 is triggered and then another update when alarm1 criteria are no longer fulfilled. -
Page 40: Library Tab
Camera web interface 10.7 Library tab Note The Library tab is only available for the admin and user roles. Under the Library tab you can view and manage saved images and videos from alarms and snapshots. When downloading multiple images or videos, a pop-up window will ap- pear. -
Page 41: Pin Configurations
Pin configurations 11.1 Ethernet connector and cable Configuration Figure 11.1 Female X-coded M12 Ethernet connector #T810579; r. AB/78918/78918; en-US... - Page 42 Pin configurations Figure 11.2 Ethernet cable M12 to RJ45 #T810579; r. AB/78918/78918; en-US...
-
Page 43: Power/Digital I/O Connector And Cable
Pin configurations 11.2 Power/Digital I/O connector and cable Configuration EXTPWR_RTN EXTPWR_IN FAULT_A FAULT_B DIGOUT1A DIGOUT1B DIGOUT2A DIGOUT2B DIGIN1 DIGIN2 Not Connected DIGIN_RTN Figure 11.3 Male A-coded M12 Power/Digital I/O connector #T810579; r. AB/78918/78918; en-US... -
Page 44: Rs232/Rs485 Connector
Pin configurations Section A—A Wire colour Black Green Purple Yellow Pink Orange Figure 11.4 Cable M12 to pigtail Brown White Grey Light blue Blue 11.3 RS232/RS485 connector Configuration RS232_TXD alt RS485A RS232_RXD alt RS485B Chassie GND Not Connected Figure 11.5 Male A-coded M8 RS232/RS485 connector #T810579;... -
Page 45: Series Connection Board
A-series connection board The A-series connection board is an accessory that can be used to test functionality and digital connections to/from the camera. Figure 12.1 A-series connection board For schematics and connection examples, see the next pages. #T810579; r. AB/78918/78918; en-US... -
Page 47: Connection Examples
A-series connection board 12.1 Connection examples (See next page) #T810579; r. AB/78918/78918; en-US... -
Page 53: Software Supported Byflir A50/A70 Series Cameras
Software supported byFLIR A50/ A70 series cameras For a list of supported software, see the online documentation for the FLIR A50/A70 camera series: http://support.flir.com/resources/9s26/. #T810579; r. AB/78918/78918; en-US... -
Page 54: Mechanical Drawings
Mechanical drawings (See next page) #T810579; r. AB/78918/78918; en-US... -
Page 56: Eu Declaration Of Conformity
EU Declaration of conformity [See next page] #T810579; r. AB/78918/78918; en-US... - Page 57 Täby, Sweden July 07, 2021 AQ320438 CE Declaration of Conformity – EU Declaration of Conformity Product: FLIR AXX series including A50 and A70 Name and address of the manufacturer: FLIR Systems AB PO Box 7376 SE-187 15 Täby, Sweden This declaration of conformity is issued under the sole responsibility of the manufacturer.
-
Page 58: Indicator Leds And Factory Reset Button
Indicator LEDs and factory reset button For location of the indicator LEDs and the factory reset button, see Figure 6.1 View from the rear, page 12. 16.1 Power/error indicator LED and factory reset button Note Do not hold down the factory reset button when connecting the camera to power. Factory reset button Indicator LED status Explanation... -
Page 59: Cleaning The Camera
Cleaning the camera 17.1 Camera housing, cables, and other items Use one of these liquids: • Warm water • A weak detergent solution Equipment: • A soft cloth Follow this procedure: 1. Soak the cloth in the liquid. 2. Twist the cloth to remove excess liquid. 3. -
Page 60: About Calibration
18.3 Camera calibration at FLIR Systems Without calibration, an infrared camera would not be able to measure either radiance or temperature. At FLIR Systems, the calibration of uncooled microbolometer cameras with a measurement capability is carried out during both production and service. Cooled cam- eras with photon detectors are often calibrated by the user with special software. -
Page 61: The Differences Between A Calibration Performed By A User And That Performed Directly At Flir Systems
The calibration information, no matter if the calibration is done by FLIR Systems or the user, is stored in calibration curves, which are expressed by mathematical functions. As... -
Page 62: Non-Uniformity Correction
About calibration Calibration is also a prerequisite for adjustment, which is the set of operations carried out on a measuring system such that the system provides prescribed indications corre- sponding to given values of quantities to be measured, typically obtained from measure- ment standards. -
Page 63: About Flir Systems
• Extech Instruments (2007) Figure 19.1 Patent documents from the early 1960s FLIR Systems has three manufacturing plants in the United States (Portland, OR, Boston, MA, Santa Barbara, CA) and one in Sweden (Stockholm). Since 2007 there is also a manufacturing plant in Tallinn, Estonia. -
Page 64: More Than Just An Infrared Camera
19.1 More than just an infrared camera At FLIR Systems we recognize that our job is to go beyond just producing the best infra- red camera systems. We are committed to enabling all users of our infrared camera sys- tems to work more productively by providing them with the most powerful camera–... -
Page 65: Supporting Our Customers
19.3 Supporting our customers FLIR Systems operates a worldwide service network to keep your camera running at all times. If you discover a problem with your camera, local service centers have all the equipment and expertise to solve it within the shortest possible time. - Page 66 Notes #T810579; r. AB/78918/78918; en-US...
- Page 67 Notes #T810579; r. AB/78918/78918; en-US...
- Page 68 Disclaimer Specifications subject to change without further notice. Models and accessories subject to regional market considerations. License procedures may apply. Products described herein may be subject to US Export Regulations. Please refer to exportquestions@flir.com with any questions. Publ. No.: T810579...
Need help?
Do you have a question about the A70 Series and is the answer not in the manual?
Questions and answers