Table of Contents
Advertisement
Quick Links
Owner's Operation and Instruction Manual
THIS MANUAL WILL HELP YOU TO OBTAIN EFFICIENT, DEPENDABLE SERVICE FROM THE HEATER, AND ENABLE YOU
TO ORDER REPAIR PARTS CORRECTLY. KEEP IN A SAFE PLACE FOR FUTURE REFERENCE.
SAFETY NOTICE:
If this heater is not properly installed, a house fire
may result. For your safety, follow the installation
instructions. Never use make-shift compromises
during the installation of this heater. Contact local
building or fire officials about permits, restrictions
and installation requirements in your area.
CAUTION!
Please read this entire manual before you
install or use your new room heater. Failure
to follow instructions may result in property
damage, bodily injury, or even death.
Improper Installation Could Void
Your Warranty!
MODEL: 2000 (L)(LN)(E)
SAVE THESE INSTRUCTIONS
United States Stove Company
227 Industrial Park Road
P.O. Box 151
South Pittsburg, TN 37380
Certified to: UL 1482 and Certified to: ULC-S627-00
Mobile home approved (U.S. ONLY)
U.S. Environmental Protection Agency
Ce produit peut vous exposer à des produits chimiques, y compris le
Certified to comply with 2015 particulate
monoxyde de carbone, qui est connu dans l'État de Californie pour causer
emissions standards.
le cancer, des malformations congénitales et / ou d'autres problèmes de
reproduction. Pour plus d'informations, visitez www.P65warnings.ca.gov
CALIFORNIA PROPOSITION 65 WARNING:
This product can expose you to chemicals including carbon monoxide, which
is known to the State of California to cause cancer, birth defects and/or other
reproductive harm. For more information, go to www.P65warnings.ca.gov
852268H-0501i
Advertisement
Table of Contents

Related Manuals for Country Hearth 2000E


Summary of Contents for Country Hearth 2000E
- Page 1 Owner’s Operation and Instruction Manual MODEL: 2000 (L)(LN)(E) SAVE THESE INSTRUCTIONS THIS MANUAL WILL HELP YOU TO OBTAIN EFFICIENT, DEPENDABLE SERVICE FROM THE HEATER, AND ENABLE YOU TO ORDER REPAIR PARTS CORRECTLY. KEEP IN A SAFE PLACE FOR FUTURE REFERENCE. SAFETY NOTICE: If this heater is not properly installed, a house fire may result.
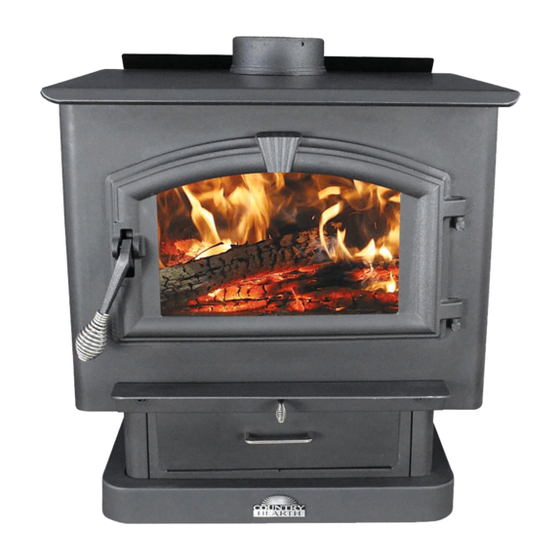
- Page 2 The instructions pertaining to the installation of your wood stove comply with UL-1482 and ULC-S627 standards. This manual describes the installation and operation of the Country Hearth, 2000E wood heater. This heater meets the 2015 U.S. Environmental Protection Agency’s crib wood emission limits for wood heaters sold after May 15, 2015.
-
Page 3: Tools And Materials Needed For Installation
TOOLS AND MATERIALS NEEDED FOR INSTALLATION You will need a drill with a 1/8” bit to install sheet metal screws into connector pipe. A 5/16” socket/wrench or screw driver to install pedestal trim, room air deflector, and blower assembly described below. A 1/2” socket/ wrench to install flue collar. -
Page 4: Blower Assembly
Assembly Instructions BLOWER ASSEMBLY THE BLOWER ASSEMBLY MUST BE DISCONNECTED FROM THE SOURCE OF ELECTRICAL SUPPLY BEFORE ATTEMPTING THE INSTALLATION. THE BLOWER ASSEMBLY IS INTENDED FOR USE ONLY WITH A STOVE THAT IS MARKED TO INDICATE SUCH USE. DO NOT ROUTE THE SUPPLY CORD NEAR OR ACROSS HOT SURFACES! Fix the assembly to the back of the stove with the four screws provided. -
Page 5: Installation
Installation SAFETY NOTICE • IF THIS STOVE IS NOT PROPERLY INSTALLED, A HOUSE FIRE MAY RESULT. TO REDUCE THE RISK OF FIRE, FOLLOW THE INSTALLATION INSTRUCTIONS. • CONSULT YOUR MUNICIPAL BUILDING DEPARTMENT OR FIRE OFFICIALS ABOUT PERMITS, RESTRICTIONS AND INSTALLATIONS REQUIREMENTS IN YOUR AREA. •... -
Page 6: Floor Protector
FLOOR PROTECTOR Your wood stove should be placed on a 1 inch, non-combustible surface with a k factor of 0.84. For multiple layers, add R-values of each layer to determine the overall R-value. The R value for the required board is 1.2. If there is a horizontal section of chimney connector, the floor protector should go under it and 2 inches beyond each side Convert specification to R-value:... -
Page 7: Clearances To Combustibles
CLEARANCES TO COMBUSTIBLES It is of utmost importance that the clearances to combustible materials be strictly adhered to during installation of the stove. Refer to the tables below. Single Wall Pipe (Double Wall Pipe) 20(14) 22(20) 22.5(16.5) 32(30) 12(11) 22(21) (508mm(356mm)) (559mm(508mm)) (572mm(419mm)) -
Page 8: Chimney Connector (Stove Pipe)
CHIMNEY CONNECTOR (STOVE PIPE) Your chimney connector and chimney must have the same diameter as the stove outlet (6”). If this is not the case, we recommend you contact your dealer in order to insure there will be no problem with the draft. The stove pipe must be made of aluminized or cold roll steel with a minimum thickness of 0.021”... -
Page 9: Factory Built Chimney
FACTORY BUILT CHIMNEY When a metal prefabricated chimney is used, the manufacturer’s installation instructions must be followed. You must also purchase (from the same manufacturer) and install the ceiling support package or wall pass- through and “T” section package, firestops (where needed), insulation shield, roof flashing, chimney cap, etc. Maintain proper clearance to the structure as recommended by the manufacturer. -
Page 10: Masonry Chimney
MASONRY CHIMNEY Ensure that a masonry chimney meets the minimum standards of the National Fire Protection Association (NFPA) by having it inspected by a professional. Make sure there are no cracks, loose mortar or other signs of deterioration and blockage. Have the chimney cleaned before the stove is installed and operated. When connecting the stove through a combustible wall to a masonry chimney, special methods are needed. -
Page 11: Combustible Wall Chimney Connector Pass-Throughs
COMBUSTIBLE WALL CHIMNEY CONNECTOR PASS-THROUGHS Method A. 12” (304.8 mm) Clearance to Combustible Wall Member: Using a minimum thickness 3.5” (89 mm) brick and a 5/8” (15.9 mm) minimum wall thickness clay liner, construct a wall pass-through. The clay liner must conform to ASTM C315 (Standard Specification for Clay Fire Linings) or its equivalent. -
Page 12: Outside Combustion Air
OUTSIDE COMBUSTION AIR Your wood stove is approved to be installed with an outside air intake which is necessary for a mobile home. This type of installation is also required in air tight houses and houses with negative pressure problems. You can purchase this option through your heater dealer. -
Page 13: Do Not Burn
WOODSTOVE UTILIZATION This heater is designed to burn natural wood only. Higher efficiencies and lower emissions generally result when burning air dried seasoned hardwoods, as compared to softwoods or to green or freshly cut hardwoods. DO NOT BURN: 1. Garbage; 10. -
Page 14: Operational Tips
It is EXTREMELY IMPORTANT that you use DRY WOOD only in your wood stove. The wood should have dried for 9 to 15 months, such that the humidity content (in weight) is reduced below 20% of the weight of the log. It is very important to keep in mind that even if the wood has been cut for one, two or even more years, it is not necessarily dry, if it has been stored in poor conditions. - Page 15 Before igniting the paper and kindling wood, it is recommended that you warm up the chimney. This is done in order to avoid back draft problems often due to negative pressure in the house. If such is the case, open a window slightly near the stove and twist together a few sheets of newspaper into a torch.
-
Page 16: Creosote Formation And Need For Removal
WARNINGS: • NEVER OVER FIRE YOUR STOVE. IF ANY PART OF THE STOVE STARTS TO GLOW RED, OVER FIRING IS HAPPENING. READJUST THE AIR INTAKE CONTROL AT A LOWER SETTING. • THE INSTALLATION OF A LOG CRADLE or GRATES IS NOT RECOMMENDED IN YOUR WOOD STOVE. BUILD FIRE DIRECTLY ON FIREBRICK. -
Page 17: Maintenance
SMOKE AND CO MONITORS Burning wood naturally produces smoke and carbon monoxide(CO) emissions. CO is a poisonous gas when exposed to elevated concentrations for extended periods of time. While the modern combustion systems in heaters drastically reduce the amount of CO emitted out the chimney, exposure to the gases in closed or confined areas can be dangerous. -
Page 18: Repair Parts
Repair Parts In order to maintain warranty, components must be replaced using original manufacturers parts purchased through your dealer or directly from the appliance manufacturer. Use of third party components will void the warranty. -18-... - Page 19 Repair Parts Key Part No. Description Qty. 40292A 6” Flue Collar 83432 5/16-18 X 1-1/2 Hx Hd C/S Pl 83045 Washer, 5/16”Id X 3/4” Od X 1/16 Thk 83431 Weld Tab 25845 Deflector, Air 69354 Blower Assembly (B36) 26060 Shield, Rear 610065 Weld., Pedestal Back 26072 Wrapper, Pedestal (Leg Option)
- Page 20 Repair Parts Part No. Description Qty. 25465 Retainer, Bottom Glass 25464 Retainer, Top Glass 88087 Glass Gasket (1 X 3/16) 3.7 ft 891131 Ceramic Glass 88066 Gasket, 5/8 Rope (Ld2 .625 G) 4.6 ft 25491 Painted, Feed Door 83506 3/8 X 1-1/4 Roll Pin 25692 Painted Door Handle 891135...
- Page 21 Notes -21-...
- Page 22 Notes...
-
Page 23: Service Record
Service Record It is recommended that your heating system is serviced regularly and that the appropriate Service Interval Record is completed. SERVICE PROVIDER Before completing the appropriate Service Record below, please ensure you have carried out the service as described in the manufacturer’s instructions. Always use the manufacturer's specified spare part when replacement is necessary. - Page 24 How To Order Repair Parts / Comment Commander Des Pièces Détachées This manual will help you obtain efficient, dependable service from your heater, and enable you to order repair parts correctly. Keep this manual in a safe place for future reference. When writing, always give the full model number which is on the nameplate attached to the heater.
Need help?
Do you have a question about the 2000E and is the answer not in the manual?
Questions and answers