Table of Contents
Advertisement
Quick Links
Advertisement
Table of Contents

Related Manuals for coesia Flexlink X65


Summary of Contents for coesia Flexlink X65
- Page 1 CONVEYOR SYSTEM X65 MAINTENANCE MANUAL...
- Page 2 © Flexlink AB 2014 All Rights Reserved No part of this program and manual may be used, reproduced, stored or transmitted in any form or by any means without the written permission of FlexLink AB. The contents of this manual are for informational use on- ly.
- Page 3 5815EN-03...
-
Page 4: Table Of Contents
General safety and design considerations Introduction Safety System information Important safety conditions Maintenance System maintenance Maintenance instructions Introduction to drive units Slip clutch adjustment Inspection – drive units Inspection – conveyor chains Inspection – slide rails, beams, idlers, bends 18 Inspection –... - Page 5 5815EN-03...
-
Page 6: General Safety And Design Considerations
General safety and design considerations General safety and design considerations Introduction 1.1.1 Critical factor To achieve an operational installation which is reasonably safe for all people involved in its use and maintenance, it is necessary to consider certain as- pects. This is done when designing a conveyor system. The chain is gen- erally the critical factor to consider with guarding. - Page 7 General safety and design considerations 1.1.2.1 Safeguarding can be achieved by: • Location Location of all hazardous areas away from areas occupied by personnel, wherever possible. • Guards Mechanical barriers preventing entry into hazardous areas or protecting against falling objects. •...
-
Page 8: Safety
Safety Safety The machine has been designed in such a way, that it can be used and maintained in a safe way. This holds for the application, the circumstances and the instructions described in this manual. Any person working with around this machine should study the manual and follow the instructions. - Page 9 Safety • Do not wear clothing or other articles that can fasten in the ma- chine. • For coupled drive units, safety protection should be applied to the connecting shaft. 2.2.1.1 End drive units • The chain slack length at the end drive units must be maintained during the system lifetime.
- Page 10 Safety generous guarding should always be employed to fully protect within user operating areas. • There is a higher risk of product damage when using cleated chains. Special attention must be given to operator access in the event of products becoming trapped or similar. 2.2.1.7 Maintenance The maintenance routine of FlexLink conveyors should also include proce-...
- Page 11 Safety 2.2.3 Electricians Electricians must have: • Experience from similar installations • Sufficient knowledge to work from drawings and wiring diagrams • Knowledge of local safety regulations for electrical power and au- tomation • Skilled (EN ISO 12100:2010) • To avoid risks, only experienced personnel with technical knowl- edge and experience may perform repair work on the machine's electronics components.
-
Page 12: Maintenance
Maintenance Maintenance System maintenance 3.1.1 Introduction The following section is designed to offer assistance for your planned maintenance schedule. It may become evident that the suggested mainte- nance intervals can be shortened or extended to accommodate your local environmental conditions. Maintenance of the FlexLink conveyor systems should only be carried out by competent persons, who are familiar with FlexLink equipment. -
Page 13: Maintenance Instructions
Maintenance Maintenance instructions 3.2.1 Introduction This maintenance manual contains directions for the standard components sold through the X65 chapter of the FlexLink main catalogue. For non-Flex- Link components, such as motors, pneumatic equipment, control systems etc., the manufacturer’s maintenance instructions apply. In general, main- tenance instructions are not given for equipment which the customer has chosen and specified for fitting to the installation. -
Page 14: Introduction To Drive Units
Maintenance Introduction to drive units 3.3.1 Three types There are three different types of drive unit: end drive, intermediate drive and horizontal bend drive units End drive units End drive unit with return chain, located at the ‘pulling’ end of the conveyor. -
Page 15: Slip Clutch Adjustment
Maintenance Slip clutch adjustment 3.4.1 Introduction The slip clutch on the drive unit is a safety device which allows the chain to stop if the load becomes excessive. It has two purposes: • Prevent damage to conveyor • Prevent damage to the products on the conveyor Where a slip clutch is fitted, it must be adjusted so that it does not slip whenever the drive unit is started under full load. - Page 16 Maintenance 3.4.2 Clutch adjustment 1 Remove the drive unit protection cover. 2 Use an Allen key, 3 mm, to loosen the screw (1) on the slip clutch so that the adjustment nut (2) can be freely rotated. 3 Turn the adjustment nut (2) clockwise with a hook spanner until the arrow on the nut is aligned with the desired F...
-
Page 17: Inspection - Drive Units
Maintenance Inspection – drive units 3.5.1 Roller chain transmission The roller chain transmission should be checked and lubricated after 50, 250, 500 hours of operation, and then every 500 hours. If the roller chain transmission is not fitted with a chain tensioner the chain tension should be checked on this occasion. - Page 18 Maintenance 3.5.4 General checks on drive unit Carry out a general inspection of the drive unit. • Check particularly that the protective covers for the roller chains are complete and firmly in place. • Replace damaged/worn parts. 5815EN-03...
-
Page 19: Inspection - Conveyor Chains
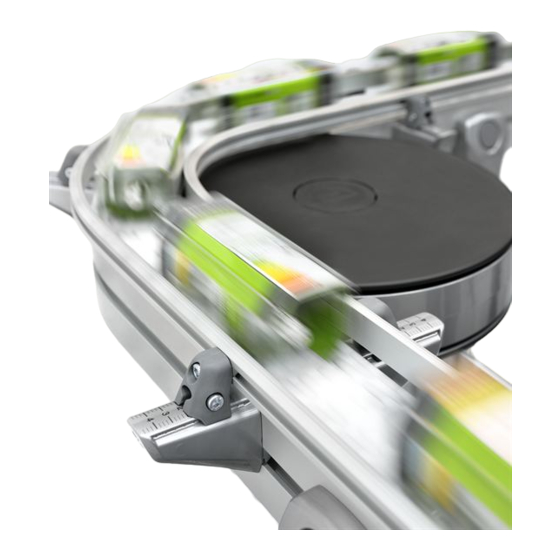
Maintenance Inspection – conveyor chains 3.6.1 Conveyor chains The most common types of conveyor chains are: • Plain conveyor chains • Chain with flexible cleats for vertical wedge convey- • Chain with friction surface for conveyors with an in- cline up to 30°. The friction surfaces are normally dis- tributed over the chain at a predetermined distance. - Page 20 Maintenance 3.6.2 Checking the tension of conveyor chain The chain is made of elastic material. The chain eventually stretches as the material creeps. The extent of the stretch depends on the traction force in the chain. The stretch shows itself as slack on the return side of the drive unit.
- Page 21 Maintenance 3.6.4 Shortening conveyor chains The most suitable place to shorten the chain is at the drive unit. Alternatively: • at a beam section for chain installation which has detachable sec- tions. • by removing the side plates of the drive or idler end unit in closed systems.
- Page 22 Maintenance 3 Remove the necessary number of links NB: With cleated or friction chains, pay attention to the divisions between the links. 4 Join the chain together with a new pivot. NB: The old pivot should not be re- used. When the chain is divided, a new pivot must always be fitted.
-
Page 23: Inspection - Slide Rails, Beams, Idlers, Bends
Maintenance Inspection – slide rails, beams, idlers, bends 3.7 .1 Checking slide rails The condition of the slide rails is fundamental to the functioning of the in- stallation. It is therefore essential that these are in good condition. 3.7 .1.1 Checking the slide rail with the conveyor chain in place The slide rail must be checked after every 250 hours’... - Page 24 Maintenance 3.7 .1.2 Checking the slide rail, conveyor chain removed At least once a year or after every 2 000 hours’ operation, the chain should be removed from the beam, and the slide rail carefully checked for wear and fastening. Plain bends should be checked after every 500 hours’...
-
Page 25: Inspection - Safety Devices
Maintenance Inspection – safety devices Protective and safety devices Safety devices should be checked at regular intervals. • Check the protective cover on the cleated chain conveyor return chain. • Drive units with chain slacks, have a slack protection for the con- veyor chain. -
Page 26: Replacement Of Worn Parts - Conveyor Chain
Maintenance Replacement of worn parts – conveyor chain 3.9.1 Removal of conveyor chain Ensure that the power to the drive motor is disconnected. Disengage the motor; there are various methods depending on the type of drive unit: – Detach the slip clutch. –... -
Page 27: Replacement Of Worn Parts - Slide Rails
Maintenance 3.10 Replacement of worn parts – slide rails 3.10.1 General Information It is very important to assemble slide rails correctly to ensure smooth sys- tem operation. Follow the illustrated instructions on the following pages carefully. Ob- serve the following points: •... - Page 28 Maintenance When fitting the slide rails with rivets, the instructions on page 24 must be followed. • The joints on the slide rails must have a distance of 100 mm be- tween them. The joints should be laid out as in the picture, se page 18 for reference, with a gap of approx.
- Page 29 Maintenance Anchoring slide rail (continued) Method 1: Using aluminium rivets Rivet cri,ping pliers / rivet crimping clamp Aluminium rivets XLAH 4x6 Insert rivets in the holes, using rivet crimping pliers or a rivet crimping clamp. If working space is limited, the rivet crimping clamp might be easier to use.
- Page 30 Maintenance Anchoring slide rail (continued) Method 2: Using plastic screws Pliers Knife Hammer Plastic screws XLAG 5 Press or screw the plastic screws into the holes using a pair of pliers or a screwdriver. Cut off the screw heads by using a knife and a hammer.
- Page 31 Maintenance 5815EN-03...
-
Page 32: Troubleshooting
Troubleshooting Troubleshooting Jerky running Cause Corrective action Damaged or badly fit- Inspect and replace if nec- ted slide rail essary. Wrongly adjusted Check and adjust slip slip clutch clutch. Worn transmission Check/replace transmis- parts sion chain, chain drive sprocket. Conveyor chain is too Tension conveyor chain tight/loose correctly. - Page 33 Troubleshooting Noise Cause Corrective action Worn or damaged Check/replace drive unit. bearings in drive unit Damaged/badly fit- Check the free running of ted slide rail the conveyor chain, espe- cially in slide rail joints. Excessive conveyor Lower speed. speed Check actual load against recommended load.
-
Page 34: Checklist/Maintenance Schedule
Troubleshooting Checklist/maintenance schedule General checks Number of operating hours/time interval See page Check roller chain, sprocket, chain Then every 500 page 12 tension and lubrication of drive unit hours Check/adjustment of slip clutch Every 1 000 hours page 10 Check conveyor chain guides in drive Every 1 000 hours page 12 units and idler ends... - Page 35 Troubleshooting 5815EN-03...
-
Page 36: System Dismantling And Disposal
System dismantling and disposal System dismantling and disposal Important safety precautions 5.1.1 Dismantling Dismantling of the FlexLink conveyor system should be carried out by com- petent persons, who are familiar with the equipment being decommis- sioned. In the absence of detailed information, every care should be taken to en- sure that all items are securely retained during the decommissioning pro- cess. -
Page 37: Dismantling End Drive Units With Suspended Motor
System dismantling and disposal Dismantling end drive units with suspended motor The locking effect of the slip clutch can be removed by removing the trans- mission chain or by releasing the slip clutch (section in maintenance and service refers to slip clutch adjustment). Remove the motor gear unit from the conveyor drive assembly. - Page 38 System dismantling and disposal 5815EN-03...
-
Page 39: Dismantling End Drive Units, No Slip Clutch
System dismantling and disposal Dismantling end drive units, no slip clutch Remove the motor gear unit from the conveyor drive assembly. The motor gear unit may be fitted with an oil breather. Ensure that the oil from the gearbox cannot leak into the surrounding area when decommissioned. Oil should be drained from the gearbox and disposed of in accordance with lo- cal environmental regulations. -
Page 40: Dismantling End Drive Units, Slip Clutch
System dismantling and disposal Dismantling end drive units, slip clutch 5815EN-03... -
Page 41: Remove Guide Rails And Guide Rail Brackets Etc
System dismantling and disposal Remove guide rails and guide rail brackets etc. 5815EN-03... -
Page 42: Remove The Conveyor Chain
System dismantling and disposal Remove the conveyor chain. Split the conveyor chain using the pin insertion tool and remove the con- veyor chain. If removing conveyor chain from over head conveyor special attention should be given when removing the last few metres. The weight of the removed chain accelerates the removal from the conveyor beams and can cause injury when the last links exit the extrusion. -
Page 43: Dismantling End Drive Units
System dismantling and disposal Dismantling end drive units Unscrew the inner grub screws from the drive unit connector strips and re- move drive end from the conveyor. Repeat for idler end unit. ≈ 6-8 Nm 5815EN-03... -
Page 44: Remove Slide Rails
System dismantling and disposal Remove slide rails Remove the slide rail on all sides of the conveyor extrusion. Remove the slide rail retaining fixings by drilling away the rivets or plastic screws and pulling away the slide rail from the aluminium extrusion profile 5815EN-03... -
Page 45: Dismantle The Conveyor Extrusions From The Support Brackets
System dismantling and disposal Dismantle the conveyor extrusions from the support brackets. Dismantle the conveyor extrusions from the support brackets. This should be done in a systematic manner, removing conveyor section by section. 5815EN-03... -
Page 46: Dismantle The Conveyor Support System
System dismantling and disposal 5.10 Dismantle the conveyor support system 5815EN-03... - Page 47 System dismantling and disposal 5815EN-03...
-
Page 48: Recycle
System dismantling and disposal 5.11 Recycle Sort different materials ready for disposal. Recycle components in accordance with local regulations. Material categories Aluminium Beams, bends, support legs etc. • Extruded aluminium Brackets, feet etc. • Die cast aluminium Electronics Motors and all other electronics Plastics Chains •... - Page 49 System dismantling and disposal 5815EN-03...
Need help?
Do you have a question about the Flexlink X65 and is the answer not in the manual?
Questions and answers