
Subscribe to Our Youtube Channel
Related Manuals for Mercusys AC12G


Summary of Contents for Mercusys AC12G
- Page 1 User Guide AC1300 Wireless Dual Band Gigabit Router AC12G Copyright © 2022 MERCUSYS REV2.0.0 1910080072...
- Page 2 2400 MHz -2483.5 MHz (20 dBm) 5150 MHz -5250 MHz (23 dBm) EU declaration of conformity Mercusys hereby declares that the device is in compliance with the essential requirements and other relevant provisions of directives 2014/53/EU, 2009/125/EC, 2011/65/EU and (EU)2015/863.
- Page 3 Canadian Compliance Statement This device contains licence-exempt transmitter(s)/receiver(s) that comply with Innovation, Science and Economic Development Canada’s licence-exempt RSS(s). Operation is subject to the following two conditions: (1) This device may not cause interference. (2) This device must accept any interference, including interference that may cause undesired operation of the device.
- Page 4 設備名稱:AC1300 Wireless Dual Band Gigabit 型號(型式):AC12G Router Type designation (Type) Equipment name 限用物質及其化學符號 Restricted substances and its chemical symbols 單元 Unit 六價鉻 多溴聯苯 多溴二苯醚 鉛 汞 鎘 Cadmium Hexavalent Polybrominated Polybrominated Lead Mercury (Cd) chromium biphenyls diphenyl ethers (Pb) (Hg)
- Page 5 guarantee that no accidents or damage will occur due to improper use of the device. Please use this product with care and operate at your own risk. Operating Temperature: 0°C~40°C (32°F~104°F) This product uses radios and other components that emit electromagnetic fields. Electromagnetic fields and magnets may interfere with pacemakers and other implanted medical devices.
-
Page 6: Table Of Contents
CONTENTS Conventions ....................... 01 Chapter 1 Introduction ..................02 1.1 Product Overview ......................02 1.2 Product Appearance ......................02 1. 2. 1 The Front Panel ..................... 02 1. 2. 2 The Rear Panel ...................... 02 Chapter 2 Connect to the Internet ..............04 2. 1. Position Your Router ......................04 2. - Page 7 4.4 NAT Forwarding ......................... 32 4. 4. 1 Port Forwarding ....................32 4. 4. 2 Port Triggering ...................... 34 4. 4. 3 UPnP ......................... 35 4. 4. 4 DMZ ........................... 36 4.5 Parental Controls ....................... 38 4.6 QoS ............................41 4.7 Security ..........................42 4.
- Page 8 5. 4. 3 HTTP Referer Head Check ................62 5.5 System Log ......................... 62 5.6 Diagnostics .......................... 62 5.7 Time ............................64 5.8 Reboot ........................... 65 5.9 LED Control ......................... 66 Appendix A: FAQ (Frequently Asked Questions) ..........67 Appendix B: Configuring the PC ................69...
-
Page 9: Conventions
AC1300 Wireless Dual Band Gigabit Router Conventions The Router, or AC12G, mentioned in this User Guide stands for AC1300 Wireless Dual Band Gigabit Router without any explanations. Parameters provided in the pictures are just references for setting up the product, which may differ from the actual situation. -
Page 10: Chapter 1 Introduction
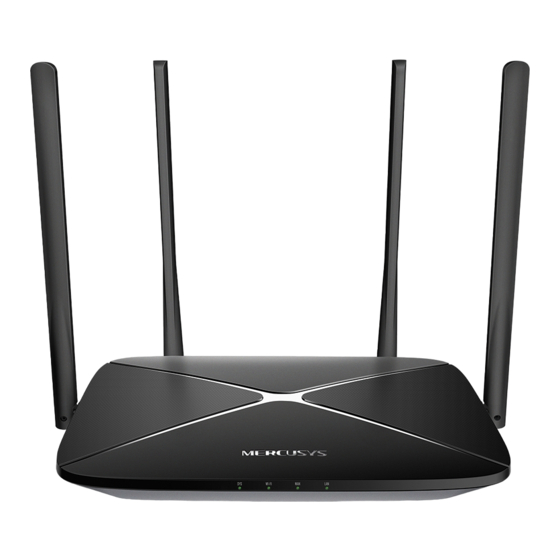
Chapter 1 Introduction Product Overview AC12G delivers blazing fast Wi-Fi speeds up to 1300 Mbps. Choose the 2.4 GHz band (400 Mbps) for internet browsing, email, and social media or the 5 GHz band (867 Mbps) for bandwidth-intensive tasks like HD streaming and gaming. - Page 11 Chapter 1 The following items are located on the rear panel (View from left to right). Item Description 1-3(LAN) These ports connect the router to the local devices. This port is where you will connect the DSL/cable Modem, or Ethernet. The power socket is where you will connect the power adapter. Please use the Power power adapter provided with this router.
-
Page 12: Chapter 2 Connect To The Internet
Chapter 2 Chapter 2 Connect to the Internet 2. 1. Position Your Router • The product should not be located in a place where it will be exposed to moisture or excessive heat. • Place the router in a location where it can be connected to multiple devices as well as to a power source. -
Page 13: Router Mode
Chapter 2 2. 2. 1. Router Mode In this mode, the router can provide internet access for multiple wired and wireless devices. This mode is required most commonly. 1. Follow the steps below to connect your router. If your Internet connection is through an Ethernet cable from the wall instead of through a DSL/Cable/Satellite modem, connect the Ethernet cable directly to the router’s Internet/ WAN port, then connect the power adapter to the router. -
Page 14: Access Point Mode
Chapter 2 3. Enter http://mwlogin.net in the address bar of a web browser. Create a password to log Note: If the above screen does not pop-up, it means that your IE Web-browser has been set to a proxy. Go to menu Tools > Internet Options >... - Page 15 Chapter 2 3. Connect a computer to the router via an Ethernet cable or wirelessly by using the SSID (network name) printed on the bottom label of the router. 4. Enter http://mwlogin.net in the address bar of a web browser. Create a password to log Note: If the above screen does not pop-up, it means that your IE Web-browser has been set to a proxy.
-
Page 16: Chapter 3 Log In To The Router
Chapter 3 Chapter 3 Log In to the Router This chapter introduces how to log in to the web management page of the router. With the web-based utility, it is easy to configure and manage the router. The web-based utility can be used on any Windows, Macintosh or UNIX OS with a Web browser, such as Microsoft the Internet Explorer, Mozilla Firefox or Apple Safari. -
Page 17: Chapter 4 Router Mode
Chapter 4 Chapter 4 Router Mode This chapter presents how to configure the various features of the router working as a wireless router. It contains the following sections: • Operation Mode • Network • Wireless • NAT Forwarding • Parental Controls • QoS •... -
Page 18: Network
Chapter 4 Network 4. 2. 1 Status 1. Visit http://mwlogin.net, and log in with password you set for the router. 2. Go to Advanced > Network > Status. You can view the current status information of the router. • Internet - This field displays the current settings of the internet, and you can configure them on the Advanced >... -
Page 19: Internet
Chapter 4 • Subnet Mask - The subnet mask associated with the LAN IP address. • DHCP Server - This field displays the current settings of DHCP (Dynamic Host Configuration Protocol) Server, and you can configure them on the Network > DHCP Server page. - Page 20 Chapter 4 Click RELEASE to release the IP parameters. • MTU Size - The normal MTU (Maximum Transmission Unit) value for most Ethernet networks is 1500 Bytes. It is not recommended that you change the default MTU size unless required by your ISP. •...
- Page 21 Chapter 4 • IP Address - Enter the IP address in dotted-decimal notation provided by your ISP. • Subnet Mask - Enter the subnet mask in dotted-decimal notation provided by your ISP. Normally 255.255.255.0 is used as the subnet mask. • Default Gateway - Enter the gateway IP address in dotted-decimal notation provided by your ISP.
- Page 22 Chapter 4 • Secondary Connection - It’s available only for PPPoE connection. If your ISP provides an extra connection type, select Dynamic IP or Static IP to activate the secondary connection. • MTU Size - The default MTU size is 1480 bytes. It is not recommended that you change the default MTU size unless required by your ISP.
- Page 23 Chapter 4 dotted-decimal notation. • DNS Address - The default setting is to get an IP address dynamically from your ISP. If your ISP does not automatically assign DNS addresses to the router, please select Use the Following DNS Addresses and enter the IP address in dotted- decimal notation of your ISP’s primary DNS server.
-
Page 24: Mac Clone
Chapter 4 • Username/Password - Enter the username and password provided by your ISP. These fields are case-sensitive. • Server IP/ Domain Name - Enter the VPN server’s IP address or domain name provided by your ISP. PPTP If your ISP provides PPTP connection, please select PPTP. •... -
Page 25: Nat
Chapter 4 3. Configure Router MAC Address and click SAVE. • Use Default MAC Address - Do not change the default MAC address of your router in case the ISP does not bind the assigned IP address to the MAC address. •... -
Page 26: Iptv/Vlan
Chapter 4 • MAC Address - The physical address of the LAN ports. The value can not be changed. • IP Address - Enter the IP address in dotted-decimal notation of your router (the default one is 192.168.1.1). • Subnet Mask - An address code that determines the size of the network. Normally 255.255.255.0 is used as the subnet mask. - Page 27 Chapter 4 devices from the IP Address Pool. You can change the settings of DHCP Server if necessary, and you can reserve LAN IP addresses for specified client devices. • To specify the IP address that the router assigns: 1. Visit http://mwlogin.net, and log in with the password you set for the router. 2.
-
Page 28: Dynamic Dns
Chapter 4 • To check the DHCP client list: 1. Visit http://mwlogin.net, and log in with the password you set for the router. 2. Go to Advanced > Network > DHCP Server and locate the DHCP Client List section. You can see the device information of the list. 3. -
Page 29: Static Routing
Chapter 4 4. Enter the Username for your DDNS account. 5. Enter the Password for your DDNS account. 6. Enter the Domain Name you received from dynamic DNS service provider here. 7. If your service provider is NO-IP, select WAN IP binding to ensure that the domain name is bound to the WAN IP of this router. - Page 30 Chapter 4 Router A Router B Company’s server WAN: 172.30.30.100 POWER RESET POWER RESET LAN: 192.168.1.1 LAN: 192.168.1.2 172.30.30.1 Switch 192.168.1.100 How can I do that? 1. Change the routers’ LAN IP addresses to two different IP addresses on the same subnet.
- Page 31 Chapter 4 should be 192.168.1.2. • Interface - Determined by the port (WAN/LAN) that sends out data packets. In the example, the data are sent to the gateway through the LAN port of Router A, so LAN should be selected. • Description - Enter a description for this static routing entry.
-
Page 32: Wireless
Chapter 4 Wireless 4. 3. 1 Wireless Settings 1. Visit http://mwlogin.net, and log in with the password you set for the router. 2. Go to Advanced > Wireless > Wireless Settings. 3. Configure the wireless settings for the wireless network and click SAVE. •... -
Page 33: Guest Network
Chapter 4 • WPA /WPA2-Enterprise - It’s based on Radius Server. • Version - Keep default version value. • Encryption - Select Auto, TKIP or AES. We recommend you keep the default settings. • Transmit Power - Select High, Middle or Low to specify the data transmit power. The default and recommended setting is High. -
Page 34: Wireless Schedule
Chapter 4 2. Go to Advanced > Wireless > Guest Network. Locate the Guest Permissions section. 3. Customize guest network options according to your needs. • Allow guests to see each other Tick this checkbox if you want to allow the wireless clients on your guest network to communicate with each other via methods such as network neighbors and Ping. -
Page 35: Wps
Chapter 4 Note: • The effective wireless schedule is based on the time of the router. You can go to Advanced > System > Time to modify the time. • The wireless network will be automatically turned on after the time period you set. 4. -
Page 36: Additional Settings
Chapter 4 • Connects via the Router’s PIN 1. Keep the WPS Status as Enabled and select Router’s PIN. 2. Enter the router’s PIN on your personal device. You can also generate a new one. Note: PIN (Personal Identification Number) is an eight-character identification number preset to each router. WPS supported devices can connect to your router with the PIN. - Page 37 Chapter 4 • Enable WMM - WMM function can guarantee the packets with high-priority messages being transmitted preferentially. • Enable Short GI - It is recommended to enable this function, for it will increase the data capacity by reducing the guard interval time. •...
-
Page 38: Wds
Chapter 4 meaning no key renewal. 4. 3. 6 WDS WDS (Wireless Distribution System) Bridging feature allows you to bridge a router with an access point to extend the wireless network coverage. Note: • WDS bridging only requires configuration on the extended router; •... -
Page 39: Nat Forwarding
LAN and realize some specific functions. The Mercusys router includes four forwarding rules. If two or more rules are set, the priority of implementation from high to low is Port Forwarding, Port Triggering, UPNP and DMZ. - Page 40 Chapter 4 Personal Website Router POWER RESET WAN: 218.18.232.154 Home 1. Set your PC to a static IP address, for example 192.168.1.100. 2. Visit http://mwlogin.net, and log in with the password you set for the router. 3. Go to Advanced > NAT Forwarding > Port Forwarding. 4.
-
Page 41: Port Triggering
Chapter 4 Users on the internet can enter http:// WAN IP (in this example: http:// 218.18.232.154) to visit your personal website. Note: • If you have changed the default External Port, you should use http:// WAN IP: External Port to visit the website. -
Page 42: Upnp
Chapter 4 • If the application you need is not listed in the Common Services list, please enter the parameters manually. You should verify the external ports the application uses first and enter them in External Ports field. You can input at most 5 groups of ports (or port sections). -
Page 43: Dmz
Chapter 4 4. 4. 4 DMZ When a PC is set to be a DMZ (Demilitarized Zone) host in the local network, it is totally exposed to the internet, which can realize the unlimited bidirectional communication between internal hosts and external hosts. The DMZ host becomes a virtual server with all ports opened. -
Page 44: Parental Controls
Chapter 4 5. Click SAVE. Done! You’ve set your PC to a DMZ host and now you can make a team to game with other players. Parental Controls Parental Controls allows you to set up unique restrictions on internet access for each member of your family. - Page 45 Chapter 4 1 ) Enter a Name for the profile to make it easier to identify. 2 ) Under Devices, click 3 ) Select the devices that belong to this family member. Access restrictions will be applied to these devices. Click ADD when finished. Note: Only devices that have previously been connected to your router’s network are listed here.
- Page 46 Chapter 4 1 ) Enable Time Limits on Monday to Friday and Saturday & Sunday then set the allowed online time to 2 hours each day. 2 ) Enable Bed Time on School Nights (Sun to Thur) and use the up/down arrows or enter times in the fields.
-
Page 47: Qos
Chapter 4 QoS (Quality of Service) is designed to ensure the efficient operation of the network when come across network overload or congestion. Devices set as high priority will be allocated more bandwidth and so continue to run smoothly even when there are many devices connected to the network. -
Page 48: Security
Chapter 4 Security This function allows you to protect your home network from cyber attacks and unauthorized users by implementing these network security functions. 4. 7. 1 Firewall The SPI (Stateful Packet Inspection) Firewall protects the router from cyber attacks and validate the traffic that is passing through the router based on the protocol. This function is enabled by default. - Page 49 Chapter 4 2 ) Click Add and select devices you want to be blocked. You can see the devices have been added to the blacklist. To allow specific device(s): 1 ) Select Whitelist and click SAVE. 2 ) Add devices to the whitelist. •...
-
Page 50: Ip & Mac Binding
Chapter 4 • Add unconnected devices Click Add Manually and enter the Device Name and MAC Address of the device you want to be allowed. Done! Now you can block or allow specific client devices to access your network (via wired or wireless) using the Blacklist or Whitelist. -
Page 51: Alg
Chapter 4 How can I do that? 1. Visit http://mwlogin.net, and log in with the password you set for the router. 2. Go to Advanced > Security > IP & MAC Binding. 3. Enable IP & MAC Binding and click SAVE. 4. -
Page 52: Ipv6
Chapter 4 IPv6 This function allows you to enable IPv6 function and set up the parameters of the router’s Wide Area Network (WAN) and Local Area Network (LAN). 1. Visit http://mwlogin.net, and log in with the password you set for the router. 2. - Page 53 Chapter 4 3 ) Click SAVE. • PPPoE: Select this type if your ISP uses PPPoEv6, and provides a username and password. 1 ) Configure the WAN settings. 2 ) Configure the LAN settings. Fill in Address Prefix provided by your ISP.
- Page 54 Chapter 4 • Tunnel 6to4: Select this type if your ISP uses 6 to 4 deployment fort assigning address. 1 ) Configure the WAN settings. 2 ) Configure the LAN settings. • If you select Pass-Through (Bridge): Click SAVE. No configuration is required.
-
Page 55: System
4. 9. 1 Firmware Upgrade Mercusys is dedicated to improving and richening the product features, giving users a better network experience. We will release the latest firmware at Mercusys official website www.mercusys.com. You can download the latest firmware file from the Support page of our website and upgrade the firmware to the latest version. -
Page 56: Change Password
Chapter 4 To restore configuration settings: 1. Click BROWSE to locate the backup configuration file stored in your computer, and click RESTORE. 2. Wait a few minutes for the restoring and rebooting. To reset the router to factory default settings: 1. Click FACTORY RESTORE to reset the router. 2. -
Page 57: Remote Management
Chapter 4 • Allow all LAN connected devices to manage the router: Select All Devices for Local Managers. • Allow specific devices to manage the router: 1. Select Specified Devices for Local Managers and click SAVE. 2. Click Add Device. 3. Click VIEW CONNECTED DEVICES and select the device to manage the router from the Connected Devices list, or enter the MAC address of the device manually. - Page 58 Chapter 4 Do not tick the Enable checkbox of Remote Management. • Allow all devices to manage the router remotely: 1. Tick the Enable checkbox of Remote Management. 2. Keep the HTTP port as default setting (recommended) or enter a value between 1024 and 65535.
-
Page 59: Http Referer Head Check
Chapter 4 2. Keep the HTTP port as default setting (recommended) or enter a value between 1024 and 65535. 3. Select Specified Device for Remote Managers. 4. In the Only this IP Address field, enter the IP address of the remote device to manage the router. -
Page 60: Diagnostics
Chapter 4 4. 10. 1 System Log 1. Visit http://mwlogin.net, and log in with the password you set for the router. 2. Go to Advanced > System > System Log, and you can view the logs of the router. 3. Click SAVE TO LOCAL to save the system logs to a local disk. 4. -
Page 61: Time
Chapter 4 • Tracert is used to display the route (path) your router has passed to reach the tested host, and measure transit delays of packets across an Internet Protocol network. 2 ) Enter the IP Address or Domain Name of the tested host. 3 ) Modify the Ping Count number and the Ping Packet Size. -
Page 62: Reboot
Chapter 4 2. Go to Advanced > System > Time. • To set System Time: 1. Select the way in which the router gets its time: Get from Internet, Get from Managing Device, Manually. 2. Select your local Time Zone. 3. Enter the address or domain of the NTP Server 1 or NTP Server 2. 4. -
Page 63: Led Control
Chapter 4 reboot automatically. You can also reboot the router to clear cache and enhance running performance. 1. Visit http://mwlogin.net, and log in with the password you set for the router. 2. Go to Advanced > System > Reboot, and you can restart your router. •... - Page 64 Chapter 4 4. Specify the LED off time, and the LED will be off during this period every day. Note: The effective LED off time is based on the time of the router. You can go to Advanced > System > Time to modify the time.
-
Page 65: Chapter 5 Access Point Mode
Chapter 5 Chapter 5 Access Point Mode This chapter presents how to configure the various features of the router working as an access point. It contains the following sections: • Operation Mode • Firmware Upgrade • Backup & Restore • Administration • System Log •... -
Page 66: Firmware Upgrade
Firmware Upgrade Mercusys is dedicated to improving and richening the product features, giving users a better network experience. We will release the latest firmware at Mercusys official website www.mercusys.com. You can download the latest firmware file from the Support page of our website and upgrade the firmware to the latest version. -
Page 67: Administration
Chapter 5 To restore configuration settings: 1. Click BROWSE to locate the backup configuration file stored in your computer, and click RESTORE. 2. Wait a few minutes for the restoring and rebooting. To reset the router to factory default settings: 1. Click FACTORY RESTORE to reset the router. 2. -
Page 68: Local Management
Chapter 5 4. Use the new password for future logins. 5. 4. 2 Local Management 1. Visit http://mwlogin.net, and log in with the password you set for the router. 2. Go to System > Administration, and focus on the Local Management section. •... -
Page 69: Http Referer Head Check
Chapter 5 5. Click SAVE. 5. 4. 3 HTTP Referer Head Check HTTP referer header check function can protect your networks against CSRF(Cross- Site Request Forgery) attacks. This function is enabled by default. You can disable this function if needed. System Log 1. - Page 70 Chapter 5 3. Enter the information: 1 ) Choose Ping or Tracert as the diagnostic tool to test the connectivity. • Ping is used to test the connectivity between the router and the tested host, and measure the round-trip time. • Tracert is used to display the route (path) your router has passed to reach the tested host, and measure transit delays of packets across an Internet Protocol network.
-
Page 71: Time
Chapter 5 The figure below indicates the proper connection between the router and the Yahoo server (www. Y ahoo.com) tested through Tracert. Time This function allows you to set the time manually or to configure automatic time synchronization. The router can automatically update the time from an NTP server via the internet. -
Page 72: Reboot
Chapter 5 2. Select the start time from the drop-down list in the Start fields. 3. Select the end time from the drop-down list in the End fields. 4. Click SAVE. Note: This setting will be used for some time-based functions such as firewall. You must specify your time zone once you log in to the router successfully;... -
Page 73: Led Control
Chapter 5 LED Control The LED of the router indicates its activities and status. You can enable the Night Mode feature to specify a time period during which the LED is off. 1. Visit http://mwlogin.net, and log in with the password you set for the router. 2. -
Page 74: Appendix A: Faq (Frequently Asked Questions)
AC12G AC1300 Wireless Dual Band Gigabit Router Appendix A: FAQ (Frequently Asked Questions) Q1. What can I do if the login window does not appear? Ǵ Reboot your main router and try again. Ǵ If the computer is set to a static IP address, change its settings to obtain an IP address automatically. - Page 75 AC12G AC1300 Wireless Dual Band Gigabit Router Ǵ Choose the device you prefer and click Set as main router. Ǵ Follow web instructions to finish the procedure. Q7. What can I do if I want to add new Halo devices to existed mesh system? Ǵ...
-
Page 76: Appendix B: Configuring The Pc
AC12G AC1300 Wireless Dual Band Gigabit Router Appendix B: Configuring the PC In this section, we’ll introduce how to install and configure the TCP/IP correctly in Windows 7. First make sure your Ethernet Adapter is working, refer to the adapter’s manual if needed. - Page 77 AC12G AC1300 Wireless Dual Band Gigabit Router 2. Configure the TCP/IP protocol Now you have two ways to configure the TCP/IP protocol below: Ǵ Setting IP address automatically Select Obtain an IP address automatically, Choose Obtain DNS server automatically, as shown in the Figure below: Ǵ...
Need help?
Do you have a question about the AC12G and is the answer not in the manual?
Questions and answers