Table of Contents
Advertisement
Advertisement
Table of Contents

Subscribe to Our Youtube Channel
Related Manuals for Electrolux EMB2529DSE


Summary of Contents for Electrolux EMB2529DSE
- Page 1 EMB2529DSE Built-in Combination Microwave User manual...
-
Page 2: Table Of Contents
CONGRATULATIONS CONTENTS Thank you for purchasing an Electrolux built in General warnings _____________________________ 3 microwave combination oven. You’ve chosen a Safety instructions ____________________________ 4 product that brings with it decades of professional Using the Microwave __________________________ 6 experience and innovation. Ingenious and stylish, it Product description ___________________________ 7 has been designed with you in mind. -
Page 3: General Warnings
GENERAL WARNINGS Please read the user manual carefully and store in a handy If the door or door seals are damaged, the appliance • place for later reference. Pass the user manual on to must not be operated until it has been repaired by a possible new owners of the appliance. -
Page 4: Safety Instructions
Specifications exists as to whether the appliance is properly grounded. Do not connect this appliance using an extension cord. Model: EMB2529DSE Rated Voltage: 230-240V ~50Hz Rated Input Power (Microwave): 1400-1450W Turning the oven off Touch the ‘ON/OFF’... - Page 5 USING THE MICROWAVE CLEANING UTENSILS Be sure to unplug the appliance from the power supply. Utensil Test: 1. Clean the cavity of the oven after using with a slightly 1. Fill a microwave-safe container with 1 cup of cold water damp cloth.
-
Page 6: Using The Microwave
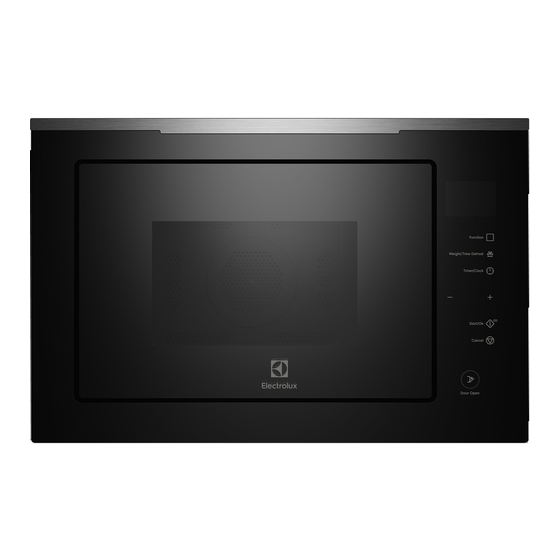
USING THE MICROWAVE Control panel Names of Oven Parts and Accessories Remove the oven and all materials from the carton and oven cavity. Function Your oven comes with the following accessories: • Glass tray x 1 Weight/Time Defrost • Turntable ring assembly x 1 •... -
Page 7: Product Description
PRODUCT DESCRIPTION Turntable Installation A. Never place the glass tray upside down. The glass tray should never be restricted. B. Both glass tray and turntable ring assembly must always be used during cooking. C. All food and containers of food must always placed on the glass tray for cooking. -
Page 8: Operation Instructions
INSTRUCTIONS Operation Instructions Clock Setting When the microwave oven is powered on, the screen will display “0:00”, and the buzzer will ring once. Press “Timer/Clock” twice to select clock function, the hour figures will flash. Press “ ” or “ ” to adjust the hour figures, the input time should be within 0--23. - Page 9 INSTRUCTIONS CONTINUED Operation Instructions 3. Grill or Combi. Cooking Press “Function” repeatedly, it will cycle through the programs “G”, “C-1”, “C-2”, “C-3”, and “C-4”. Press “Start/OK/+30” to confirm your chosen program, then press “+” or “-” to set the cooking time from 0:05 to 95:00.
- Page 10 INSTRUCTIONS CONTINUED Defrost By Weight Press “Weight/Time Defrost” once, and the oven will display “dEF1”. Press “ ” or “ ” to select the weight of food from 100 to 2000 g. Press “Start/OK/+30” to start defrosting. Defrost By Time Press “Weigh/Time Defrost”...
- Page 11 INSTRUCTIONS CONTINUED Auto Program table: Menu Weight Display Power 150g 250g 350g 100% AUTO REHEAT 450g 600g 1 (about 230g) 2 (about 460g) 100% POTATO 3 (about 690g) 150g 300g 100% MEAT 450g 600g 150g 350g 100% VEGETABLE 500g 150g 250g 350g FISH...
- Page 12 INSTRUCTIONS CONTINUED 10. Quick start cooking In standby, press “Start/OK/+30” key to cook with 100% power level for 30 seconds. Each press on the same key can increase 30 seconds. The maximum cooking time is 95 minutes. During the microwave, grill, convection, combination cooking and the defrost by time process, press “Start/OK/+30”...
-
Page 13: Installation Of The Door Handle
USING THE SUCTION CUP TO OPEN THE DOOR Using the suction cup supplied, press firmly on the door surface near the control panel as pictured Pull on the suction cup handle to open the door... -
Page 14: Installation
This can cause overloading and risk of fire. 3. Please observe the special installation instructions. • Model EMB2529DSE is for built-in use only. 4. The appliance can be installed in a 60cm wide wall • The fitted cabinet must not have a back wall behind mounted cupboard. - Page 15 INSTALLATION Installation - Built-in model EMB2529DSE A 45mm ventilation gap must be left between the built-in cabinetry and wall with no back panelling on the cabinet For the best integration within a kitchen, install this housing the microwave oven. A ventilation gap of min.
- Page 16 INSTALLATION Preparing the cabinet 3. Put the template on the bottom of the cabinet and Read the instructions on the bottom cabinet template and mark the spots for screws. Remove the template place the template on the bottom plane of the cabinet.
-
Page 17: Troubleshooting
TROUBLESHOOTING Normal Radio and TV reception may be interfered interfered with when the microwave oven is operating too close to the TV. This is similar to the The microwave oven is interfering interference caused from small appliances such as mixers, vacuum with TV reception. - Page 18 NOTES...
-
Page 19: Warranty
4. Repair or replace warranty: Repair or replace warranty: During the other reasonably foreseeable loss or damage. You are also entitled to Warranty Period, Electrolux or its ASC will, at no extra charge if your have the Appliance repaired or replaced if the Appliance fails to be of Appliance is readily accessible for service, without special equipment acceptable quality and the failure does not amount to a major failure. - Page 20 Electrolux Home Products New Zealand telephone: 0800 436 245 fax: 0800 225 088 email: customercare@electrolux.co.nz web: electrolux.co.nz To add a touch of professional inspiration to your home, visit electrolux.com.au or electrolux.co.nz electrolux.com.au or electrolux.co.nz © 2018 Electrolux Home Products Pty Ltd. EMAN_EMB2529DSE_Oct18 PN:16170000A87576...
Need help?
Do you have a question about the EMB2529DSE and is the answer not in the manual?
Questions and answers